[TR] 1.6 Zendesk Basics
1. Basic Basics - Lumion & Zendesk
Please take the time to absorb and follow the knowledge below. For any questions please don't hesitate to ask José or Miguel.
We will be constantly brainstorming and making decisions on all things Zendesk with the objective of making sure the incorporation of this tool will:
A) Reduces stress for the team by improving workflow and ease of use - and
B) Adds to the customer experience journey by simplifying the steps and increasing the response rate and quality.
2. Getting Started: Basic Zendesk Functions
2.1 General/Good to know
There are a few groups in Zendesk:
- Lumion Tech Support (Peter, Dimitris, and Javier - added Jonathan, Bosko, Mihnea and Mayck)
- Lumion Customer Care (Lourenço, Melvis, Patricia and José)
- IT operations (Arthur and Paul)
Each group is assigned an email:
2.2 How are tickets assigned?
Tickets sent to these addresses are routed to the groups based on business rules, through automations and triggers.
Groups are assigned different “Views” which are basically a filtered result of incoming tickets. As a group member, you have some “Views” that are assigned to you, and others that are not.
These are currently being defined. For example, a customer writing to [email protected] will have their issues appear in the “Lumion Customer Care” view.
If you are part of the team that can see that view, you can click on any ticket in the “New” list and assign it to yourself to work on. You can also assign it to other team members or Groups.
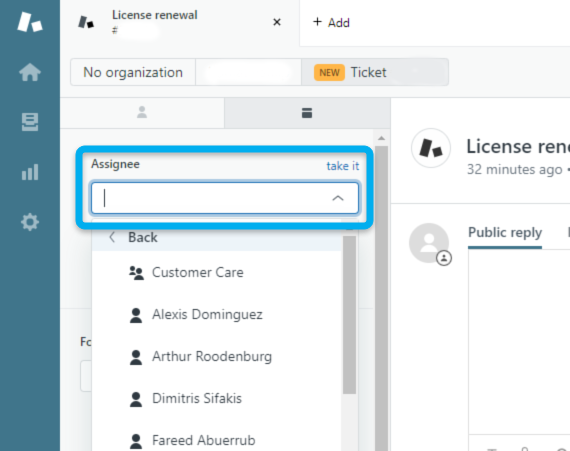
If you open the Assignee list, you will see the members of your Group. To assign it to another Group, simply click “back”:
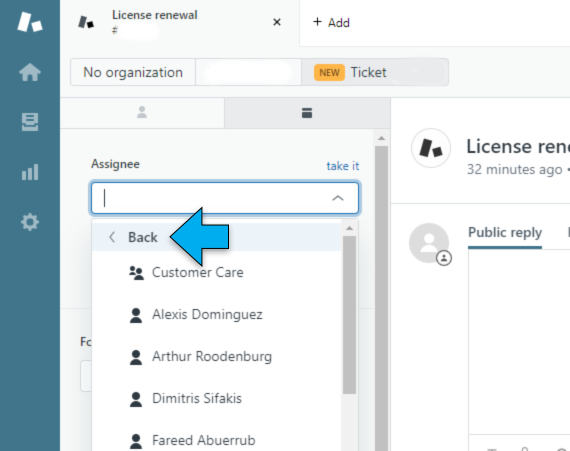
And select the other Group:
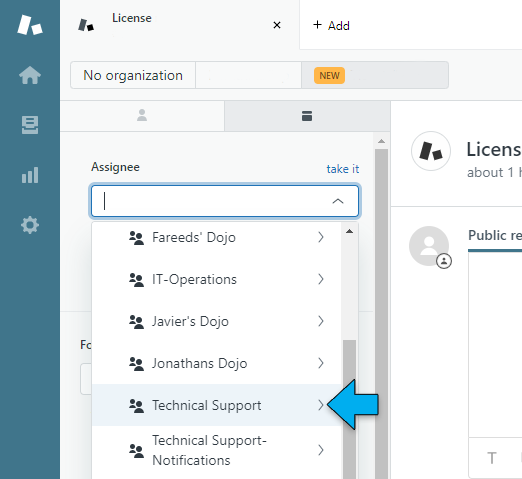
Then, add an Internal Note and then click on “Submit as New”.
This will successfully assign a ticket to another Group.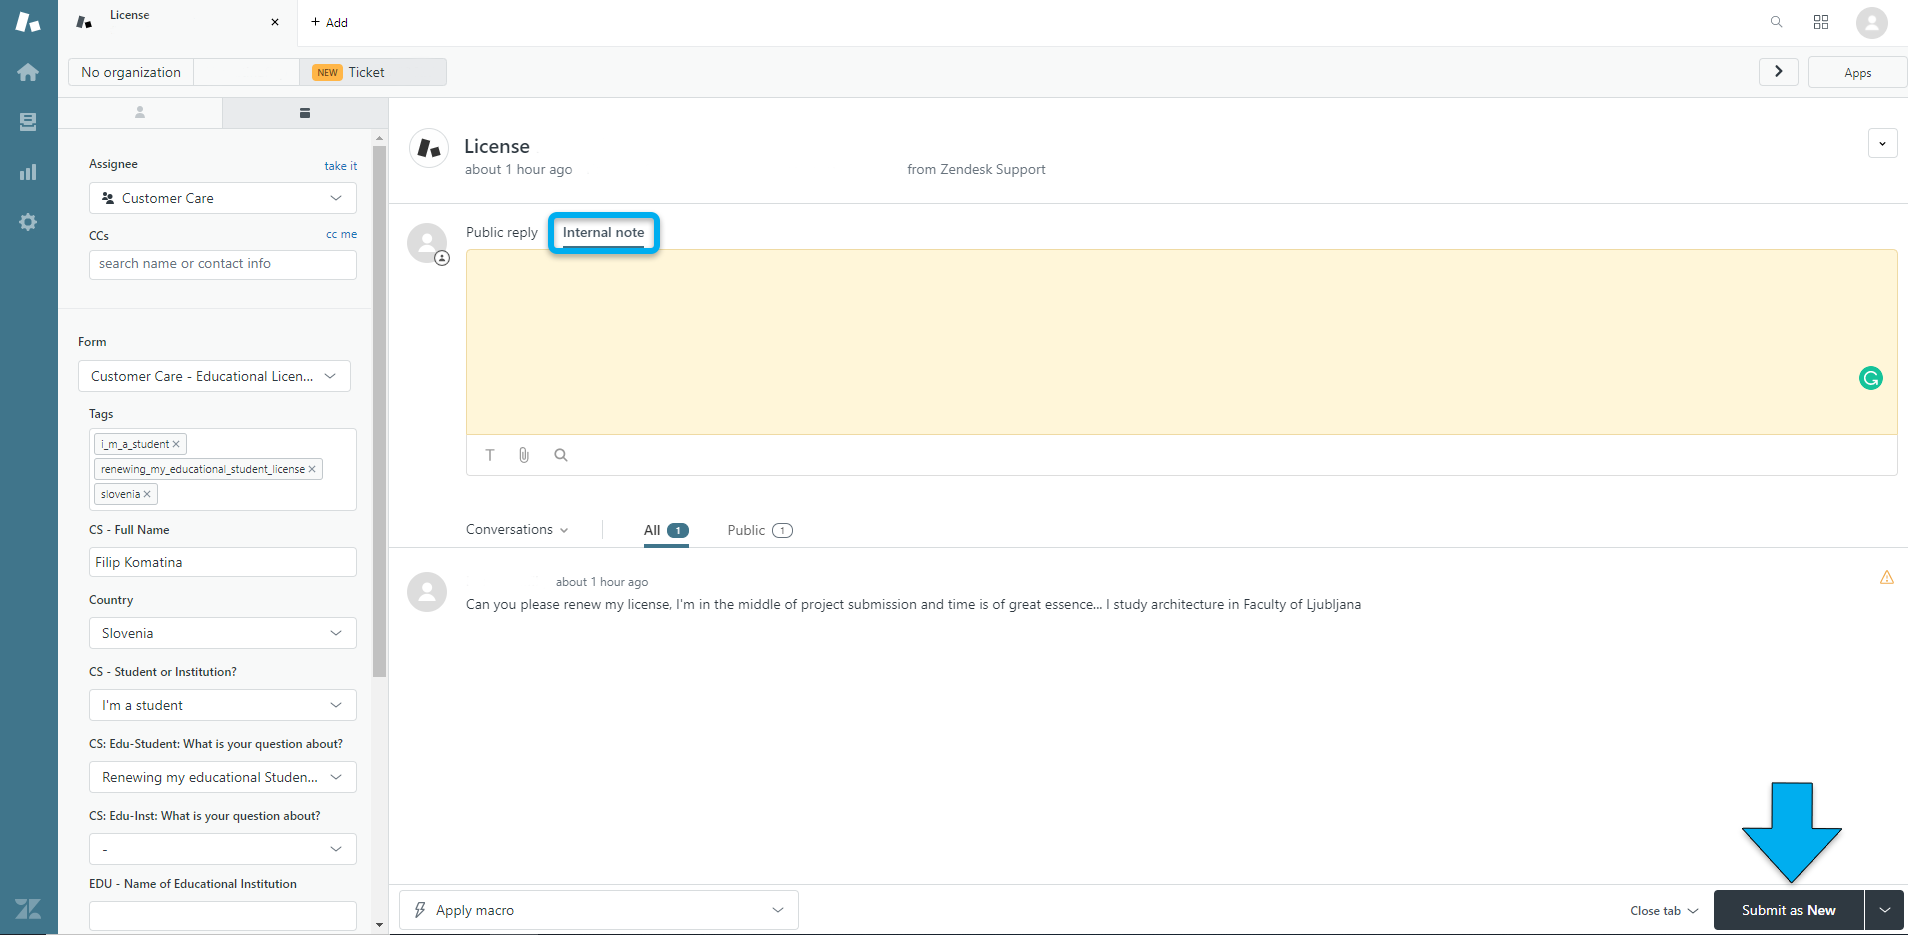
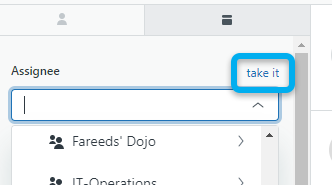
Clicking on “take it” will assign it to you.
2.3How to see the incoming customer requests, tickets to deal with, and tickets assigned to you
First, sign in to Zendesk with your Zendesk account. The first screen is your dashboard. It gives you an overview of updates of your tickets and a list of tickets that require your attention. It’s up to you to decide if you want to work based on the dashboard or not. It’s a good starting point to make sure you don’t miss anything.
Here you will find detailed info on the Zendesk dashboard, side bar, top bar and main window. This will help you understand the very basics of the Zendesk setup.
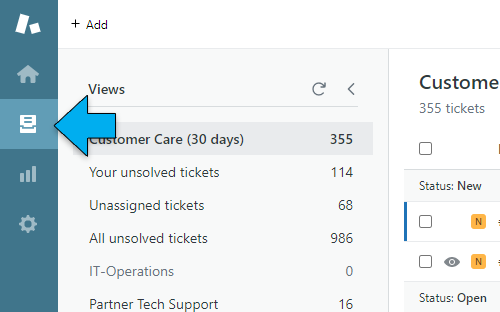
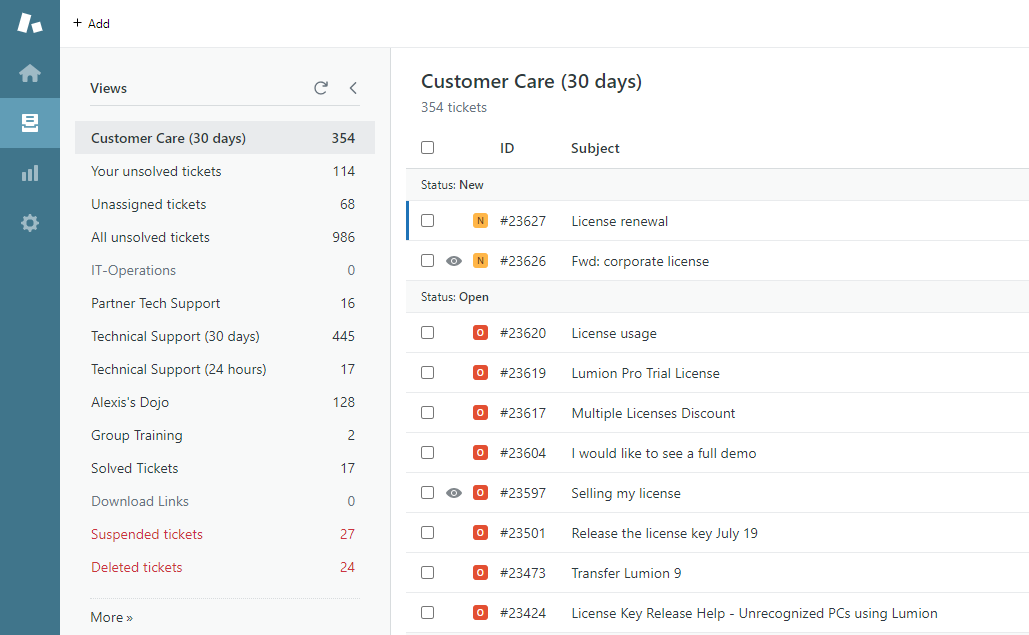
Another way to manage your tickets is to work from your view
Click the Views icon () in the sidebar, then select a view from the list.
The views are customizable and you can have both shared views and personal views.
Here’s an example of the views you may have:
2.4 How to change or create a "User" in your Zendesk conversation (Requester)
Sometimes, it is necessary to edit the email and/or user that shows up as the creator or “Requester” of the ticket. This happens when the email info contains no valid name or last name and you wish to give that email address a name to go along with it. Anyone you add or replace in the Requester field would become the contacts you speak with when answering.

See more detailed information on user Requester here
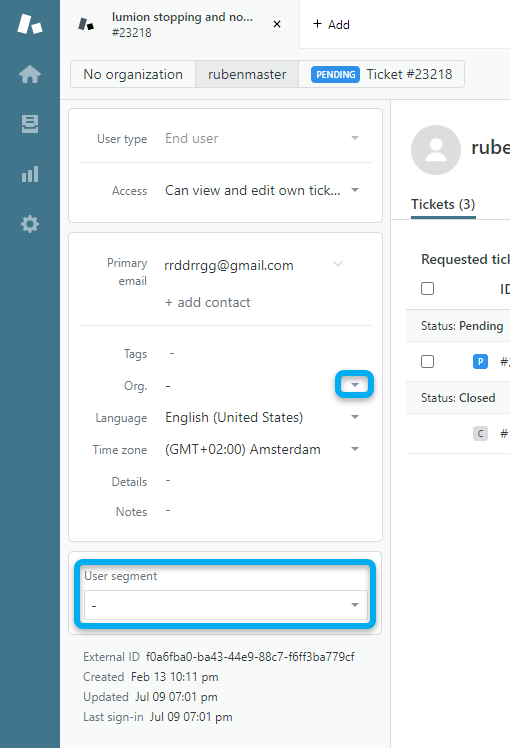
2.5 How to place a Requester under an "Organization" or “Demographic”
Zendesk has the capability to allow us to organize users in Organizations (For Example: all the users from the same company) and Demographics (For example: all the users that have an EDU license can be placed in this demographic)
To access this information, on top of the ticket view, you can click on the User’s name and you will be shown the user's profile which you can edit.
NOTE: We are currently not using these functions. As a team, we need to first decide how much we use Zendesk in this area, as categorizing users in organizations and segments have a lot of funnel applications. Secondly, we would need to define a consistent list of Organizations and Segments for the team to choose from.
See more detailed information on user Requester and Organization here.
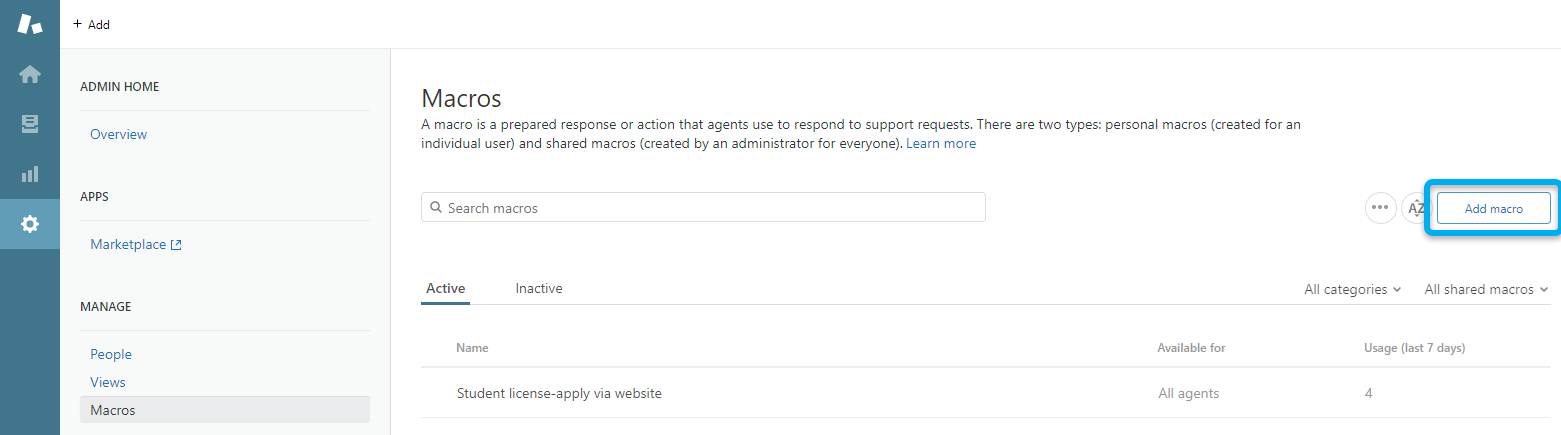
2.6 How to use Macros to gain speed
- Click the Admin icon () in the sidebar, then select Macros.
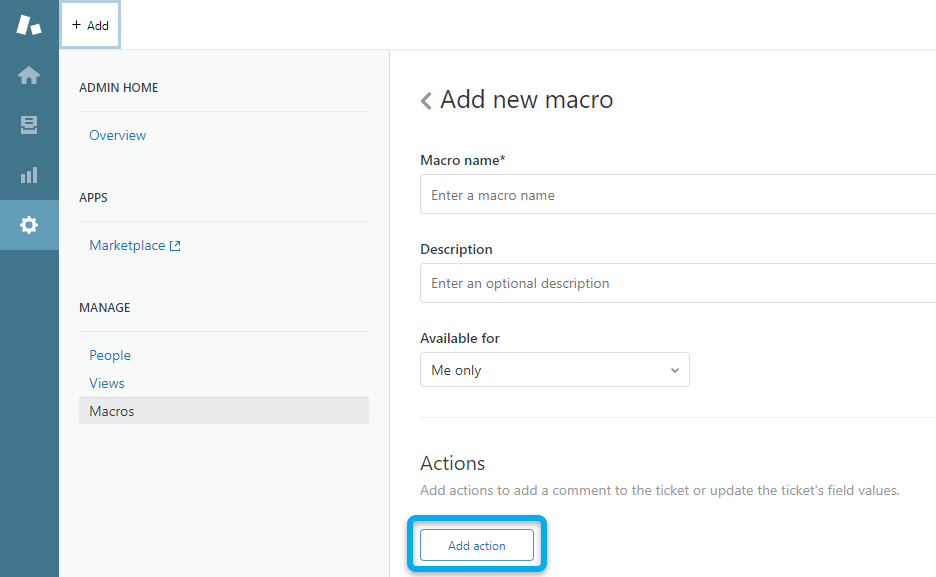
- Click the Add macro button.
- Enter a Macro name.
- (Optional) Enter a Description.
- Select an option from the Available for menu: (Me Only)
Following this, you can set up the macro which can include a series of actions that it would perform on the ticket.
For example, you can set the macro to:
A) Reply to the ticket with a specific answer and
B) Set the ticket to “Pending”
As you can see above, there are many Variables (Such as ) that automatically get replaced with information from the user.
If you’re having difficulty setting up a Macro, just contact Miguel or José to help you out.
Macro’s that have already been set up are:
- Assign ticket to Technical support
- Assign ticket to CustomerCare
These macros are to help with internal organization and do not send a reply to a customer. This should be used when Techsupport receives a customer request for CustomerCare and vice versa. You can also assign tickets to different groups using the “Assignee” pulldown menu explained above.
When you are using a macro that includes a pre-written answer to a customer, While you are in your ticket view, after applying a Macro you can still edit the message you are sending the Customer to personalize it further.
Learn more detailed info about how to create personal Macros here
2.7 Steps to take when Replying or Solving a ticket
Always add an Internal Note! Aside from writing your answer, Make sure to summarise what you’ve done in the Internal Documents:
Why? As mentioned above, by doing this, it will be easy for your colleagues to catch up on the case and be able to address it immediately without having to re-read the long email chain. For example: “Customer asked about adding more seats to his EDU license. I requested a formal request from their university.”

To see all the internal notes, simply click on the “Internal Tab” to display only your colleagues' internal notes.
@Mentions
When addressing a colleague in the internal notes, mention them by typing “@” in front of their name. @Jose will send a notification to Jose’s email that her help is needed in a ticket, even if the ticket is not assigned to her.
- Note: If the ticket needs to be followed up by a specific team or colleagues, make sure you assign it to them and submit it as “Open” so that the ticket shows up in their Dashboard and queue. If this doesn’t happen, then the ticket will remain assigned to you and no one will notice, leaving the customer without an answer.
How to submit your work and reply:
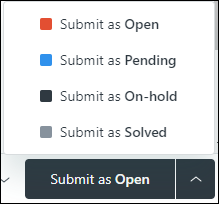
Ticket Statuses that can be “Submitted”:
- New= The ticket just arrived and it is not assigned to anyone
- Open= The ticket is assigned to someone, and the customer has written to us and is waiting
- Pending= We wrote back to the customer, and we are waiting for feedback from the customer. We will build workflow around it to send a reminder to the client within x period and automatically close it if no answer after x period of time.
- On-Hold= The ticket is assigned to someone, and the customer doesn't hasn’t received a solution, but we need external info from somewhere before being able to continue the conversation. Workflow will be built so that the hold tickets will return to your open tickets so that you don't forget them.
- Solved= You are confident that the last message you sent is the final solution.
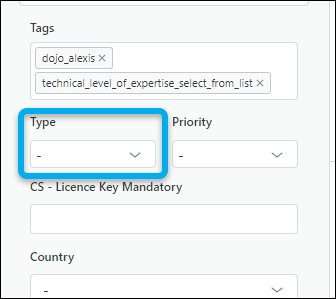
Make sure to fill in some ticket information: (TYPE) Which categorizes the ticket as: Incident, Question, Problem, Task.
Only after the above steps are done, and Only when you are sending a “Final” answer to a user, can you “Submit as Solved” in the bottom right of the ticket. The user can still answer, and if he does the ticket will appear as “Open” again. If they just replied with “thank you”, and you already thanked the user, you can simply close it again without a reply.
Tickets will only be closed x days after they have been solved. Customers can still reply to solved tickets. A new ticket is created if a client answers to a ticket that is closed
3. Lumion Specific Practices & Policies
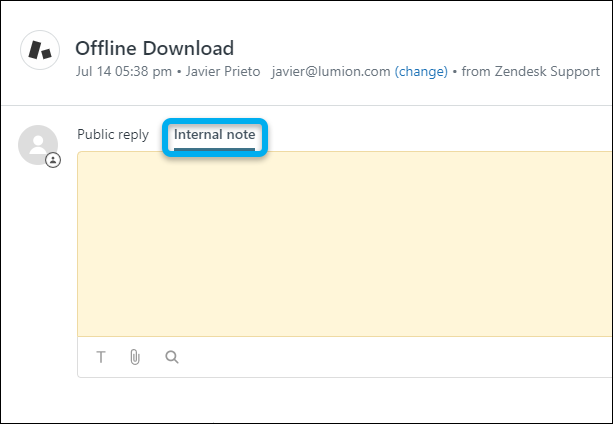
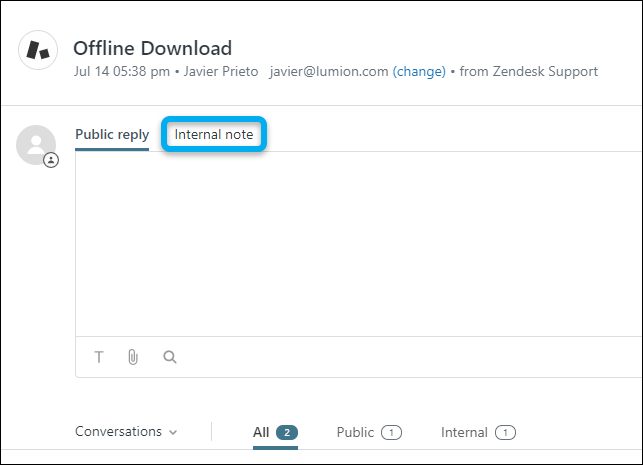
3.1 When and How to use Internal Notes
In your ticket, you can see “Internal Note” right next to the “Public Reply”. This area is for Lumion team members to communicate with each other regarding the ticket, without running the risk of sending the internal information to the customer.
Always Use the Internal Note to document any decisions, information, or conversations regarding the ticket that was done every time you answer the customer or new information is available. These notes should act as a summary of every interaction done with the ticket by every team member.
Internal Notes help your colleagues catch up with what is important in LONG email exchanges with the customer and save precious time with way. This is why Internal notes are important.
Internal notes are only sent to people who have the Zendesk ‘agent’ status
3.2 How to move a conversation outside of Zendesk
If a contact entered Zendesk through our public emails which would involve teams or people that don’t use Zendesk, you will need to proceed as follows:
- “Copy-paste the ticket into Gmail” to continue the conversation in Gmail (copy-paste it by clicking on “See original email” icon. That way the entire conversation is copied

- In the Internal Note in the Zendesk ticket: Write the details of who is handling the conversation externally and the subject line of this external email for future reference.
- Close the ticket by submitting it as Solved.
3.3 How to search for and link to Knowledge base articles in the ticket
Zendesk allows you to easily refer to Knowledge base articles
Here’s how to do that:
In a new or open ticket, choose the Knowledge Capture icon in the editor toolbar under the ticket comment. This allows you to search in existing articles and link articles in tickets. In this example, we search for ‘Mac’
You can browse through the results and select the appropriate article.
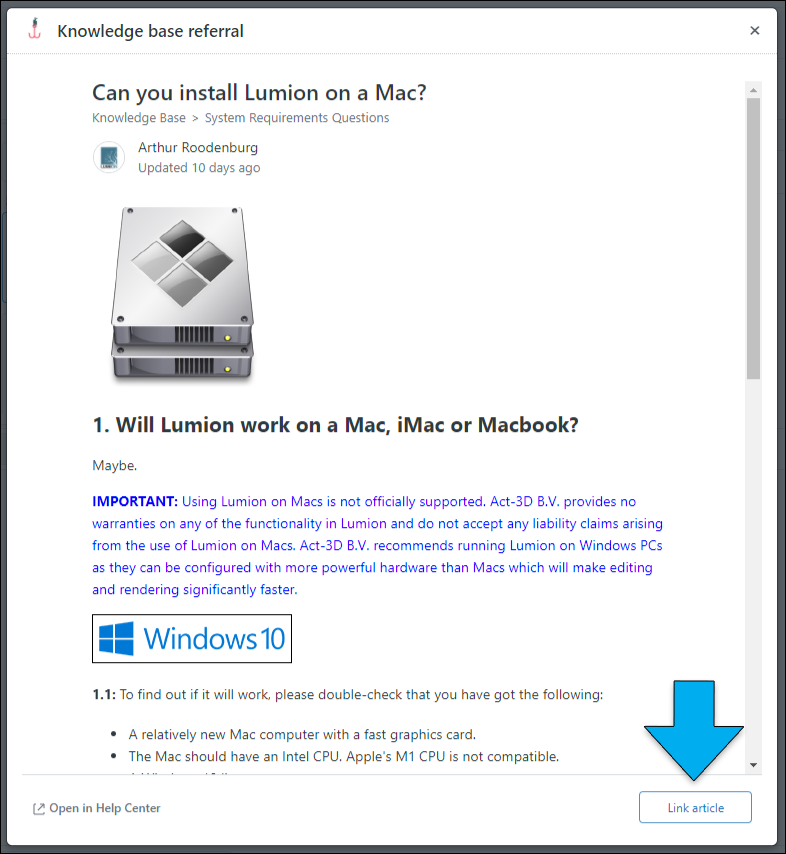
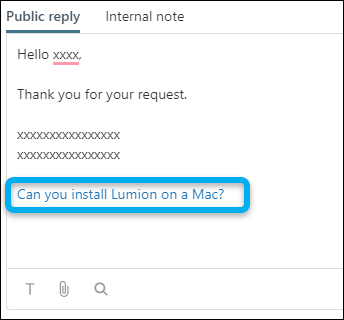
If it answers the question, you can link the article to your ticket with this result:
3.4 How to work together
In the near future, we will not be working exclusively in Zendesk. Customer requests are sent through the officebox, the forum, and Zendesk. To secure prompt follow-up, below are some examples on how to deal with this.
Possible situations:
Technical support receives a request ON THE FORUM that should be answered by Customer Care. Options:
- Technical support employee sends an answer to the client mentioning his request will be forwarded to the CustomerCare team. Put [email protected] in bcc of this email, which will create a ticket in Zendesk.
The ticket that is created in Zendesk, needs to be put in the customer’s name (see paragraph 4) by the customer care team and can then be worked on as usual.
This option is preferable if the customer has both technical and commercial questions.
- the technical support employee creates a ticket in Zendesk in the customer’s name and assigns this ticket to the Customer support group
3.5 How To create a ticket on an end-user's behalf
- Hover over the +Add tab in the top toolbar, then select Ticket

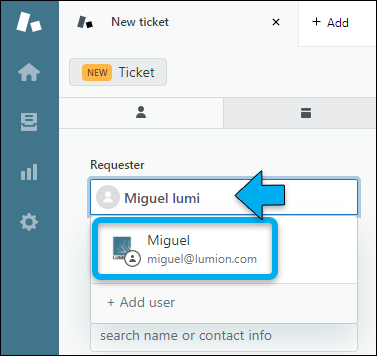
- If the requester is an existing user, begin entering the user's name, email domain, or organization name in the Requester field and the relevant results appear. Select a user.
Note: Alternatively, you can open the user's profile, then click User options in the bottom toolbar and select New ticket. The user's name automatically appears in the Requester field.
If the requester does not yet have an account, add them by clicking +Add user at the bottom of the search results.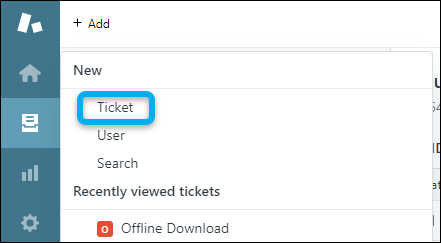
- Enter the ticket data, (copy/paste the subject and the question) then click Submit as New.
- Then assign it to the appropriate Team/agent via Macro (see paragraph 6)
3.6 Showing the full email of a reply.
Occasionally, a user might reply with something like this when answering our questions:
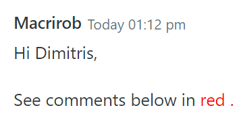
But the comments are nowhere to be found in the Zendesk thread.
In those cases, you can click the arrow button in the top right section and select View Original Email:
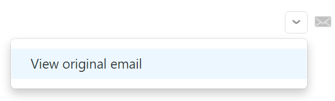
A new window will pop up with the user's original email in which they replied and the comments should be visible.
3.7 Using tags
Tags are a way to add meaning to a ticket, a user or an organization.
We’ll start out with adding tags to tickets. This can help you find tickets with a similar issue, we can use tags in workflows and it will give more insight (statistics). In customer care, we will use tags such as quote, Lumion10_protrial, Lumion10_Try&buy, split_license, merge_license etc.
From 1 August 2022 we will also be using Tags specifically to allow for statistical tracking and reporting on tickets.
See this internal article:
For more info on using tags (also included in the above article), see this Zendesk article
3.8 Merging Support Requests
3.8.1 On occasion, users may send us duplicate Support Requests at short intervals. When that happens, use the Merge feature in Zendesk to join the two Support Requests into one. Here's how:
- External Link: Zendesk - Merge Tickets
3.8.2 In other instances, a Lumion Partner and a customer may contact us at the same time for the same issue. If that is the case, the procedure is the following:
- Add the partner's email address in the CC section of the customer's ticket
- Tell the partner we will be troubleshooting things directly with the user and they have been added to the conversation
- In a reply to the customer, tell them we have CC'ed the partner to this chat as they have also submitted a Support Request in the customer's name
- Set the Support Request submitted by the partner as 'Solved' and add in an internal note a link to the customer's Support Request.
- Then, continue all communication in the customer's Support Request.
Requests & Feedback
As we use Zendesk, lets list all feedback regarding workflow changes, setting changes and any other idea that we should consider in the list below. Once we gain practice and confidence with what we currently have set up, we can go through the list and implement any ideas that would improve things.
List your feedback and ideas below:
- Remove sentence You received this message because you are subscribed to the Google Groups "Lumion Customer Care" group.To unsubscribe from this group and stop receiving emails from it, send an [email protected]
- Signatures/logo/font => Lumion branding guidelines
- Ability to set local time zone per user for the Requested Column and other time stamp fields.
- Zendesk feature required? Set a delay period before reply ticket is sent to allow for cancelling/editing .
- [6/05/2020] Zendesk auto-collapse or other method of removing all the duplicated replies from a ticket.
- [6/05/2020] Auto-replies and auto-replies for weekends.
- .
- .
- .
please copy/paste this document:
==========================================
ARTICLE SUPPORT (from transfer to HubSpot):
1. Tables:
Tables were not able to be imported via HubSpot Importer. Any Tables in this article are now based on a DIV Conversion. Same is also the case for the transfer of articles with tables in the EKB.
You can add new (basic) Tables in the HubSpot Editor directly.
If the layout does not work, then you can copy/paste or recreate the old Table from ZD. Where possible the Table has also been copy/pasted from the source page (see link below in 3.). Instructions, see this article: Copying an old Zendesk Table over to HubSpot
2. Finding the reference to the old Zendesk Ticket in HubSpot:
Use this Support article: Finding the reference to the old Zendesk Ticket in HubSpot
and for ZD ticket Search in HubSpot following step 1 in above article:
3. Source Zendesk article:
A source and backup copy was made of all articles 9 June 2025.
The saved HTML files and images are in subfolders of: HTML files and images subfolders.
See also Support article in 2 above.
Backup/copy article: [TR] 1.6 Zendesk Basic... (4403944081170).html
4: Quick Link to Zendesk IKB article:
(not available when Zendesk closed)
[TR] 1.6 Zendesk Basics