[TR] How do you install third-party 3D/CAD software?
Please ensure the instructions are followed when accessing, installing, or uninstalling third-party 3D/CAD software:
- 1. Who to contact for access to a license key?
- 2. How to install software
- 3. How to uninstall software
We need to make sure licenses are released/deactivated when not needed as we have a limited number of licenses ( e.g. ArchiCAD and Vectorworks).
LiveSync Note: When installing LiveSync on a machine with multiple versions of the same program, LiveSync will provide a prompt to specify which version it should install into it.
1. Who to contact for access to a license key?
1.1: Contact Jonathan or Dimitris.
1.2: We currently have NFR licenses for the following software. If you require a license key simply contact Jonathan ([email protected]) who is the administrator:
- Allplan 2021, 2022 & 2023
- ArchiCAD 25 & 26
- BricsCAD 22 (pending an inquiry about access to V23)
- Vectorworks 2024
- Rhino 5, 6, 7, & 8
- SketchUp
- Autodesk Products:
- Autodesk Revit 2020, 2021, 2022 & 2023
- Autodesk AutoCAD 2020, 2021, 2022 & 2023
- Autodesk AutoCAD Architecture 2020, 2021, 2022 & 2023
- Autodesk AutoCAD LT 2020, 2021, 2022 & 2023
- Autodesk AutoCAD MEP 2020, 2021, 2022 & 2023
- Autodesk AutoCAD Map 3D 2021, 2022 & 2023
- Autodesk AutoCAD Plant 3D 2020, 2021, 2022 & 2023
- Autodesk 3Ds Max 2020, 2021, 2022 & 2023
- Autodesk Infraworks 2020, 2021, 2022 & 2023
- Autodesk Navisworks Manage 2020, 2021, 2022 & 2023
- Autodesk Civil 3D 2020, 2021, 2022 & 2023
- Autodesk Inventor Professional 2020, 2021, 2022 & 2023
We also have some old single-seat Autodesk licenses available for:
-
- Autodesk 3Ds Max 2013 & 2014
- Autodesk AutoCAD Architecture 2013 & 2014
- Autodesk Revit Architecture 2013 & 2014
- Autodesk AutoCAD Revit Architecture Suite 2013
- Autodesk Civil 3D 2013
- Autodesk Inventor 2014
2. How to install software
2.1: Locate the software you need in Section 1 (Software) and click on it to go to the linked section below.
2.2: Allplan
2.2.1: On the Allplan home page, use the following login details:
- Username: Jonathan_act3d
- Password: LumionSupport1234$
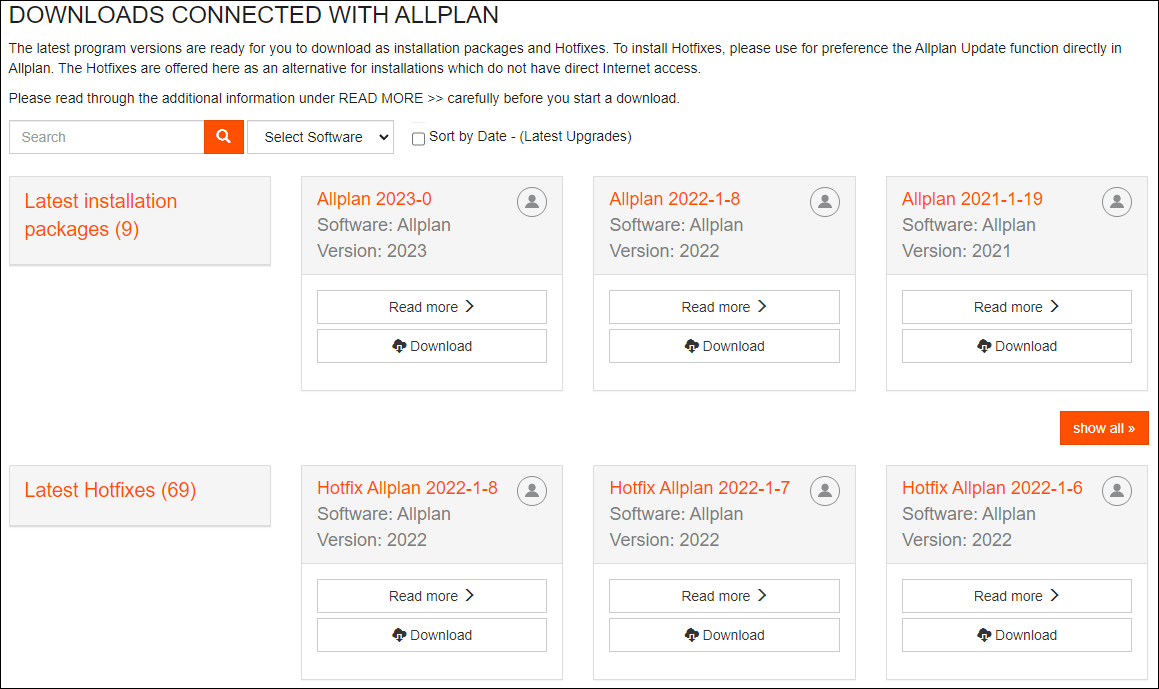
2.2.2: On the next page that loads select the button highlighted below to be taken to the download page.
(alternatively if the 'Download Now button is selected, the latest version of Allplan can be accessed)

2.2.3: Select the desired version of Allplan to begin the download.
2.2.4: Once the download is complete, unpack the Zip folder.
2.2.5: Double-click on the unpacked EXE file.
2.2.6: Follow the instructions in the dialog with the installation program.
2.2.7: Before opening the program, the following steps need to be taken to activate the license.
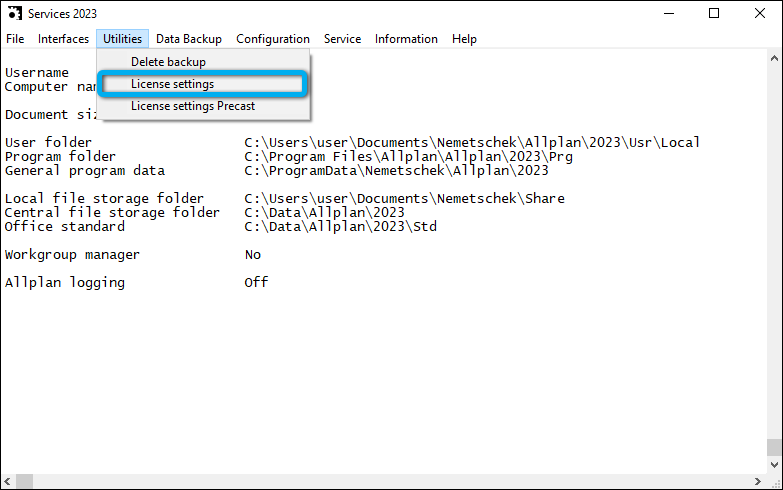
2.2.7.1: Open the Allmenu application (which is installed with Allplan)
2.2.7.2: locate and select 'License Settings' (Utilities>License Settings)
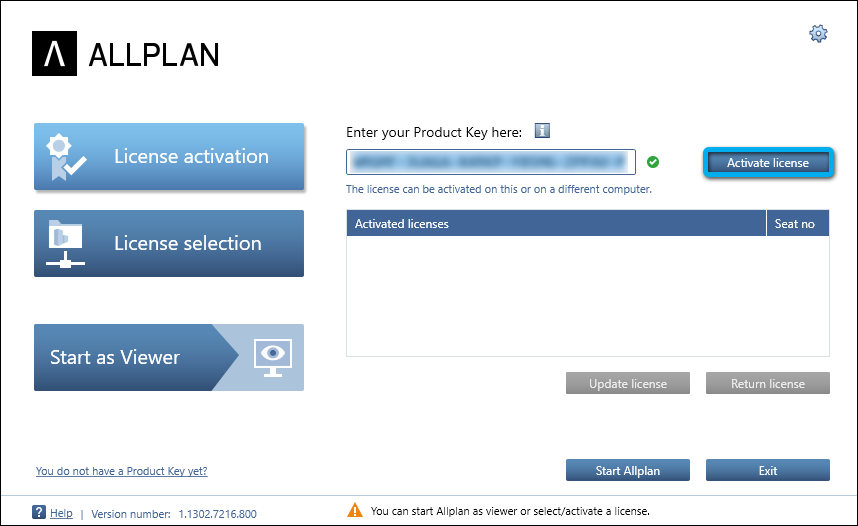
2.2.7.3: On the 'License Activation' tab enter the Product Key that was provided to you and select 'Activate license'.
(A green tick will appear once a valid license has been inputted in the field)
2.2.8: Allplan can now be opened and used.
2.3: ArchiCAD
2.3.1: Create an account or use the following details to log in to the Graphisoft website.
- Username: [email protected]
- Password: cglifwiuJ28yr2H1g7gdyugG28f
2.3.2: Open the Download page (Home>Resources and Support>Downloads) and select "Download the latest Archicad version".
2.3.3: Double-click on the EXE file.
2.3.4: When the dialog appears, follow the instructions to begin the installation.
2.3.5: Before opening the program, the following steps need to be taken to activate the license.
2.3.5.1: Open the GRAPHISOFT License Management Tool (which is installed with ArchiCAD).
2.3.5.2: Use the following details to login:
- Username: [email protected]
- Password: cglifwiuJ28yr2H1g7gdyugG28f
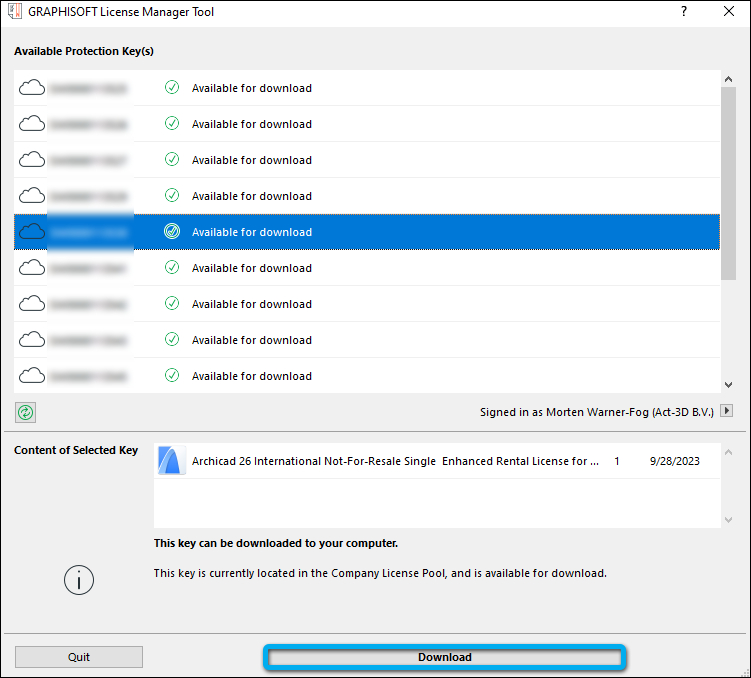
2.3.5.2: Highlight the license that Jonathan provided you from the list and select Download.
2.3.6: You are now free to open and use ArchiCAD.
2.4: Autodesk Software
2.4.1: Use the login details below to sign in to the Autodesk Website.
- Username: Act-3D
- Password: Kawornik8
2.4.2: Once signed in click on All Products and Services from the side panel menu.
2.4.3: Scroll down & locate the desired product and select Install to begin downloading the web installer.
2.4.3.1: Alternatively if you would like a previous version of the product, simply click on the product link which will bring up the page below.
2.4.4: Follow the instructions in the Web Installer to begin the installation.
2.5: BricsCAD
2.5.1: Create an account or use the follow details to login to the BricsCAD website.
- Username: [email protected]
- Password: LumionSupport1234$
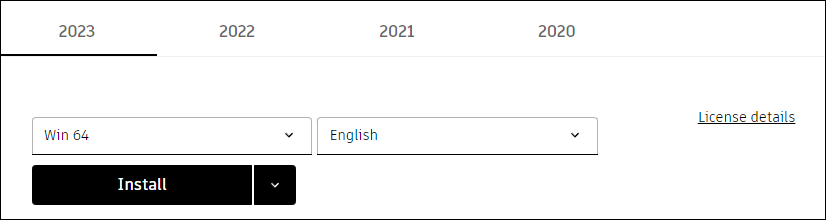
2.5.2: On the home page, select Download BricsCAD
2.5.3: Once the download is complete, run the Installer and follow the instructions in the dialog to install the program.
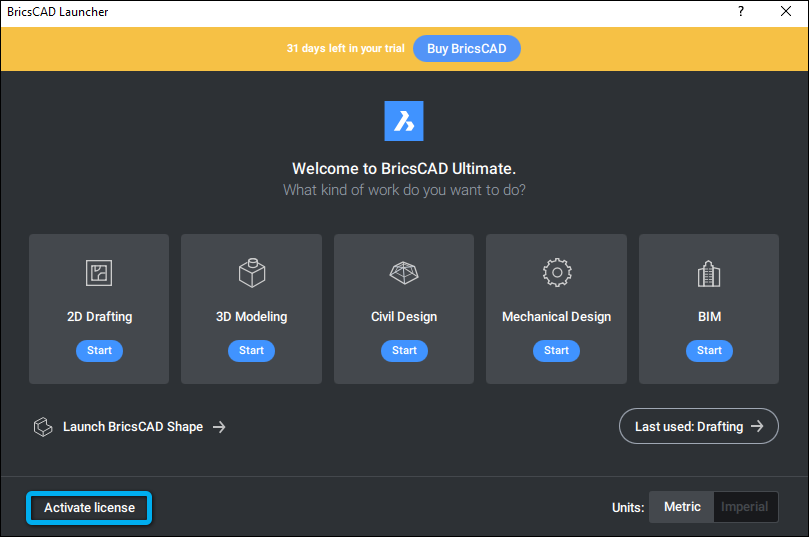
2.5.4: When you open BricsCAD for the first time you will need to select Activate License.
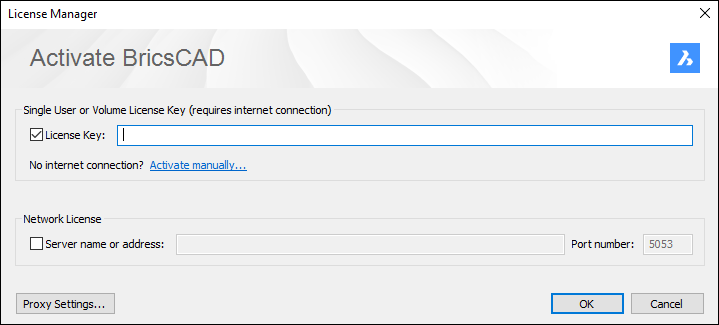
2.5.5: Enter the license that Jonathan provided you into the field next to 'License Key' and select OK.
2.5.6: You are now free to open and use BricsCAD.
2.6: Vectorworks
2.6.1: Login to the Vectorworks Customer Portal with the following details:
- Username: [email protected]
- Password: LumionSupport1234$
2.6.2: Select Downloads from the top panel.
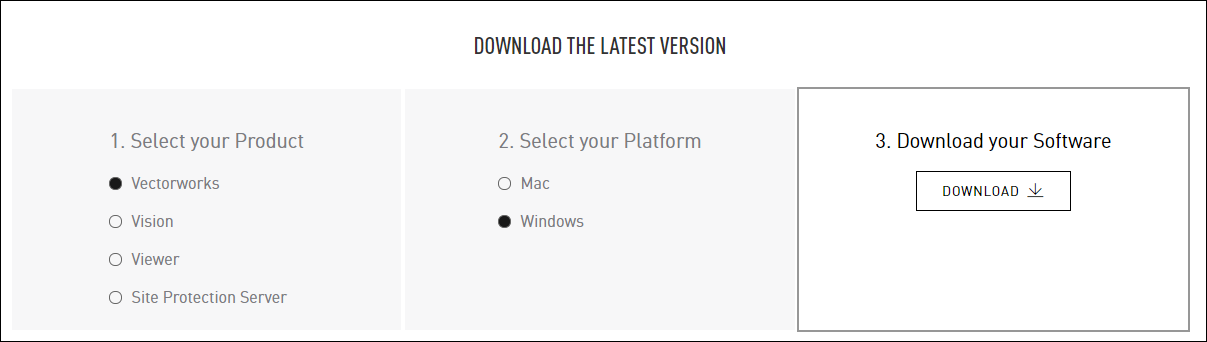
2.6.3: On the next page simply define Vectorworks as the program, and Windows as the platform, and then select Download:
2.6.4: Once the download is complete, unpack the Zip folder.
2.6.5: Double-click on the unpacked EXE file.
After the Installer has finished extracting, the installation dialog window will open.
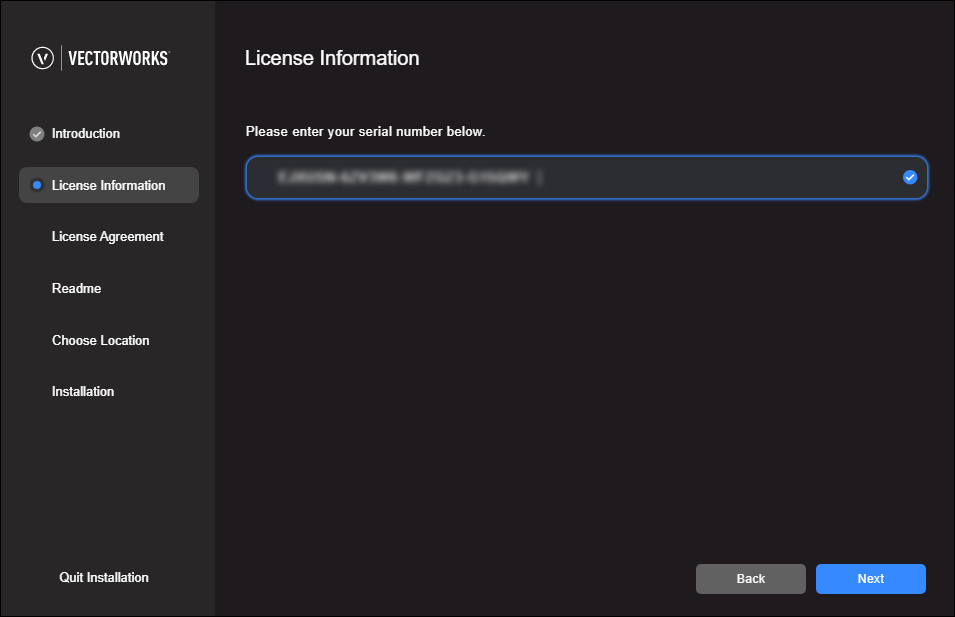
2.6.6: On the second page enter the serial number Jonathan provided you and click on next.
(A tick will appear next to the serial number confirming the license is valid)
2.6.6.1: If the message below appears follow these steps.
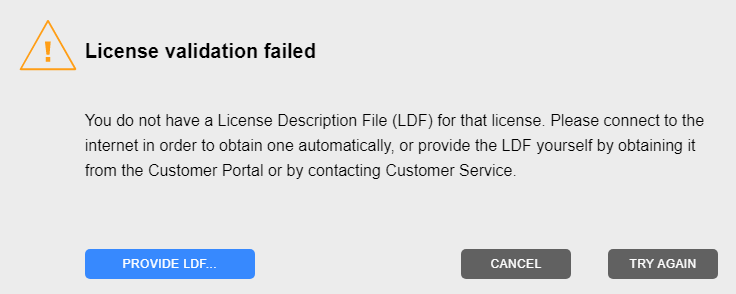
2.6.6.2: Logon to the Vectorworks Customer Portal and click on Licenses
2.6.6.3: Scroll down, locate your license and click on the Download .LDF file icon (seen in the image below).
 2.6.6.4: Once the file has been downloaded, click on Provide LDF (seen in the example for 2.6.6.1) and select the .LDF that has just been downloaded.
2.6.7: Follow the rest of the instructions in the dialog to install Vectorworks.
2.6.8: You are now free to use Vectorworks.
2.7: Rhino
Rhino can be accessed directly via the Rhino website.
(Can confirm we have 30 seats for Rhino 7. We also have valid licenses for Rhino 5 & 6 though have not confirmed how many seats they have)
2.7.1: These links can be used to access the desired version of Rhino.
- External Link: Download for Rhino 8
- External Link: Download for Rhino 7
- External Link: Download for Rhino 6
- External Link: Download for Rhino 5
2.7.2: Once Rhino has finished downloading, double-click on the EXE file.
2.7.3: When the dialog window appears, follow the instructions to begin the installation.
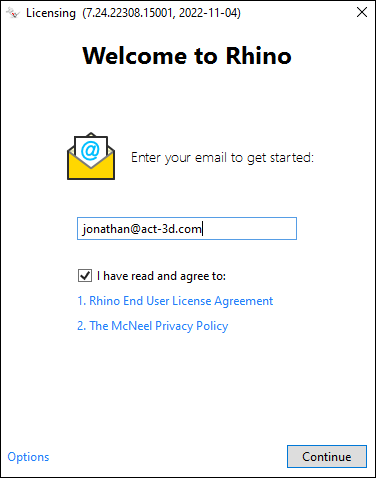
2.7.4: When opening Rhino for the first time you will need to enter your @act-3d.com email address and then click continue.
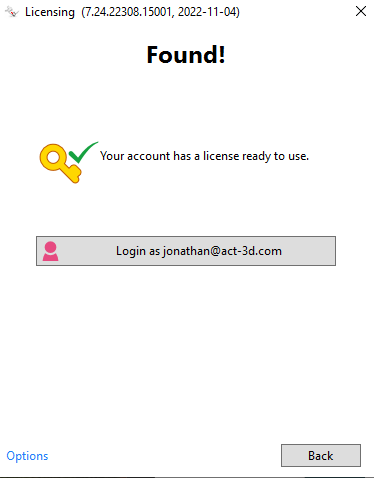
2.7.5: Rhino should then identify that your email address is part of the CloudZoo - Lumion Team and simply allow you to login.
If it does not, please contact Peter or Dimitris - they will add your address to the database.
2.7.6: You are now free to use Rhino.
2.8: SketchUp
2.8.1: Locate the email title "Your subscription for SketchUp Studio, Not For Resale, annual termed contract is here" and follow the instructions to access and download your SketchUp subscription license which provides access to past, present & future versions of SketchUp.
2.8.2: If you require access to SketchUp, contact Jonathan who will organize a SketchUp subscription license for you.
3. How to uninstall software
3.1: If you need to uninstall one of the applications, please follow the relevant instructions below.
Note: Make sure to notify Jonathan that you are removing the software so he can update his records!
3.2: Allplan
3.2.1: Open the Allmenu application (which is installed with Allplan)
3.2.2: locate and select 'License Settings' (Utilities>License Settings)
3.2.3: On the 'License Activation' tab, select 'Return license'.
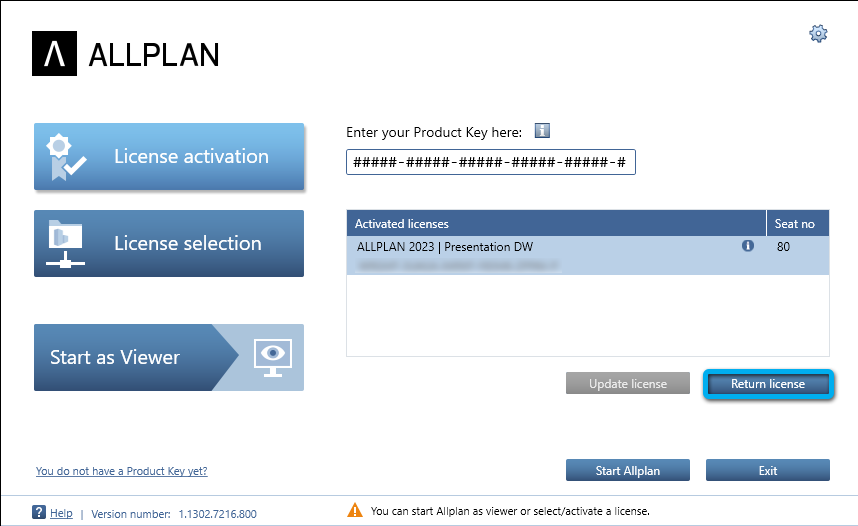
3.2.4: You are now free to uninstall Allplan.
3.3: ArchiCAD
3.3.1: Open the GRAPHISOFT License Management Tool (which is installed with ArchiCAD).
3.3.2: Use the following details to log in:
- Username: [email protected]
- Password: cglifwiuJ28yr2H1g7gdyugG28f
3.3.3: Highlight the license that Jonathan provided you from the list and select Upload.
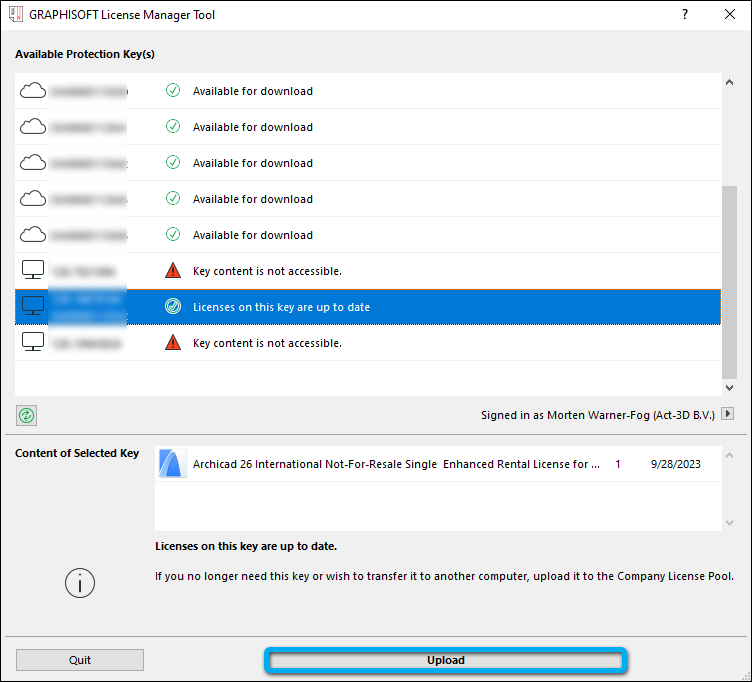
3.3.4: You are now free to uninstall ArchiCAD.
3.4: Autodesk Software
3.4.1: Uninstall the Autodesk product as normal via Programs and Features found in the Windows control panel. (The uninstall process will automatically deactivate your Autodesk license)
3.5: BricsCAD
3.5.1: Open a new or existing project in BricsCAD.
3.5.2: Type 'LICENSEMANAGER' into the command prompt.
3.5.3: On the License Management dialog window, click on the Manage License option.
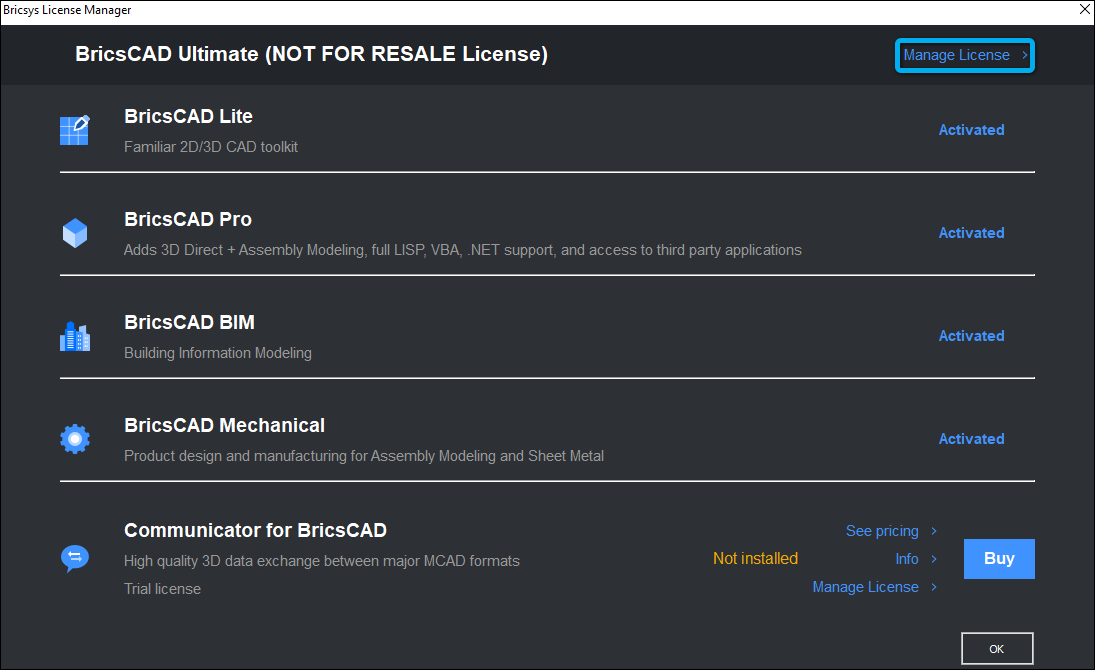
3.5.4: On the License Information dialog window, select Deactivate License.

3.5.5: You are now free to uninstall BricsCAD.
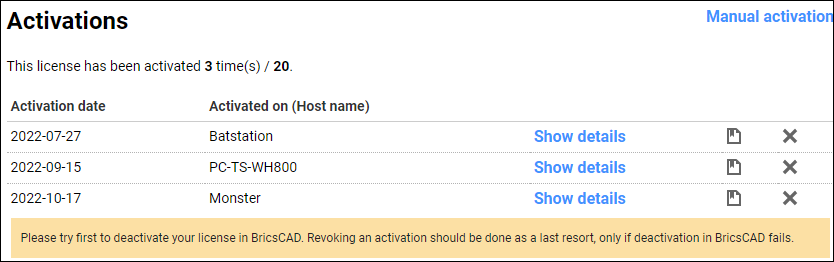
(With BricsCAD there is a last resort in case these instructions have not been followed. Via the BricsCAD account it is possible to revoke a license from a machine)
3.6: Vectorworks
3.6.1: Uninstall Vectorworks as normal. (The uninstall process will automatically deactivate your Vectorworks license)
3.6.2: If, for some reason you have activated more than 1 Vectorworks license, follow these steps to remove the additional license:
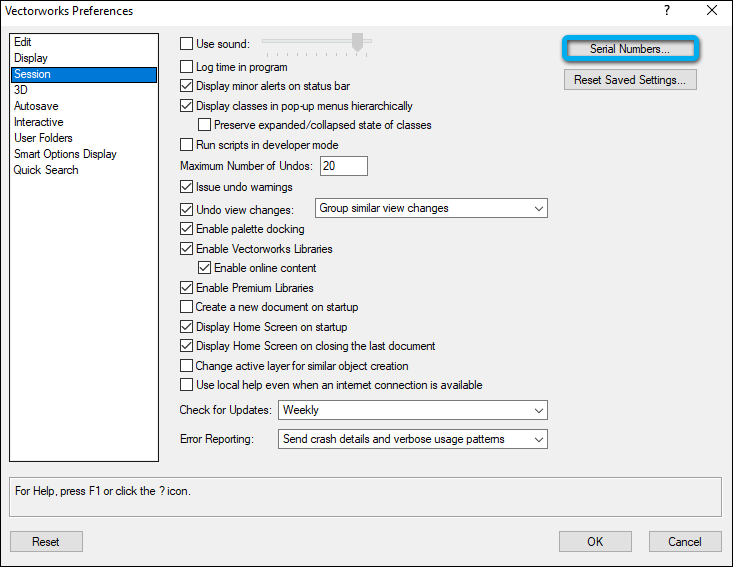
3.6.3: Open Vectorworks and navigate to Vectorworks Preferences:
Tools>Options>Vectorworks Preferences
3.6.4: In the Vectorworks Preferences dialog window click on Serial Numbers.
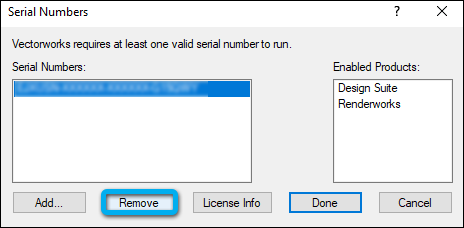
3.6.5: With the license highlighted select Remove.
3.7: Rhino
3.7.1: When launching Rhino, select the License tab on the opening dialog window.
3.7.2: Then click on Change my License Key
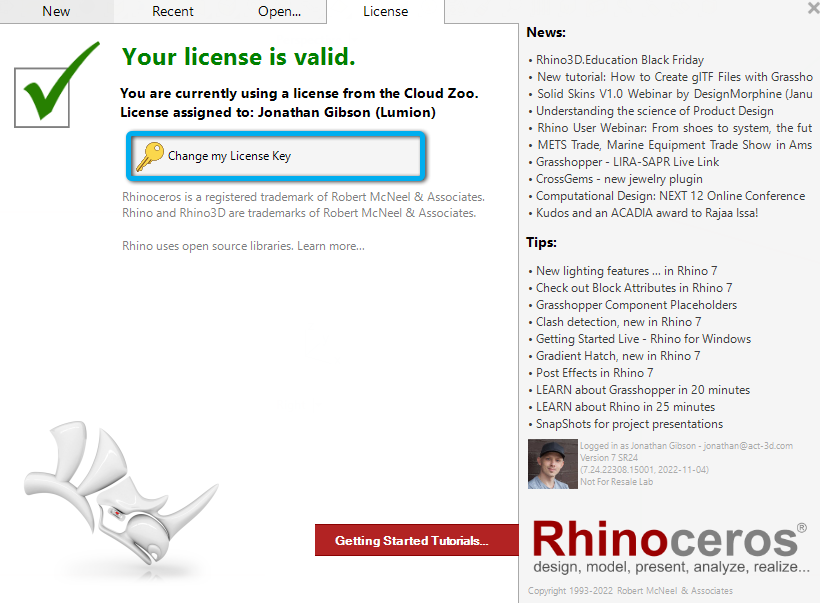
3.7.3: Then click on Logout.

3.7.4: Open Rhino once more and on the Welcome to Rhino dialog click on Options>Remove License.
3.7.5: You are now free to uninstall Rhino.
3.8: SketchUP
3.8.1: When you no longer require SketchUp for use at Lumion please let Jonathan know in order to have your subscription invalidated.
==========================================
ARTICLE SUPPORT (from transfer to HubSpot):
1. Tables:
Tables were not able to be imported via HubSpot Importer. Any Tables in this article are now based on a DIV Conversion. Same is also the case for the transfer of articles with tables in the EKB.
You can add new (basic) Tables in the HubSpot Editor directly.
If the layout does not work, then you can copy/paste or recreate the old Table from ZD. Where possible the Table has also been copy/pasted from the source page (see link below in 3.). Instructions, see this article: Copying an old Zendesk Table over to HubSpot
2. Finding the reference to the old Zendesk Ticket in HubSpot:
Use this Support article: Finding the reference to the old Zendesk Ticket in HubSpot
and for ZD ticket Search in HubSpot following step 1 in above article:
3. Source Zendesk article:
A source and backup copy was made of all articles 9 June 2025.
The saved HTML files and images are in subfolders of: HTML files and images subfolders.
See also Support article in 2 above.
Backup/copy article: [TR]%20How%20do%20you%20instal...%20(6533674502428).html
4: Quick Link to Zendesk IKB article:
(not available when Zendesk closed)
[TR] How do you install third-party 3D/CAD software?