---
title: How do you use Post Processing Styles in Lumion Cloud?
description: How do you use Post Processing Styles in Lumion Cloud?
---
Solutions
[Architectural design All you need to bring your residential, commercial or institutional designs to life](https://lumion.com/product/architectural-design) [Landscape architecture Beautiful terrains and fine-detailed nature for any climate or season](https://lumion.com/product/landscape-architecture)
[Interior design Realistic light, high-quality textures, and an extensive asset library](https://lumion.com/product/interior-design) [Students and Faculties Lumion is free for students, educators, and faculties around the world](https://lumion.com/product/educational-licenses)
[SketchUp](https://lumion.com/compatibility/sketchup-rendering) [Revit](https://lumion.com/compatibility/revit-rendering) [ArchiCAD](https://lumion.com/compatibility/archicad-rendering) [Rhino](https://lumion.com/compatibility/rhino-rendering) [Autocad](https://lumion.com/compatibility/autocad-rendering) [See more](https://lumion.com/compatibility/)
Product
[Discover Axogram New Live architectural diagramming](https://lumion.com/product/axogram) [Lumion Cloud Where design meets collaboration](https://lumion.com/product/lumion-cloud)
[Lumion Pro Advanced visualization solution](https://lumion.com/product/lumion-pro) [Discover AI tools New AI built for architectural work](https://lumion.com/product/ai)
[Lumion Pro 2026.1 is out now! 🚀](https://lumion.com/product/latest-version-pro) [Compatibility](https://lumion.com/compatibility/) [System Requirements](https://lumion.com/product/system-requirements) [Roadmap](https://lumion.com/product/roadmap)
[Pricing](https://lumion.com/product/buy) Resources
[Made with Lumion Get inspired by the stories behind the designs](https://lumion.com/made-with-lumion)
[Tips & Guides Make the most out of Lumion with helpful guides and tutorials](https://lumion.com/tips-guides)
[Knowledge base](https://support.lumion.com/knowledge-base?hsLang=en-us) [Community](https://community.lumion.com/index.php) [Downloads](https://support.lumion.com/downloads?hsLang=en-us)
About
[Who we are Learn about our story and mission](https://lumion.com/about) [Careers - We're hiring Let's build the future of architectural visualization](https://lumion.com/about/careers)
[News Discover the latest product news and more](https://lumion.com/news)
[Find your local reseller](https://lumion.com/about/find-reseller) [Contact us](https://lumion.com/about/contact)
[](http://lumion.com)
[My Account](https://account.lumion.com)
Solutions
[Architectural design](https://lumion.com/product/architectural-design) [Interior design](https://lumion.com/product/interior-design) [Landscape architecture](https://lumion.com/product/landscape-architecture) [Students and Faculties](https://lumion.com/product/educational-licenses)
---
[SketchUp](https://lumion.com/compatibility/sketchup-rendering) [Revit](https://lumion.com/compatibility/revit-rendering) [ArchiCAD](https://lumion.com/compatibility/archicad-rendering) [Rhino](https://lumion.com/compatibility/rhino-rendering) [Autocad](https://lumion.com/compatibility/autocad-rendering) [See more](https://lumion.com/compatibility/)
Product
[Axogram New](https://lumion.com/product/axogram) [Lumion Cloud](https://lumion.com/product/lumion-cloud) [Lumion Pro](https://lumion.com/product/lumion-pro) [Discover AI tools New](https://lumion.com/product/ai)
---
[Lumion Pro 2026.1 is out now! 🚀](https://lumion.com/product/latest-version-pro) [Compatibility](https://lumion.com/compatibility/) [System Requirements](https://lumion.com/product/system-requirements) [Roadmap](https://lumion.com/product/roadmap)
[Pricing](https://lumion.com/product/buy) Resources
[Made with Lumion](https://lumion.com/made-with-lumion) [Tips & Guides](https://lumion.com/tips-guides)
---
[Knowledge base](https://support.lumion.com/knowledge-base?hsLang=en-us) [Community](https://community.lumion.com/index.php) [Downloads](https://support.lumion.com/downloads?hsLang=en-us)
About
[Who we are](https://lumion.com/about) [Careers - We're hiring](https://lumion.com/about/careers) [News](https://lumion.com/news)
---
[Find your local reseller](https://lumion.com/about/find-reseller) [Contact us](https://lumion.com/about/contact)
[My Account](https://account.lumion.com)
[Submit a request](https://support.lumion.com/hc/en-us/requests/new?hsLang=en-us)
Lumion Knowledge Base: Lumion Cloud
How can we help?
- There are no suggestions because the search field is empty.
[Skip to content](https://support.lumion.com/lumion-cloud/how-do-you-use-post-processing-styles-in-lumion-cloud#main-content)
English - United States
Show submenu for translations

Open main navigation
Close main navigation
- English - United States
Show submenu for translations
- Contact us
Contact us
How can we help you?
- There are no suggestions because the search field is empty.
1. [Lumion Cloud](https://support.lumion.com/lumion-cloud?hsLang=en-us)
2. [Lumion Cloud](https://support.lumion.com/lumion-cloud/lumion-cloud?hsLang=en-us)
3. [Feature Guides](https://support.lumion.com/lumion-cloud/lumion-cloud?hsLang=en-us#feature-guides)
# How do you use Post Processing Styles in Lumion Cloud?
## Prepare presentation-ready visuals without leaving Lumion Cloud.
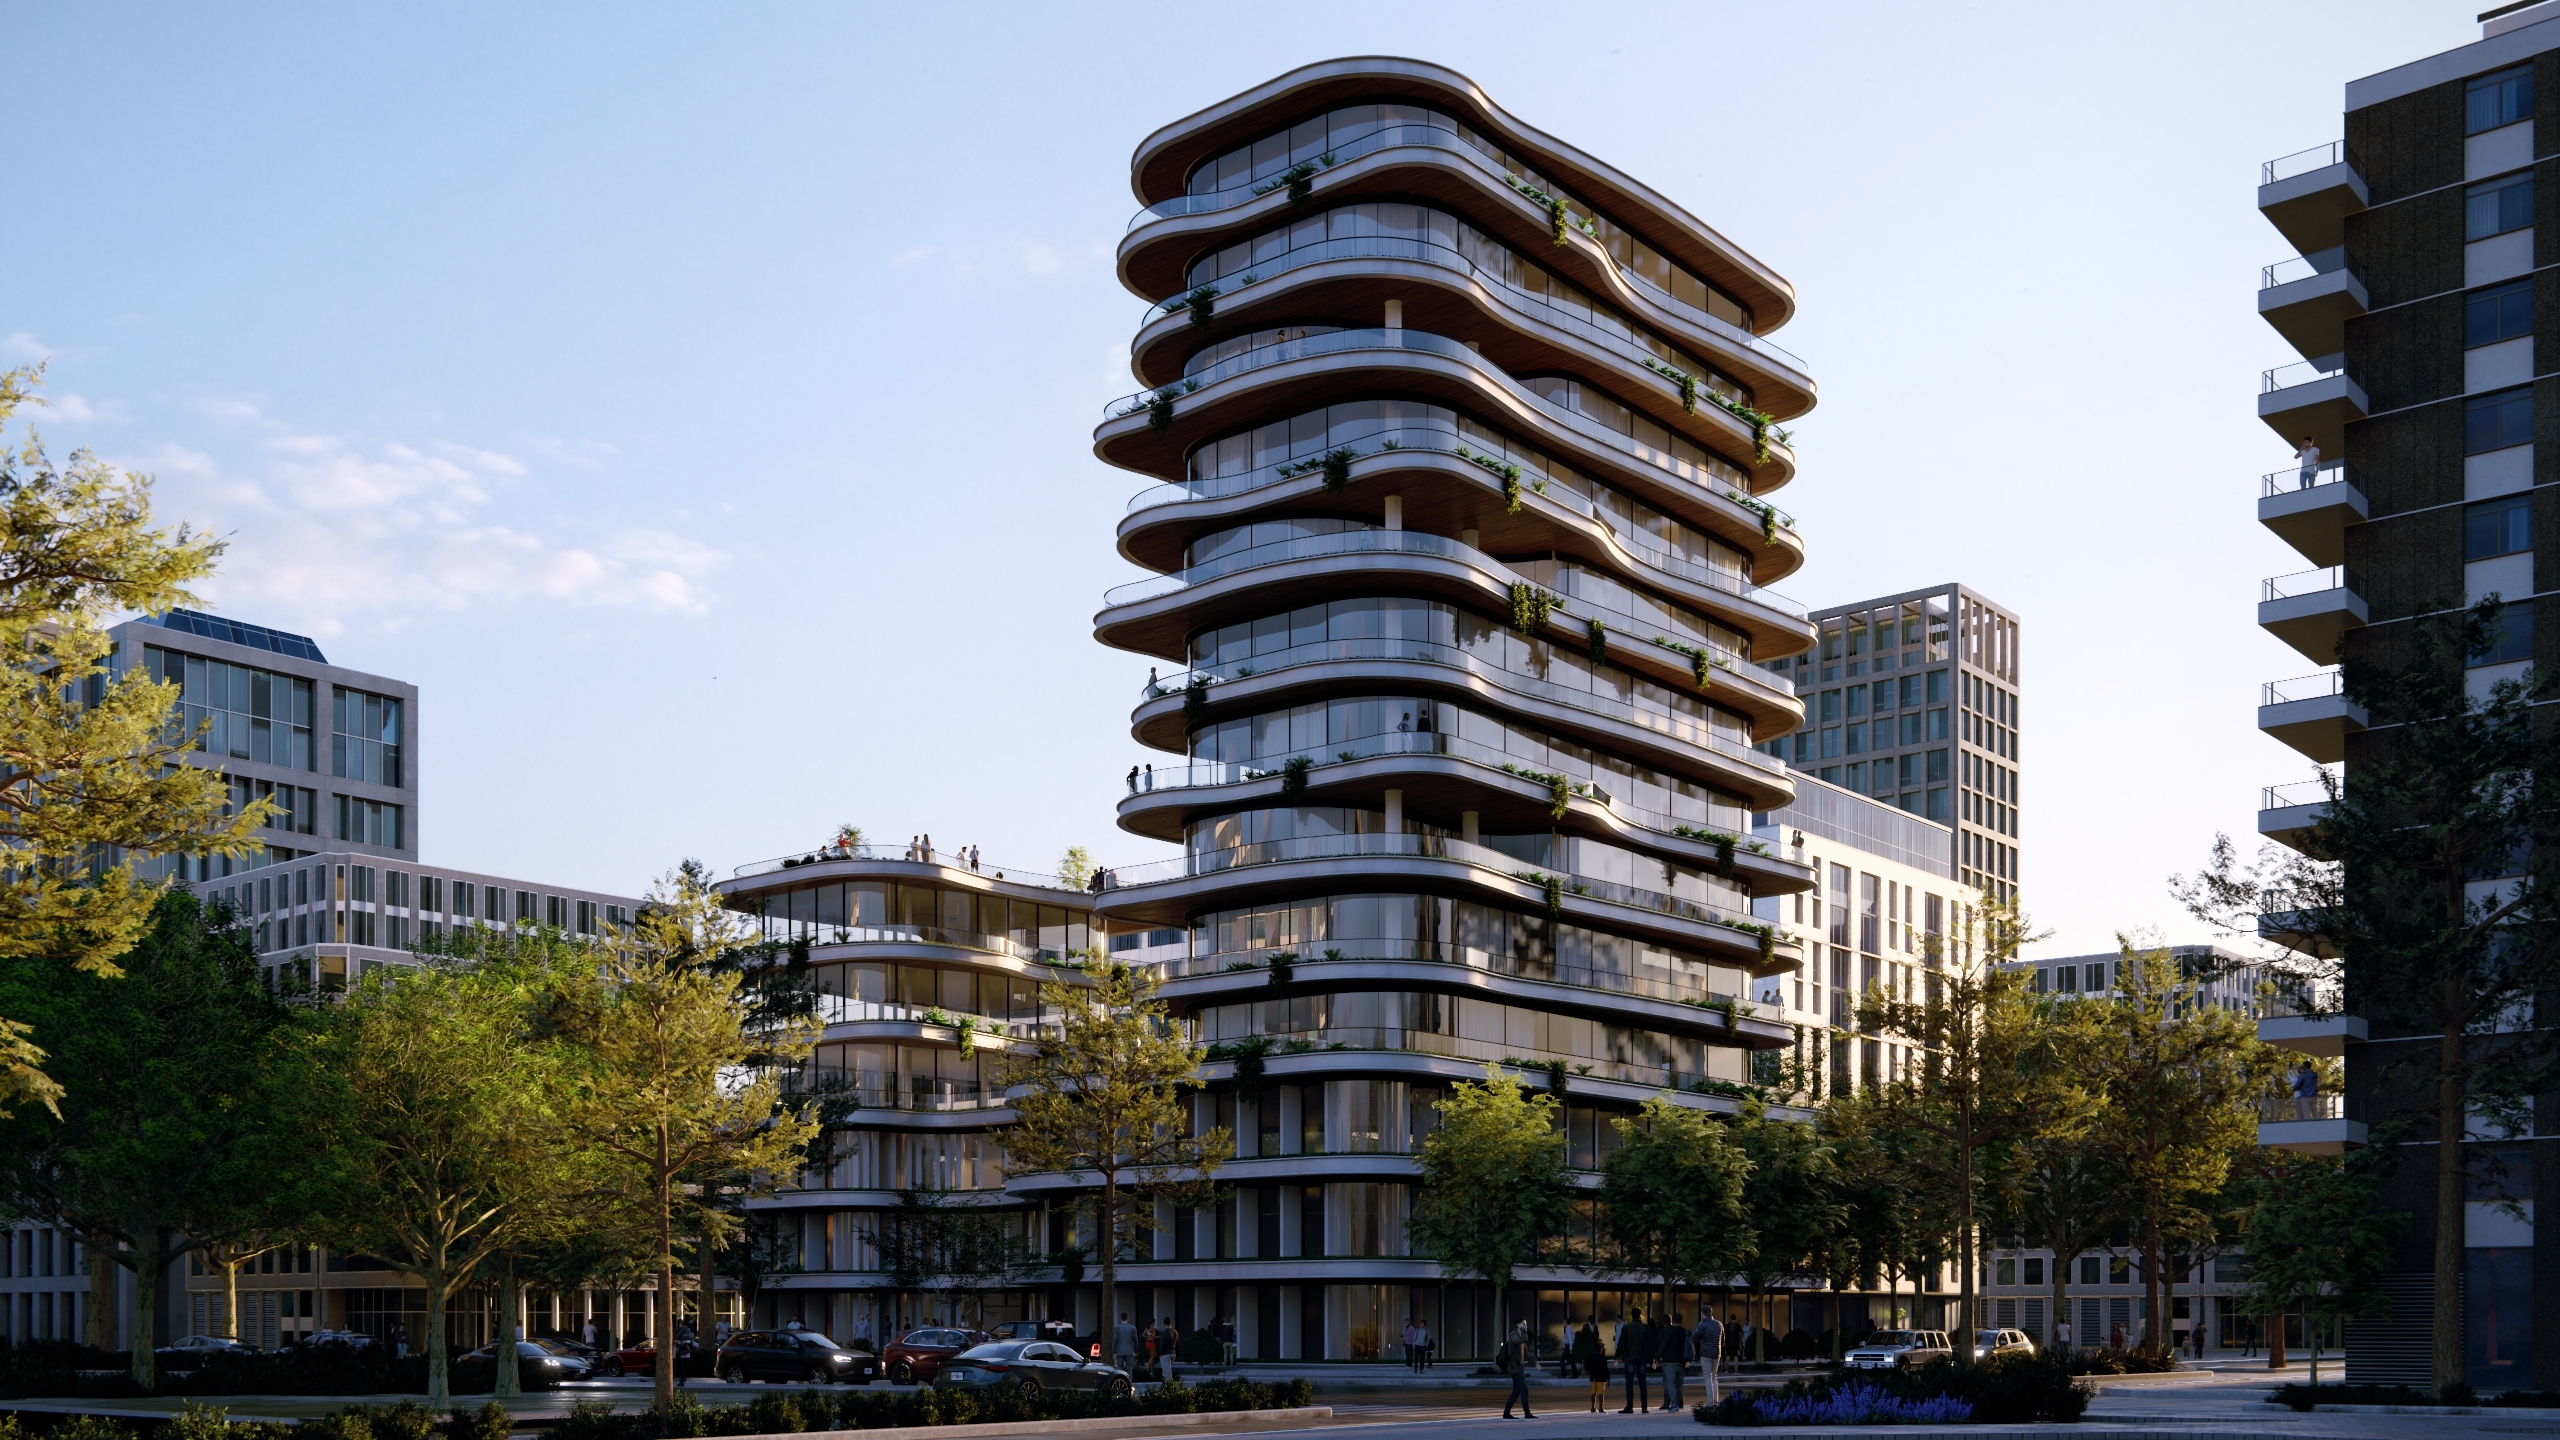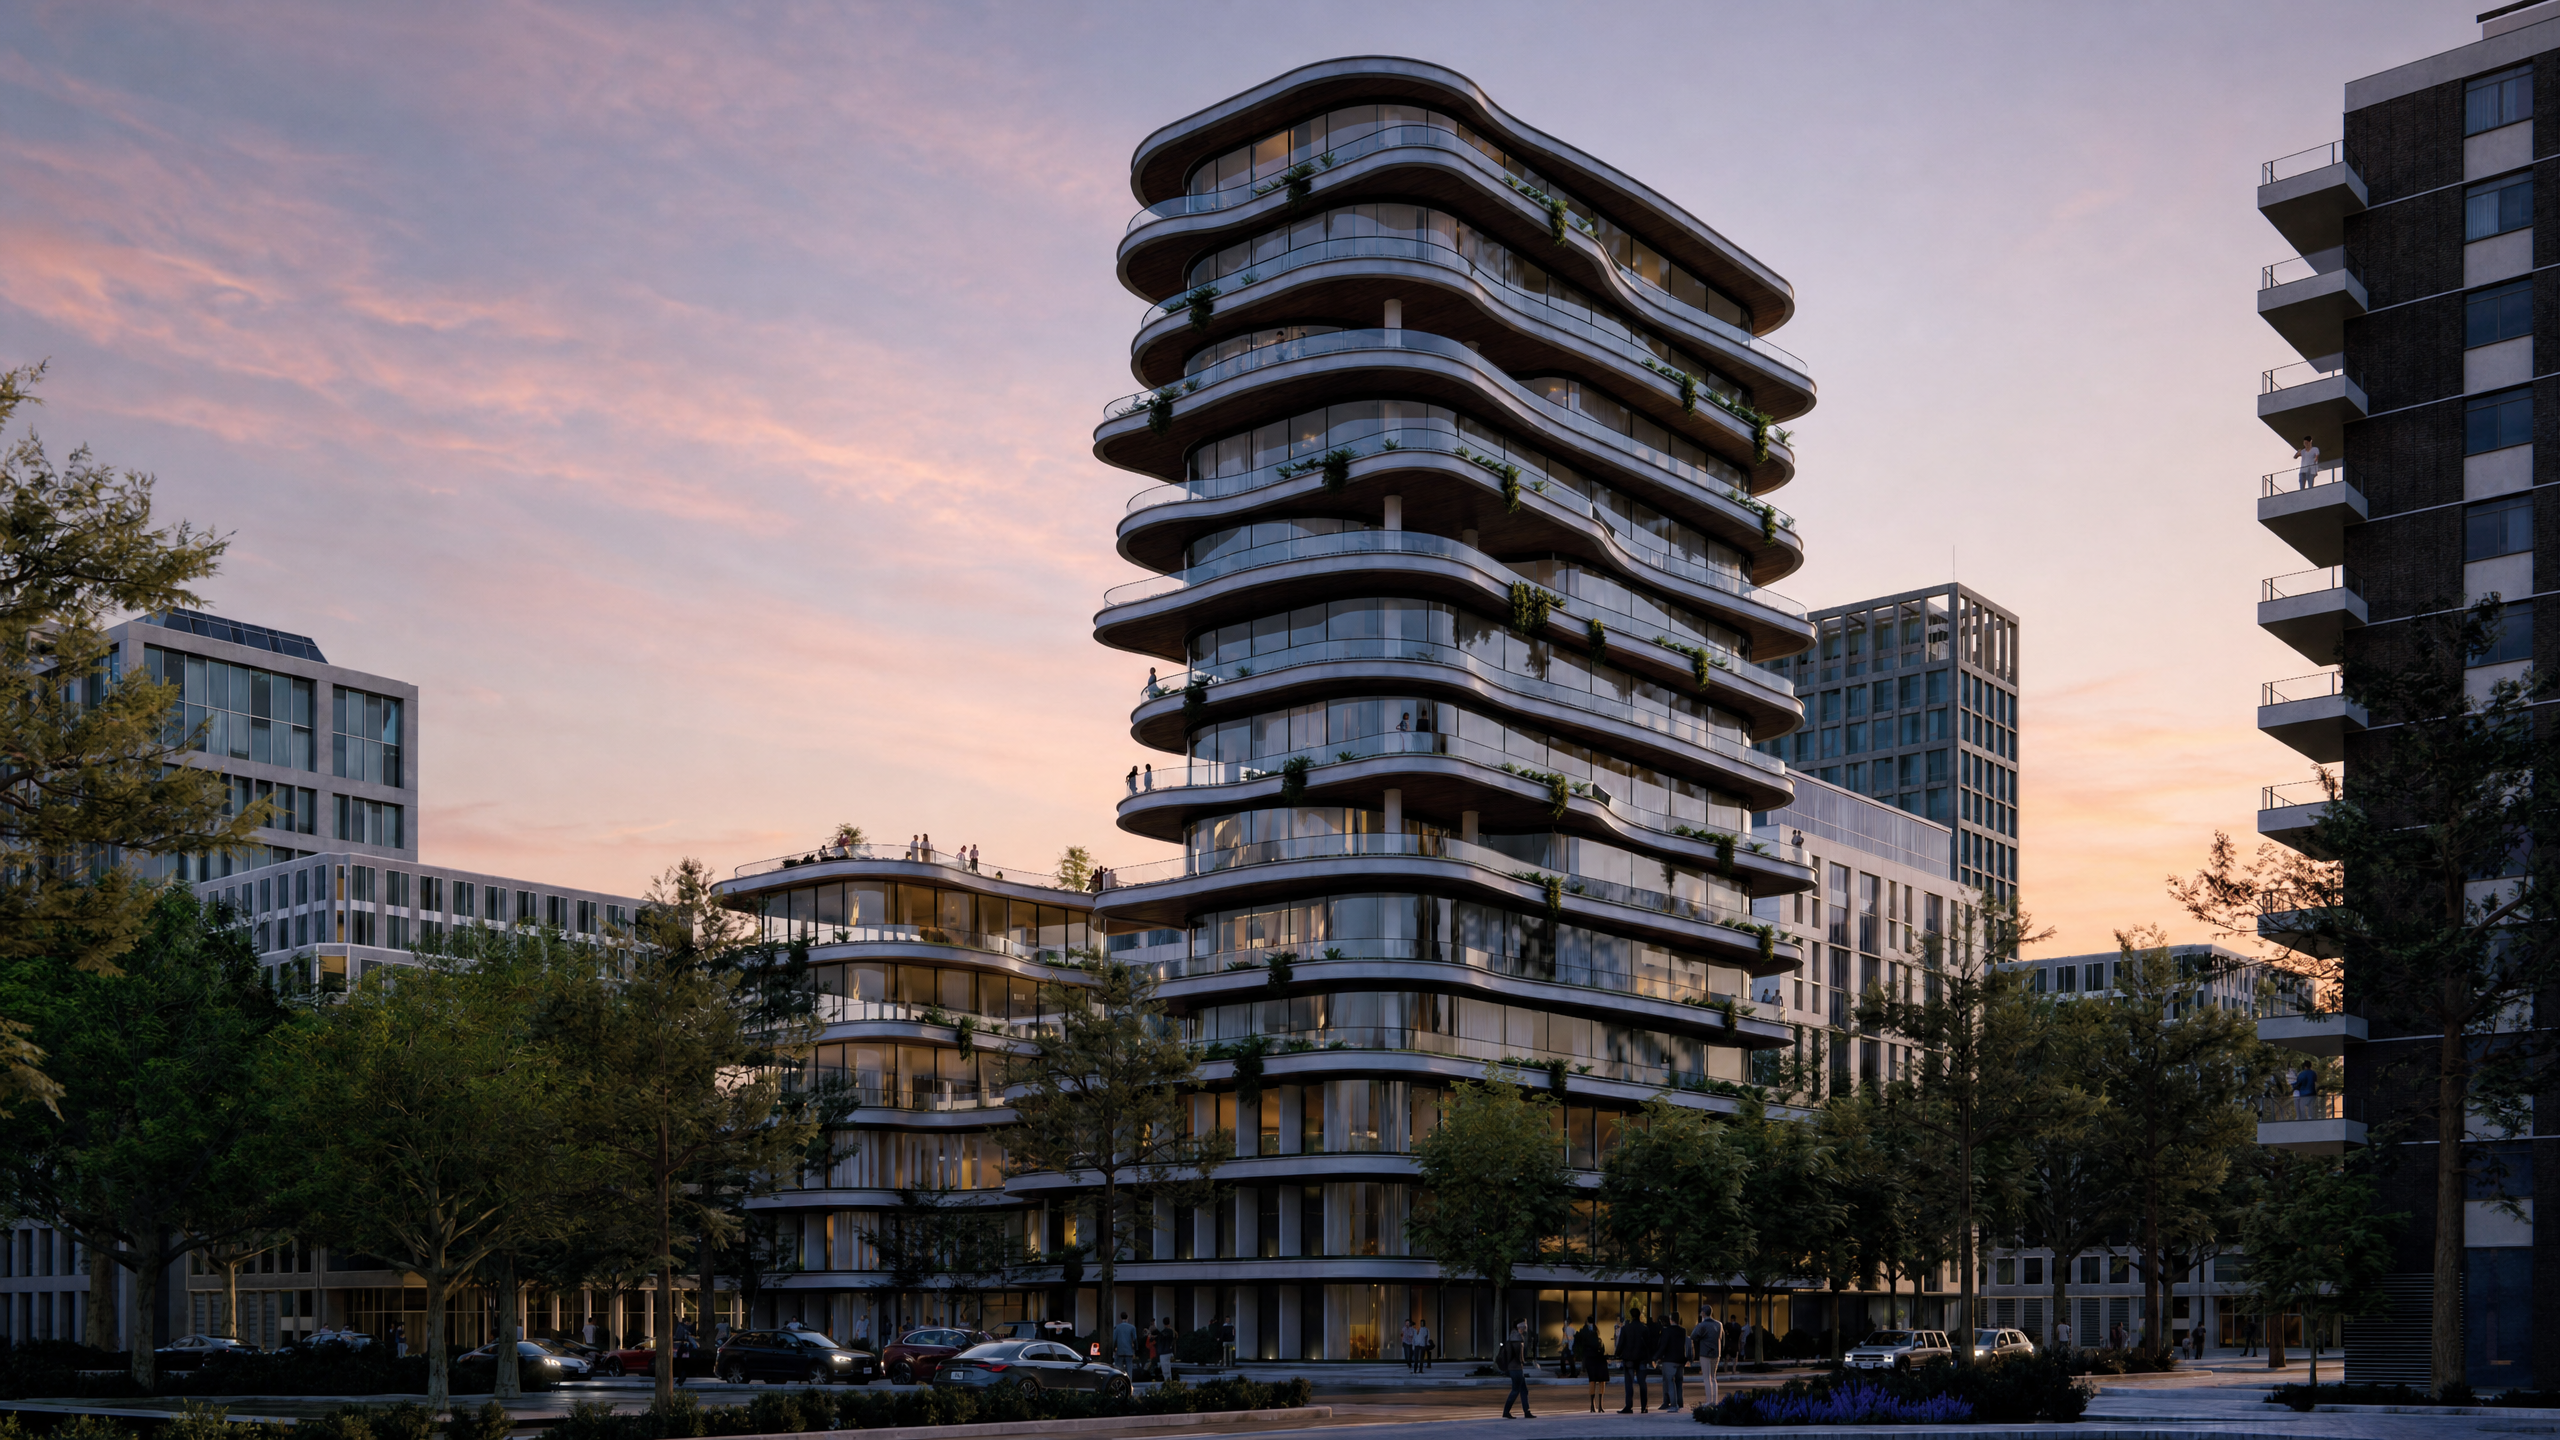
A finished render is often only the starting point for presentation. Before an image is shared with a client, submitted for review, or added to a presentation set, it may need a final round of cropping, color correction, or styling.
***Post Processing*** in ***Lumion Cloud*** brings those refinements into the same workflow where images are already being reviewed and shared. You can crop and recompose an image, make visual adjustments, apply presets or LUTs, and save the result as a new ***Version*** or ***Variation*** without returning to ***Lumion Pro*** or using separate image editing software.
This is particularly useful during review. If feedback calls for a tighter composition, a warmer image, stronger contrast, or a different visual treatment, you can create and compare those alternatives while keeping them connected to the existing ***Project***.
**Knowledge Base Tip:** Use *Variations* to explore different presentation treatments while keeping them connected to the same active *Version*.
### Menu:
[**1. Opening Post Processing**](https://support.lumion.com/lumion-cloud/how-do-you-use-post-processing-styles-in-lumion-cloud#Post_Processing)
[**2. Cropping and recomposing the image**](https://support.lumion.com/lumion-cloud/how-do-you-use-post-processing-styles-in-lumion-cloud#Cropping)
[**3. Adjusting the image**](https://support.lumion.com/lumion-cloud/how-do-you-use-post-processing-styles-in-lumion-cloud#Adjusting)
[**4. Working with presets**](https://support.lumion.com/lumion-cloud/how-do-you-use-post-processing-styles-in-lumion-cloud#Presets)
[**5. Applying filters and LUTs**](https://support.lumion.com/lumion-cloud/how-do-you-use-post-processing-styles-in-lumion-cloud#LUTs)
[**6. Previewing and saving your changes**](https://support.lumion.com/lumion-cloud/how-do-you-use-post-processing-styles-in-lumion-cloud#Changes)
[**7. Continue with AI Edits**](https://support.lumion.com/lumion-cloud/how-do-you-use-post-processing-styles-in-lumion-cloud#AI)
### 1. Opening Post Processing
**1.1.** Open the image you want to refine in ***Lumion Cloud***.
**1.2.** Select the small ***Edit*** button immediately to the right of ***AI Edits*.**
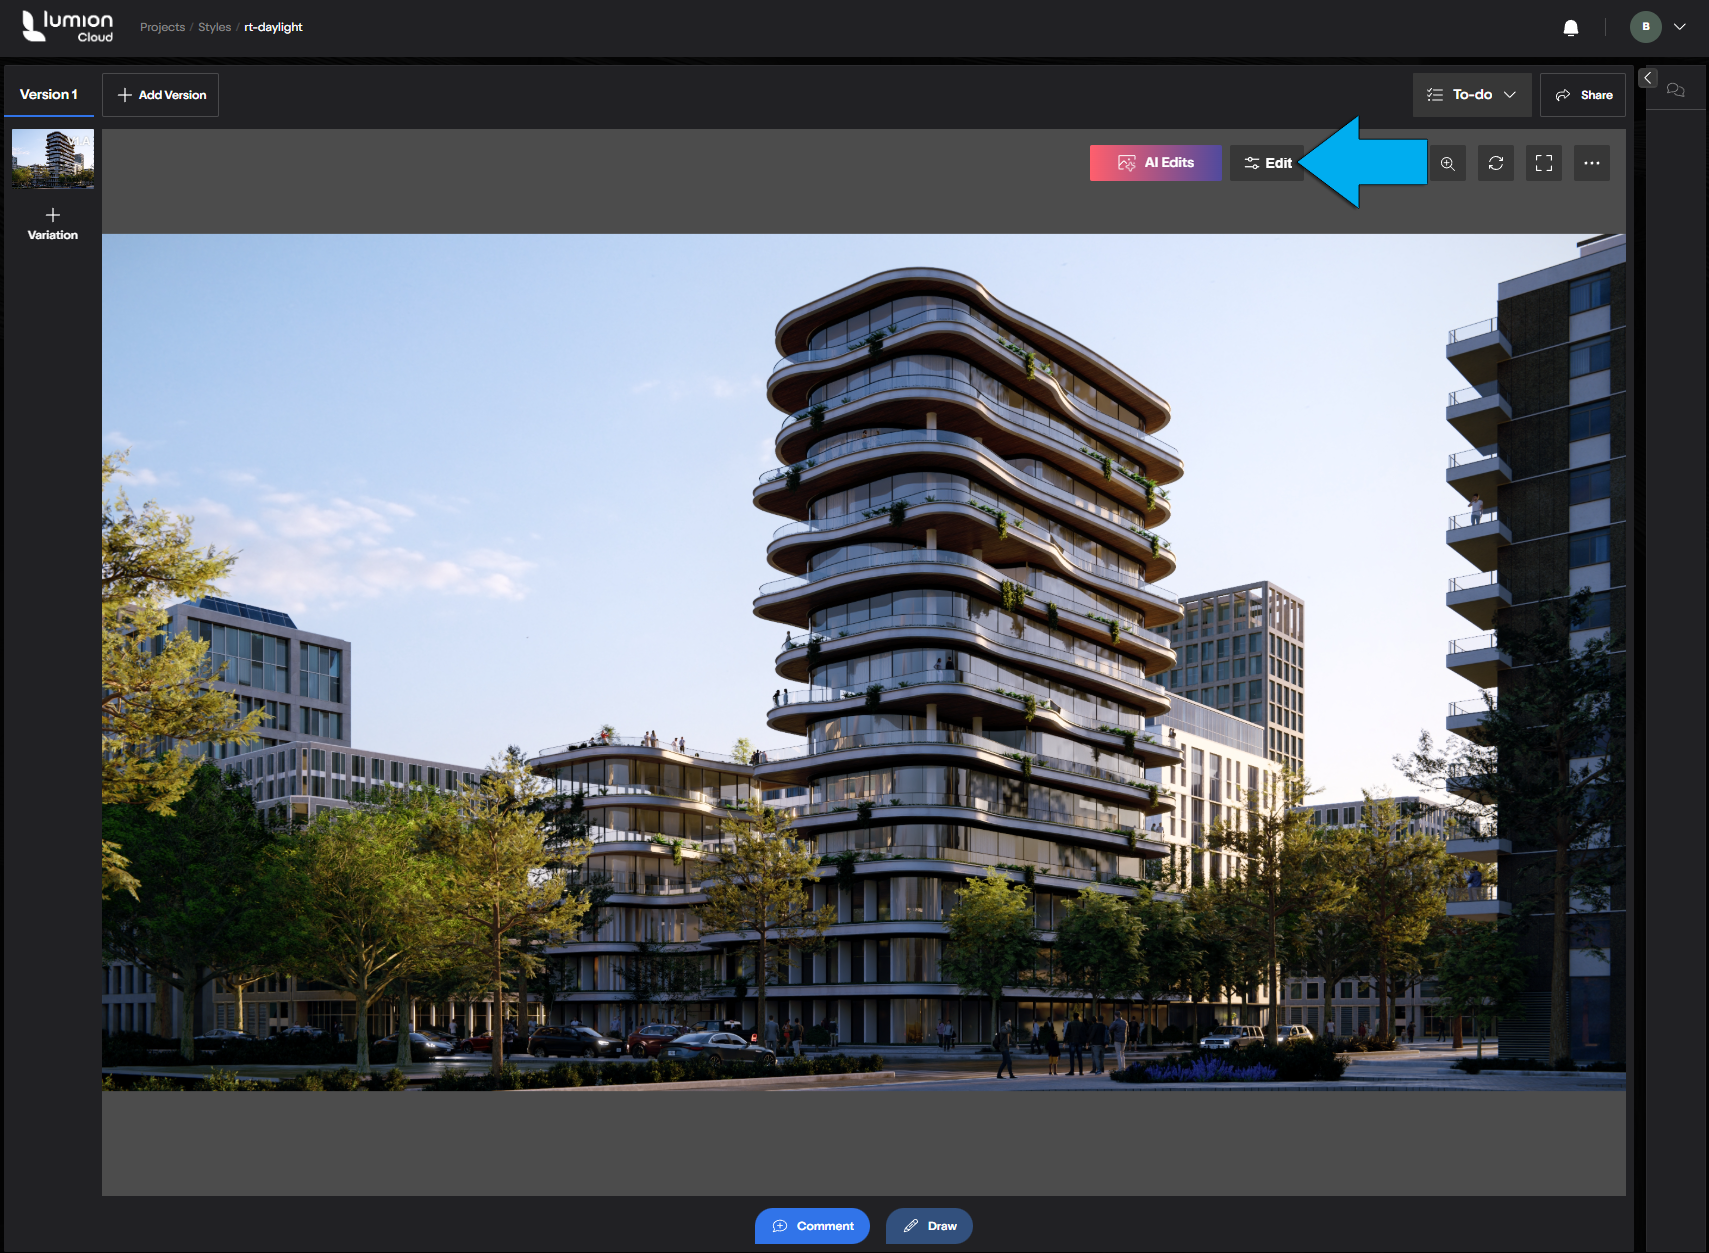
The ***Post Processing*** workspace is divided into three main areas:
- ***Crop**:* crop, resize, rotate, flip, and straighten the image.
- ***Adjust**:* apply presets or refine the image using individual adjustment controls.
- ***Filters**:* apply Lumion LUTs or import your own LUT for a consistent presentation style.
### 2. Cropping and recomposing the image
**2.1.** Select the *Crop* tab.
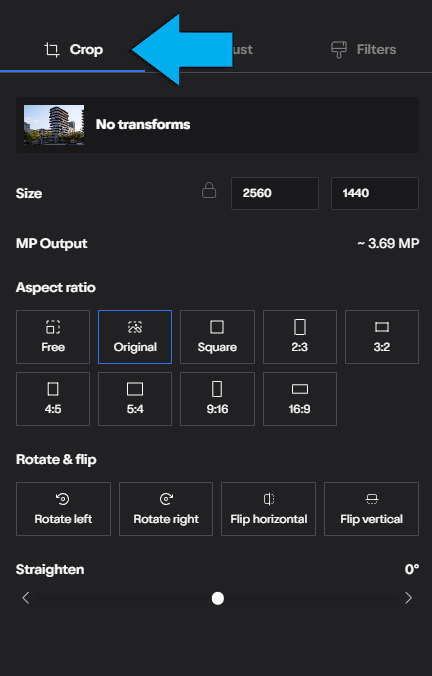
**2.2.** Set the required output ***Size***. Use the lock control if you want to preserve the current proportions while resizing.
**2.3.** Under ***Aspect ratio***, select ***Free*, *Original***, or one of the available preset ratios.
**2.4.** Use the ***Rotate & flip***controls to rotate the image left or right, or flip it horizontally or vertically.
**2.5.** Use ***Straighten*** to correct a tilted horizon or refine the composition.
**Knowledge Base Tip:** Small composition changes can often resolve review feedback without requiring a new render.
#### 2.2. When to use Crop
Cropping is useful when the render itself is suitable but the framing needs refinement.
For example, you can use ***Crop*** to:
- Remove unnecessary space around the main subject.
- Place more emphasis on a particular part of the design.
- Adapt an image to a different presentation format.
- Correct a slightly tilted horizon.
- Create alternative compositions from the same render.
This can be especially useful when responding to review comments. A change to the presentation may be possible without changing the original camera position or creating another render.
### 3. Adjusting the image
**3.1.** Select the ***Adjust*** tab.
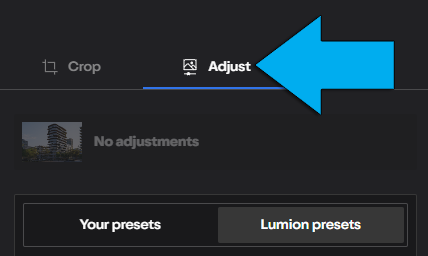
**3.2.** Choose a starting point:
- ***Lumion presets:*** apply one of the ready made Lumion looks.
- ***Your presets:*** reuse adjustment presets you have saved for consistent styling across future images and ***Projects***.
**3.3.** Refine the result using the individual adjustment controls.
What do adjustment controls do
***Brightness:*** changes the overall lightness of the image.
***Contrast:*** increases or reduces the difference between light and dark areas.
***Saturation:*** controls the intensity of the colors.
***Temperature:*** shifts the image toward a warmer or cooler color balance.
***Tint:*** adjusts the balance between green and magenta.
***Highlights:*** adjusts the brightest areas of the image.
***Shadows:*** adjusts the darkest areas of the image.
***Sharpness:*** increases or reduces the definition of edges and fine details.
***Vignette:*** adds edge darkening to draw attention toward the center of the image.
When you create a look you want to reuse, save it as a custom preset so the same adjustment style can be applied consistently across other presentation images.
**Knowledge Base Tip:** Start with a Lumion preset, then use the sliders for smaller corrections. This is usually faster than building a look from the default settings.
### 4. Working with presets
Presets allow several adjustment settings to be applied together.
They provide a quick starting point for exploring different presentation treatments and can also help maintain a consistent appearance across several images.
#### 4.1. Preset controls
**4.1.1.** In the ***Adjust*** tab, select ***Lumion presets*.**
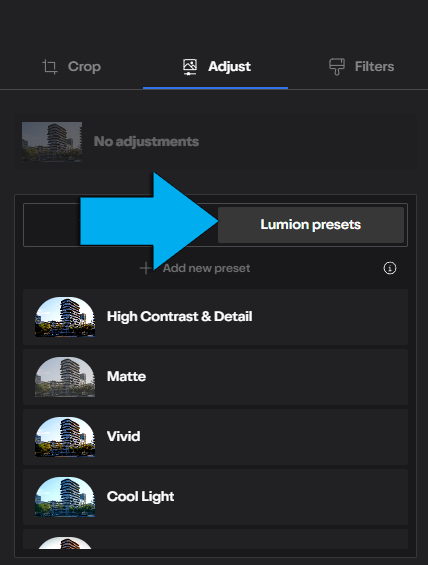
**4.1.2.** Select a preset to apply it to the current image.
You can continue changing the individual adjustment controls after applying a preset.
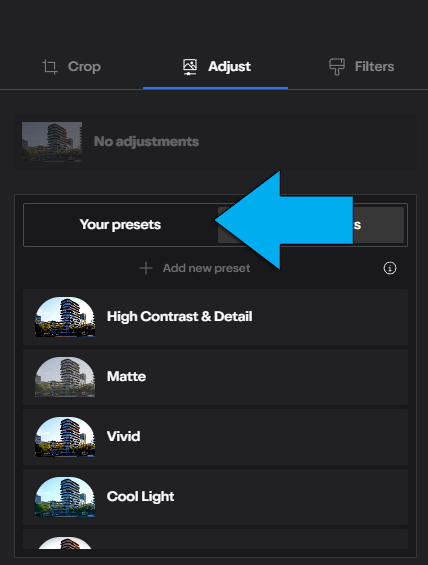
**4.1.3.** Select ***Your presets*** to access presets you have previously saved.
#### 4.2. When to use presets
- Use ***Lumion presets*** when you want to quickly explore different visual treatments before refining individual settings.
- Use ***Your presets*** when you have created a combination of adjustments that you want to reuse.
This is particularly useful when several images belong to the same presentation set. Instead of adjusting every view independently, you can establish a visual treatment on one representative image and use it as the starting point for the others.
Different renders may still require small individual corrections because their lighting and composition can vary.
**Knowledge Base Tip:** Establish the overall treatment on one representative image first. Save the settings as a preset, then use that preset as the starting point for the remaining views.
### 5. Applying filters and LUTs
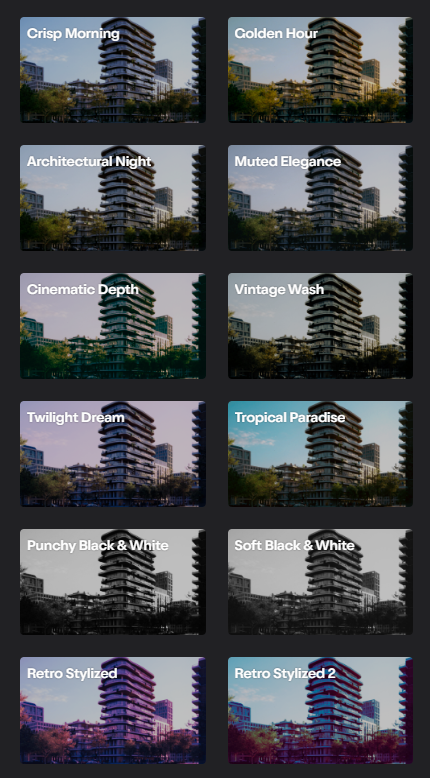
The ***Filters*** tab provides ***Lumion LUTs*** and support for imported LUTs.
A LUT applies a predefined color transformation to the image and can be useful when several presentation images need to share a consistent visual style.
#### 5.1. Filter controls
**5.1.1.** Select the ***Filters*** tab.
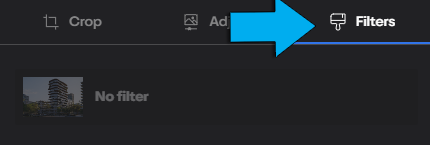
**5.1.2.** Under ***Lumion filters***, select the filter you want to apply.
**5.1.3.** Use the ***Intensity*** slider to control how strongly the selected filter affects the image.
**5.1.4.** To use your own LUT, select***Import LUT*** and choose the LUT file you want to use.
**5.1.5.** Imported LUTs are available under ***Your filters*** and can be reused on other images.
**5.1.6.** Select ***No filter*** to remove the active filter.
**What do the filter controls do?**
***Lumion filters:*** provides the supplied Lumion LUTs.
***Your filters:*** contains LUTs you have imported.
***Import LUT:*** lets you add a custom LUT.
***Intensity:*** controls the strength of the active LUT.
***No filter:*** removes the active LUT treatment.
#### 5.2. When to use filters and LUTs
Use a LUT when you want to apply a consistent overall color treatment rather than adjusting each color characteristic individually.
LUTs can help you:
- Give several images a consistent presentation style.
- Establish a warmer or cooler overall mood.
- Apply a familiar visual treatment across different ***Projects***.
- Quickly compare different presentation directions.
The ***Intensity*** control is useful because a LUT does not always need to be applied at full strength. Reducing ***Intensity*** allows more of the original render to remain visible while still introducing the desired color treatment.
#### 5.3. Using adjustments and LUTs together
The ***Adjust*** and ***Filters*** tools can be used together.
A preset or individual adjustment can establish the lighting and color balance of the image, while a LUT can provide the final color treatment.
When combining them, evaluate the final image rather than the strength of each individual setting. Strong adjustments combined with a strong LUT can produce an exaggerated result.
### 6. Previewing and saving your changes
Once the image has been refined, review the result before deciding how the edited image should be stored.
#### 6.1. Reviewing the image
**6.1.1.** Compare the edited result with the original image.
Check:
- The composition.
- Overall brightness and contrast.
- Color balance.
- Bright and dark areas.
- The strength of any preset or LUT.
- Whether the edited image communicates the design more effectively.
This is particularly useful when responding to review feedback because you can evaluate whether the change addresses the original comment.
#### 6.2. Saving the image
**6.2.1.** Select *Save*.
**6.2.2.** Choose how the edited image should be stored.
**What is the difference between a Version and a Variation?**
***Save as New Version:*** creates a new ***Version*** containing the edited asset. The newly created ***Version*** becomes the active ***Version***.
***Save as New Variation:*** creates a new ***Variation*** under the current active ***Version***.
**6.2.3.** Leave ***Continue editing*** selected if you want to remain in Post Processing after saving.
**6.2.4.** Select ***Confirm save*.**
#### 6.3. When to use Versions and Variations
Use a new ***Variation*** when you are exploring alternatives.
Examples include:
- Different crops.
- Warmer and cooler treatments.
- Alternative presets.
- Different LUTs.
- Different levels of contrast or saturation.
Use a new ***Version*** when the edited image represents the next stage you want to continue reviewing or working from.
Keeping these alternatives inside the ***Project*** allows presentation refinements to remain connected to the same review workflow instead of creating separate files in external editing software.
**Knowledge Base Tip:** Use *Variations* while exploring presentation options. Create a new *Version* when the preferred treatment is ready to become the next stage of the image.
### 7. Continue with AI Edits
***Post Processing*** is best suited to controlled changes to composition, lighting, color, and presentation style.
For AI assisted enhancements and the exploration of alternative visual directions, use ***AI Edits***.
- **Knowledge Base:** [How do you use Lumion Cloud Ai Enhancer?](https://support.lumion.com/lumion-cloud/how-do-you-use-lumion-cloud-ai-enhancer?hsLang=en-us)
- [Visit our other Sections](https://support.lumion.com/lumion-cloud/visit-our-other-sections?hsLang=en-us)
- [Lumion Cloud](https://support.lumion.com/lumion-cloud/lumion-cloud?hsLang=en-us#main-content)
- [Feature Guides](https://support.lumion.com/lumion-cloud/lumion-cloud?hsLang=en-us#feature-guides)
- [Video Tutorials](https://support.lumion.com/lumion-cloud/lumion-cloud?hsLang=en-us#video-tutorials)
[](https://lumion.com/)
[mailto:email@email.com](mailto:email@email.com)
Copyright © 2026, Lumion - Act3D B.V.
#### Product
[Plans and pricing](https://lumion.com/product/buy)
[Discover Lumion](https://lumion.com/product/discover-lumion)
[Compatibility](https://lumion.com/compatibility/)
[System Requirements](https://lumion.com/product/system-requirements)
[Find a reseller](https://lumion.com/about/find-reseller)
[Free trial](https://lumion.com/product/free-trial)
#### Solutions
[Architectural design](https://lumion.com/product/architectural-design)
[Interior design](https://lumion.com/product/interior-design)
[Landscape architecture](https://lumion.com/product/landscape-architecture)
[Urban planning](https://lumion.com/product/urban-planning)
[3D rendering](https://lumion.com/product/3d-rendering-software)
[Education](https://lumion.com/product/educational-licenses)
#### Compatibility
[Trimble SketchUp](https://lumion.com/compatibility/sketchup-rendering)
[Autodesk Revit](https://lumion.com/compatibility/revit-rendering)
[Graphisoft ArchiCAD](https://lumion.com/compatibility/archicad-rendering)
[Rhinoceros](https://lumion.com/compatibility/rhino-rendering)
[Autodesk Autocad](https://lumion.com/compatibility/autocad-rendering)
[Autodesk FormIt Pro](https://lumion.com/compatibility/lumion-for-autodesk-formit-pro)
[Nemetschek Allplan](https://lumion.com/compatibility/allplan-rendering)
[Nemetschek Vectorworks](https://lumion.com/compatibility/vectorworks-rendering)
[BricsCAD](https://lumion.com/compatibility/bricscad-rendering)
[3D Studio Max](https://lumion.com/compatibility/3ds-max-rendering)
#### Resources
[Made with Lumion](https://lumion.com/made-with-lumion)
[Tutorials](https://support.lumion.com/video-tutorials?hsLang=en-us)
[Support and learning](https://support.lumion.com/knowledge-base/api/v2/help_center/en-us/articles/360044608053.json?hsLang=en-us)
[Downloads](https://support.lumion.com/downloads?hsLang=en-us)
[Community](https://community.lumion.com/index.php)
#### About
[Our Story](https://lumion.com/about)
[We're hiring!](https://lumion.com/about/careers)
[News](https://lumion.com/news)
[Contact us](https://lumion.com/about/contact)
[Terms & conditions](https://lumion.com/legal/terms-of-service) [EULA](https://lumion.com/legal/eula) [Privacy statement](https://lumion.com/legal/privacy-statement) [CEIP](https://lumion.com/legal/ceip) [Disclaimer](https://lumion.com/legal/disclaimer) © 2026 Lumion