
Menu
1. Set your Output render options and Render.
2.3: Render To file: > Save a file.
4. Make final output for your client as:
(screenshots show Lumion View for SketchUp (edition for Windows)
1. Set your Output render options and Render:
Super easy and fast Steps:
1. Choose the look and feel Settings (Environment, Styles) you want for your render.
2. Click on Render to File.
3. Save file to a folder of your choice.
4. Optional copy to clipboard (see 4 below).
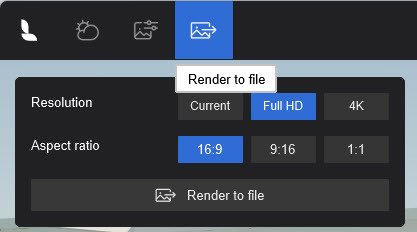
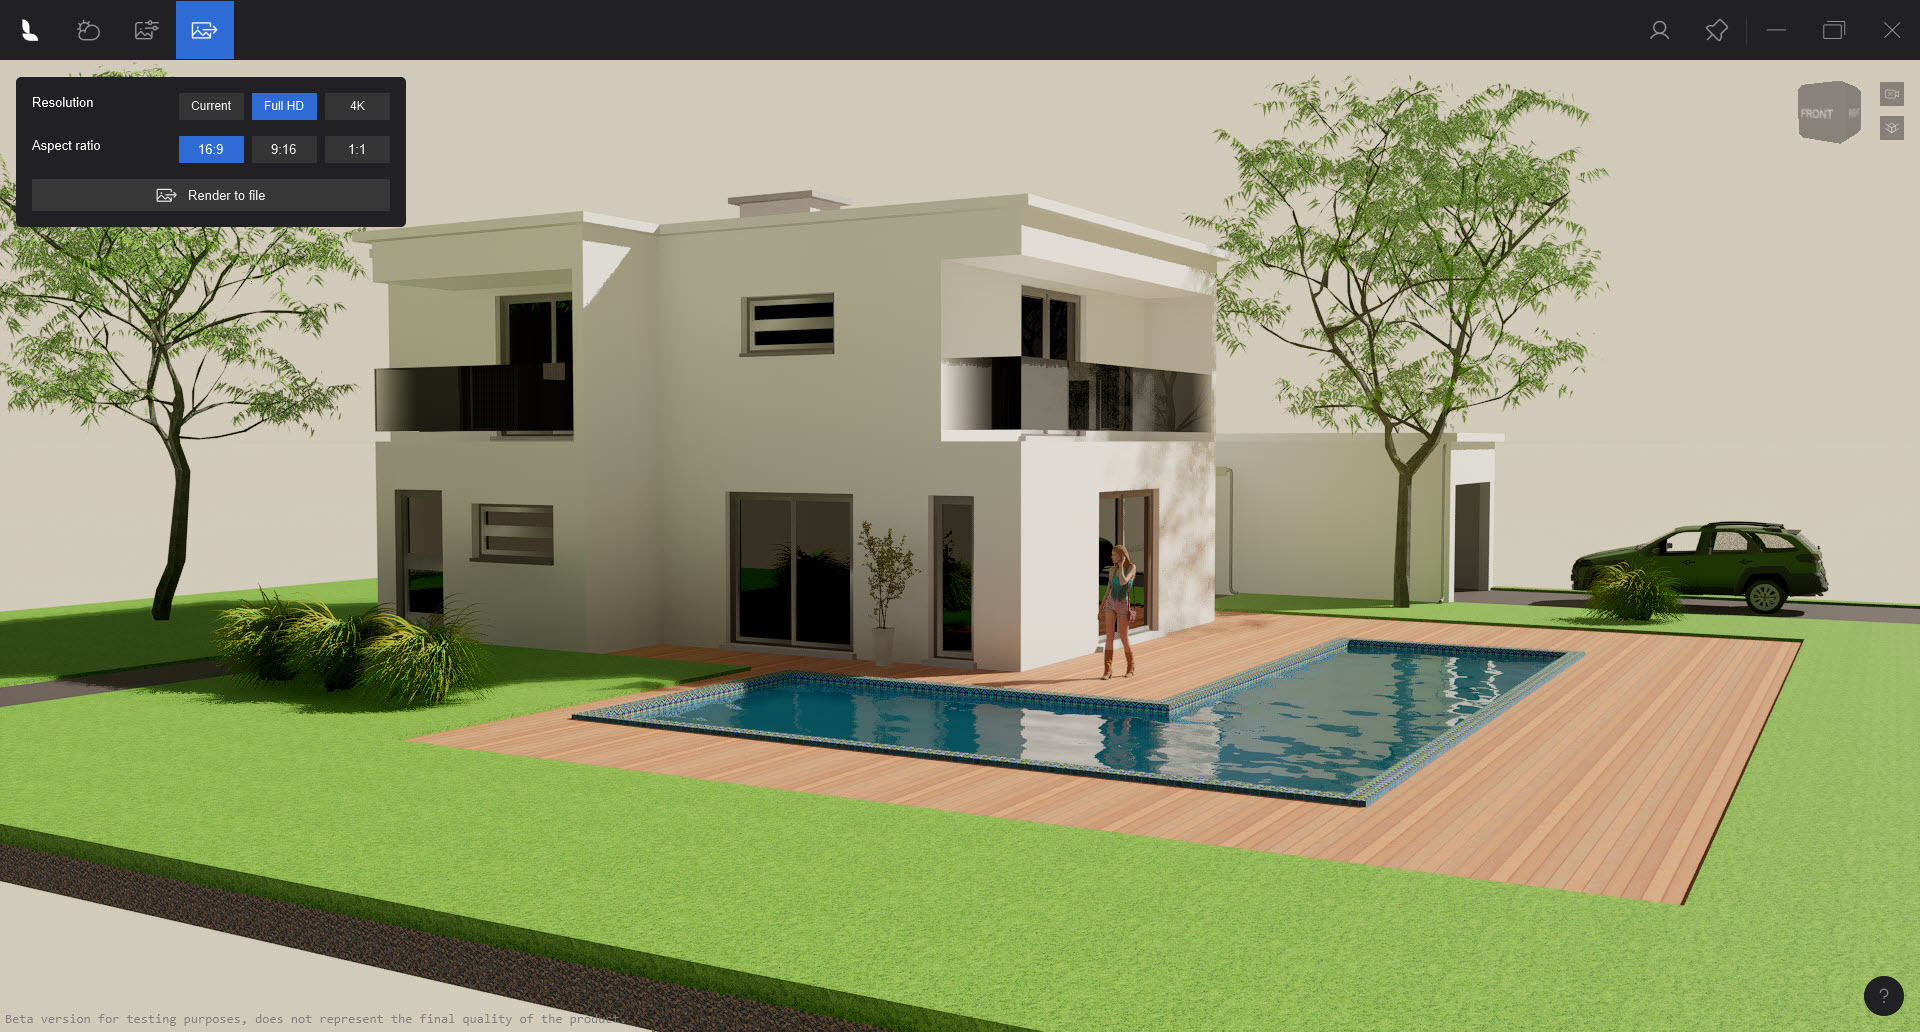
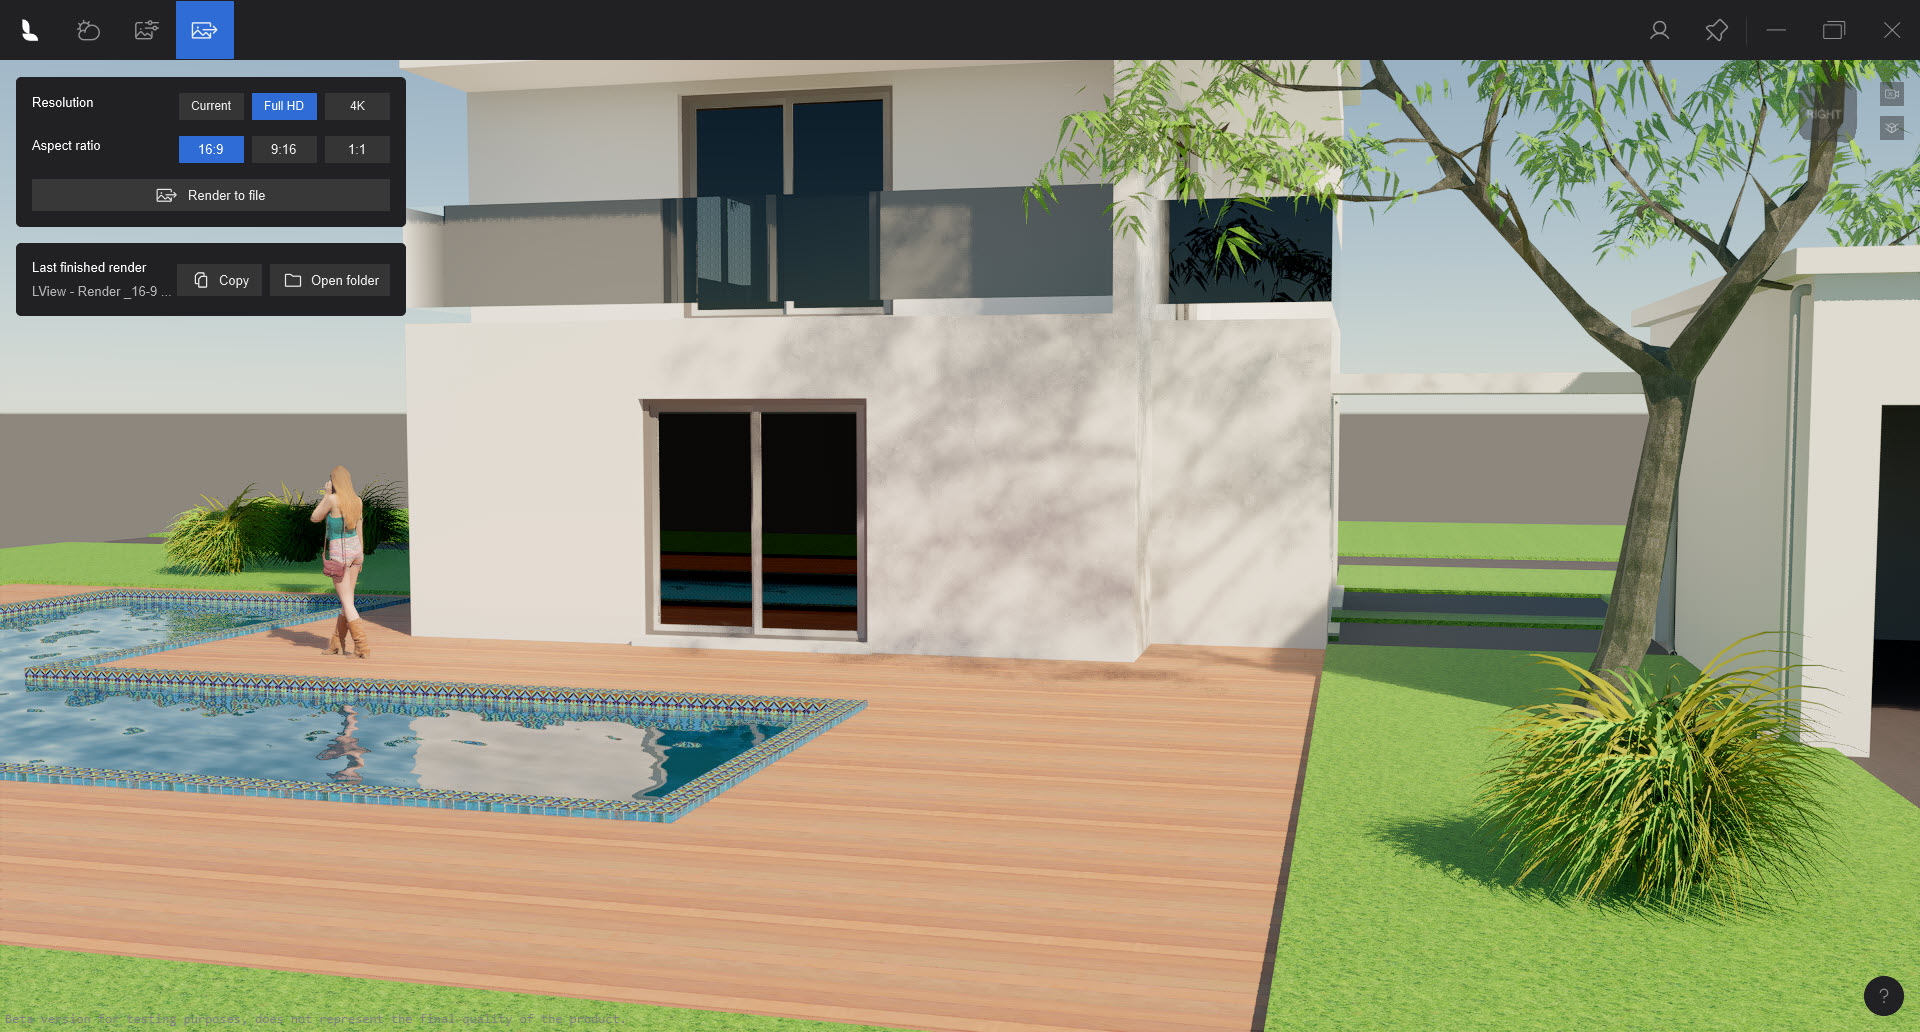
2. Render Settings:
2.1: Resolution
- Current: takes the current Lumion View screen dimensions and renders to that size.
- Full HD: 1920 x 1080 pixels.
- 4K: 3840 x 2160 pixels.
2.2: Aspect Ratio
- 16:9: most screen support this aspect, landscape.
- 9:16: an alternative, for rotating the 16:9 Landscape to Portrait.
- 1:1: Square, based on the width dimension of the Resolution.
2.3: Render To file: > Save a file
Enter a file name and folder location to save the file:
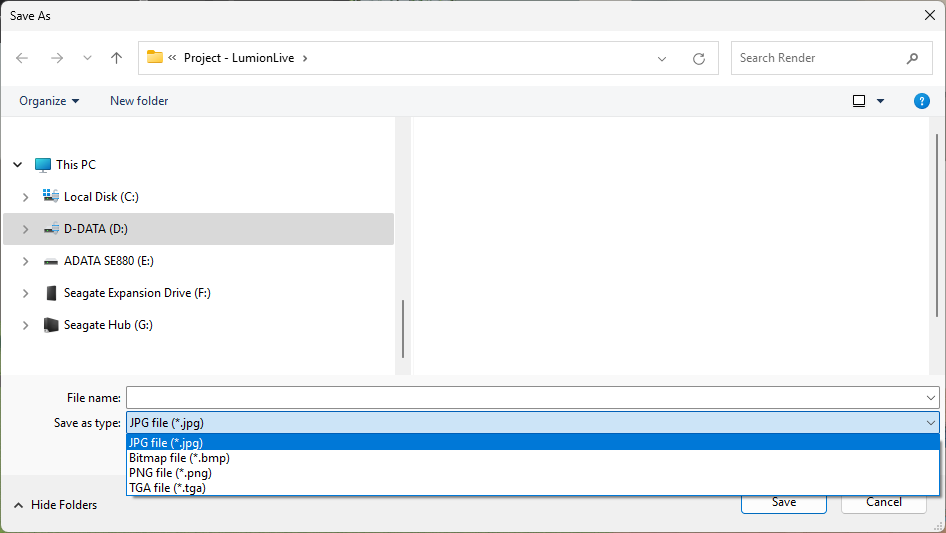
File formats for images: JPG, Bitmap (24bit color RGB 8-8-8), TGA (aRGB 8 bit color).
The files rendered below took less than 10 seconds each for a Desktop, 16:9 (hardware: RTX 3080 laptop 16,000 PassMarks).
3. Option when Rendered:
Copy the last render to the Clipboard:

As it says, the image just rendered can also be copied to the Clipboard. A time saver for some of your workflows.
From there, paste it into a client email, or other document, for a client or for internal review.
4. Make final output for your client as:
Realistic:
Conceptual:
Conceptual With Edges:
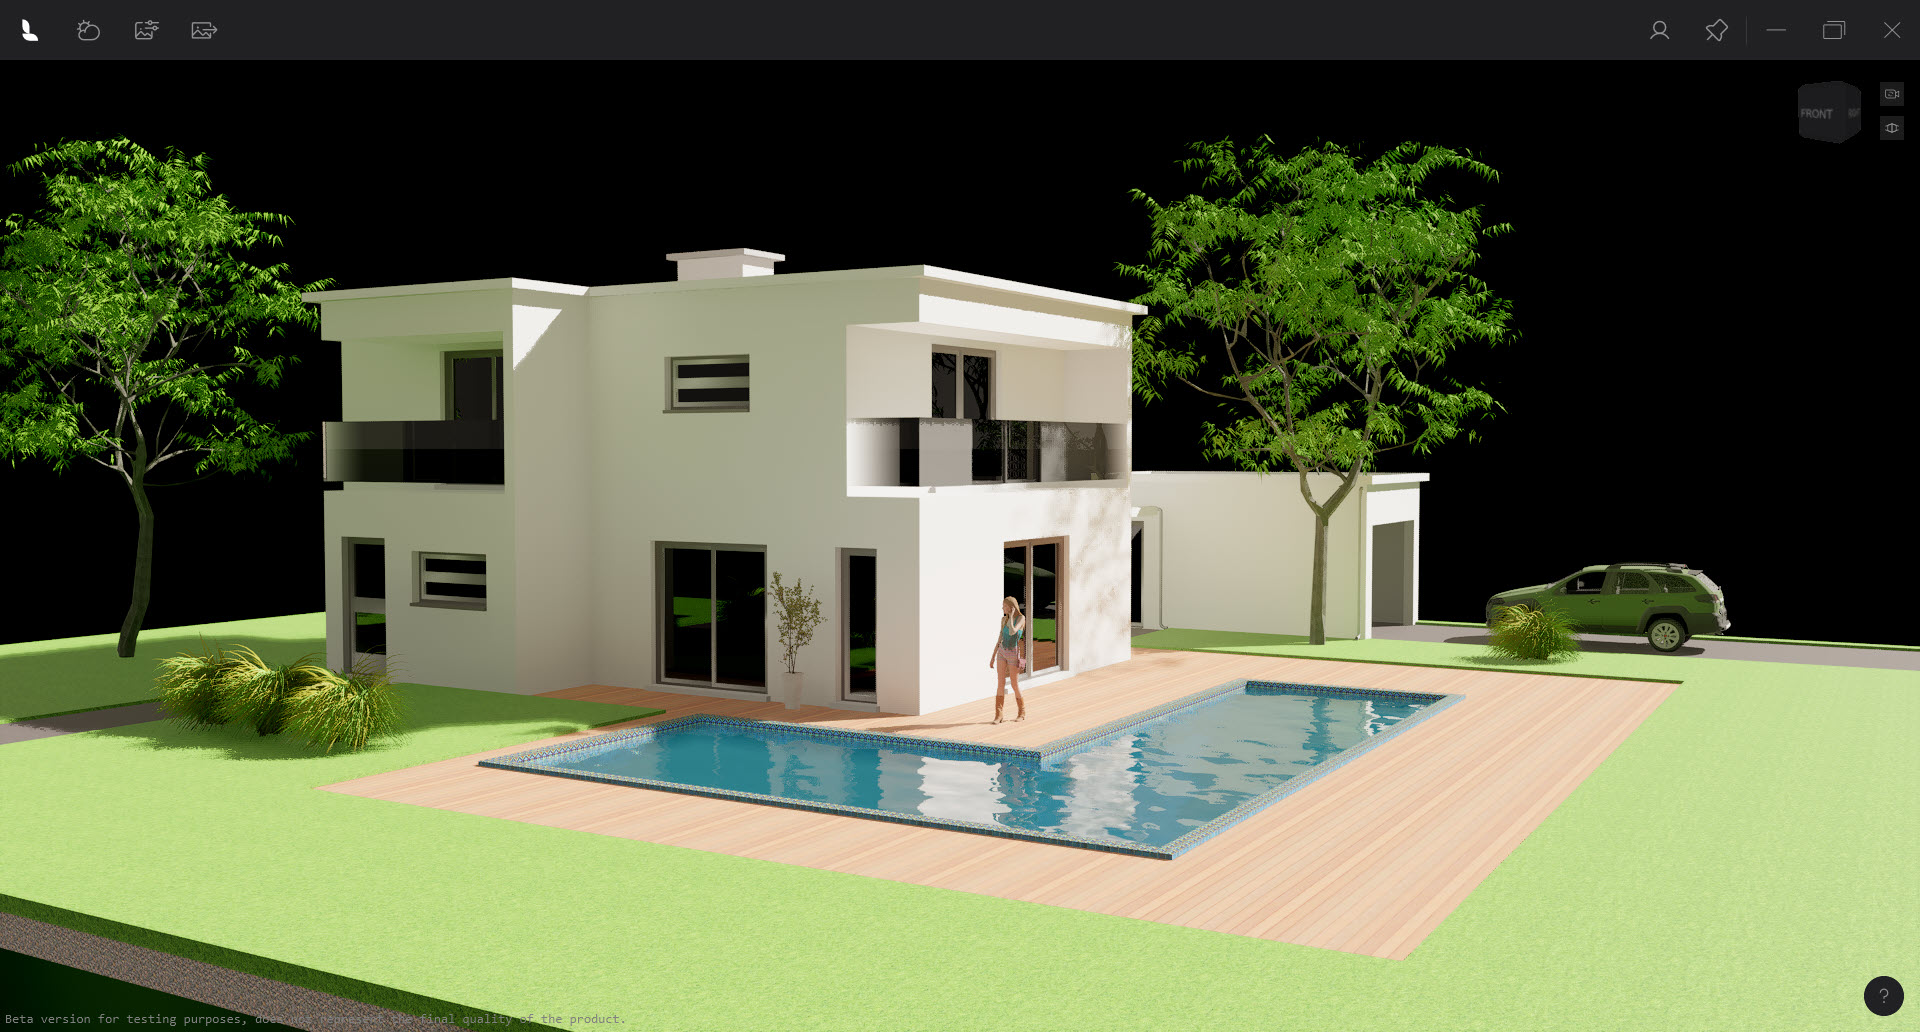
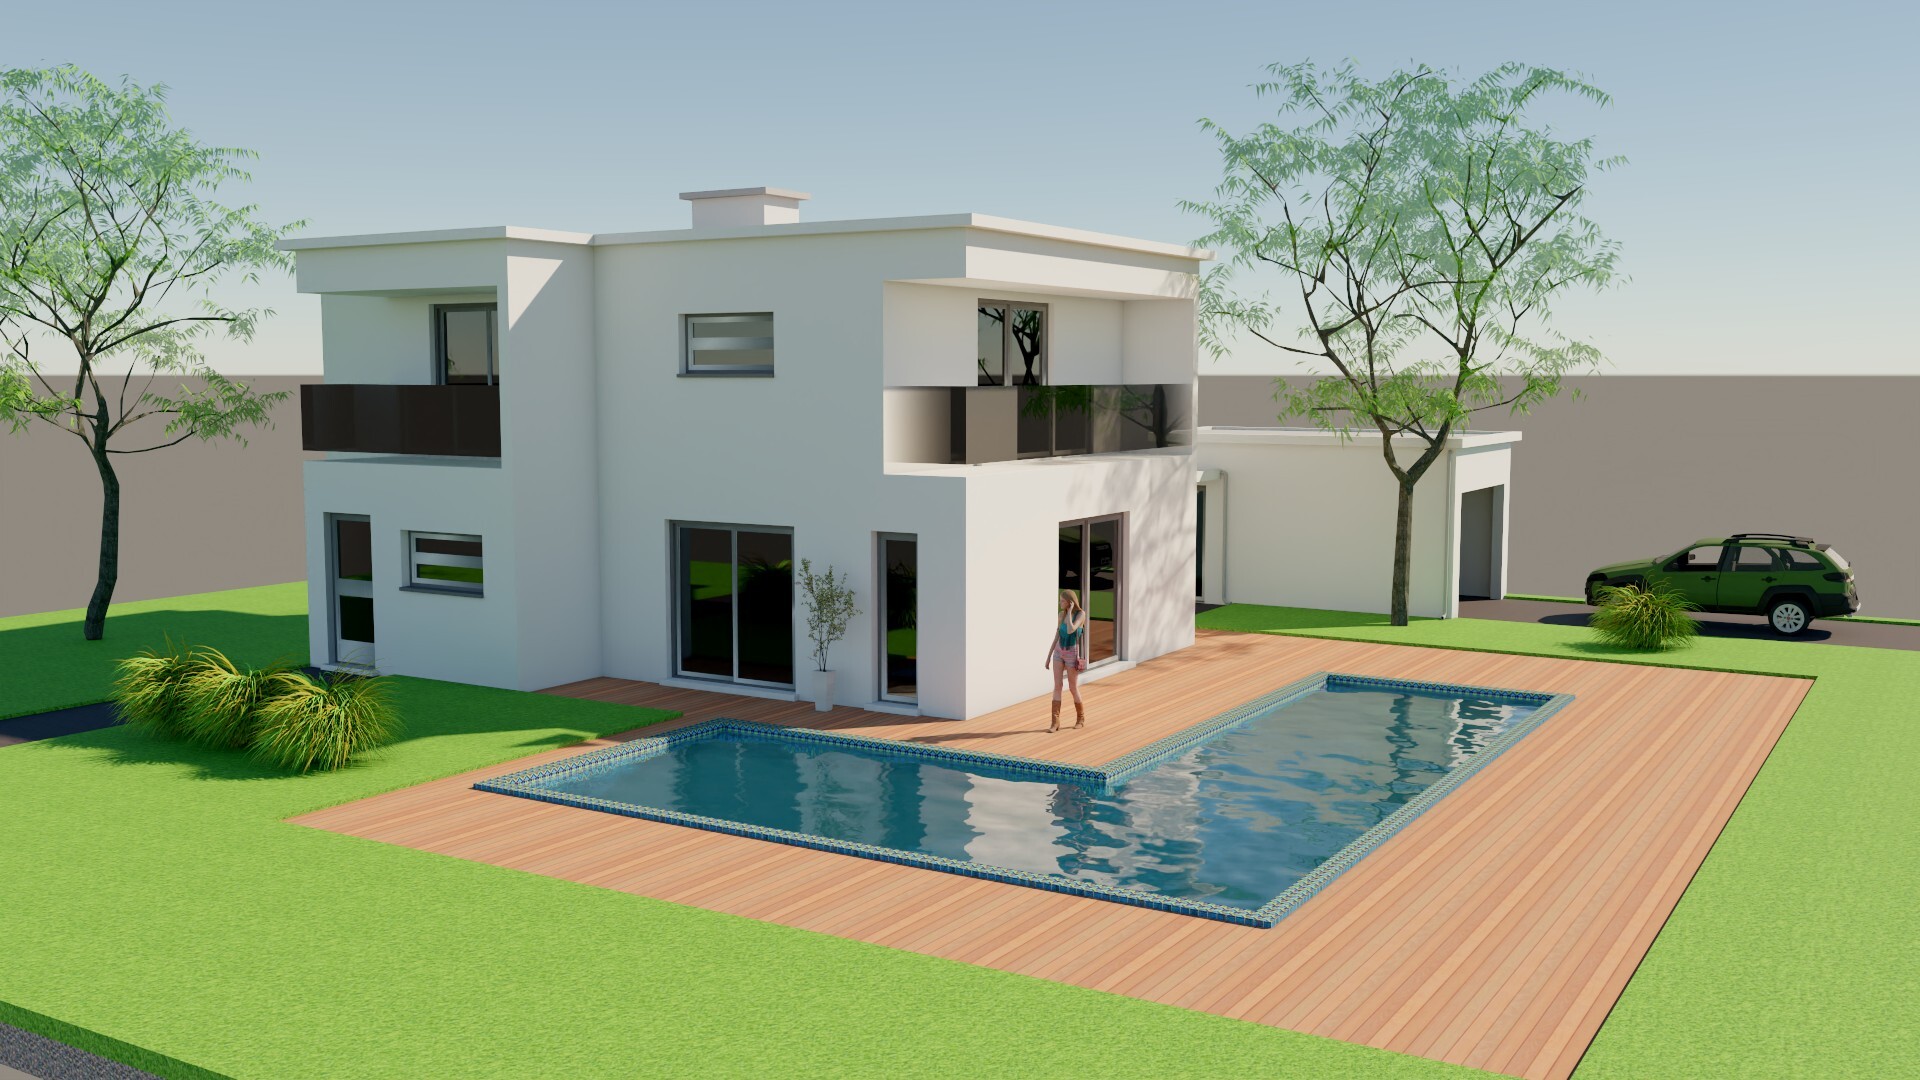
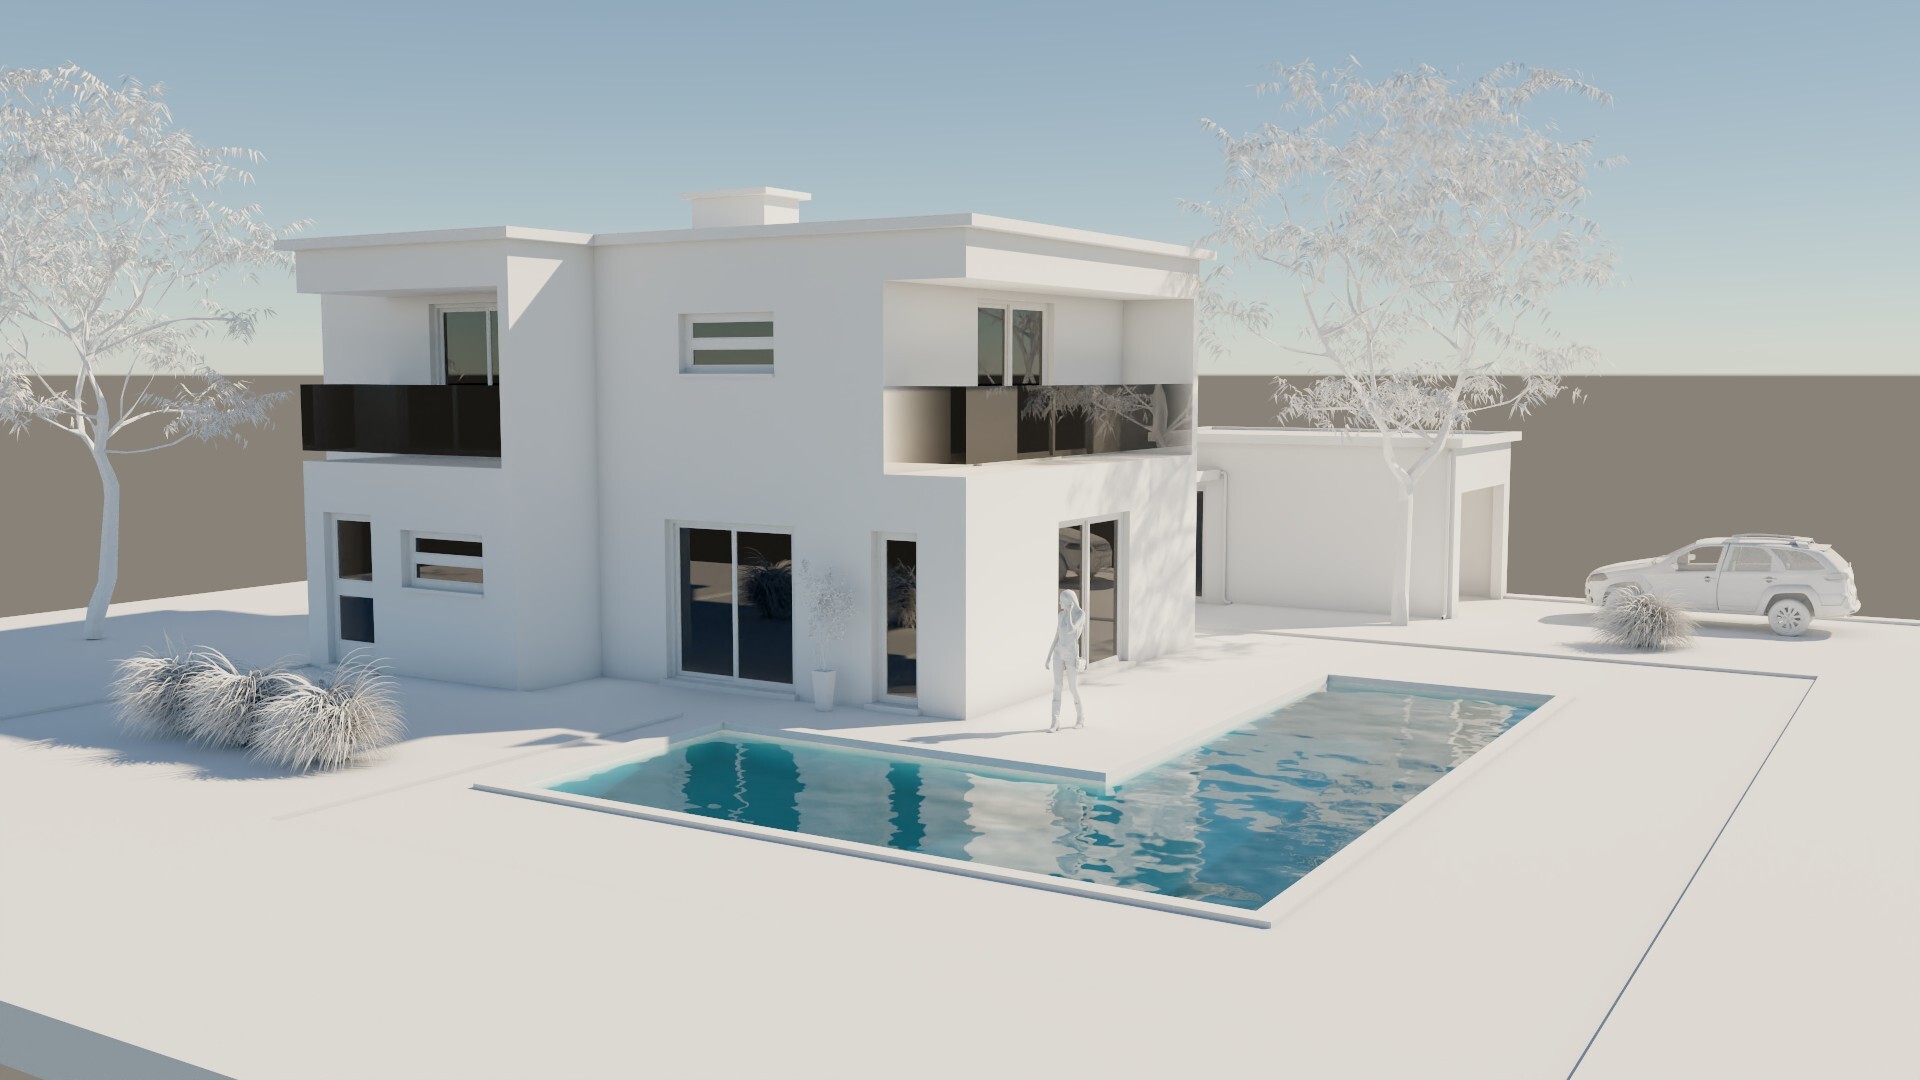
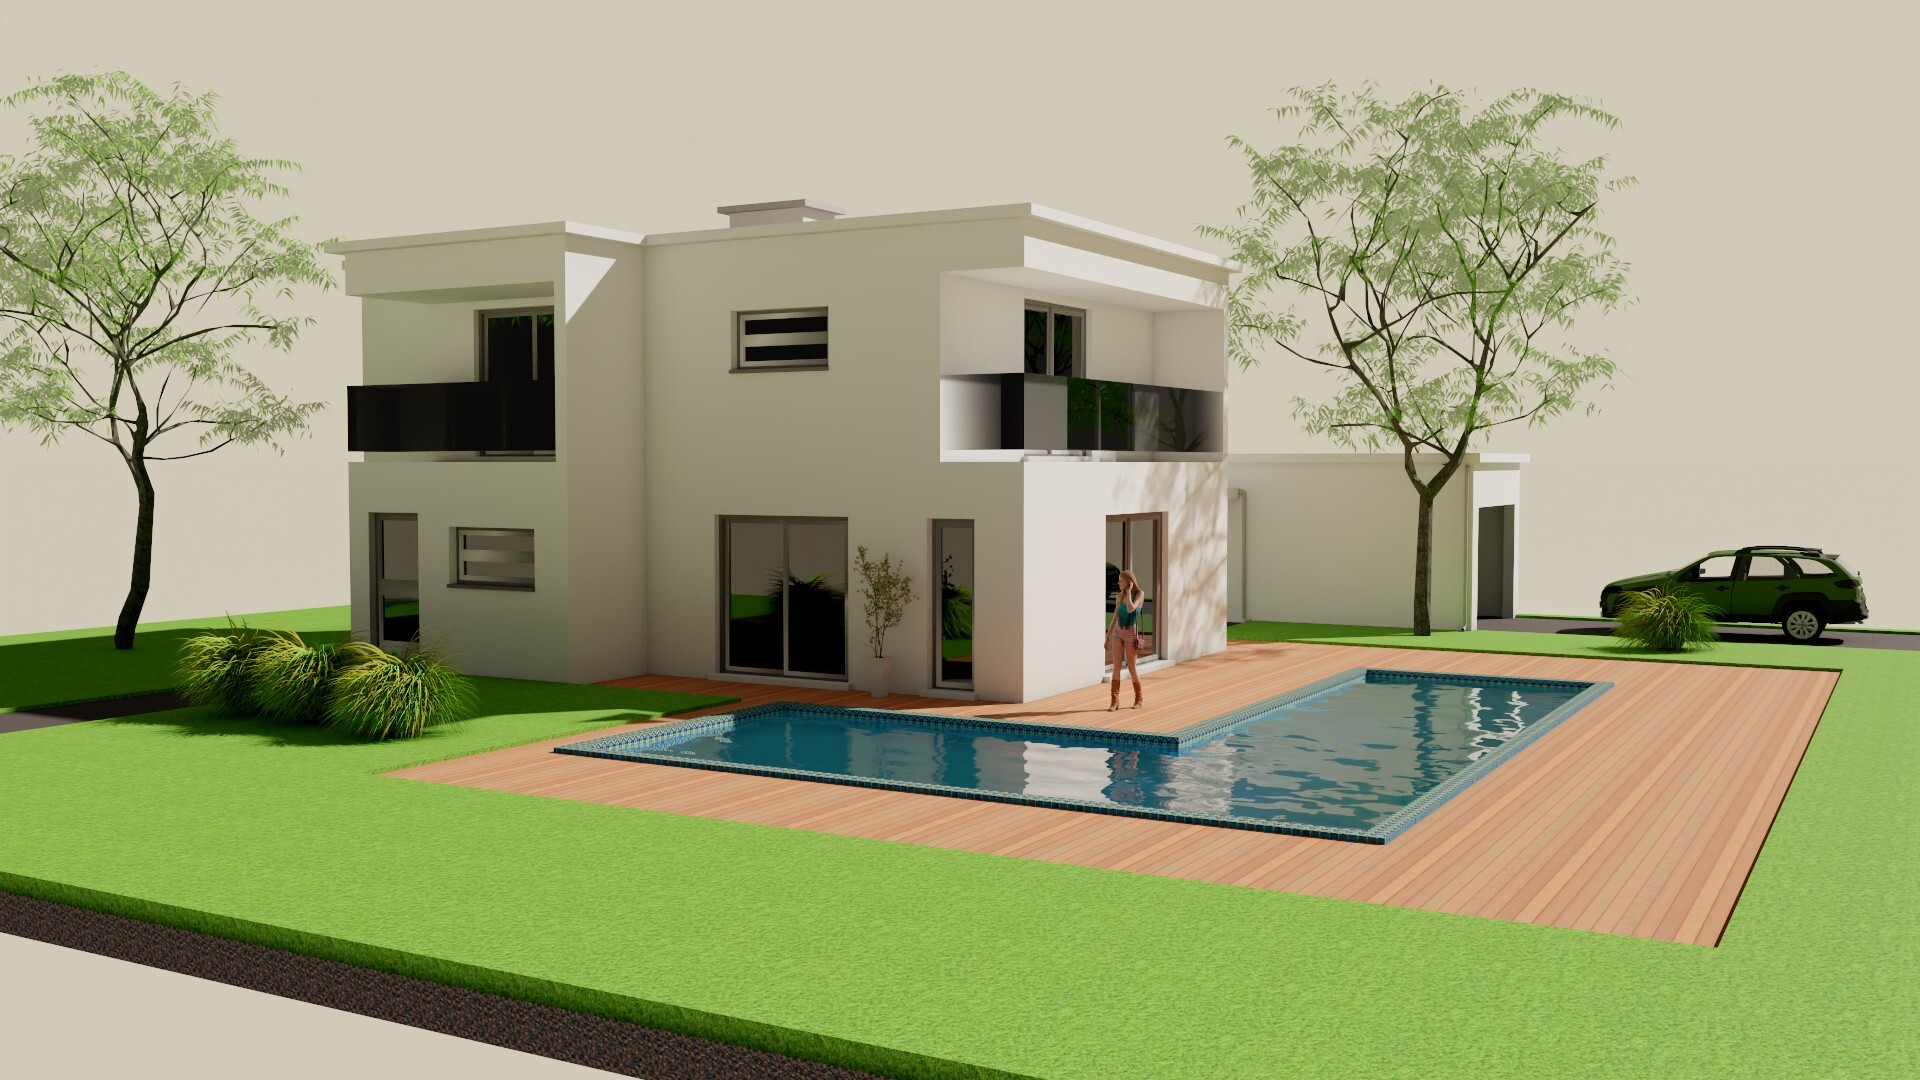
5. An Example Render:
From a SketchUp view:
Editor view:
Rendered:
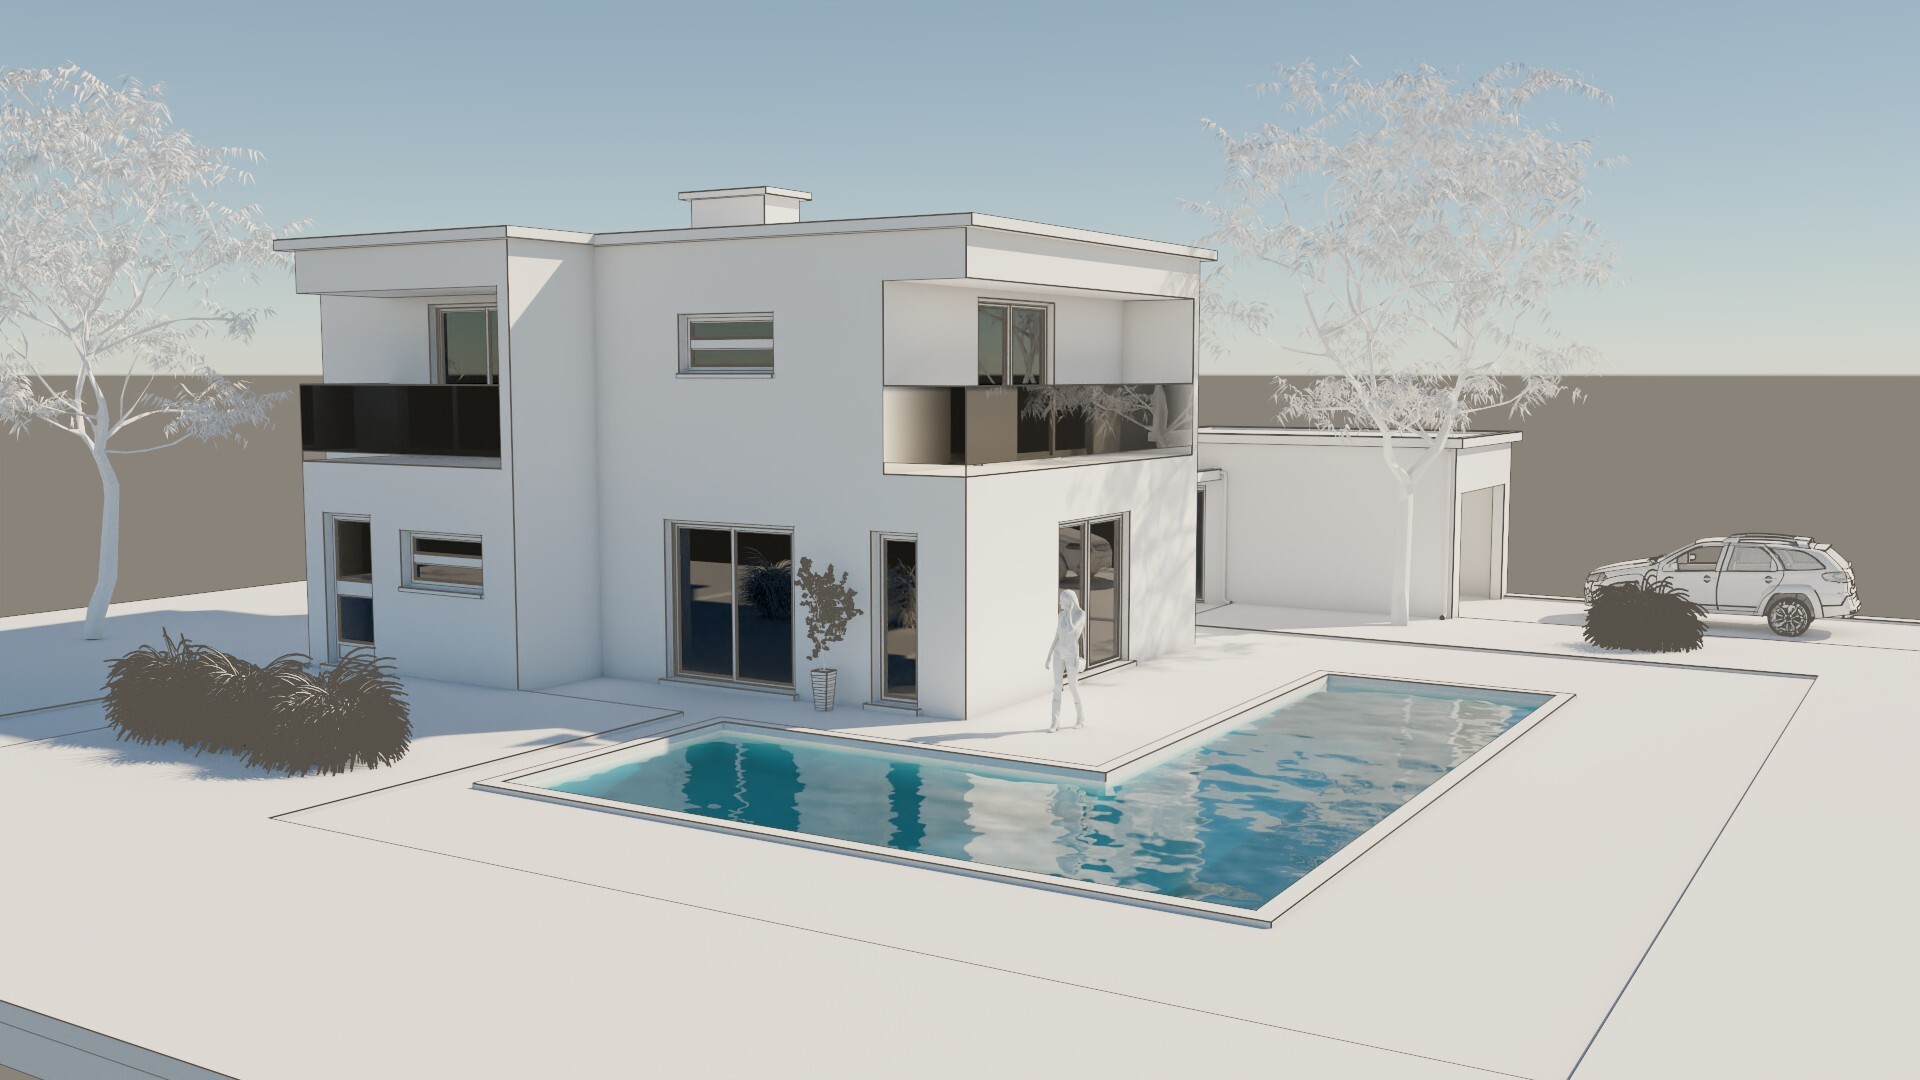
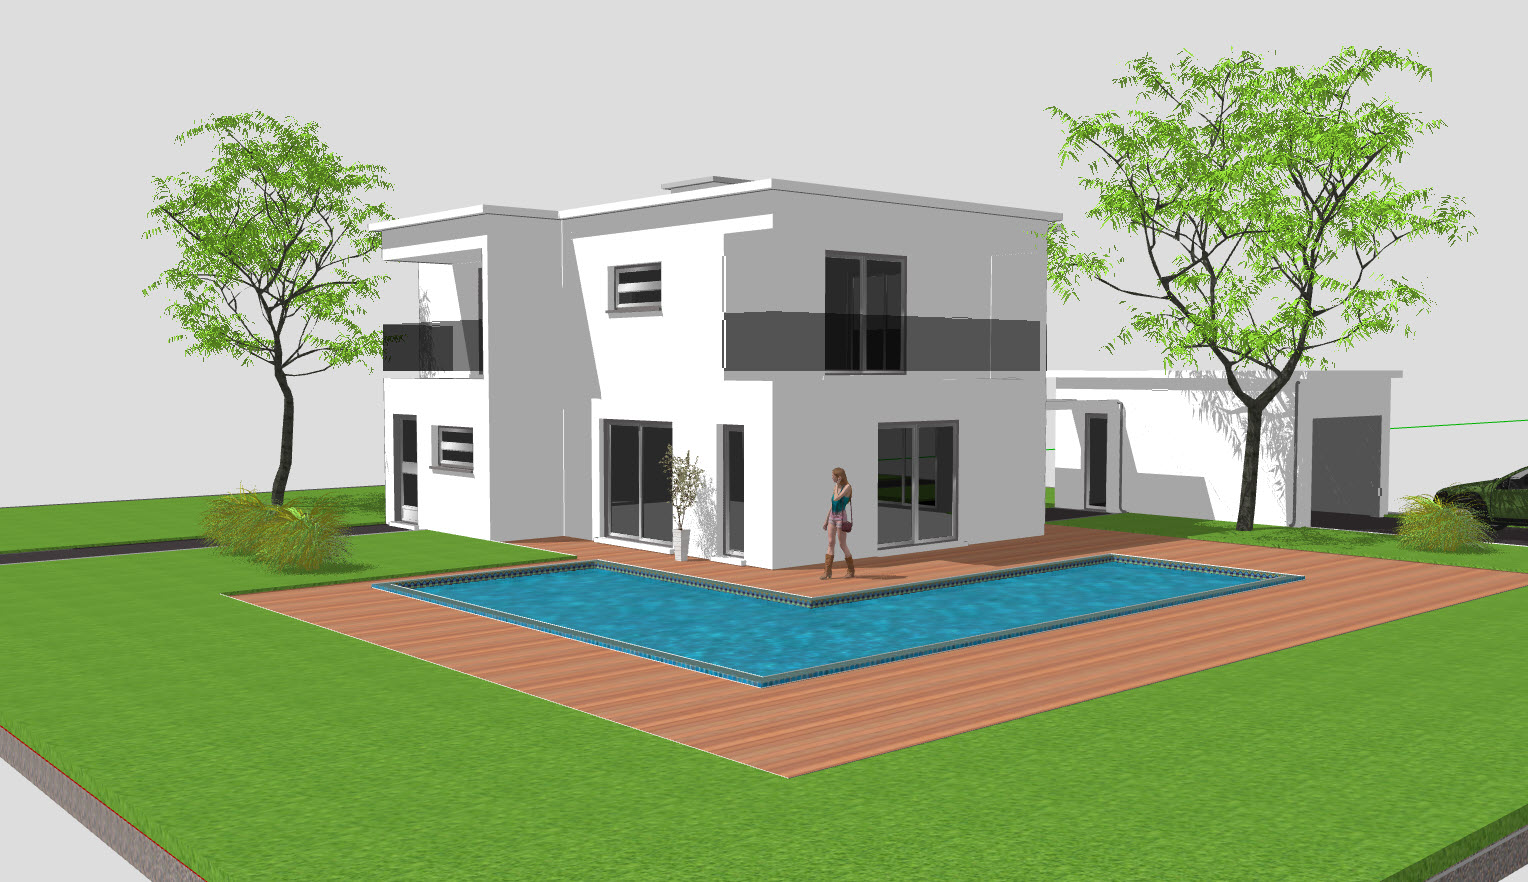
Another View:
Editor:
Rendered:
Water and Reflections in Windows (Glass Material) of Pool water (Water Material)

For further:
- Knowledge Base: All About View: Working in the Lumion View Editor
6. FAQ:
1. Render an image but don't see the open folder it is in?

See section 4. Renders an image but don't see the open folder it is in?:
- Knowledge Base: All About Lumion View: Windows and Mac: FAQ