
You have five Photo Sets ready with a total of 47 Photos. You would like to render all of them by clicking the render button once so that you could render them like a batch render overnight and do not have to render each Photo Set separately.
1. How can you render all Photos or Photo Sets in one go:
In Lumion versions 12.3.1 and newer this is now super easy to do.
Options include:
- Select Current: select all Photos in the currently selected Photo Set you are in.
- Select All: select every Photo in all Photo Sets.
- Deselect All: as it implies, select no Photos at all.
Additional to those broad selection options you can:
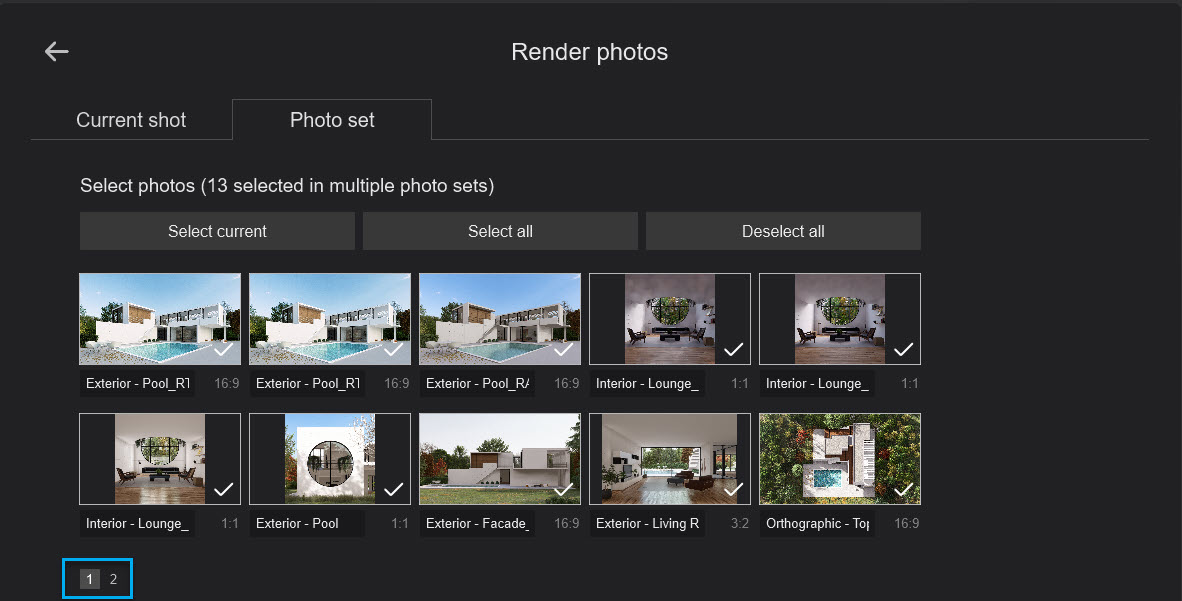
- Tick to Select or Deselect any Photo in the Photo Set you have selected from the list of Photo Sets:
- Select each of the Photo Sets to decide which ones you want to render.
2. Render Photos in a single Photo Set in one go:
Versions prior to 12.3.1:
For versions prior to 12.3.1 (excluding those versions when Photo Sets were not a feature, prior to 8.0).
You can only select the current Photo Set (have selected a Photo of one of the sets) and then render that Photo Set.
3. Earlier versions - options and workaround:
For versions earlier than 12.3.1 when you want to render many more Photos all at once then you could consider the following workaround.
This workaround is easiest if you are able to plan for it early on.
Use Clips in Movie Mode to store the camera views and set the Effects stack rather than in Photo Mode. Or if you have already done them in Photo Mode, then you can transfer them over to Movie Mode.
There are 30 Clip slots per Clip Set, with a maximum of 10 Clip Sets. This gives you a minimum of 300 images.
If some of your views are going to use the same Effects, then you also have the option of storing and rendering multiple views within a Clip. Movie Mode allows for an extensive number of single image renders.
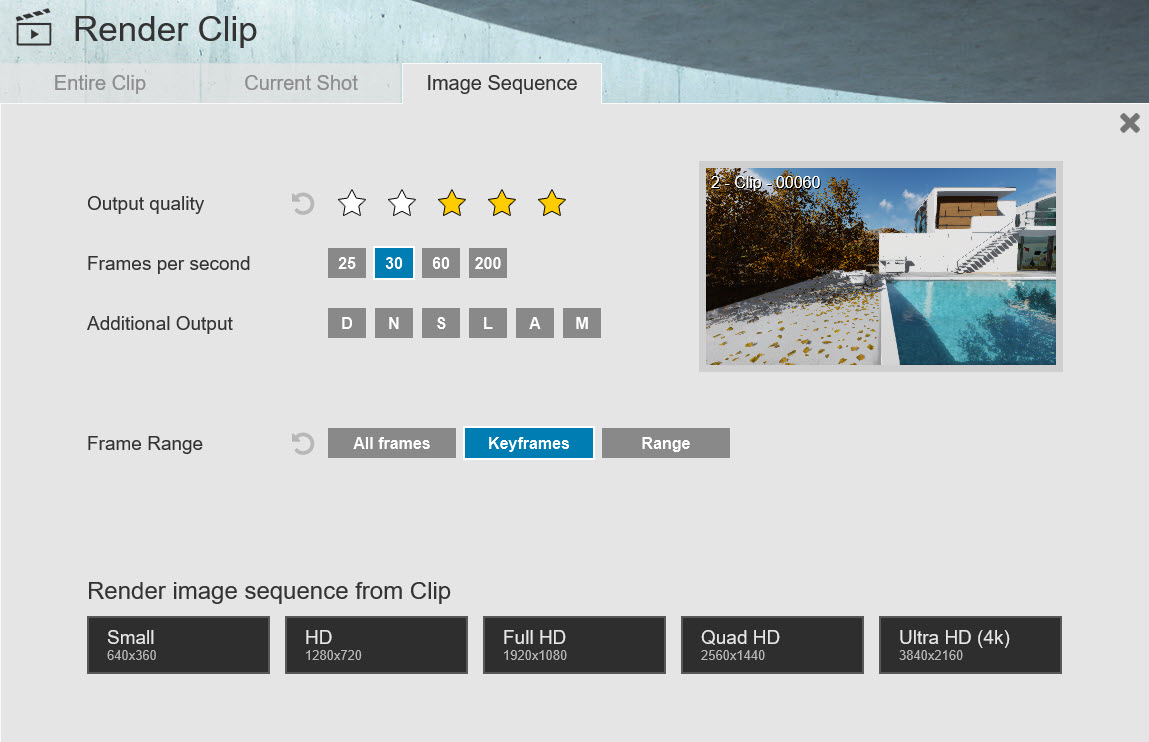
Here's how to render each Camera Keyframe in a Clip as a still image using Image Sequence.
Copy and Paste each Photo to a Keyframe.
If you have your camera view set up in Movie Mode, go to step 2.
1. Select the Photo so the Camera view is current.

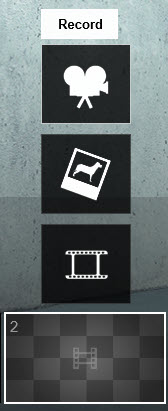
2. In Movie Mode go to an empty Clip. Click on Record:
Tip: Use a separate Clip Set from the one you have for your main Movie.
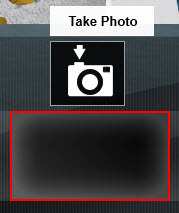
3. The camera is the same as from the Photo. Click to Take Photo:
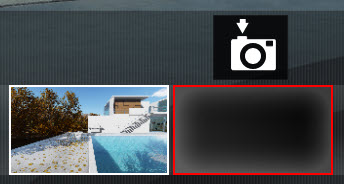
4. The Clip view now has the same camera view as in the Photo:
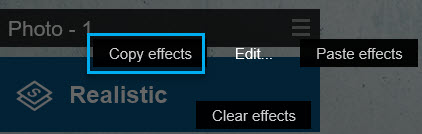
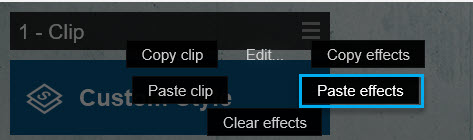
5. Copy and Paste the Effects Stack for the Photo to the Clips Effect Stack.
6. Render your Camera Keyframes as a still images using Image Sequence.
- Knowledge Base: How do you render the camera keyframes in your Movie as Photos?
Notes on this method:
It is not possible to render a group of Clip Sets at the same time, only one at a time.
So you would need to use a single Clip Set if you have up to 30 Photos (using a single Camera Keyframe per Clip).
Or you could create multiple Keyframes in each Clip.
If you use the same Clip for multiple Keyframes, then be aware that there is the one Effect Stack for that Clip - all Keyframes - your desired Photos will have the same Effects and overall look. This might not suit your Project rendering requirements.
Or there are 99 Keyframes per Clip (in general), and this requires that all images have the same Effects. This provides for a total of 30*99 = 2970 images for rendering.
Although you can set Effects to change at given Keyframes so the Effects apply differently.