
1. Here's how
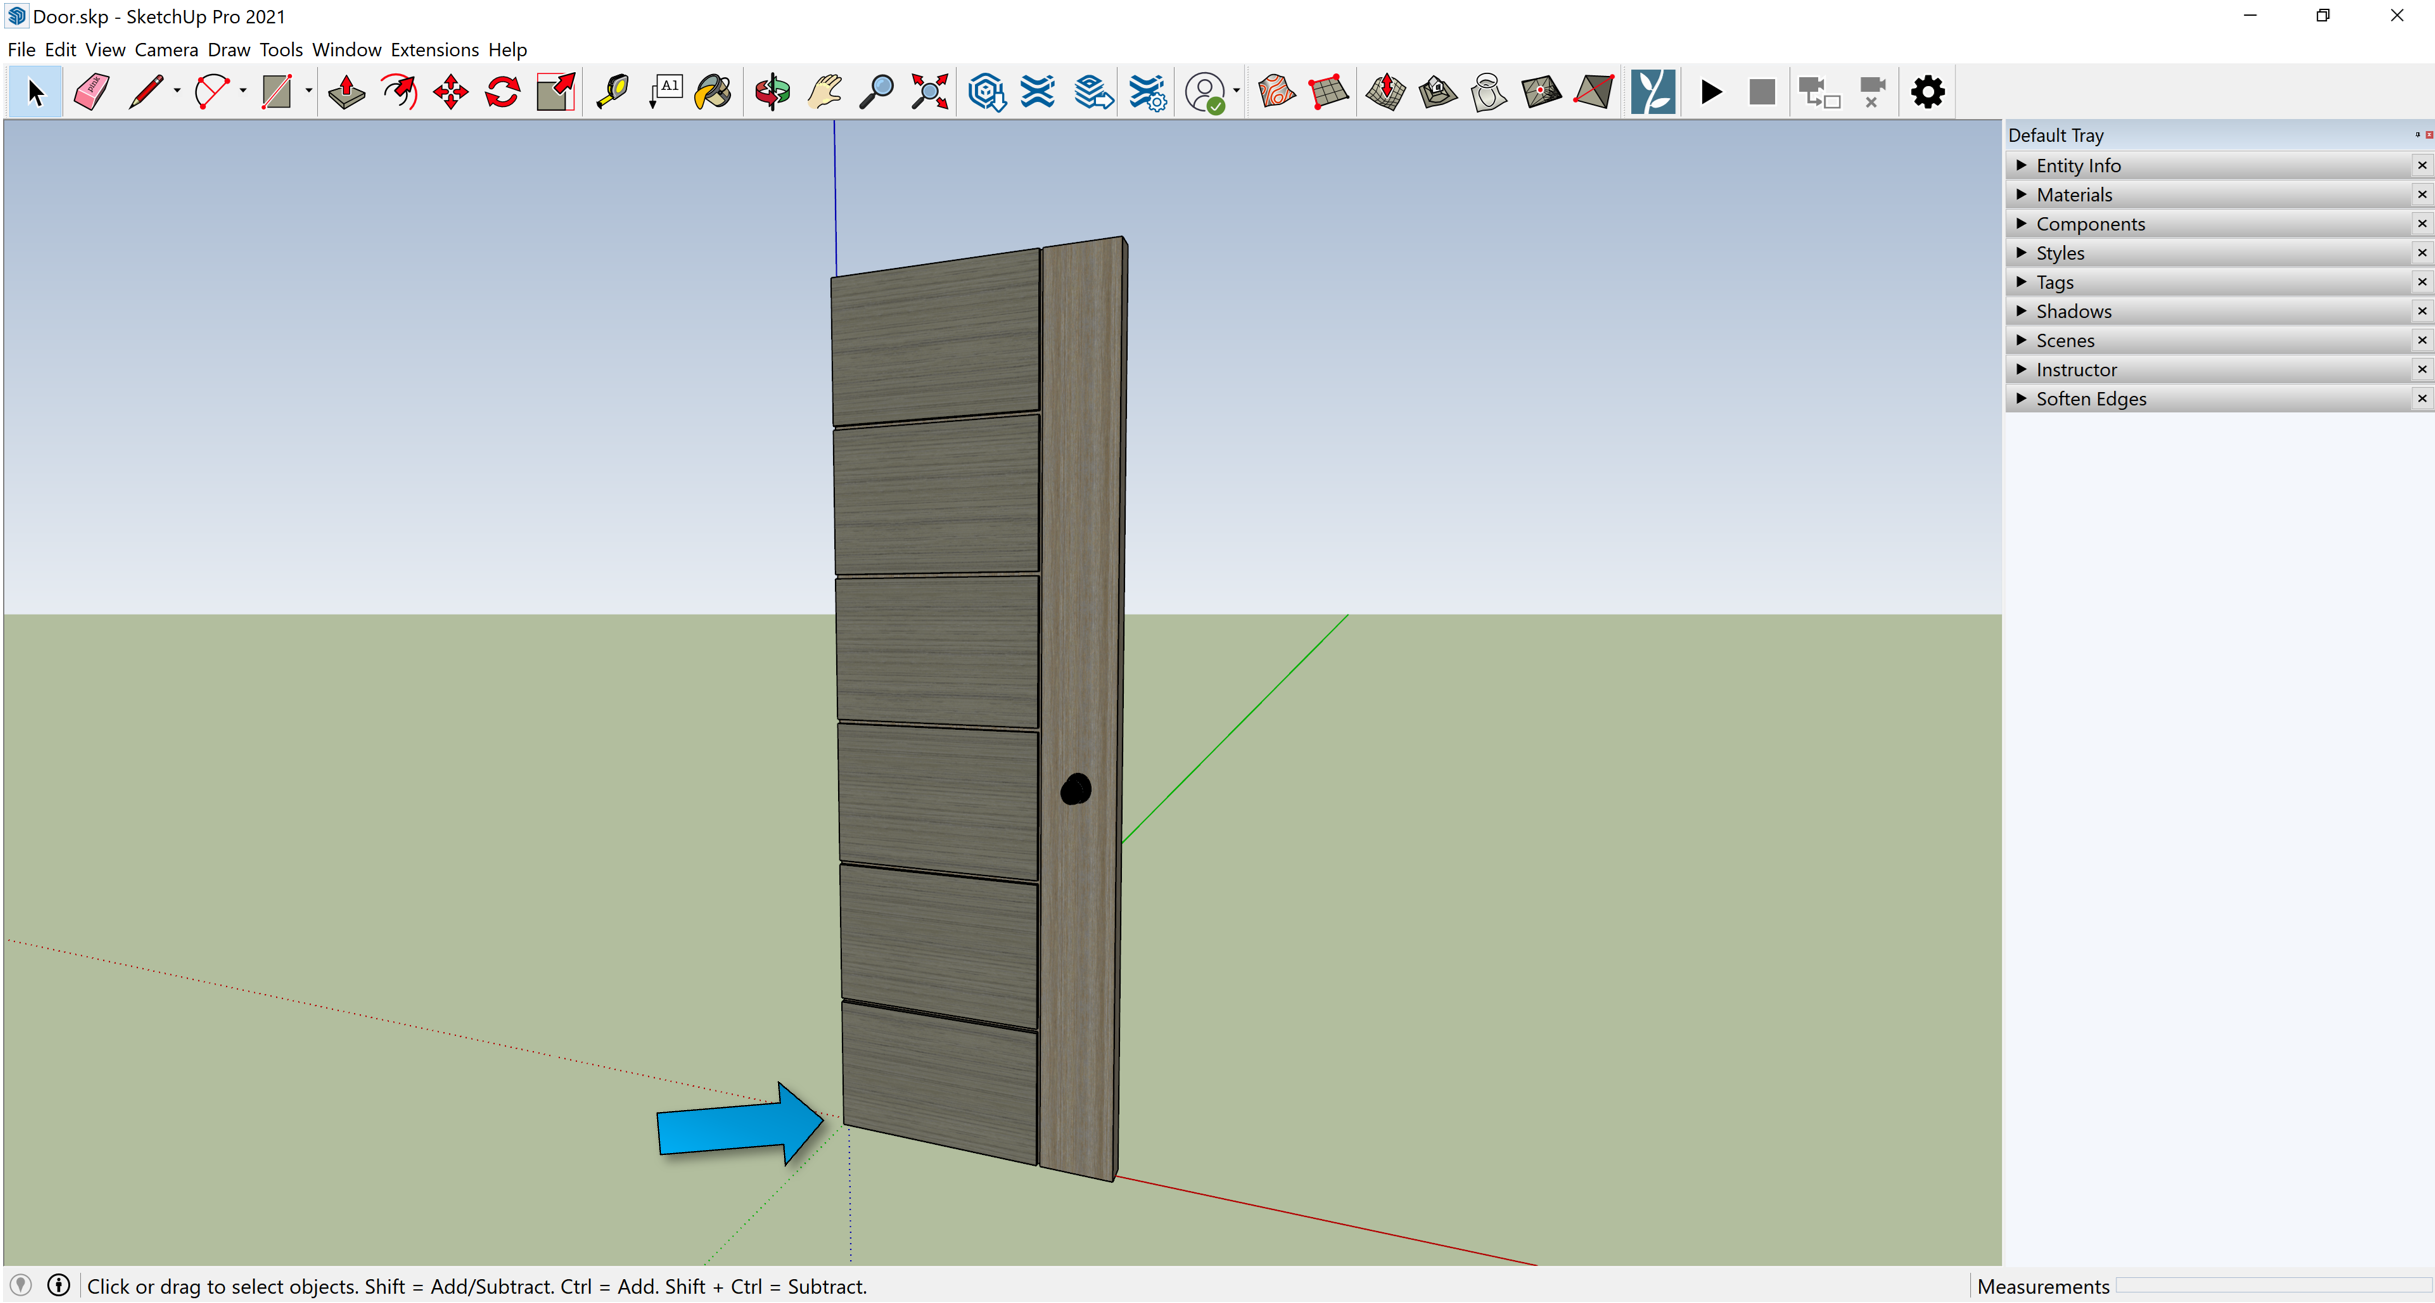
1.1: To animate a door, the first step is to isolate the model in your CAD/3D modeling software, so you can move the corner of the door (where the hinges are) to 0,0,0:
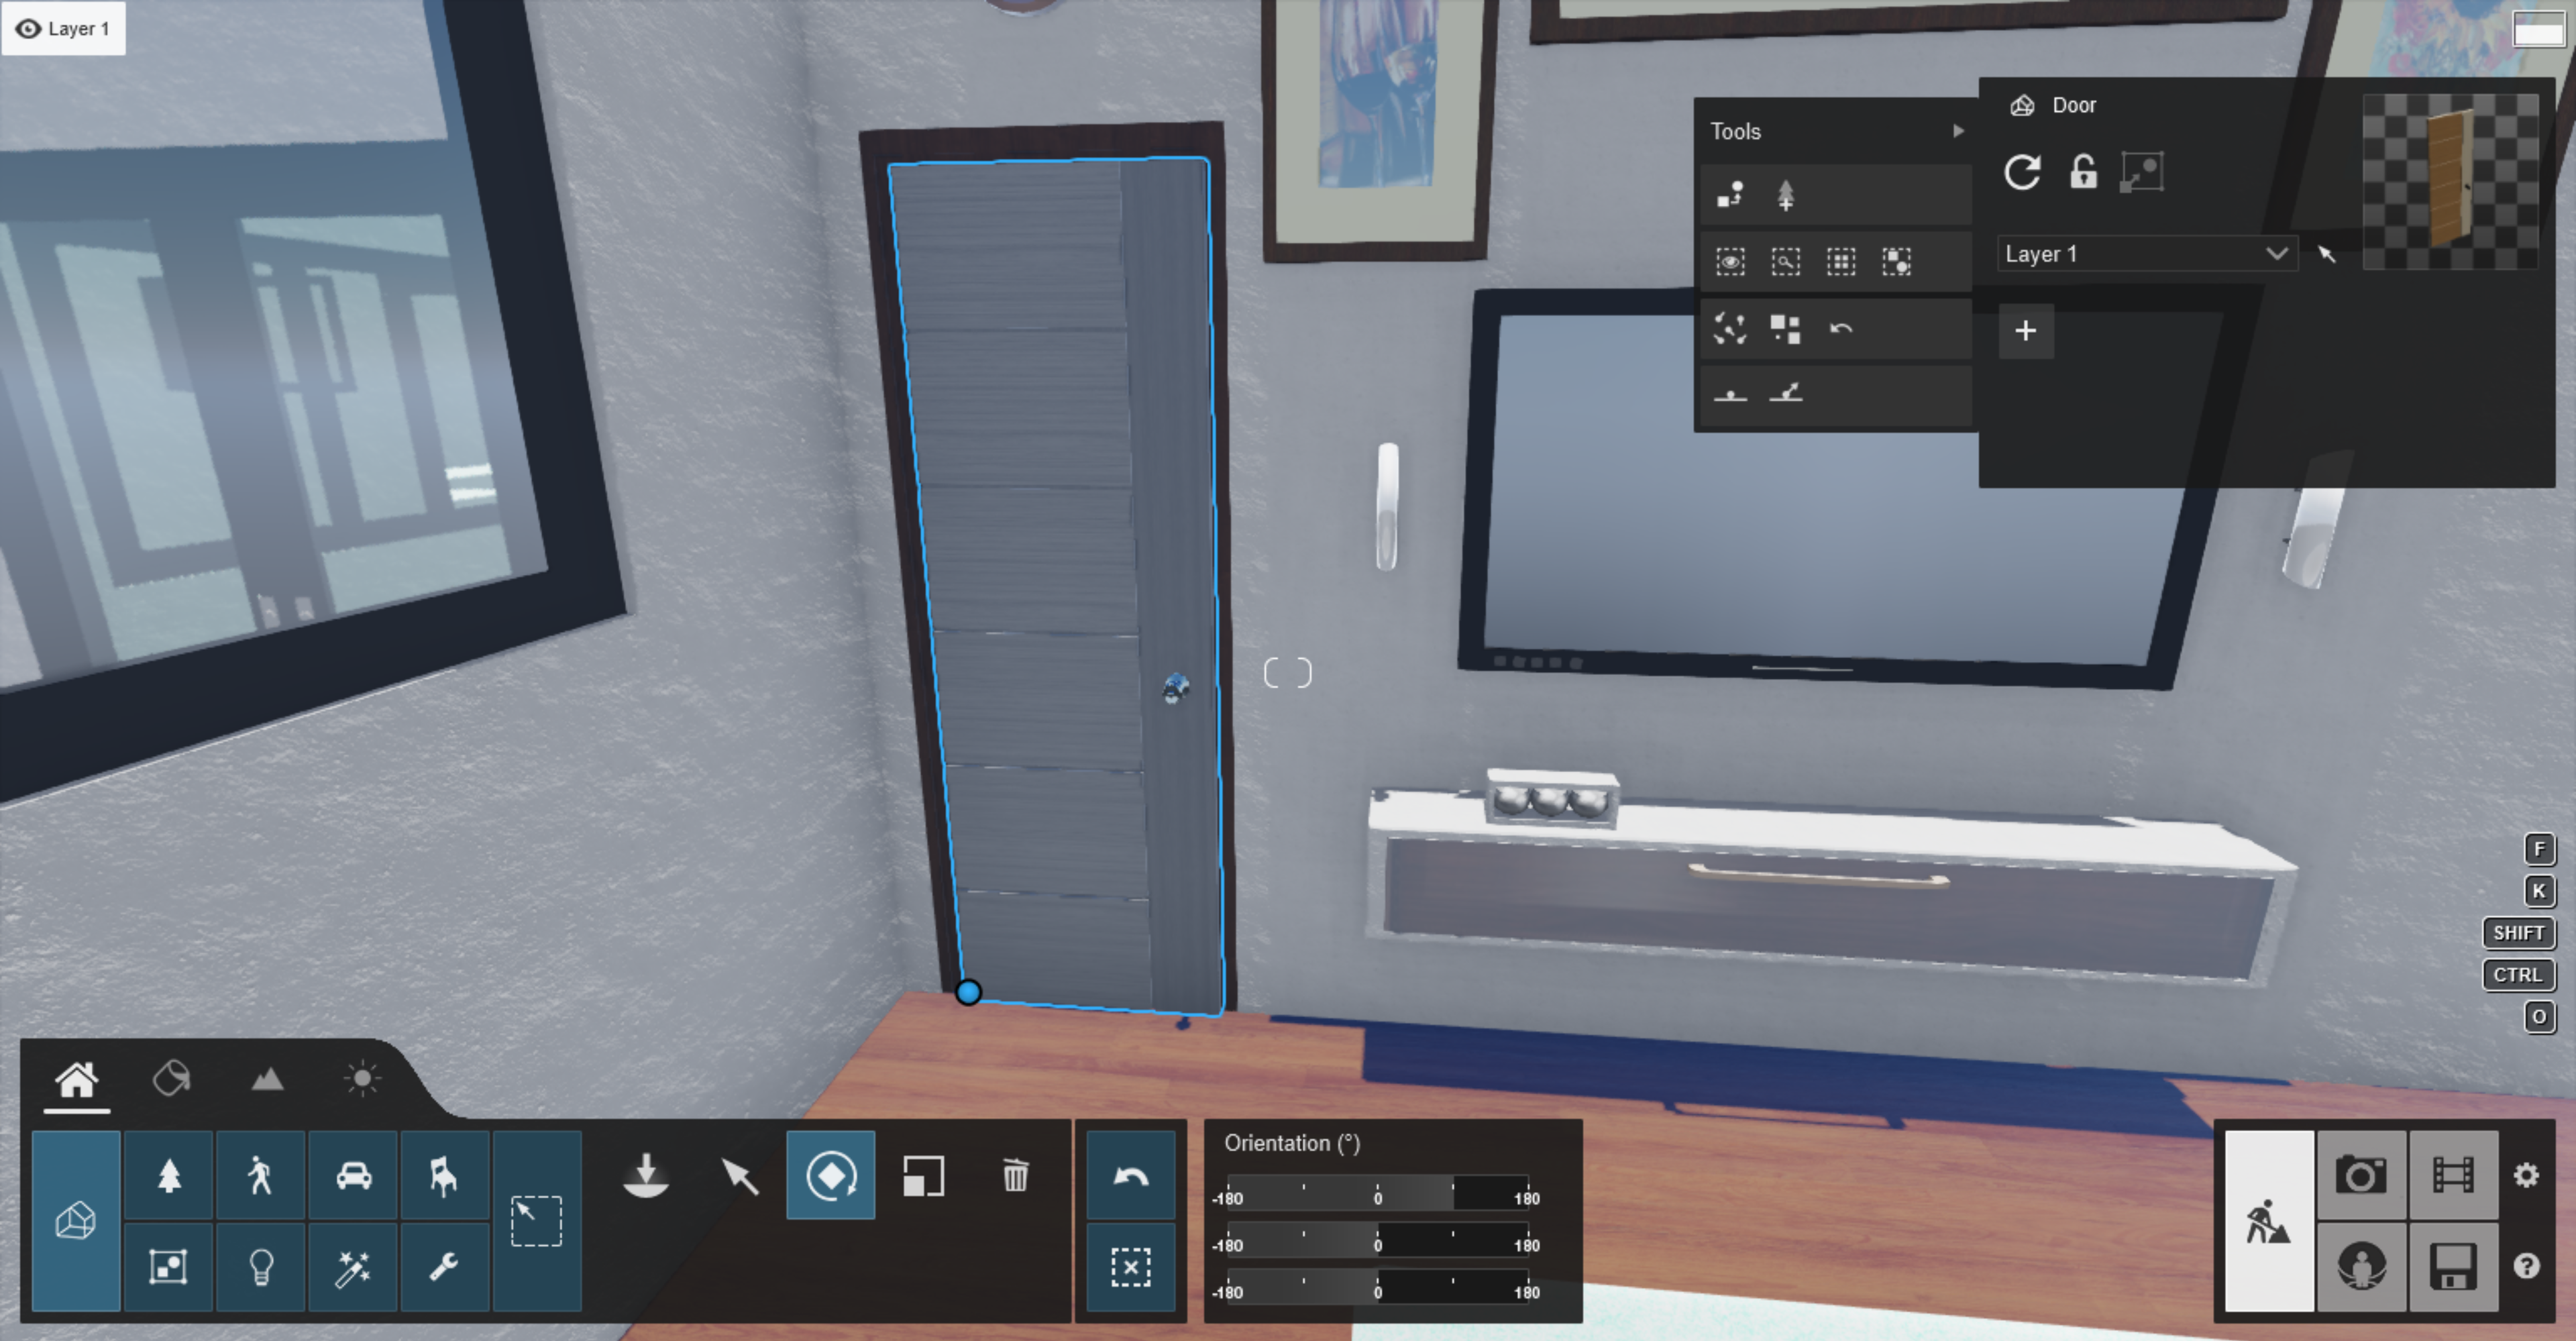
1.2: Import the door as a separate model in Lumion, and place it at the desired location.
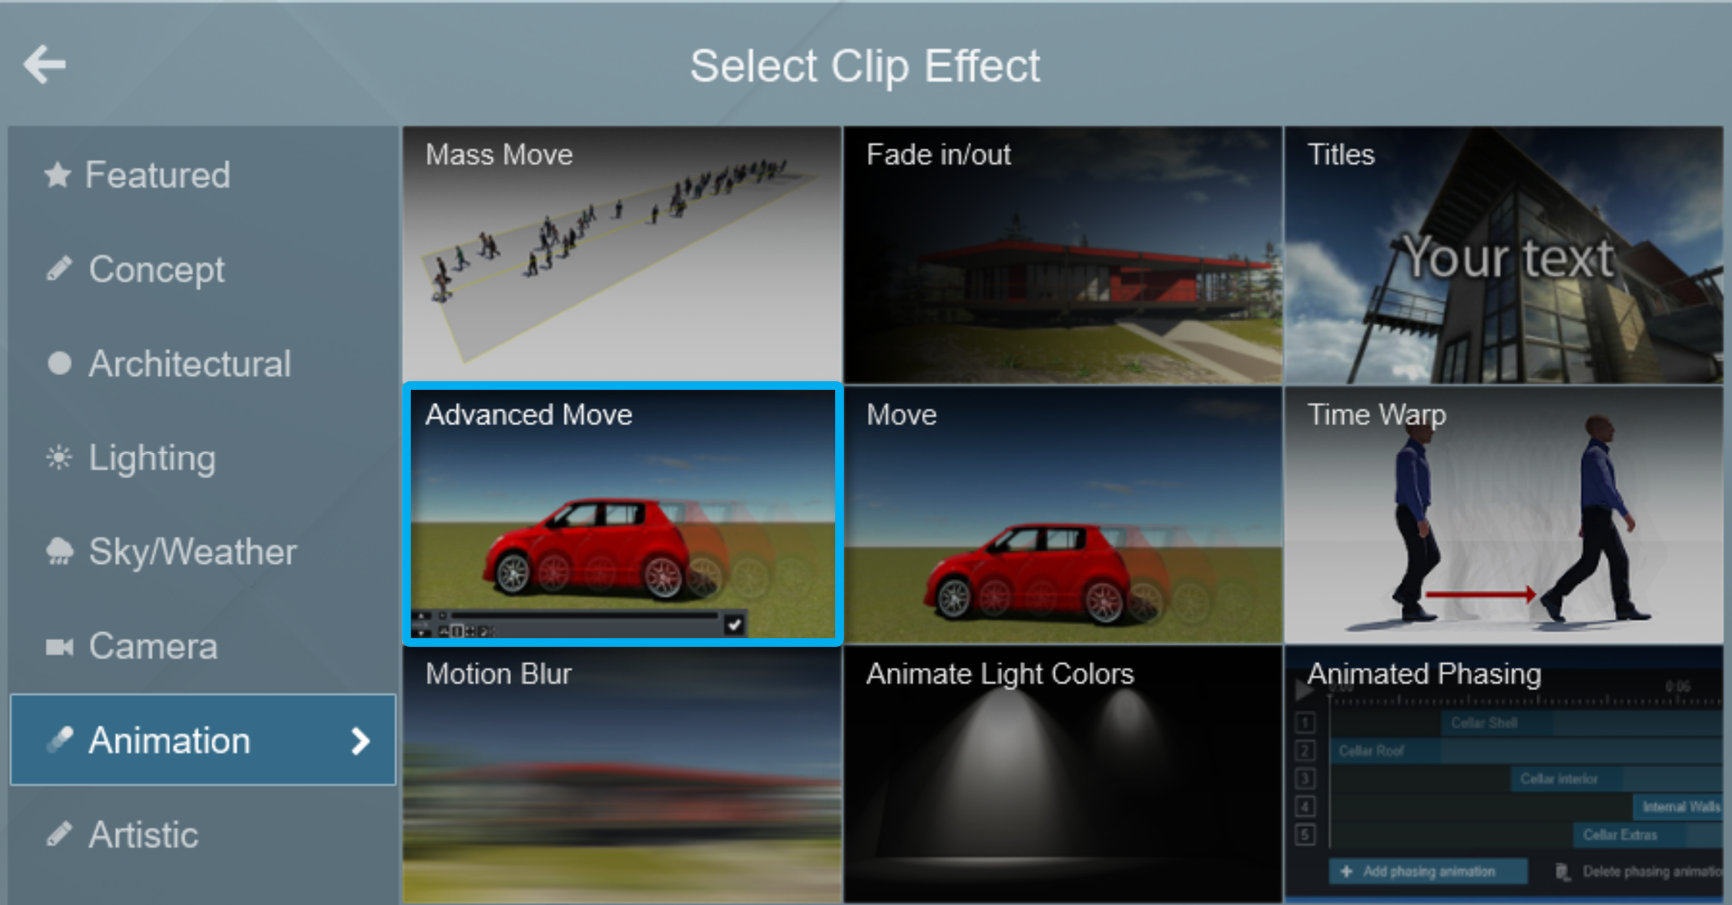
1.3: Add an Advanced Move Effect to a Clip in Movie Mode:
1.4: Edit the effect:

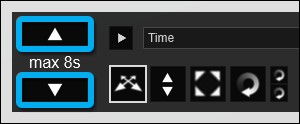
1.5: Make sure that the Max duration is the same as the duration of your Clip:
In Lumion 12,
Toggle the Use Clip Length button:

In Lumion 11:
Use the Clip Length - Increase or Decrease buttons.
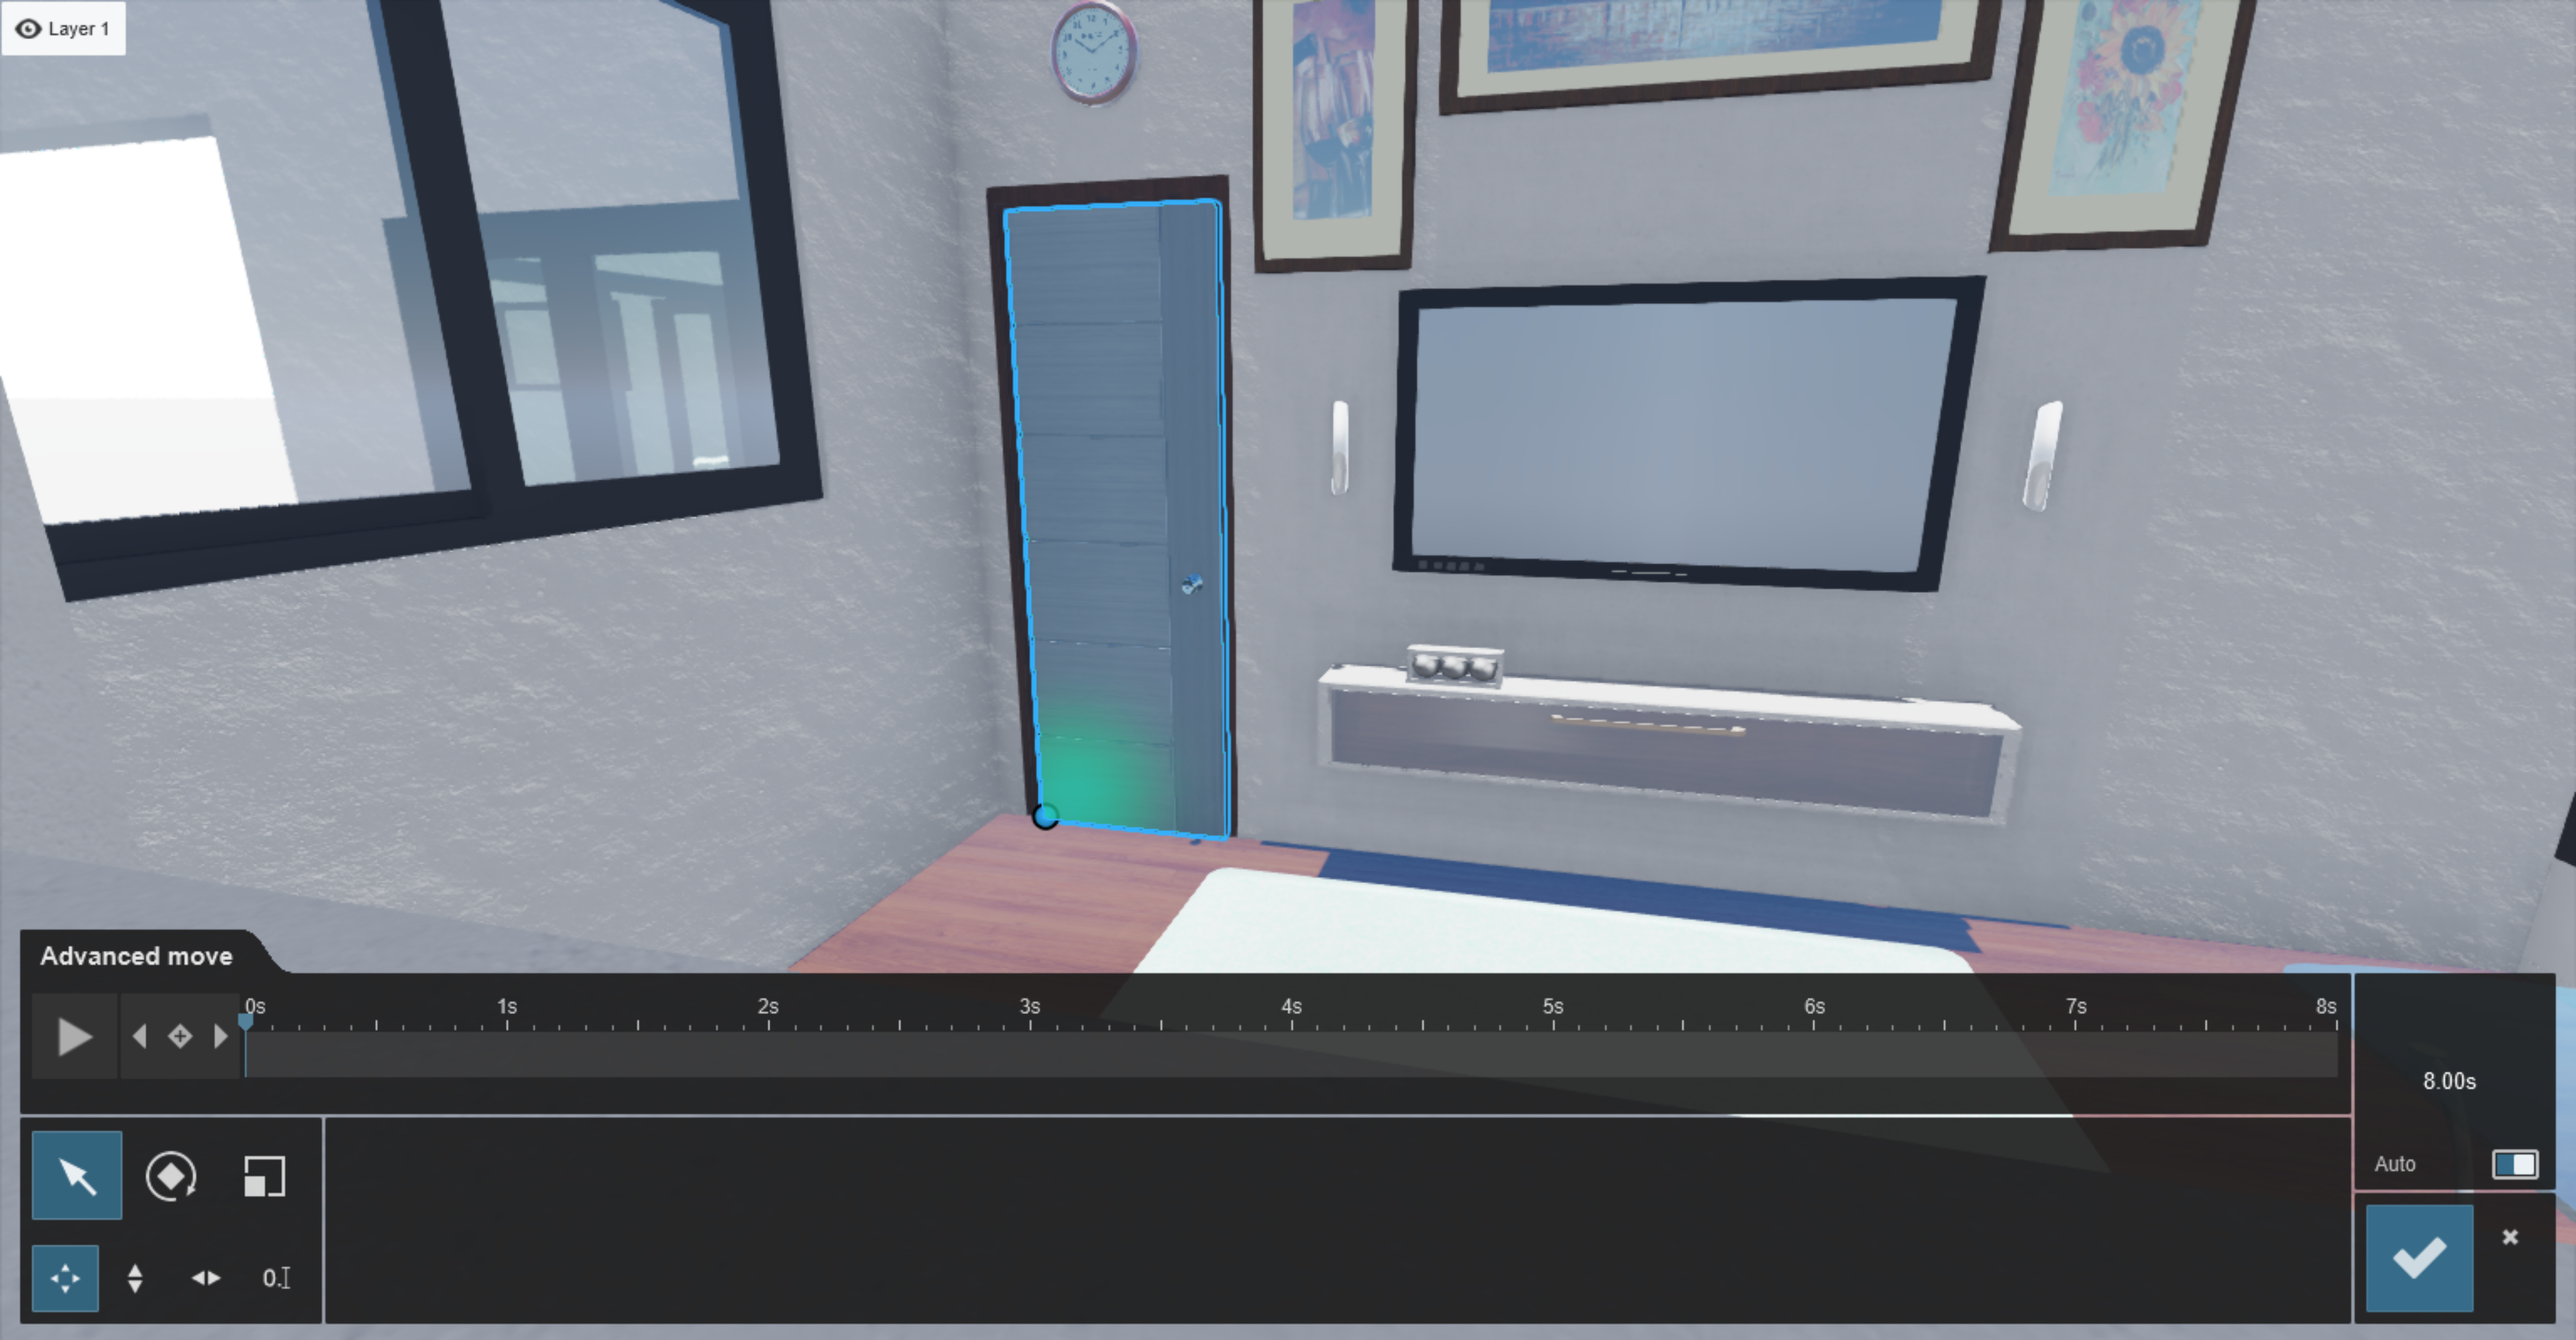
1.6: Select the door that you want to animate:
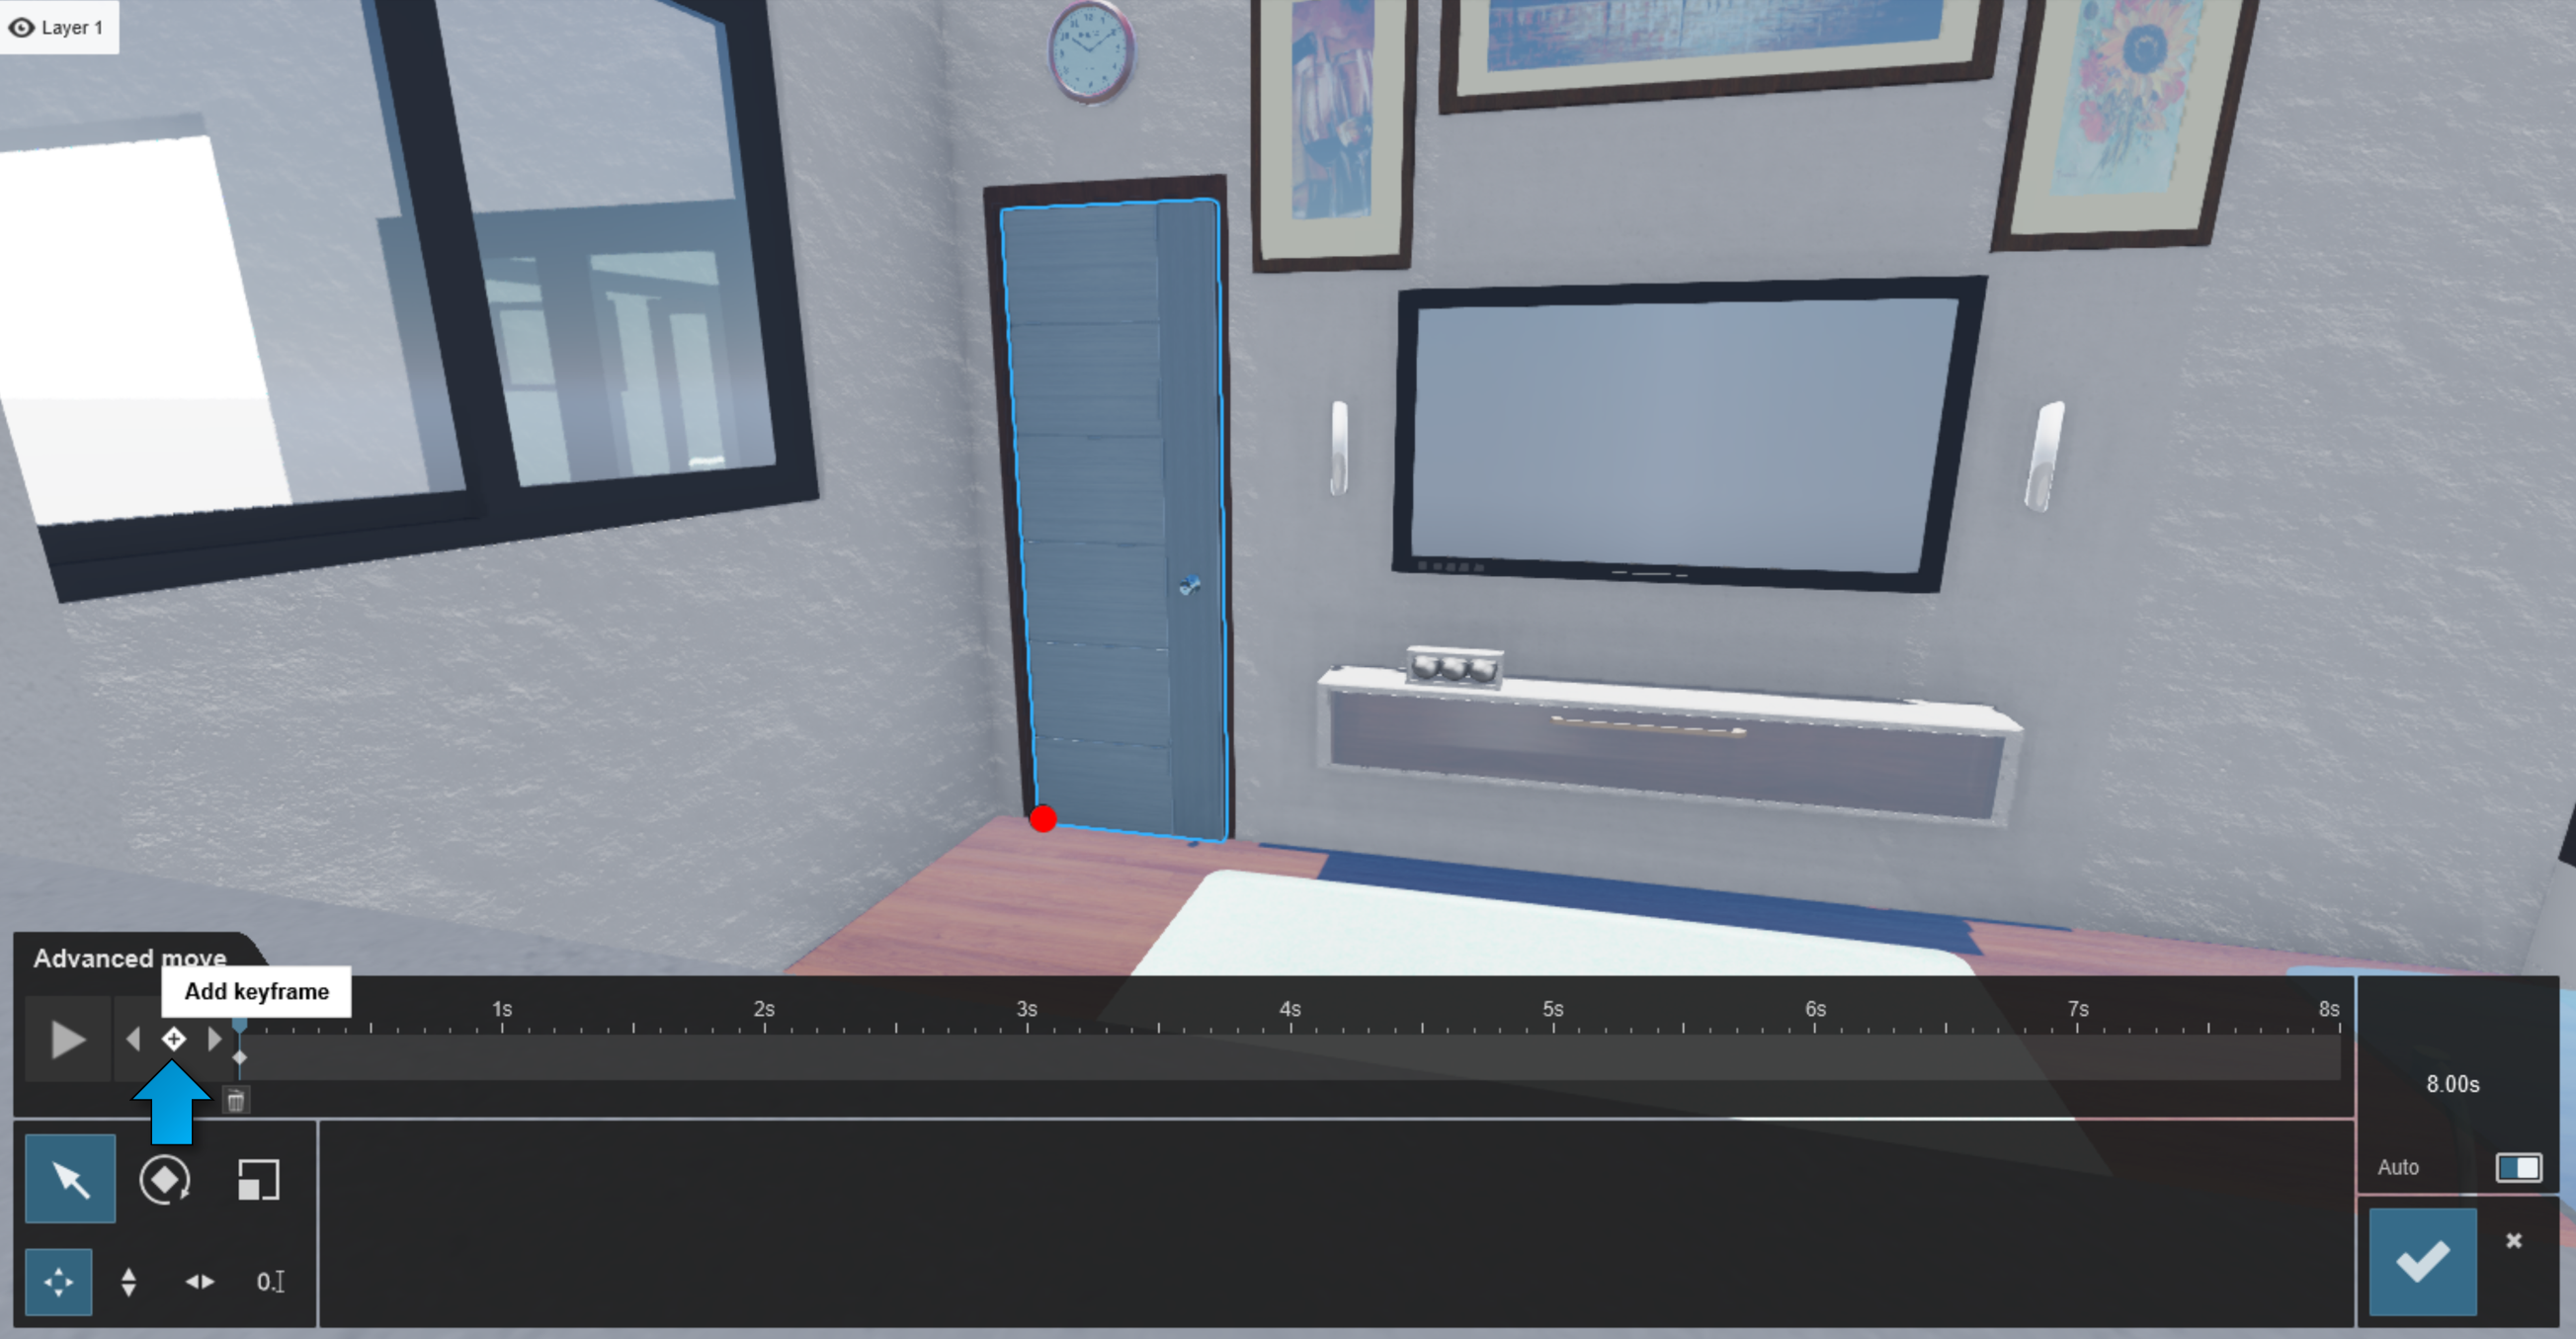
1.7: To make the first Keyframe:
In Lumion 12, click on the Add Keyframe button.
In Lumion 11 and older versions, rotate the door slightly with the Rotate tool, and then rotate it back to the start:

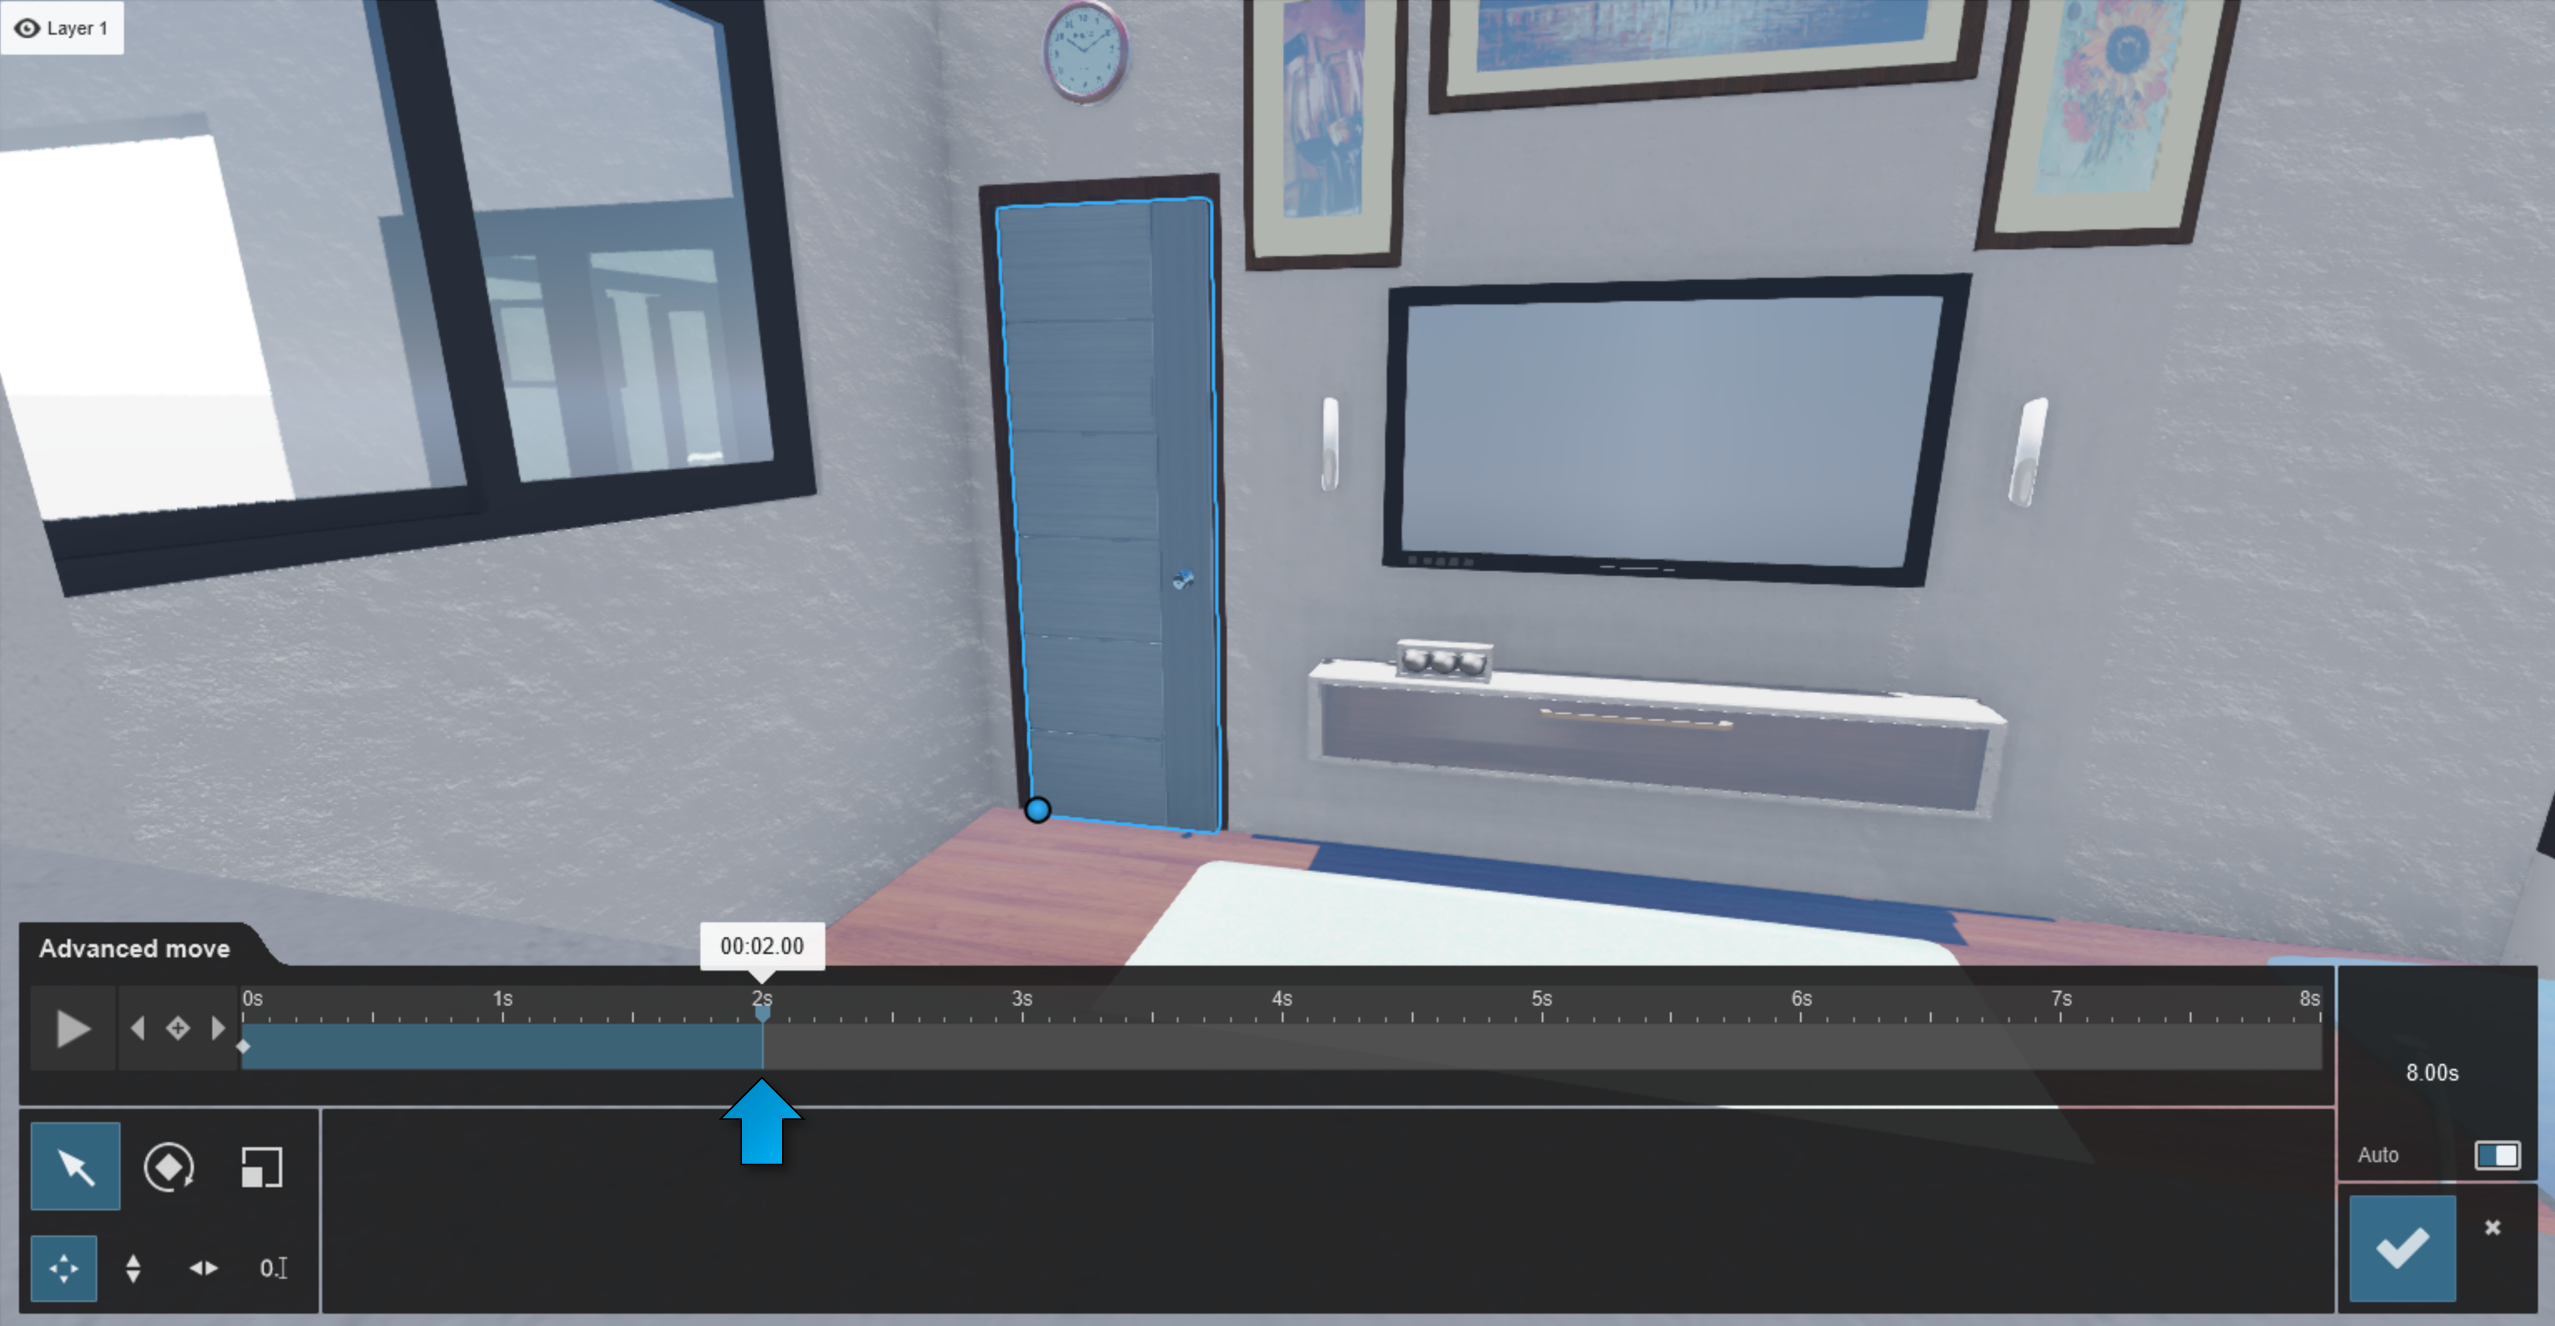
1.8: Move the Timeline slider to the point in time when the door should start opening. Select the Rotate button and set the starting Heading value for the door being either fully closed or partly open. Add another Keyframe:
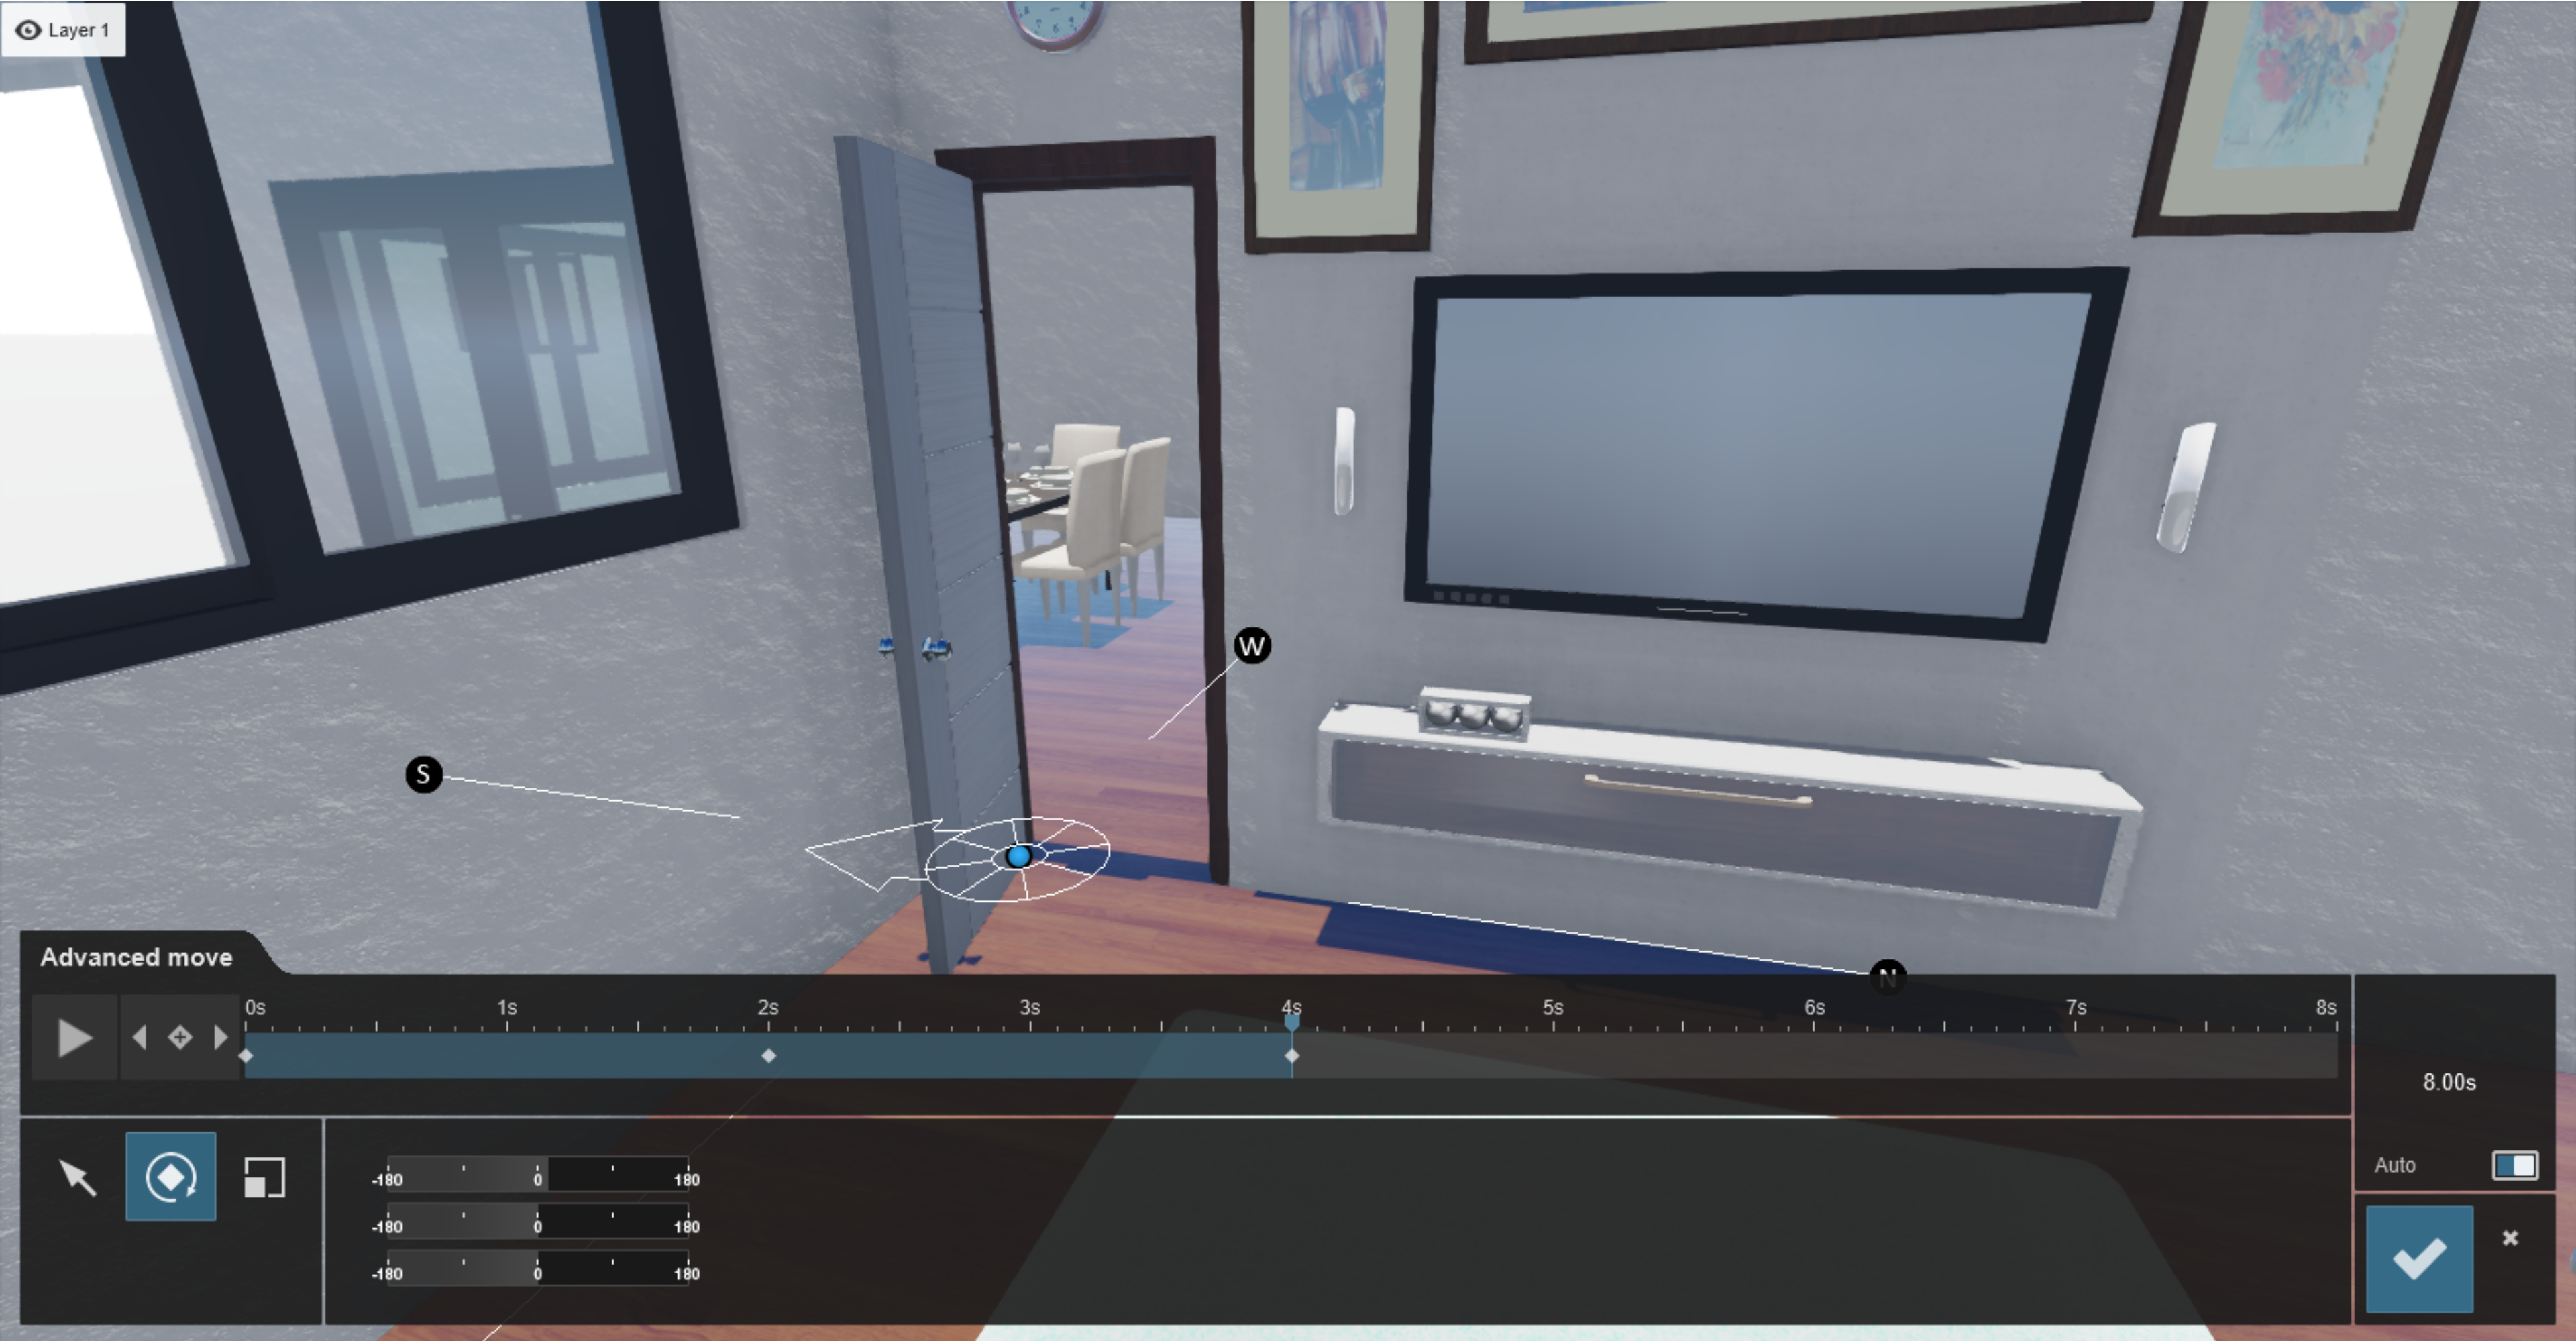
1.9: Move the Timeline slider to the point in time when the door should be open fully and rotate the door with the mouse Rotation gizmo, or set the Heading slider to the required angle. Lumion will automatically set the third and final Keyframe:
1.10: If you want the animation to start earlier or later than at frame 0 of the Clip, simply adjust the Time Offset slider in the Advanced Move Effect. Set the slider value to a negative value if you want the animation to start later, and to a positive value if you want it to start earlier:
