Transitions: How to Set up Lumion 2023 for Good renders
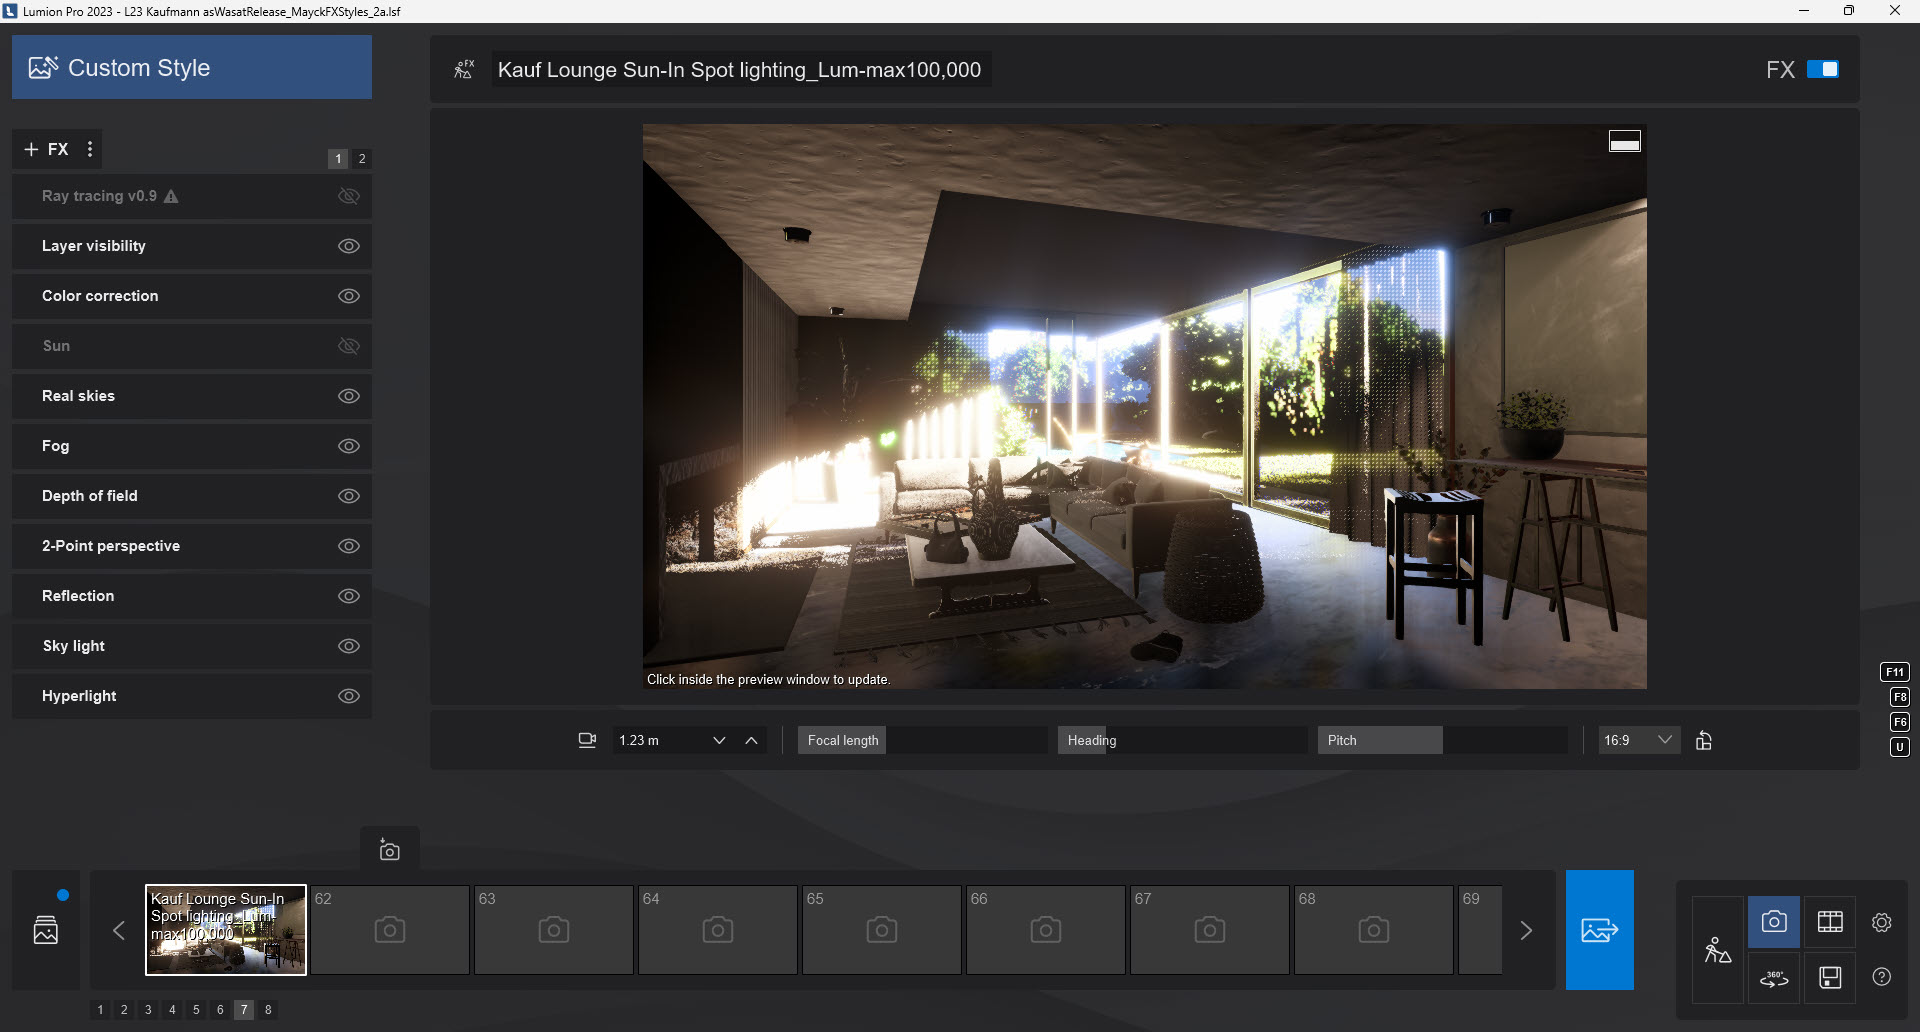
You loaded an old Project file into Lumion 2023, jumped right into Photo Mode ready to be amazed, only to find yourself getting unexpected results in the Preview and render.
1. What the Project might look like in Lumion 2023
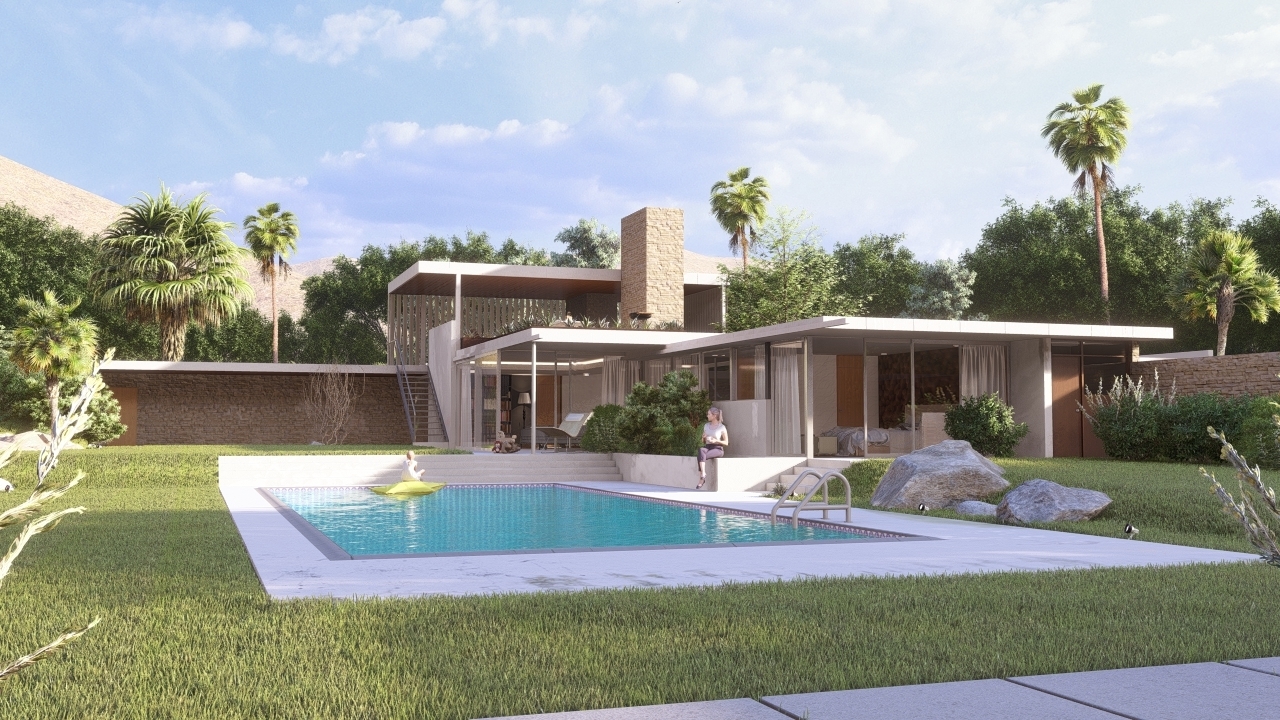
For example, using our Example Project Kaufmann.
You create a New Photo and add in the Custom Effects Stack you have previously been using.
It looks all wrong, not what you had in Lumion 12.5.
The sky is completely overbright leading to strong areas of shadows and light in the lounge:
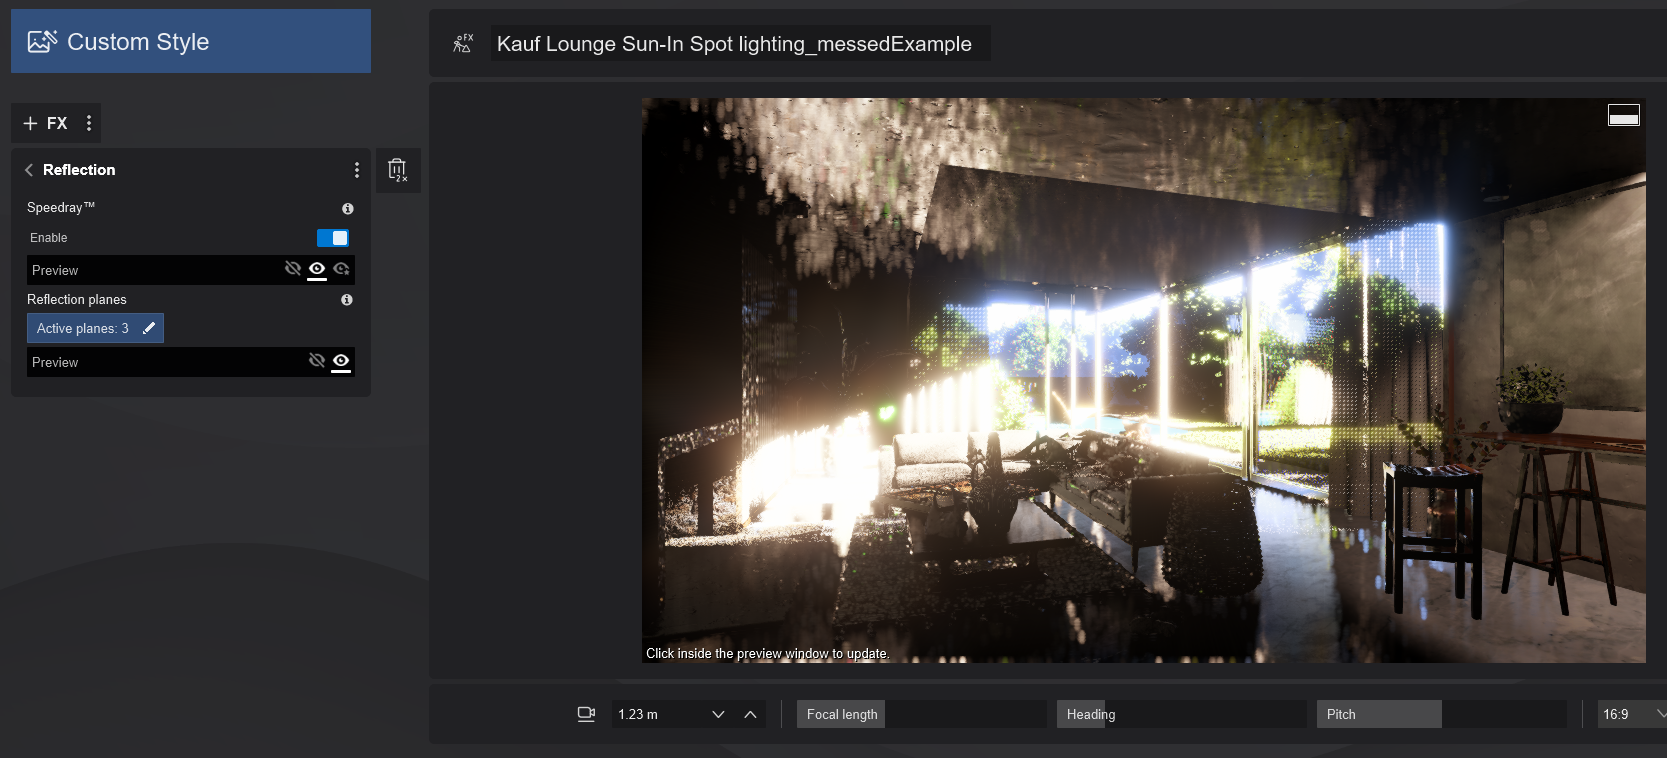
And if you have a Reflection Effect (most Photos would) and the SpeedRay and/or Planar Reflections - Previews are on, it's not looking good for a render:
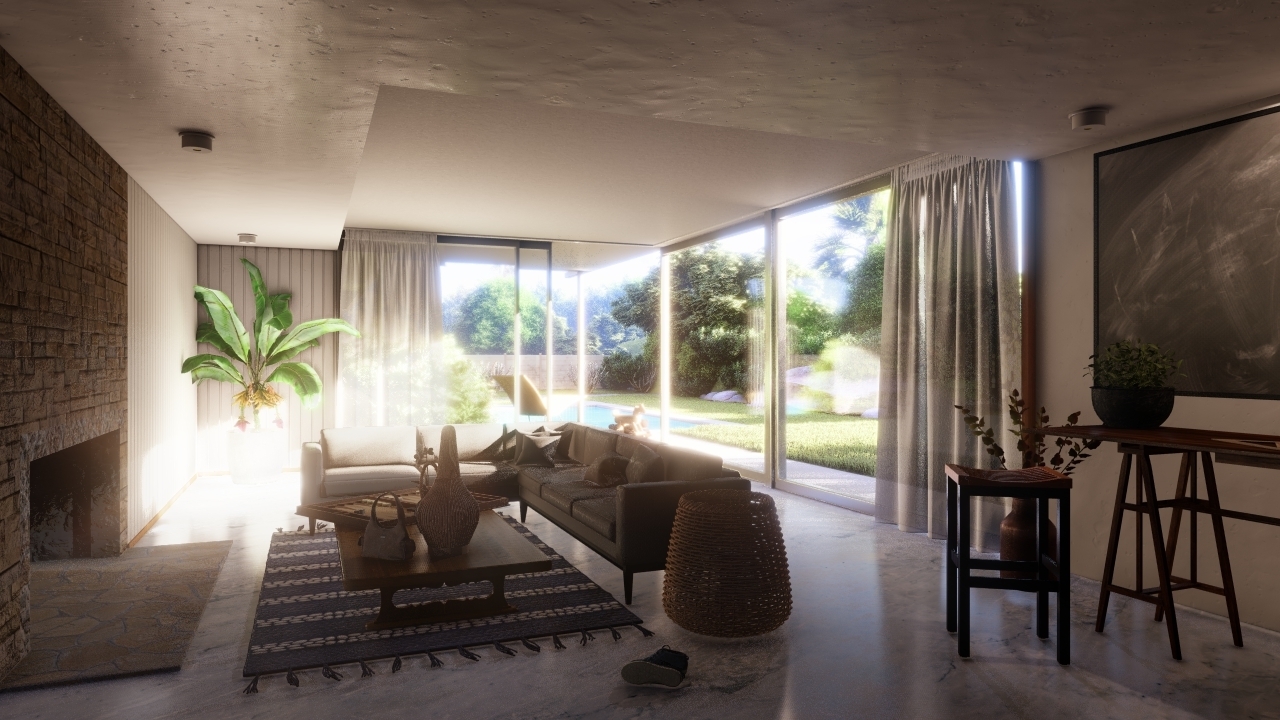
When rendered it's a bit better but lighting is not good and the sky is still overbright:
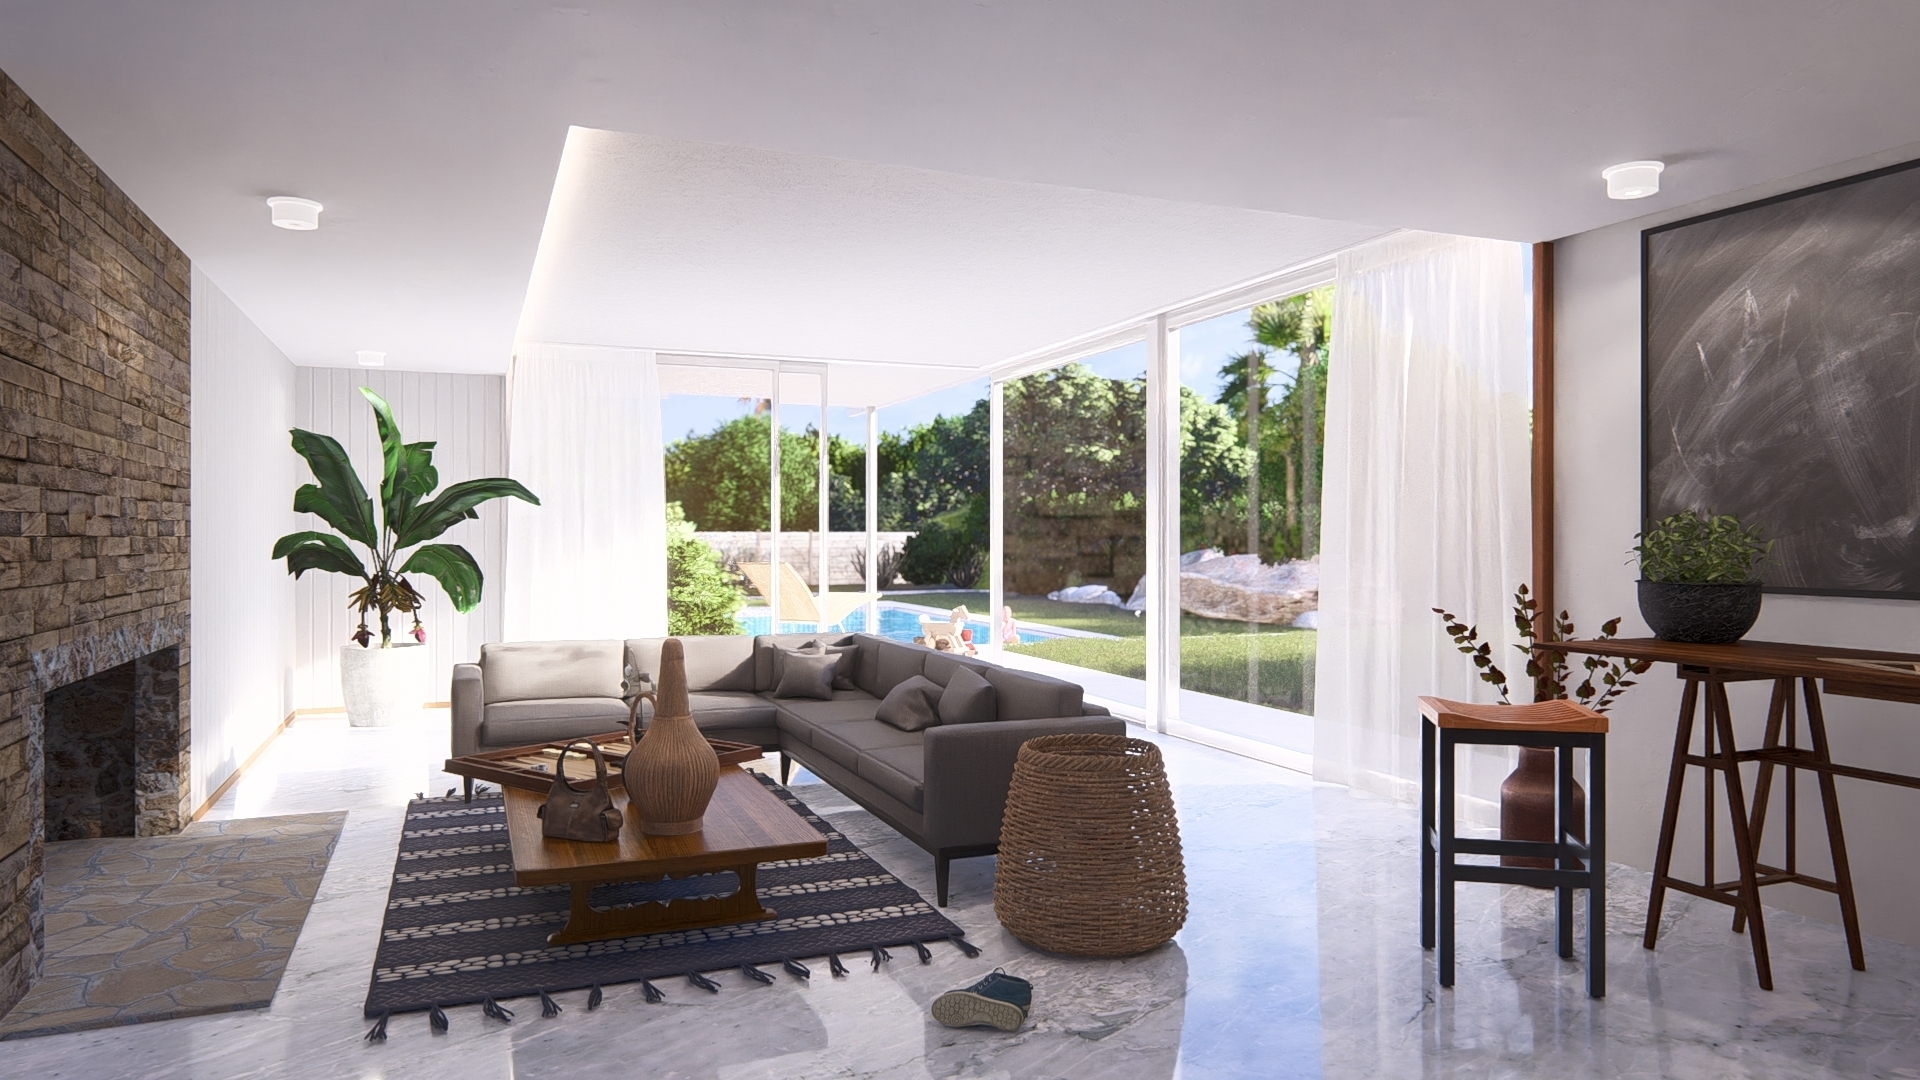
In Photo Preview it should look something like this, with an Effects Stack at default values:
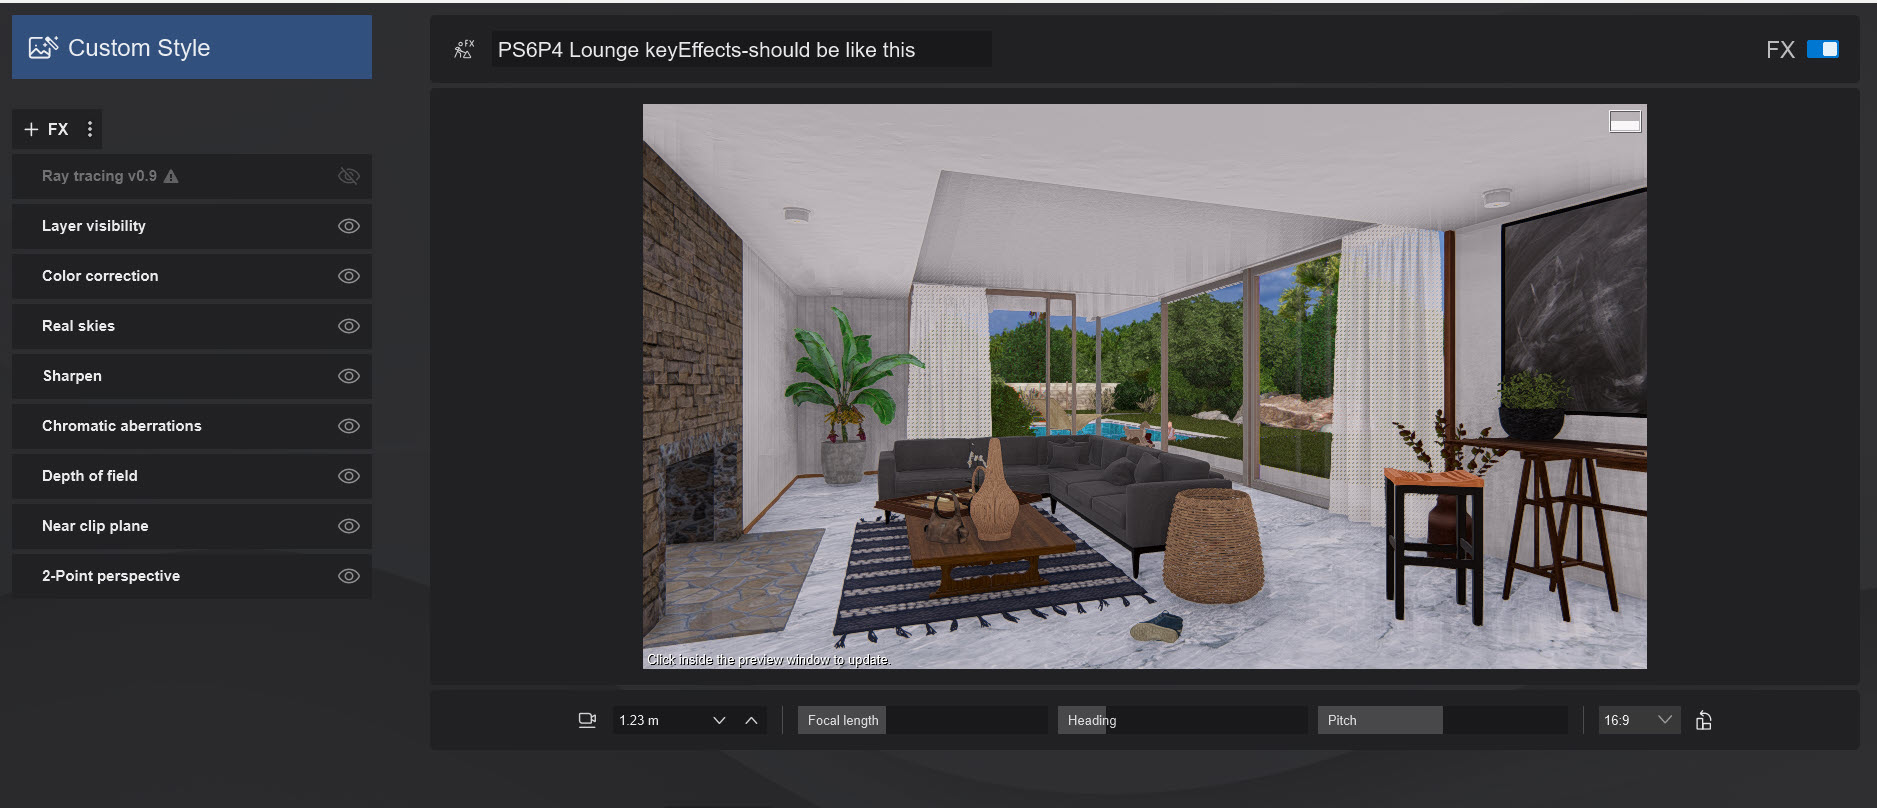
Or, even without any Effects it's a better start:
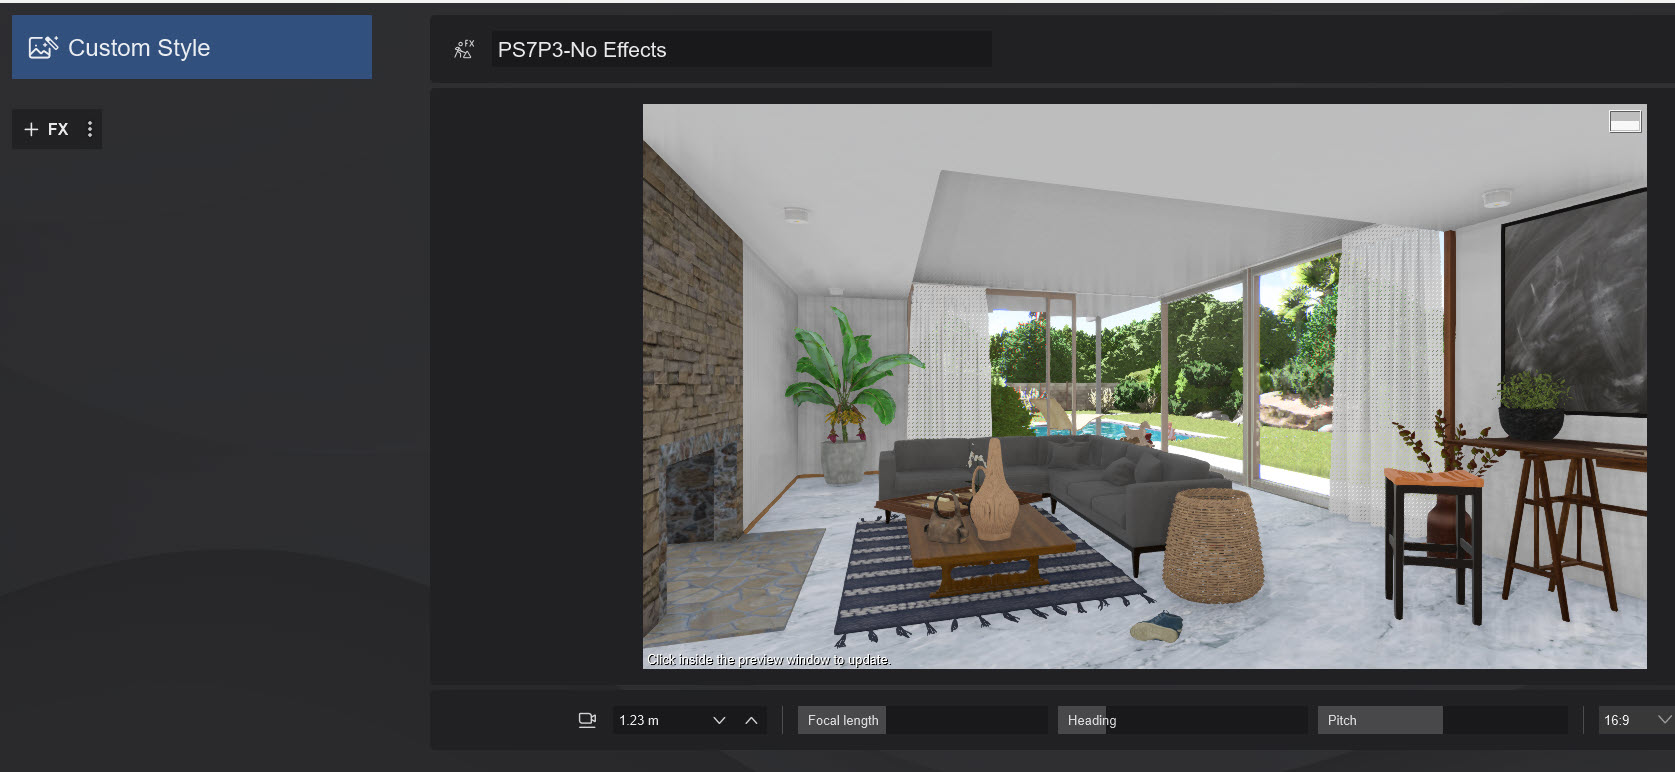
2. The changes that are needed
Some changes in properties and Effect settings are needed. Here is an overview of the most relevant changes.
Want to jump straight into making some changes? For Effects, use the Summary Changes table in Section 2 Changes in Lighting and Effects in this following article:
- Knowledge Base: Transitions: Why does my Project look different in Lumion 2023 compared to previous versions?
2.1: Lighting:
-
Direct Lighting:- Brightness and Exposure:
It's mostly about the amount of real-world light that will be in the resulting render. The needed changes by you are about brightness/exposure/balance. -
Lights:
They are now also based on real-world lighting units. The artificial lights in your Project will need reviewing for Brightness. As well as reviewing if there are too many or too few. -
Lighting that might no longer be required:
Area/Line/OmniLights/Fill Lights that had been added for further brightness areas in prior Projects need to be reviewed or removed.
2.2: Materials:
- Some properties may need adjusting depending on what you had, for example Reflectivity, Roughness/Gloss.
- To enhance the quality you might, but don't have to, include other Material Maps.
Tip: It is likely to make things easier for you if you have a different Effect Stack (or Photos) for Ray Tracing or for Rasterization. Some Effects require different settings for each type of render.
Every Scene is different and you will need to chose the type of render and find the sweet spot.
Here are the detail changes within Lumion:
- Knowledge Base: Transitions: Why does my Project look different in Lumion 2023 compared to previous versions?
3. Overview of Changes you can make
3.1: Where to start from?
There were many changes made in order to include Ray Tracing in Lumion. So if you are still having trouble getting your Photos, Clips and Panoramas looking the same as before after following these suggestions, then it's best to start your Effects, Material, and lighting settings from scratch in Lumion 2023.
- Consider using Lumion 2023 only in new Projects.
- Or if you want to bring your Project across then:
- Make it easy - use what has been provided to you as Styles and Effects Stacks in the Example Projects. Do this as a good and easy starting point to work from. Ignore what you had - delete the Effects Stack, you'll spend more time messing around with settings than is worth it.
- Where you like to have your own personalized Effects Stack. Fine, we get that. Just do the changes from a good starting point- from the default values.
3.2: Follow these suggestions
3.2.1: Use the new Styles from Lumion 2023 instead of the Styles from prior versions.
3.2.2: Use the Effects Stacks from the Example Projects instead of the ones you did have in your earlier version Projects.
3.2.3: Use the Summary Changes table in Section 2 Changes in Lighting and Effects in this following article:
- Knowledge Base: Transitions: Why does my Project look different in Lumion 2023 compared to previous versions?
3.3: Which version to complete in?
3.3.1: Starting a New Project?
If you are starting a New Project then use the Effects as in 3.2.1 or 3.2.2 above.
3.3.2: Existing Project?
If you are working on an existing Project you might want to consider completing it in the version it was started in.
3.4: Existing Project suggestions
3.4.1: If you require that an existing Project is brought into Lumion 2023 then either delete the Effects Stacks and start with those from 3.2.1 or 3.2.2 above.
3.4.2: Or, if you want to keep your other (favorite) Effects that you have been using then at the least delete the Effects that are fully involved in the changes.
- Add the Effect back in. It will be set with default values that provide for the best starting point for Projects. Now you can adjust the values to suit the Project.
- Or make a copy of the Photo and replace the Effect.
- Some individual slider values can be copied from your original Effect.
3.5: Important Effects for the changes
3.5.1: For Lighting
- Real Skies Effect.
- Sun Effect.
- Sky and Clouds Effect.
- Shadows Effect: if you are wanting to render using Rasterization.
3.5.2: For Exposure
- Exposure Effect - it has been removed for new and old Projects, and is included in the upgraded Color Correction Effect.
- Color Correction Effect.
3.6: Other Effects to check
- Fog, Volumetric Sunlight, and Volumetric Lights (These Effects are more intense now)
- Lens Flare (Effect is more intense in some situations)
- Depth of Field (Effect is less intense)
Here's the detail of the changes:
- Knowledge Base: Transitions: Why does my Project look different in Lumion 2023 compared to previous versions?
4. Some key considerations (Steps)
4.1: Type of Rendering?
The first key steps is to decide on the type of rendering you want for output: Rasterization or Ray Trace. Both have their advantages and disadvantages. Decide per camera view.
Want to go all out for Ray Tracing? Sure, we understand, however, if you can't decide, you might want to decide on the basis of:
- Exterior -> Rasterization (for the meantime, speed and current Ray Trace limitations),
- Interior -> Ray Trace (save time defining shadows, reflections, lighting, but longer render time).
4.2: Suggested changes:
4.2.1: Not sure what is needed for your exterior or interior view?
If you cant decide, create dual Photos (at least for a while as you get used to the changes).
That is, you have the same camera view for one Photo using Rasterization and one Photo for Ray Tracing.
Alternatively you can save an Effect Stack file LME, one for each type of render.
There may still be some expectations for a certain result, your judgement applies based on the camera view, lighting, story, and project requirements from the client, among others.
This best practice keeps the settings separate and easier to maintain.
4.2.1: Why use the dual option?
Our suggestion is to NOT try getting the Effects settings right for Rasterization and expect to just add the Ray Trace Effect on top and still expect the same result but improved by Ray Tracing. Or the other way around, keeping a Ray Trace Effect there when you need a Rasterization render.
Why? Because the lighting levels, color adjustments - exposure, highlights, etc, will be different for each.
-->> Treat each one as unique.
Why? You may end up in looped experimentation stages - testing too much without the progress you need.
Once you have found the best settings then certainly you can copy/paste those to other Photo Slots, saveAs to Effects Stacks (LME) and then re-use.
4.2.2: Effects Stacks for Ray Tracing
Interior RT Style as a starting point for Ray Tracing
Interior RT Stack as Custom Effects from the Interior Example Project for Ray Tracing
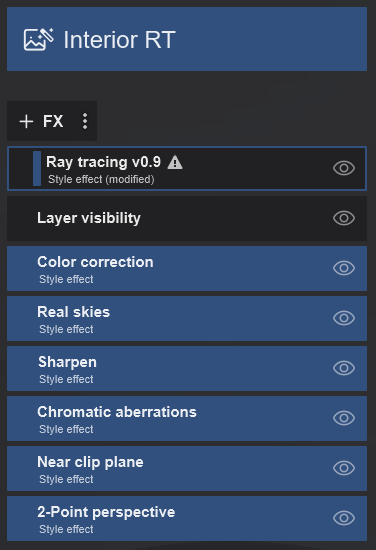
-added in Layer Visibility Effect, change Ray Tracing Effect only for quick Preview
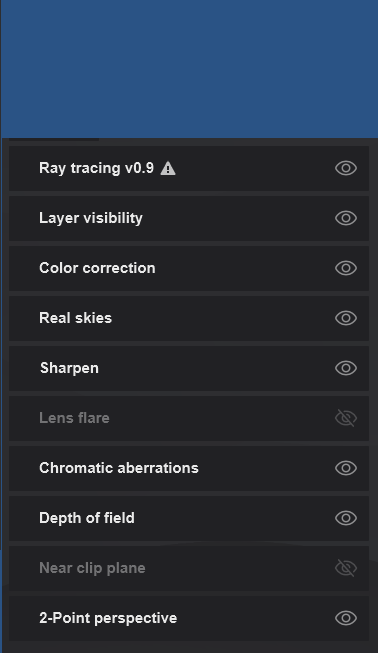
- these customized ones are much the same as from the Style for RT (Ray Tracing)
The Effects Stacks are very much the same. However, the values of the settings will require changing to suit each render type. Notice that there are the same core Effects for Ray Tracing:- apart from the Ray Tracing Effect, you need as a minimum: Real Skies/Sun, Color Correction.
And if you want a Rasterization render then you still need to also include the Sky Light, Reflection, Shadows and HyperLight Effects.
5. Here's Why
These changes are extremely important so please take the time to read about these changes. This will help with setting the right value more quickly.
Older Projects can be loaded into Lumion 2023. However, due to the significant changes, some of the settings will result in a different look compared to previous versions.
The entire Lighting and Materials systems for Lumion were overhauled to support Ray Tracing and ongoing improvements to the Rasterization rendering pipeline in Lumion 2023.
The new unified Lighting system uses real-world units.
The significantly upgraded and unified Materials system now supports full PBR Materials (Physically Based Rendering material pipeline) based on the Roughness approach.
Effects, Materials, or Light (Sun or Real Skies) settings might not be well suited for your older version Projects right out of the box, so renders might look different. Some Effect settings may need to be adjusted in order to get the renders looking the close to what you had before, including if you used Styles.
For example, a 0.2 Sun Brightness value in previous versions of Lumion is not the same as a 0.2 Sun Brightness in Lumion 2023. However, that value needs to be retained and cannot be converted by Lumion itself when you load a Project file.
This means that you likely need to do adjust some settings in order to get things looking great again. Or, for that matter, looking close to the same that you had before.
Here is the detail of the changes:
- Knowledge Base: Transitions: Why does my Project look different in Lumion 2023 compared to previous versions?
6. What Effects will be used?
6.1: For Ray Trace Rendering
The following Effects to do with lighting are disabled by default when you add the Ray Tracing Effect or turn it On in an Effects Stack.
- Skylight Effect.
- Hyperlight Effect.
- Global illumination Effect.
- Shadows Effect.
- Reflection Effect.
So the lighting will depend only on the inclusion and Settings for:
- Sun Brightness.
- Sky Brightness.
- The brightness from Emissive Materials that emit light.
- The Brightness settings from artificial light sources such as Spotlight/OmniLight/Area Lights.
6.2: For Rasterization Rendering
The same Effects exist as in prior versions. The changes to the core systems (Lighting and Materials) also impact Rasterization rendering.
Need Help?
There should be no stumbling blocks but if you hit something or start spending too much time trying to get the right settings for that perfect image, then let's take a look and help.
- Knowledge Base: Contact Lumion Technical Support
See Also:
- Video Tutorial: Lumion 2023: Welcome to Lumion 2023
- Video Tutorial: Lumion 2023: The Raytracing Effect
- Video Tutorial: Lumion 2023: Full PBR Material Workflow

