Why do you get artifacts, blotches or patchy looking renders with Ray Tracing?
You have been using Lumion 2023 and creating great photo-realistic interior renders with the Ray Tracing Effect. However, this time for another Project they are not rendering nice and clean. They have artifacts, blotchy patterns, patchy changes, and strange-looking artifacts.



- Artificial lights do not have excessive brightness.
- There is enough direct sunlight.
- If it is an evening or night Scene then also ensure artificial lights do not have excessive brightness.
- The Ray Trace Effect settings are balanced. Generally use Samples for a final render of 256 to 512. Firefly Reduction - set to 0 unless it is needed.
- Workflow: Establish good renders first from direct light then include your artificial lighting.
See more in Section 5. Setting the lighting for your Scene and the spaces.
Let's walk through an example in more detail.
1. Daytime - Interiors:
Scenario: Bedroom with windows.
- The windows provide a large (wide) enough source of direct sunlight and ambient skylight for the whole room.
- However, the curtains do reduce the total amount of lighting.
- There is no need to have direct sunlight cast onto the interior.
- You start with a rendering of the bedroom using the Rasterization rendering pipeline and using the Reaslitic Styles Effects.
A render with no indirect lighting:

And with lights.
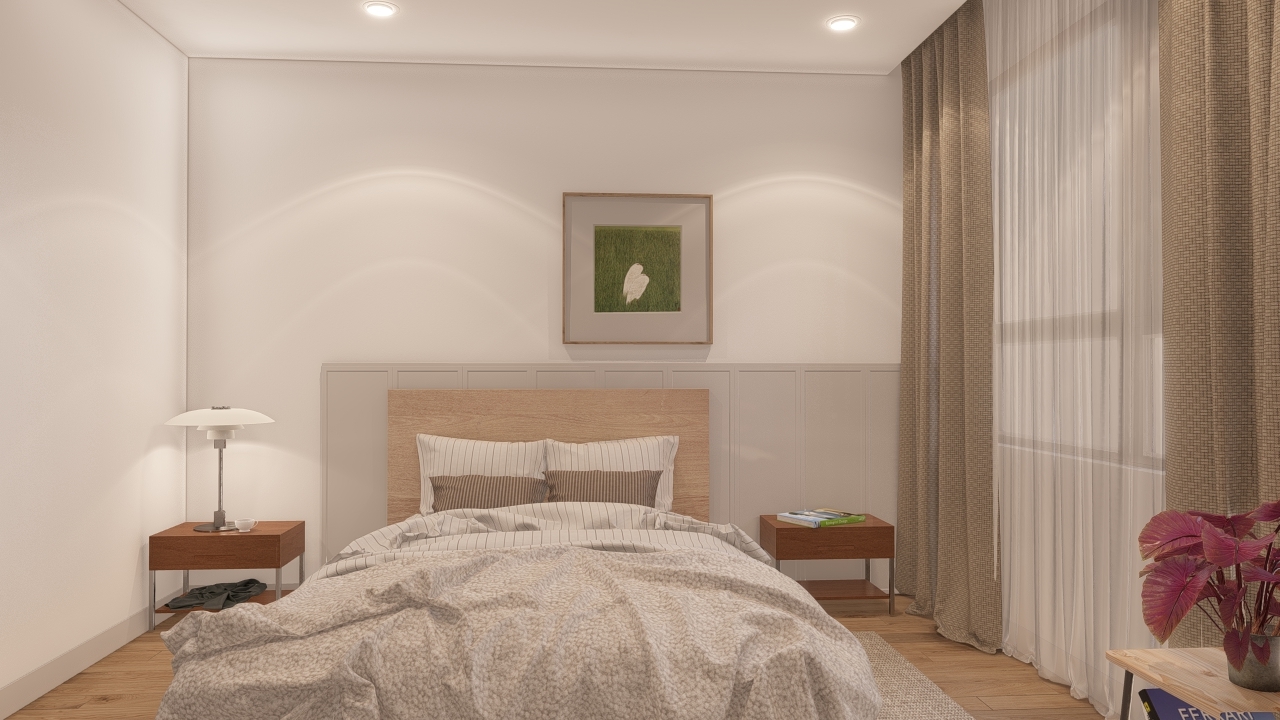
It looks OK but you would like to get even better quality as an interior by using Ray Trace rendering.
You try adding in the Ray Tracing Effect and set the Samples to 16 for a quick render along with 8 Bounces:
(Click on the picture to zoom, Escape key to close)
There's not a lot of pronounced patchy/blotchy looking in this render:- the windows are large enough to allow for enough good direct sunlight and the light is from a single source.
- Even though using the same Real Skies lighting it is much darker.
- And the walls do show blotches and a patchy look.
- You try again at much higher Samples as that should make for a better ray-traced image.
- That works.
- Plenty of light in the room, shadows, looking good, and the patchy-colored look on the walls is now gone.
Increasing Samples can sometimes help resolve the render. At even a low Sample of 128 but with less light Bounces - 3 it is now looking better:
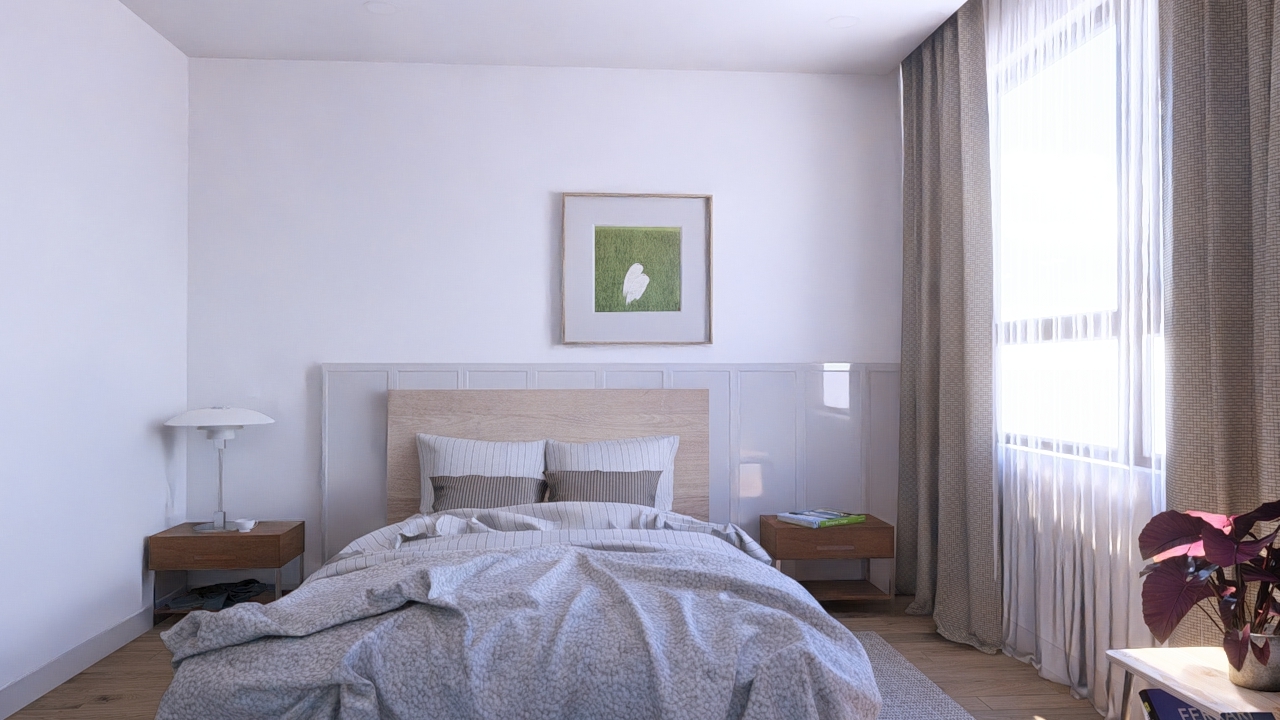
Reducing the Bounces so that there is less Global Illumination bounced around the room will help cut back on the patchiness.
Sometimes though some other adjustments are also needed. Those almost always relate to the other sources of light (see Section 2. Adding Indirect Lighting). As we only have direct light, the Ray Tracing system does a good job for now.
A good range of Samples for a final render is from a minimum of 128, use 256 to 512. That is, as a balanced render: time to render versus quality. You can use higher but 256 or 512 worked fine. (Click on the picture to zoom, Escape key to close)
And, looking at a maximum of 8 Bounces and 2048 Samples: (Click on the picture to zoom, Escape key to close)
Comparing the Rasterization render with the Ray Trace render. The color grading of the Rasterization render could of course be changed via the Color Correction Effect:


Make use of the Effects Stacks already set up for you as a base to work from. For Ray Trace rendering for an interior you can use the simplified Interior RT Style:


2. Adding Indirect lighting:
Let's now take a look at adding indirect/ artificial lights.
Adding too many lights, or the value of the lit area is too high, or a combination of both can often result in artifacts.
You can also affect the total value needed for artificial lights by decreasing the Sun and/or Sky Brightness.
The room is roughly 9 feet x 12 feet = 108 square feet. This would require a general level of Lumens set at 2,160 in total (20 Lumens per square foot ). For each light that is 540 Lumens. Somewhere between a 6W and 9W LED bulb. See also Sections 4 and 5.
The bedside table lamp can be taken as adding extra above the rooms' requirements for being well-lit.
If the Spotlights were set at that value of 540 Lumens:
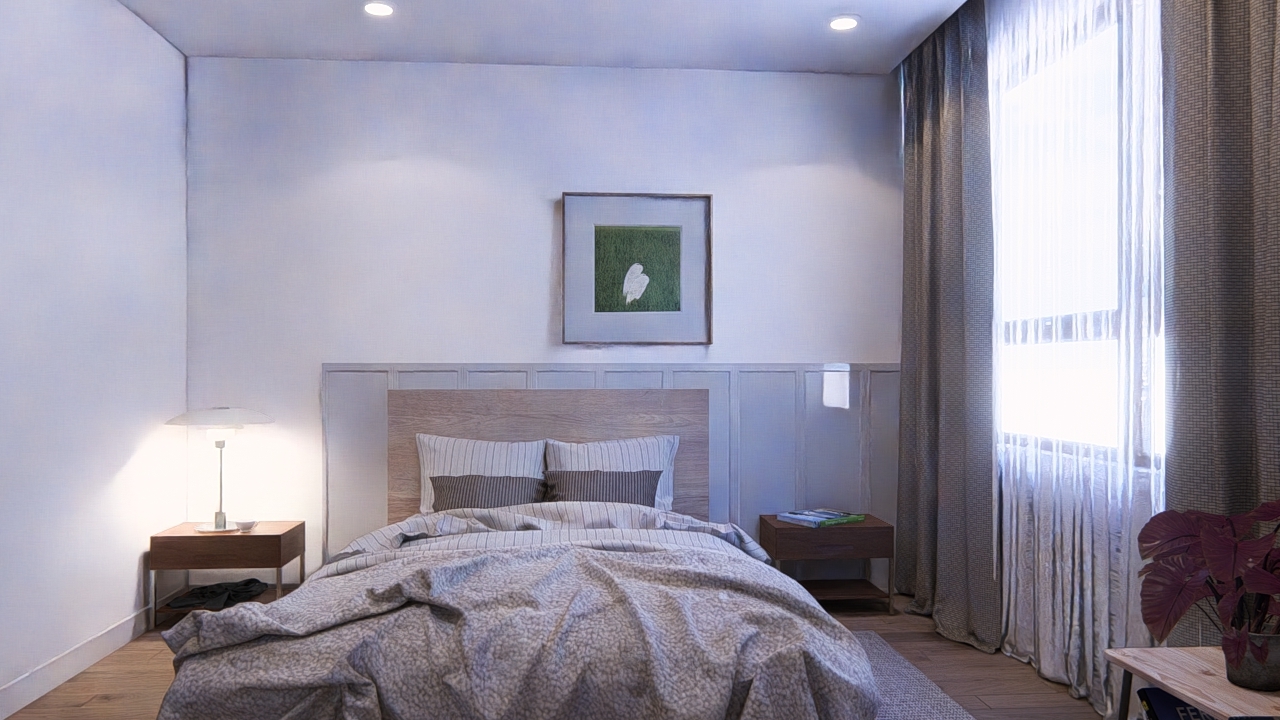
It is still a draft render with only 32 Samples, it's patchy and the light cast is not very strong.
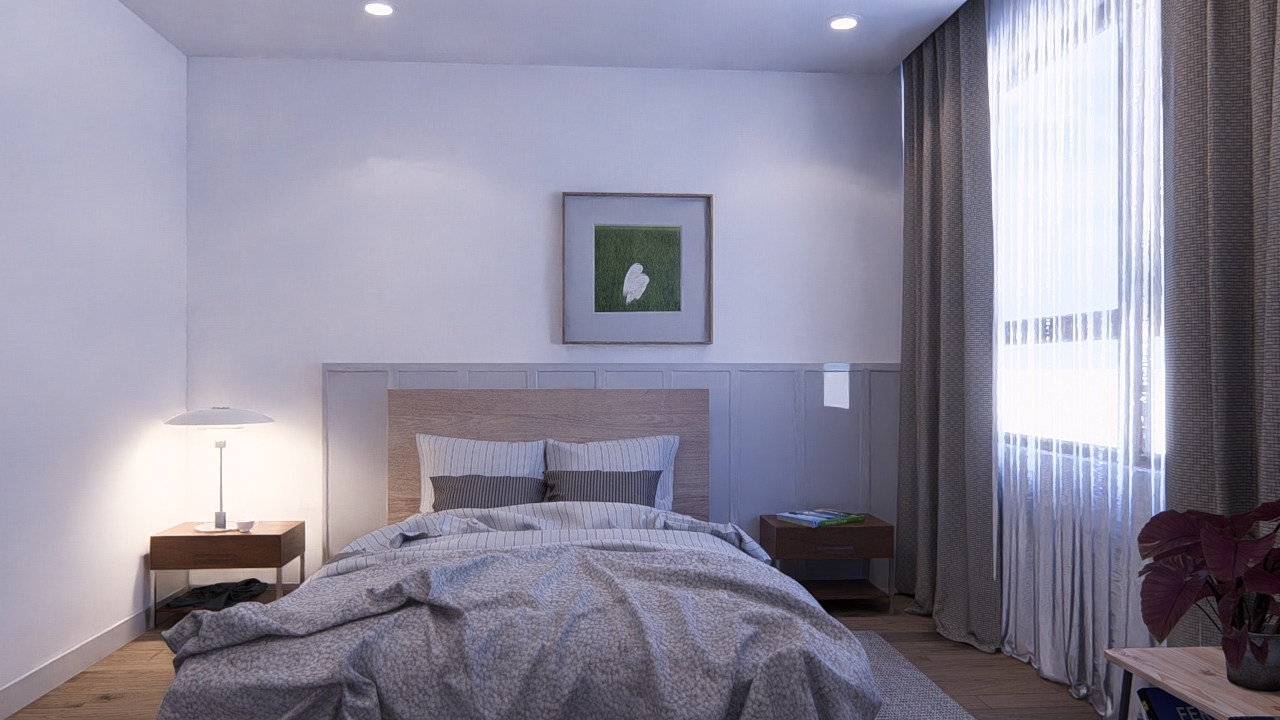
If you want to over-emphasize the light cast it may still be patchy because the Samples are still very low.
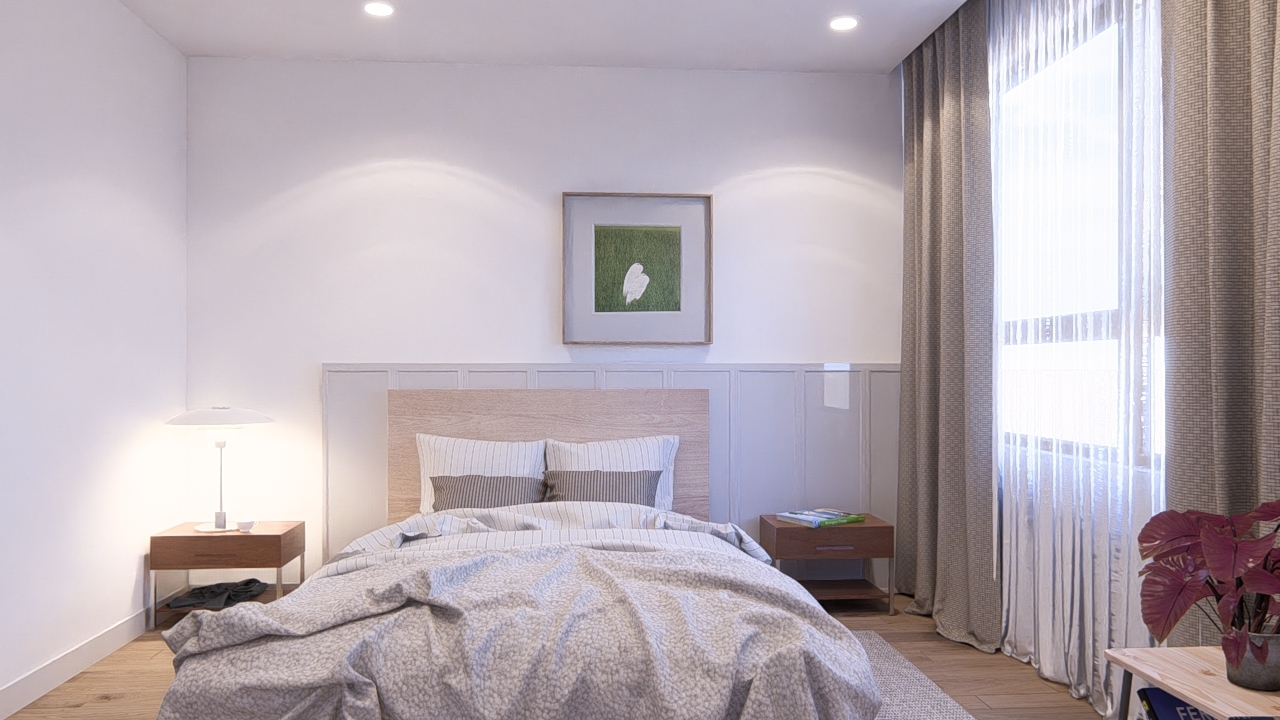
The final settings were:
Ceiling recessed LEDs: 4 Spotlights, Brightness: 640 Lumen, Light Source: shown (the source adds an Emissive value for total lighting). Table lamp: 1 Spotlight, Brightness: 160 Lumen. Total Lumens: 2,720. Samples 512. Real Skies - Cloudy3, Brightness 1.30 Overall Brightness default 1.0. No blotches or patchy artifacts. To compensate for the Spotlight shadows Exposure in the Color Correction Effect was increased to +0.6.
Refer also to these articles about how the level of brightness may need to increase to compensate for the suns' natural brightness:
- Knowledge Base: Transitions: How to Set up Lumion 2023 for Good renders
Section 2.8: Lights:
- Knowledge Base: Transitions: Why does my Project look different in Lumion 2023 compared to previous versions?
- Lumion Community: Lighting in RT???
You can also adjust the amount of direct light via the Real Skies Effect and Sun Effect so that the artificial lights are more prominent.
3. Daytime - Exteriors:
It is rare for exterior views to have these types of artifacts.
The artifacts are almost always likely to occur for an interior and more often when you include artificial lights.
For an exterior there is usually at least one single direct source of light - the sun and the render will resolve things. If you have added Effects such as Noise and Sharpen then either or both combined can affect the final pixels and result in a slightly blotchy or uneven coloring. For example:


4. Lighting values to work with:
4.1: How Many Nits in a Lumen?
One Nit is equal to one candela (one candlepower) per square meter (1cd/m2).
1 Nit = 3.426 Lumens.
For Emissive materials, the maximum value is capped at 10,000 Nits. That is equivalent to roughly 34,500 Lumen.
For more details on lighting values. The Archdaily guide on how much Lumens or Nits to use could be very useful:
- Knowledge Base: Reference: Artificial Lighting values
4.2: Sun Light:
See Also Section 2.1: Summary of Changes: Lighting and Effects, and, Section 2.8: Lights:
- Knowledge Base: Transitions: Why does my Project look different in Lumion 2023 compared to previous versions?
Extract from the article:
- The noonday Sun in Lumion measures around 1,600,000,000 Nits and the night sky around 0.001 Nits.
- Emissiveness has a maximum of 10,000 Nits and Area Lights a maximum of 100,000 Nits (the average for a TV is 500-1500 Nits).
- Spotlights and Omnilights have a max of 100,000 Lumens, approximately 29,200 Nits. (1.0 Lumen = 0.29 Nits).
4.3: Need an idea of the Lumens or Nits to set for your lighting?
If you are using Watts - Google Search:
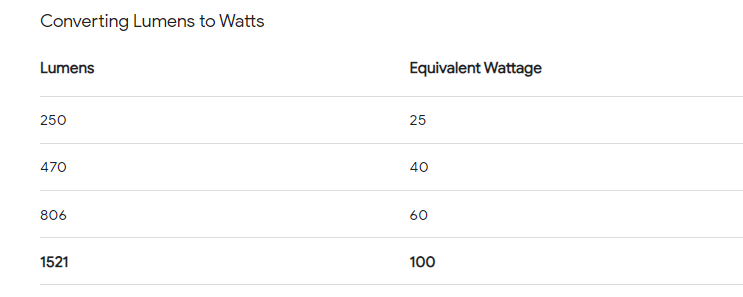
Some lighting manufacturers or retailers will provide the details on the lighting values, for example:
- External Link: LedsC4
See also the suggestions in the next section.
5. Setting the lighting for your Scene and the spaces:
5.1: How much Added Lighting:
Avoid having many light sources all at once as that can produce undesired results. The more lights that are enabled/visible, the noisier the output can be. This is because the rays that are shot from the camera are randomly assigned to each light source (common for the ray tracing method), somewhere near the lighting. And it can generate overbright pixels in random places.
Fewer light sources mean that you get more rays per light, which might result in a better less noisy image. This aspect of Ray Tracing is part of the active developments and improvements of the system.
- Keep the total value of lighting from artificial lights plus the lighting from Emissive Materials to a level that is suitable for the room area. Whilst each space may differ in the total lit value needed, if you see that it is more than, say, 5,000 to 15,000 Lumens then you know that you should look at reducing the values.
- Knowledge Base: Reference: Artificial Lighting values
- Web Site: ArchDaily: How To Determine How Many LED Lumens You’ll Need To Properly Light Your Space
5.2: Values to use Guide:
The Ray Trace Effect settings are balanced:
Samples:
- Generally 256 to 512.
- Only in rare cases set it to the maximum of 2048 and you can afford the render time.
- Reduce the number of Bounces when using lower Samples 2 to 4.
Firefly Reduction value:
- In most cases set it to 0, or a maximum of 5%, as it can be very aggressive.
- The Firefly Reduction will affect overbright pixels only.
- This is what can happen with an excessive Firefly Reduction value.
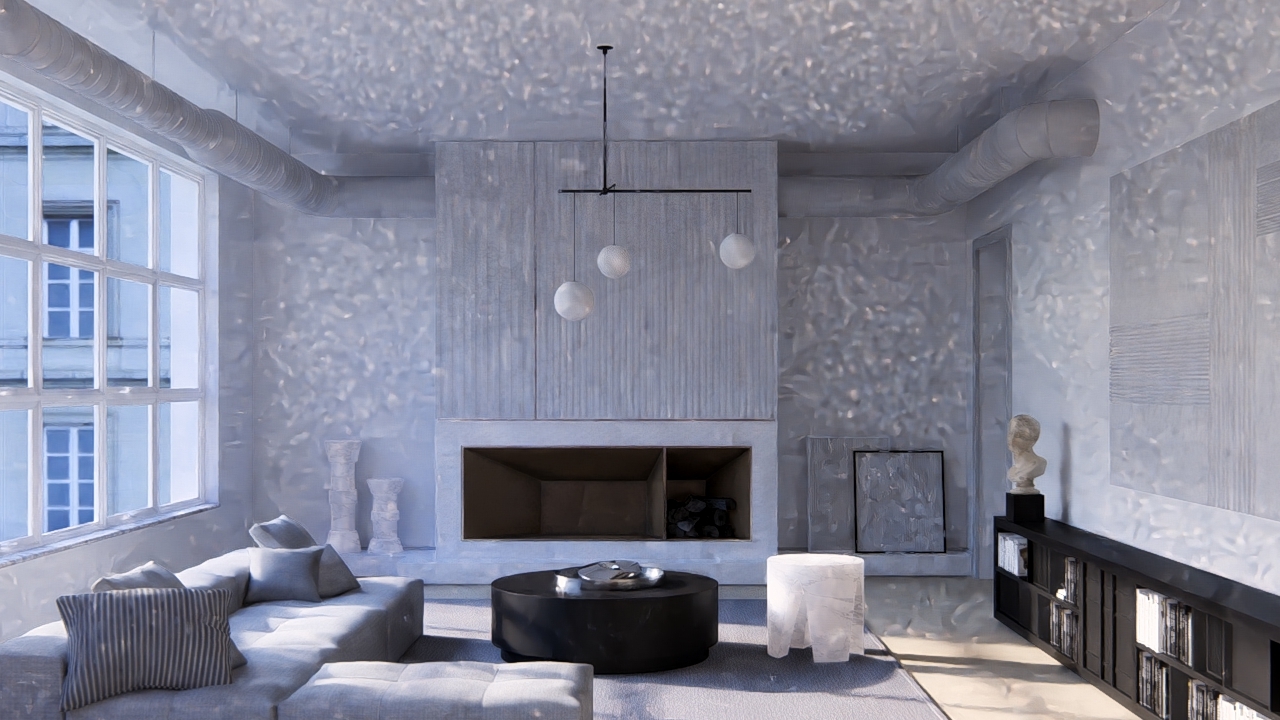
- Rendering with more Samples may only sometimes resolve things without doing other changes as mentioned earlier. Only in some cases like this room where there is only direct light will increasing the Samples alone have the desired result. For example:
16 Samples 4 Bounces:

132 Samples 4 Bounces:

512 Samples 8 Bounces:

5.3: Effective Workflow:
Establish good renders first from direct light. This gives you a baseline of real-world light in the space for your render.
Then include your artificial lighting (if needed) so that you only need to adjust the brightness and number of those lights.
5.4: Examples of Scenes where problems might occur:
- Plenty of direct sun through large windows, but there is an overly strong light - possibly just from an Emissive material, or a Spotlight.
- No direct sunlight, only many Spotlights, and may also include Emissive material for the lamp/s. The additive brightness value of the Spotlights and the Emissive lights is too much for the Sampling. For example: 16 spotlights all with 5,000 Lumen each = 80,000 Lumen! And, another 14 line lights at 1,000 each = 14,000 lumen, so overall 94,000 Lumen.
- Small room, 4 Spotlights in the room each set to 100,000 Lumens! Although we understand that you would like the artificial lights to be visible in daylight, a value for 2,000 to 5,000 Lumens is more suitable
The Emissive strength of the overhead lamps are 10,000 Nits - which again is too bright. Reducing it down to 2000 Nits will work.
Having some natural light come into the space should help improve global illumination. Change the Real Skies: type of sky and/or the Heading. You can also add in a Sun Effect to further manage the direction of the sun in to the room.
- The Firefly Reduction value is excessive or not needed. Perhaps you were just trying to use it to get rid of some artifacts.
There are some exceptions but follow the guide of 0 to a maximum of 5% as earlier.
- Avoid doubling some Spotlights (for example in kitchens) in the same direction. If the light is a dual-directional then that's OK.
- There is plenty of direct light but the Spotlights - the number and value of them are causing the space to be too over-lit.
See Section 5. Setting the lighting for your Scene and the spaces.
- If the room is small, and or has small windows, letting only a small amount of direct light in then make sure the artificial lights do not over-brighten the space by too strong a Brightness value and/or combined with too many lights.
See Section 5. Setting the lighting for your Scene and the spaces.
5.5: Summary - Balance the lighting so that:
- Artificial lights do not have excessive brightness.
- There is enough direct sunlight.
- If it is an evening or night Scene then also ensure artificial lights do not have excessive brightness.
- Apply balanced settings for the Ray Tracing Effect.
5.6: Need Help?
- Knowledge Base: Contact Lumion Technical Support
See Also:
- Lumion Community: Strange glows - problem
References:
- Knowledge Base: Reference: Artificial Lighting values
- Web Site: ArchDaily: How To Determine How Many LED Lumens You’ll Need To Properly Light Your Space


