Skip to content
English - United States
  • There are no suggestions because the search field is empty.

What are the keyboard shortcuts in Lumion 2024 and newer?

Screenshot 2024-03-13 174927.png

Note that it is not possible to change the default keyboard shortcuts.  You can however select a camera control scheme that matches your 3D CAD application. See Section 1. Navigation - Changing Control Scheme.

Applies to Lumion 2024 and Lumion Pro 2025. 

Screenshots are mostly from Lumion 2023 and have similar/same keyboard and UI navigation. There is a Sidebar Menu as shown above.


1. Navigation

Keyboard Navigation:

W or Arrow Up
Move camera forward.
S or Arrow Down
Move camera backward.
A or Arrow Left
Move camera left.
D or Arrow Right
Move camera right.
Q
Move camera up.
E
Move camera down.


Change the Speed for Keyboard and Mouse:

SPACEBAR + Keyboard or Mouse
Very slowly.
SHIFT + Keyboard or Mouse
Fast.
SHIFT + SPACEBAR + Keyboard or Mouse
Very fast.


Change the Speed for Keyboard Navigation:

SPACEBAR + W/S/A/D/Q/E
Move camera very slowly.
SHIFT + W/S/A/D/Q/E
Move camera faster.
SHIFT + SPACEBAR + W/S/A/D/Q/E
Move camera very fast.


Look around:

RIGHT MOUSE BUTTON + Move mouse
Look around.


Pan:

MIDDLE MOUSE BUTTON + Move mouse
Pan camera.
SPACEBAR + MIDDLE MOUSE BUTTON + Move mouse
Pan camera very slowly.
SHIFT + MIDDLE MOUSE BUTTON + Move mouse
Pan camera faster.
SHIFT + SPACEBAR + MIDDLE MOUSE BUTTON + Move mouse
Pan camera very fast.


Move camera forwards/backwards:

MOUSEWHEEL UP/DOWN
Move camera forwards/backwards.
MOUSEWHEEL UP/DOWN + SPACEBAR
Move camera forwards/backwards very slowly.
MOUSEWHEEL UP/DOWN + SHIFT 
Move camera forwards/backwards faster.
MOUSEWHEEL UP/DOWN + SHIFT + SPACEBAR 
Move camera forwards/backwards very fast.


Other Navigation and View Options:

CTRL + H
Reset camera pitch to horizontal viewpoint.
O + RIGHT MOUSE BUTTON + Move mouse
Orbit camera. Move the camera so that the crosshairs [ ] are placed at the point on a model that you want to orbit around.
Double-click with RIGHT MOUSE BUTTON on models
Instantly teleport to the position that you clicked on.

Double-click with LEFT MOUSE BUTTON on an Objects Icon

LeftDblClick_plus_Object_Icon.jpg

Instantly move the camera to the model that you clicked on.

Fast navigation to sored viewpoints:

CTRL + 1 2 3 ... 9 0


SHIFT + 1 2 3 ... 9 0


When in Build Mode, use these keys to save up to 10 camera shots/viewpoints (Store Camera) in Photo Set 1 in Photo Mode.


Navigate/move the camera to a previously saved camera shots/viewpoints (Store Camera).


Changing Control Scheme:
Settings -> Input-> Camera input

For users of Sketchup, Revit and Rhino.

sAJ2HFeXDG.gif

Select your control scheme of choice. 


2. Settings and Sliders:

Function Key Settings:

F1

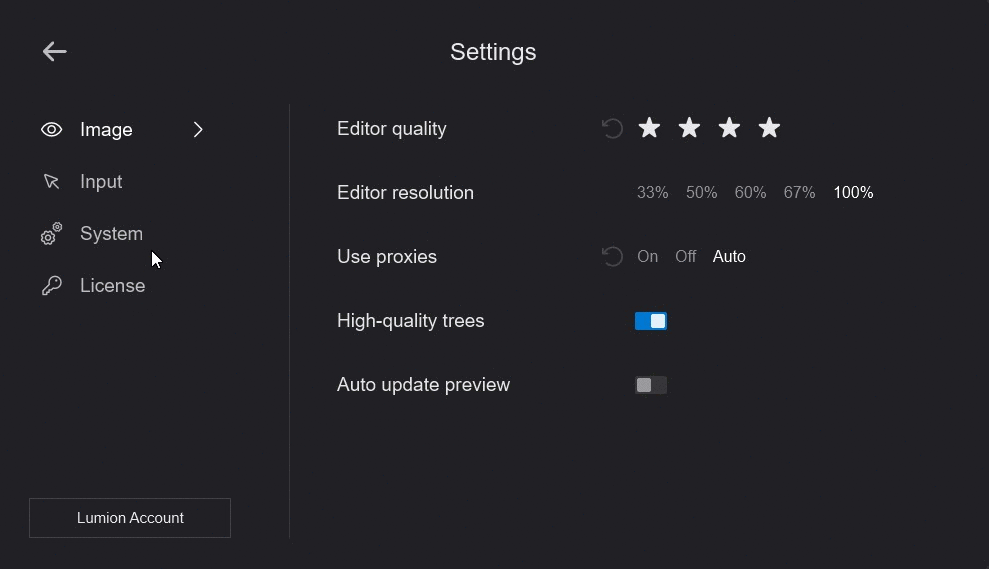
Editor Quality: 1 Star

All shadow types are off.  Note: also applies to the Preview for Photo Mode and Movie Mode, including High Quality Preview.

Playback of video texture is held at the frame when the key is pressed.  

F2

Editor Quality: 2 Stars

Lumion Landscape shadows and OmniShadow off, playback of video texture is held at the frame when the key is pressed.  

F3

Editor Quality: 3 Stars

Lumion Landscape shadows off, playback of video texture is held at the frame when the key is pressed. 

F4

Editor Quality: 4 Stars

Highest quality level. Everything on, playback of video texture occurs. 

F6
Toggle between automatic and manual update of the High-Quality Preview.
F7

Cycle through each of the five Editor Resolution levels.

Function_Key_F7_Cycle_Thru_Editor_Resolution__EdRes_only.png

F8
Hold down this key to temporarily show the shadows from Spotlights.
F9
Toggle between low-quality and high-quality trees and plants.
F11
Toggle between Build Mode and  Theater Mode. Theater Mode hides the user interface in  Build Mode.


Other Settings:

Settings -> Full Screen

Toggle between Full-screen and Windowed Mode.

Settings-_Full_Screen_Mode.png

You can also use this in combination with F11 for a full screen Theatre Mode presentation.


Sliders: 

Sliders: Effects

You can double-click on most sliders in Lumion to manually type in values. Press Shift while adjusting slider values to fine-tune them (more digits after the decimal point will be displayed).

Sliders_-_TypeIn_Value__HlpTxt.png

Sun Effect - Shift Key usage.png

Sliders: updated User Interface sliders

These sliders for the updated interface allow for a single click to type in. (example shown Materials Editor)

Sliders__New_-_TypeIn_Value__Materials.png

For these you can also use the Shift key to show the non-rounded value of a slider:

Sliders__New_-_TypeIn_Value_Shift_key_non-rounded_value__Materials.png


Keyboard: TAB key 

TAB:

Cycle/move through the fields for various settings where you are able to type in a value or text.

Click in one of the fields and then press the TAB key to move to the next field. 

Currently, the order is not always as per visual order on the screen, for example, in the Color Picker the first ordered field is the R for RGB.


TAB + Shift:

Reverse order to move through the fields.


Using

Color


3. Placing, selecting, copying, and moving


Place button:

L2023__Build__Place__HlpTxt.png

LEFT MOUSE BUTTON
Place a copy of the selected model from the Model Library.
LEFT MOUSE BUTTON + V
Place a new model with +/-0 to 50% random scale.
H + LEFT MOUSE BUTTON + Move mouse
Move the selected object(s) up or down when placing.


Place button -> Line Placement/Mass Placement:

Lumion 2023.3.0 and newer: Line Placement

You can add multiple Objects to the selection from the active Object Categories. You can create a pool and select up to 20 Objects per Placement Line.

L23.3.3 Mass now Line Placement.png

L23.3.0 Line Placement Settings.png

Note: Imported models, Groups, Lights, Nature\Fine-detail trees, Nature\Fine-detail plants, Effects\Sounds, Effects\Decals, and Utilities are not available in Line Placement as those should be placed individually.

Line Options:

When you place a Line and add one or more Control Points:

L23.3.0 Line Placement Add a Control Point_b.jpg

you have the option of switching between a smooth (spline) curved line or a straight line:

L23.3.0 Line Placement Settings -Line Options - Toggle Curved StraightLine.png

L23.3.0 Line Placement Settings -Line Options-Curved Example.jpg

L23.3.0 Line Placement Settings -Line Options-StraightLine Example.jpg

Placement Options:

Enable/disable Conform to Ground to let the objects align to the curve or to the ground.

L23.3.0 Line Placement Settings -Placement Options-Place on Ground.png


L23.3.0 Line Placement Settings -Placement Options-Conform to Ground.png

Control Points are no longer limited to being on the Terrain or an Imported Model, but can be moved up into the sky.

L23.3.0 Line Placement Settings -Placement Options-up.jpg

When using the Line PLacement tool for 3D People make sure to click on the Pla ce On Ground button so they align vertically and not to the slope of the terrain:

L23.3.0 Line Placement Settings -Placement Options-People-placed at landscape angle.jpg

L23.3.0 Line Placement Settings -Placement Options-People-make sure use Place On Ground.jpg


Other Keys:

Enter
Accept the current Line and start a new Line.


L23.3.0 Line Placement -Accept etc.jpg


CTRL + LEFT MOUSE BUTTON
Add a Control Point to the current Line.
RIGHT MOUSE BUTTON
Remove a point from the current Line.


Prior to Lumion 2023.3.0: Mass Placement:

L2023__Build__Mass_Placement__HlpTxt.png

L2023__Build__Mass_Placement-UI.png

Enter
Accept current Line and start a new Line.
CTRL + LEFT MOUSE BUTTON
Add a point to the current Line.
RIGHT MOUSE BUTTON
Remove a point from the current Line.


L2023__Build__Mass_Placement-_exmaple_-Line_placement.jpg


Place button -> Cluster Placement:

L2023__Build__Cluster_Placement__HlpTxt.png

L key + move mouse
Control the Cluster Range 
R key + move mouse
Control the rotation/ Direction of the Objects.
CTRL + LEFT MOUSE BUTTON
Cluster Placement: Place 10 copies of the selected model from the Model Library at random positions.
CTRL + V + LEFT MOUSE BUTTON
Cluster Placement with random size: Place 10 copies of the selected model from the Model Library at random positions with +/-0 to 50% random size.

Note: Imported models, Groups, Lights, Nature\Fine-detail trees, Nature\Fine-detail plants, Effects\Sounds, Effects\Decals, and Utilities are not available in Cluster Placement as those should be placed individually.  This also applies to Paint Placement.

L2023__Build__Cluster_Placement__plants_Exmaple_b.jpg


Select button:

L2023__Build__Select__HlpTxt.png

L2023__Build__Select_plants_cluster__HlpTxt.png

CTRL + Drag with LEFT MOUSE BUTTON
Rectangular selection tool for selecting multiple objects.
CTRL + Click on an Object Icon
Select/De-select each object from the current selection.
CTRL + Click anywhere with LEFT MOUSE BUTTON
De-select all objects.
CTRL + SHIFT + Drag with LEFT MOUSE BUTTON
Add new rectangular selection to existing selection.

L2023__Build__Select__plants_Example-all8.jpg


Move free button:

L2023__Build__Select-free_Move__HlpTxt.png

Select Object Icon to Move freely:

L2023__Build__Select-free_Move__Object_Icon.jpg


Using the Gizmo to Move up/down or Move horizontally on each (world) axis of the Object:

See also:

Gizmo2.gif

L2023__Build__Select-Move__Gizmo_-_Move_on__Axis-all.png

Click on the red, blue or green arrows of the Gizmo to constrain the movement to an axis.

Gizmo: LEFT MOUSE BUTTON + Red arrow + Move mouse
Move along the X axis only. 
Gizmo: LEFT MOUSE BUTTON + Blue arrow + Move mouse
Move along the Z axis only.
Gizmo: LEFT MOUSE BUTTON + Green arrow + Move mouse
Move up or down along the Y axis only.


Click on the red, blue or green squares of the Gizmo to constrain the movement to a plane along two of the axis:

  • on Blue plane XY Space -up and down, left and right.
  • on Green plane XZ Space -back and forward, left and right.
  • on Red plane: YZ Space -up and down, back and forward.

L2023__Build__Select-Move__Gizmo_-_Move_on__planes_of_Space-All.png


Copy an Object:

ALT + LEFT MOUSE BUTTON + Move mouse
Duplicate selected object(s).
ALT + click on the X, or Z or Y axis of the Gismo + LEFT MOUSE BUTTON + Move mouse
Copy an object using ALT key when pressed and constrain the movement for the copied Object along that axis. 


L2023__Build__Select-Move__Gizmo_-_Move_on__Axis-all.png


Place, Move freeMove up and Move horizontal:

L2023__Build__Place__HlpTxt.png


G + LEFT MOUSE BUTTON + Move mouse
Place or move object(s) to make them snap to the Lumion Landscape while ignoring all other object types.
F + LEFT MOUSE BUTTON + Move mouse

Place or move object(s) to make their orientation adapt to the surface below them, provided that the surface is facing the sky, i.e. less than 90 degree angles. 

F_key_conform_to_Landscape.jpg

L2023__Build__Select__F_key_-Conform_to_Landscape_slope__50p.jpg

SHIFT + LEFT MOUSE BUTTON + Move mouse
Place or move object(s) horizontally with snapping turned off.


Rotate button:

L2023__Build__Select__Roatate_tool__HlpTxt.png

The Gizmo Tool provides for rotation in each axis.

L2023__Build__Select__Rotate_tool__Gizmo__All.jpg

Switch to Rotate Mode using the R key.

Change the heading of the selected Object Icon(s).

R + LEFT MOUSE BUTTON + Move mouse

Change the heading of the selected object(s).

L2023__Build__Select__Roatate_tool__R_key.jpg

SHIFT + Rotate selected object(s)
Temporarily turn the 45 degree angle snapping off.
F + Rotate selected object(s) + Move the mouse cursor to another surface

The heading of the selected objects will match the orientation of the surface below the mouse cursor.

K + Rotate selected object(s)

Make all of the objects face the mouse cursor.


Scale button:

L2023__Build__Select__Tool__Scale__button_htl.png

L + LEFT MOUSE BUTTON + Move mouse
Scale (size) an object using the mouse.


Selecting a model when multiple Object Selection icons are aligned:

Multiple objects can be aligned or positioned at the same location. To select the model you want, you can either click on the model you want to select or you can use this method:

  1. Place the mouse over the Object Selection Icons.
  2. Use the W and S or Arrow Up and Arrow Down keys to cycle through the models.
  3. As you scroll through, each model will be highlighted in green.
  4. Click on the current Object Selection Icon to select it.


Auto-Snap Tool:

Instantly align/snap your objects to a face of one of the Objects in your Project, while placing or moving it.

L2023__Build__Select__Move_Tool__Snap__button_pntr.png

Snap (was F + Rotate selected object(s) + Move ) now uses this specialized tool. 

In Place Mode, the Auto-Snap Tool is always visible. And in Select Mode, it only becomes visible when a certain ('smart') object is selected.


AutoSnap_Chairs_-_xFloyd.png AutoSnap_People_-_xFloyd.png


Auto Snap - Objects Category:

Models from the Objects Category will snap and align to the surface of an Imported Model.

Some object types like chairs will by default stay on the ground and align to the vertical surface.

Objects like canvasses, posters, pictures, and paintings will snap and align to a vertical surface. But can also be moved vertically.


Snap_obj.gif


Auto Snap - People and Animals Category:

Seated characters from the Object Library will snap and align to chairs for quick, easy placement.


Snap_ppl.gif


4. Build Mode - Lumion Library, Imported Models Library:


Mouse middle scroll button
scroll forward and back to move through the pages

Mouse back button or

Backspace button (keyboard)

Exit a Folder or Collection and go up to the next level.

Same as clicking on the Back button:

Back_button_and_bakckey-Backspace.jpg


5. Photo Mode:


L2023_Photo_Mode__Store_camera_views_with_hotkeys.png

CTRL + 1 2 3 ... 9 0

Use these keys to save up to 10 camera shots/viewpoints (Store Camera) in Photo Set 1 in Photo Mode.

You can also use these keys to save a viewpoint when in Build Mode.

SHIFT + 1 2 3 ... 9 0

Load previously saved camera shots/viewpoints (Store Camera) .

The saved slots are available via the thumbnail images in Photo Set 1 in Photo Mode.

Ctrl+C / Ctrl+ V
Keyboard Copy and Paste a Photo to another Photo slot. Alternative to using the Context Menu.


Photo Matching Effect:

mceclip11.png

SHIFT
Hold down this key while dragging points on the red and blue lines to move them more accurately.


Orthographic View Effect: Align camera with surface

mceclip10.png

F
Press this key to align the camera so that it is perpendicular to the surface at the center of the 3D view.


6. Movie Mode:


CTRL + 1 2 3 ... 9 0
Use these keys to save up to 10 camera Viewpoints in  Photo Set 1 while editing a camera animation in a Clip.
SHIFT + 1 2 3 ... 9 0
Load previously saved camera Viewpoints. The saved slots are also available as easily accessible thumbnail images in  Photo Set 1 in  Photo Mode.
CTRL (while rendering)

While rendering, hold down this key to show the frames per second.

L2203___Movie_Mode___render_a_Clip___Seconds_per_Frmae_log_b.jpgL2203___Movie_Mode___render_a_Clip___Frames_log_b.jpg

CTRL (while mouse cursor is over the Timeline Slider)

The frame count can now be displayed above the Timeline by pressing the CTRL key whilst the mouse is over the Timeline Slider.

L2203___Movie_Mode___render_a_Clip___Timeline_-Frames.png

If you select to render to a frame range, the Timeline Slider displays the frame count by default, until you choose to render with another option. Whilst using the frame range option, you can toggle the display to show the seconds counter using the CTRL key whilst the mouse cursor is over the Timeline Slider.

L2203___Movie_Mode___render_a_Clip___Timeline_-Time.png

SPACEBAR (while mouse cursor is over the Timeline Slider)

Plays or stops the Movie Preview in Movie Mode.

Plays or stops the Clip Preview in the Clip Editor.

L2203___Movie_Mode___render_a_Clip___Timeline_-_play-stop.png

Ctrl+C / Ctrl+ V
Keyboard Copy and Paste a Clip to another Clip slot.  Alternative to using the Context Menu.


Mass Move Effect:

Mass_Move_Effect_-_general_-_path_placed_UI.png

CTRL + LEFT MOUSE BUTTON
Add a Node to the current Path.
RIGHT MOUSE BUTTON
Remove a Node from the current Path.
SHIFT
A line is drawn to preview curves and smoothing of the Path.


7. 360 Panorama Mode:

360 Panormama Mode for keyboard article.jpg

Ctrl+C / Ctrl+ V
Keyboard Copy and Paste a 360 Panorama Viewpoint to another 360 Panorama Viewpoint slot. Alternative to using the Context Menu.