

1. Install the Lumion plug-in (if required)
1.1: Please follow the instructions in section 1 in the article below to download and install the plug-in for your version of Lumion and Autodesk FormIt (if required):
- Download Link: Download Lumion LiveSync for Autodesk Formit
1.2: Alternatively, use the Cloud-install option in FormIt:
- Open the 'Plugin Manager'

- In the list, find 'Lumion LiveSync' and enable the switch next to it:

- For more information, clicking the blue symbol below the switch will redirect you to the Github page.
2. Method A: LiveSync export
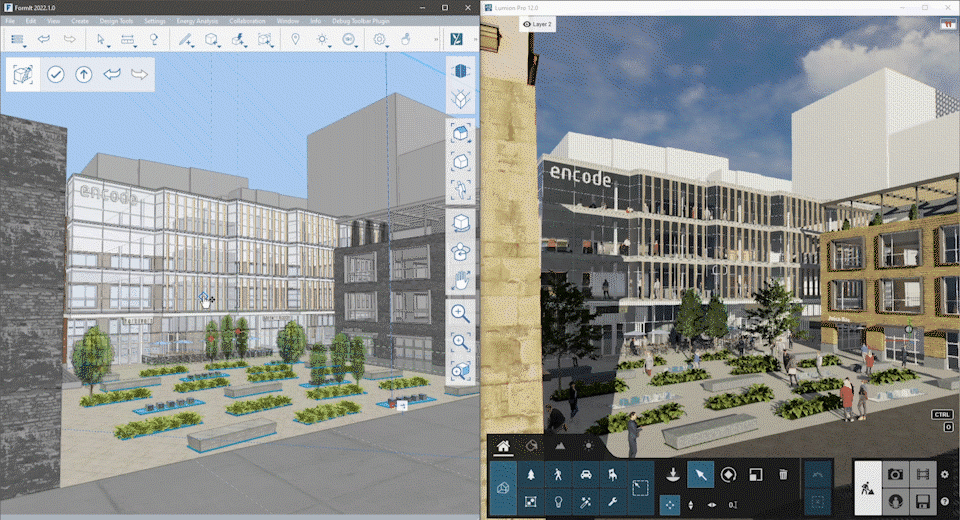
2.1: With Lumion LiveSync for Autodesk FormIt and Lumion 12.0 and newer, you can immediately set up a live, real-time visualization of your Autodesk FormIt 2022.1 model:
If you are using an older version of Lumion, please see Method B or Method C below.
3. Method B: Lumion .DAE file export (Lumion 8.5 and newer)
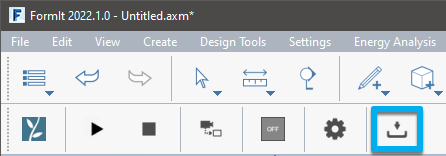
3.1: If you prefer to export your model via a file and you are using Lumion 8.5 or newer and Autodesk FormIt 2022, you can export a Lumion Collada file (.DAE) using the Lumion LiveSync for Autodesk FormIt Export button in the palette:
However, please note that we recommend exporting the model via LiveSync (Method A) rather than via .DAE format as it is faster and requires fewer resources.
4. Method C: .FBX and .SKP file export (FormIt 2022.0 and older)
4.1: If you are using Lumion 8.3 to 11.5.1, please export the model to .FBX format and use the relevant settings:
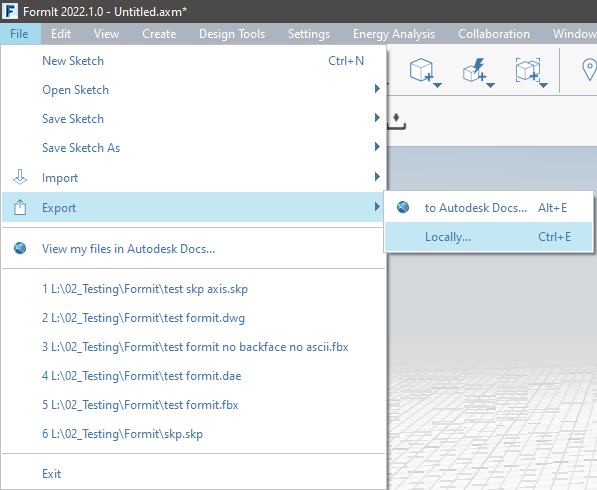
File -> Export -> Locally... -> .FBX
4.2: Select these options in the export options window:

4.3 For SketchUp select 'SKP' from the list. The model will be exported in SketchUp 2018 format and can be imported in Lumion 8.3 and newer.

5. Tips & Troubleshooting
5.1: Why can't you see the model after importing and placing it in your Project?
- The Insertion Point for the Imported Model in Lumion corresponds to 0,0,0 in the World Coordinate System in Autodesk FormIt.
- If a model is far away from the Insertion Point in Lumion, you need to move the model closer to 0,0,0 in Autodesk FormIt, before exporting it to Lumion.
-
-
- Right-click in an empty space in the FormIt scene.
- Choose Reset Axes.
- Alternatively, type 'R Z'.
-
- Using Custom Coordinates will export the 0,0,0 World Origin instead of the user-set Origin
See also:
- Knowledge Base: Why is your model invisible or black after importing it?
- Knowledge Base: Why do yellow lines (but no model) appear after Importing your model?
5.2: Why can't you assign a Lumion material to individual surfaces?
Lumion will always combine surfaces that use the same material in FormIt. If you want to assign a Lumion material to a specific surface, you must assign a unique material to that surface in FormIt before importing the model.
- Knowledge Base: Why can't I select just a part of the imported model?
5.3: How do you update a model in LiveSync when the file name or folder location of the Autodesk FormIt file has changed?
5.4: Why are some materials automatically converted in Lumion?
- Knowledge Base: How do Auto-Converted Materials work in Lumion?