An AI Upscaler was introduced in Lumion Cloud 20 January 2026.
Menu:
2. Access From the Lumion Cloud Menu: Upload:.
2.3: Example when using this uploaded image and Upscale.
3. Access Directly when selecting an image (already been uploaded):.
4. View your Upscaled Images: Your Upscale Creations.
5. How does the Upscaling Work.
6. Want to do your Upscaling in Lumion Pro rather than Lumion Cloud.
1. The Lumion Cloud Upscaler
1.1: Access to the Feature
1.2: Why upscale?
As an architect, you need high-fidelity renders to present to clients—without delay. The AI upscaler lets you bypass the lengthy high-resolution rendering phase and drastically reduce project turnaround time. Enjoy pristine, ultra-high-res renders immediately, with no hours wasted or expensive re-rendering required.
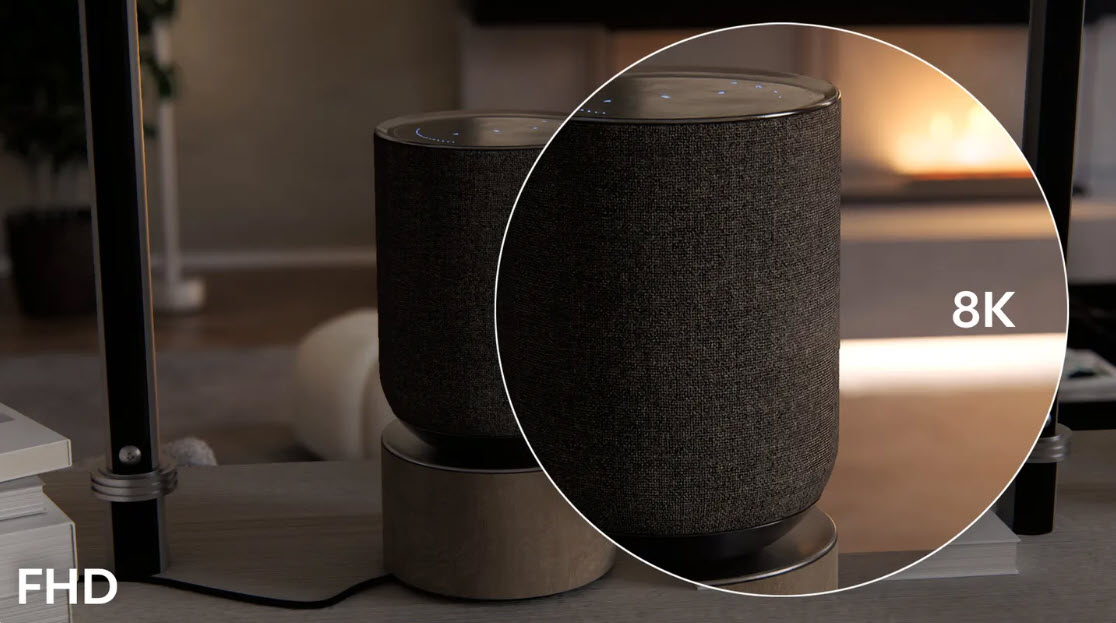
The AI upscaler offers a simple, reliable way of turning draft, low- or mid-resolution renders into enhanced images in an instant by applying a fixed upscale factor (2x, 4x, or 8x) and delivering high-end, high-res output perfect for large-format prints or 8K+ presentations.
- Lumion website: News: Your new rendering shortcut: the AI upscaler is now live in Lumion Cloud
- Lumion website: Tips and guides: Render sharper, faster: using the AI upscaler in Lumion Cloud
2: Access From the Lumion Cloud Menu: Upload
Head over to Lumion Cloud and log in. You'll find the AI upscaler on the left menu:
2.1: Uploading
1. Select from the left hand menu in the Lumion Cloud Home page/screen:
 or if you reduce the left menu to the Icon View:
You can also access it directly when selecting an image. See Section 2.2: Access Directly when selecting an image (already been uploaded).
2. Upload Menu:

Click on the button to locate your local file you want to Upscale:

or:

You can upload .JPG, .JPEG, and .PNG files up to 4096x4096 and 50MB in size.
3. Options once your file is Uploaded:

(click to enlarge)
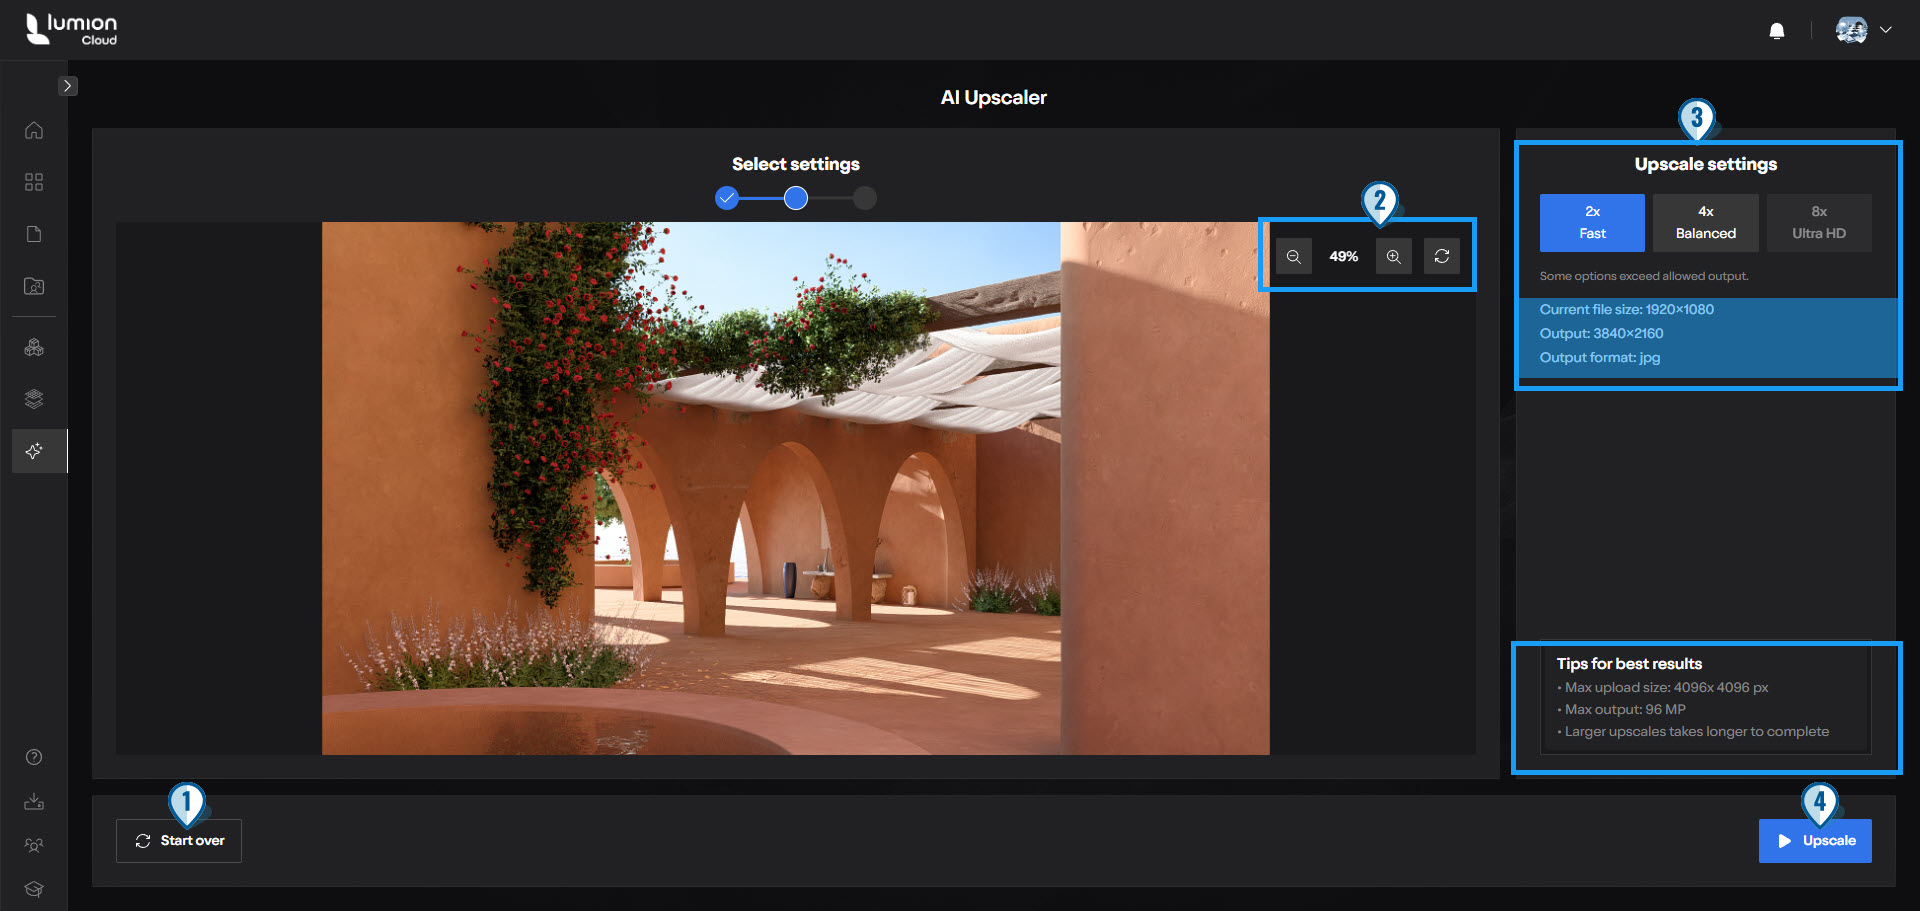
2.2: Options
1. Start Over:

2. Zoom Views:
Zoom In or Out or Reset the view

3. Upscale Settings:

To see what current (original) file sizes can be Upscaled, see the Section: Wanting 2x or more scaling up of the Resolution
4. Upscale:
Click the Upscale button to start the process:

Also: Tips for Upscaling on your screen for assistance.
2.3: Example when using this uploaded image and Upscale 4:x
2.3.1: Uploaded:

2.3.2: Upscaling in Progress:

Note: you can leave the page while the image is processing and come back later to your Creations to check out and compare the result.
2.3.3: Upscaling Completed: - your next Options to Compare

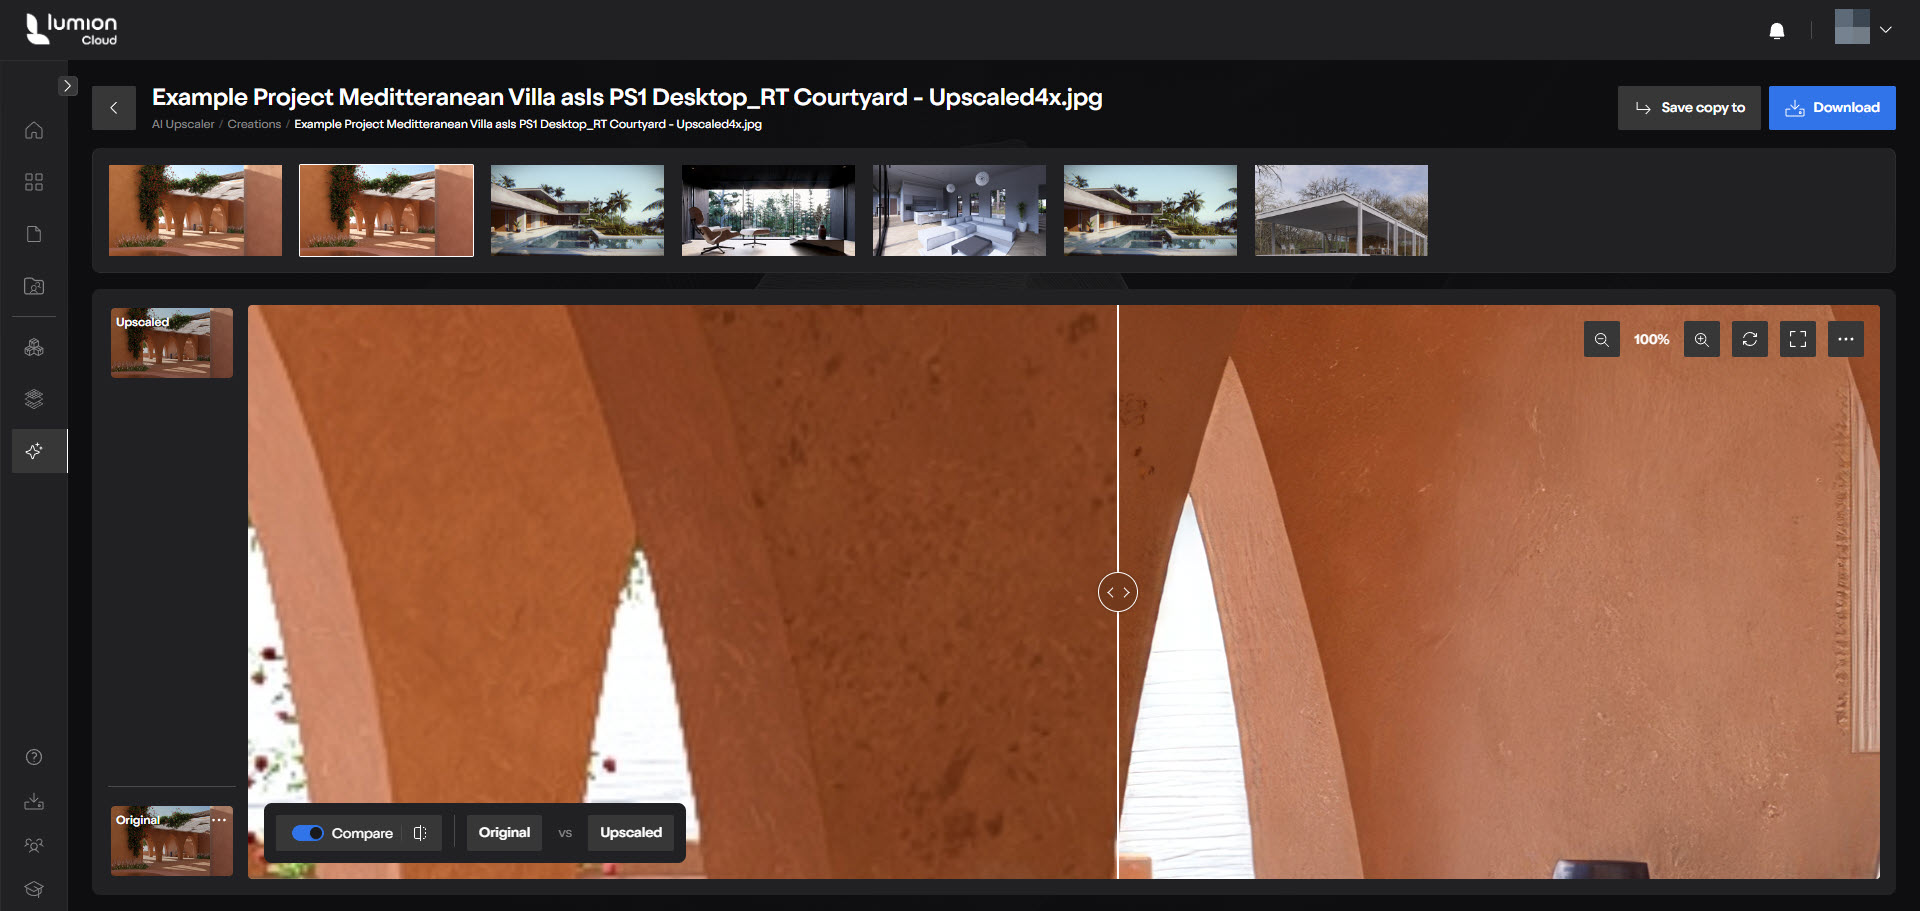
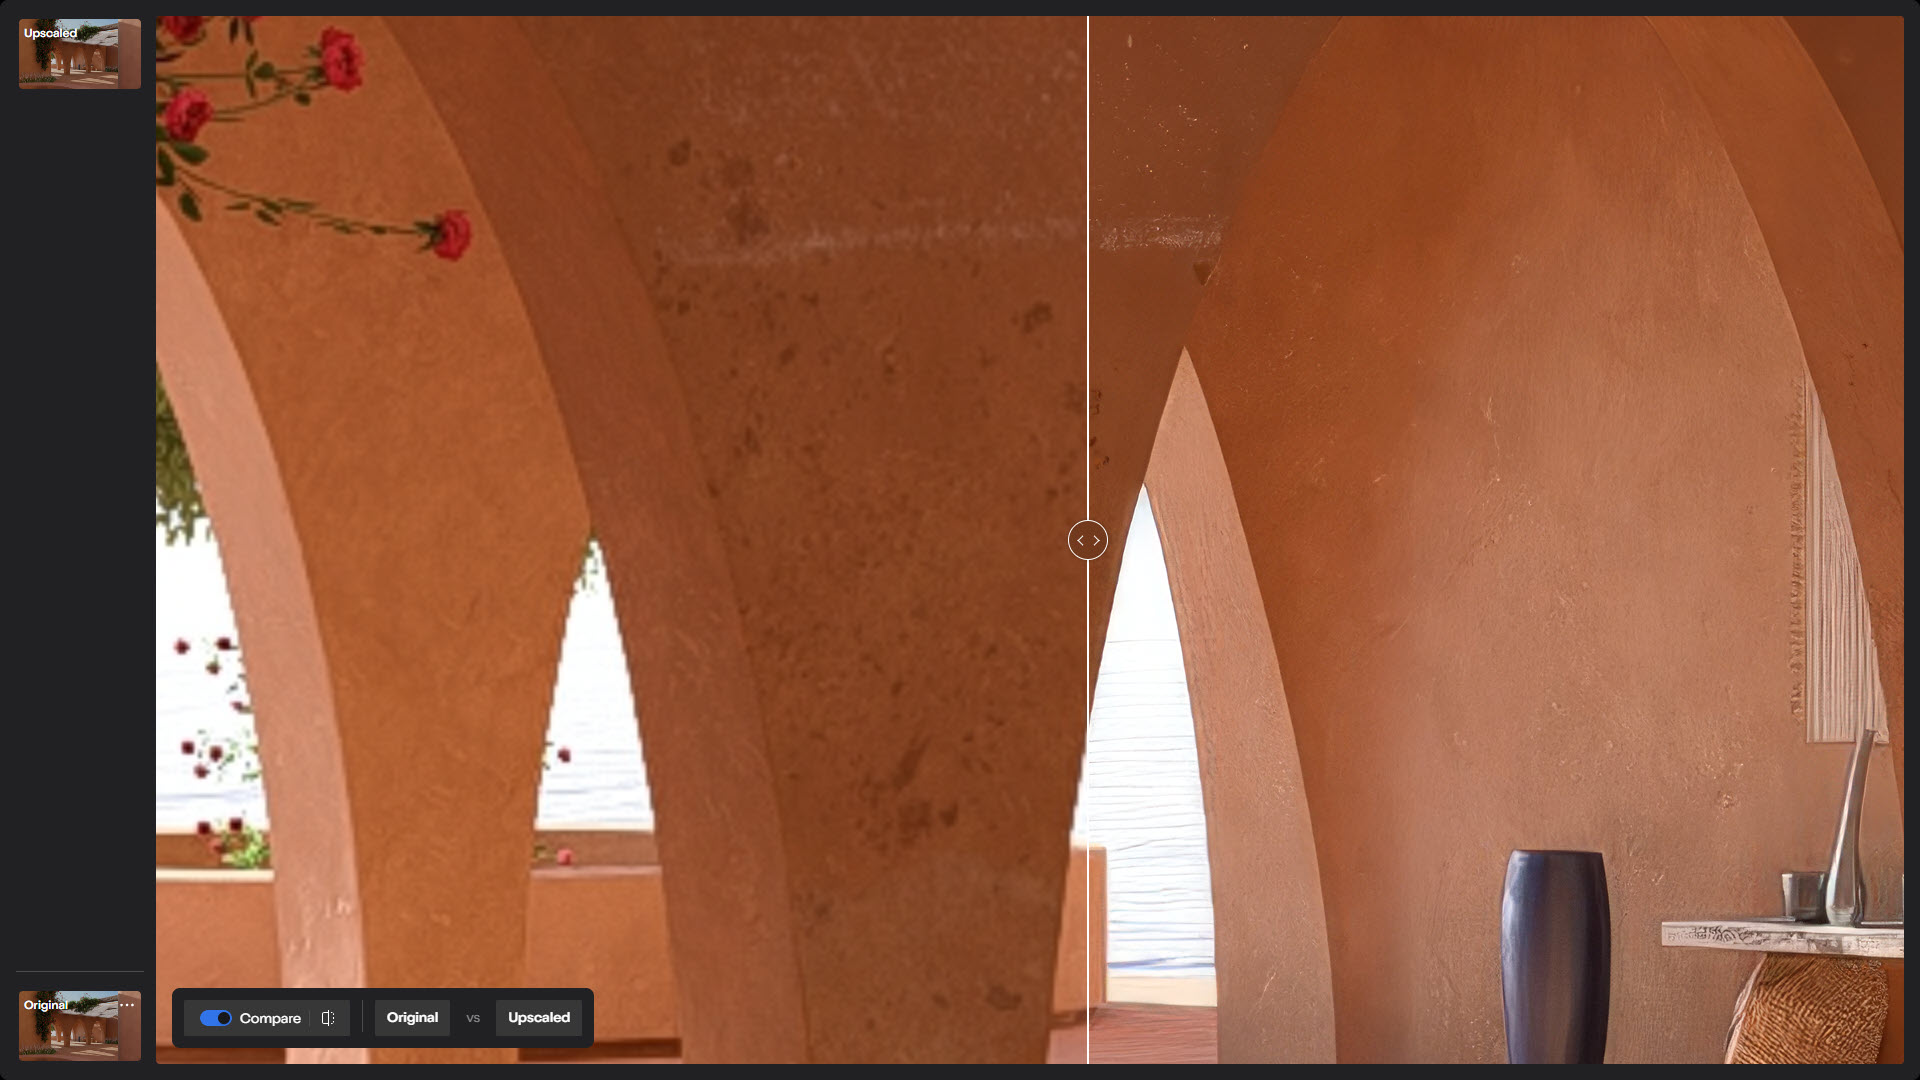
2.3.4: Comparing side by side - at 100%
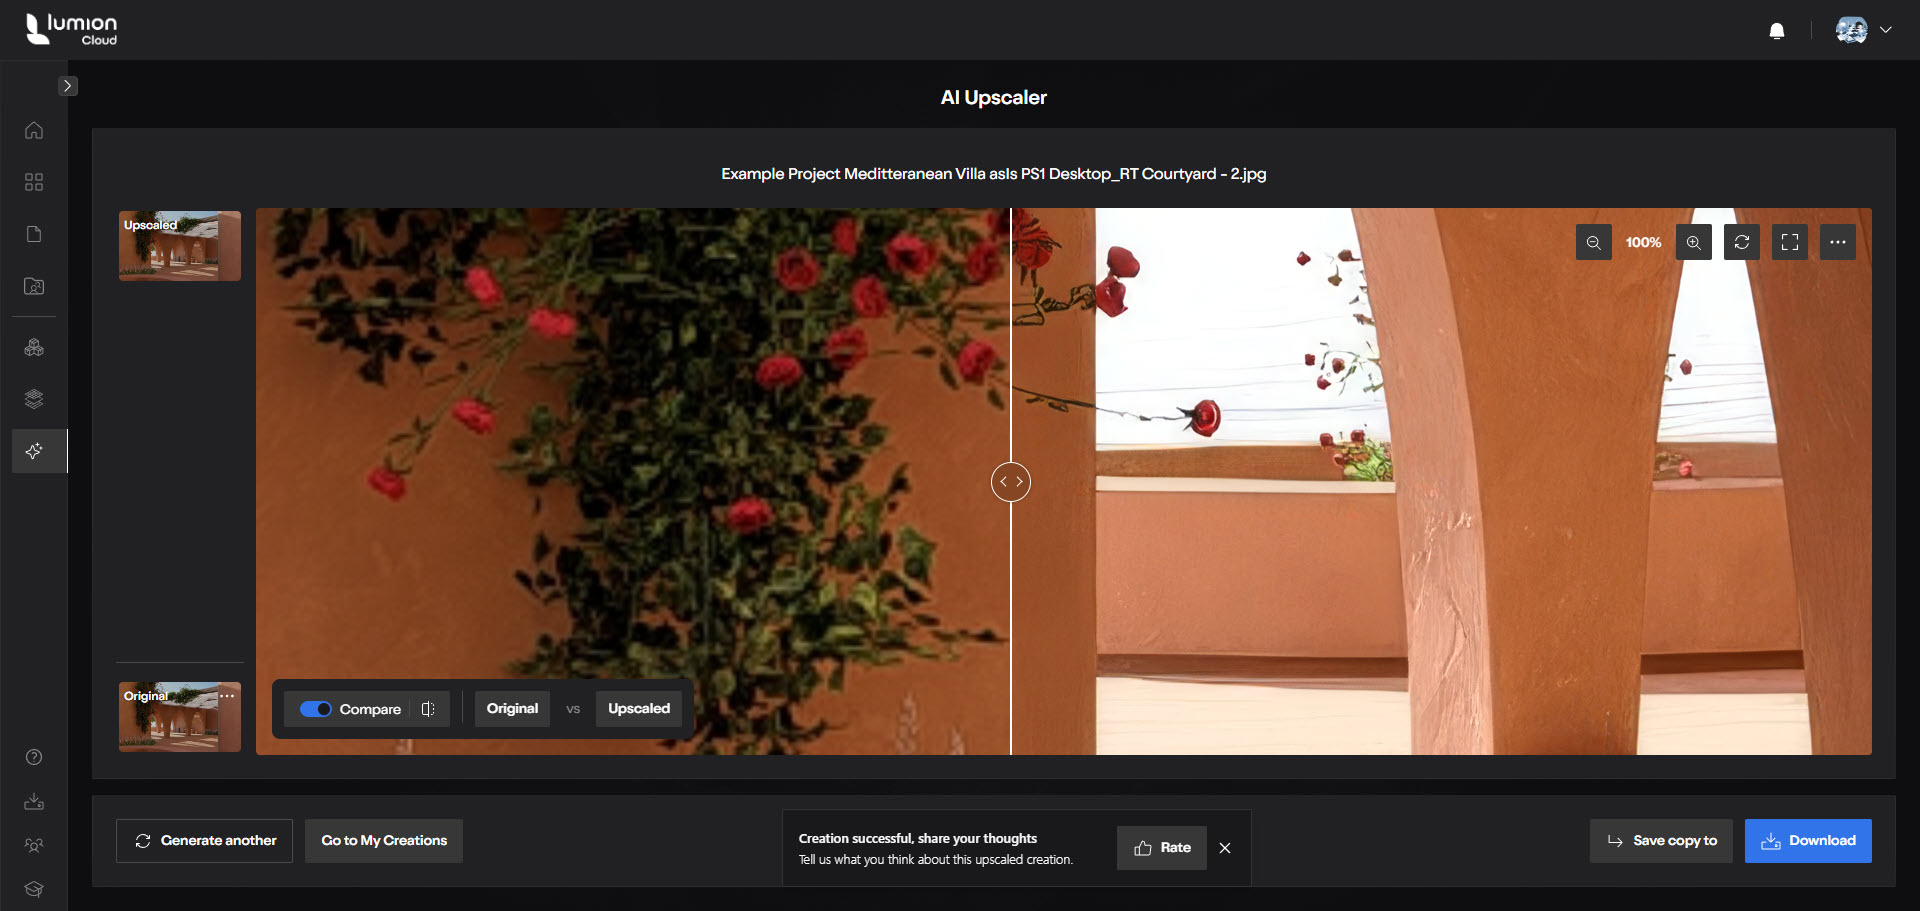
(click to enlarge)
Tip: You can type in the value for the Zoom, if the +- buttons do not take you to the % you want.
(click to enlarge)
2.3.5: Generate Another or Go to My Creations

2.3.6: File things-Save To or Download


3. Access Directly when selecting an image (already been uploaded):
You can also Upscale existing images you have already uploaded to Renders or Projects. For example in this Project

This image from the Project was selected:

Move your mouse over the image to show the image tools:


The same Upscale Options and steps are now available to you as in the above step: Options once your file is Uploaded

4. View your Upscaled Images: Your Upscale Creations:

You can use the middle mouse button to scroll up and down the thumbnails of Upscaled images, or use the Up and Down arrows:


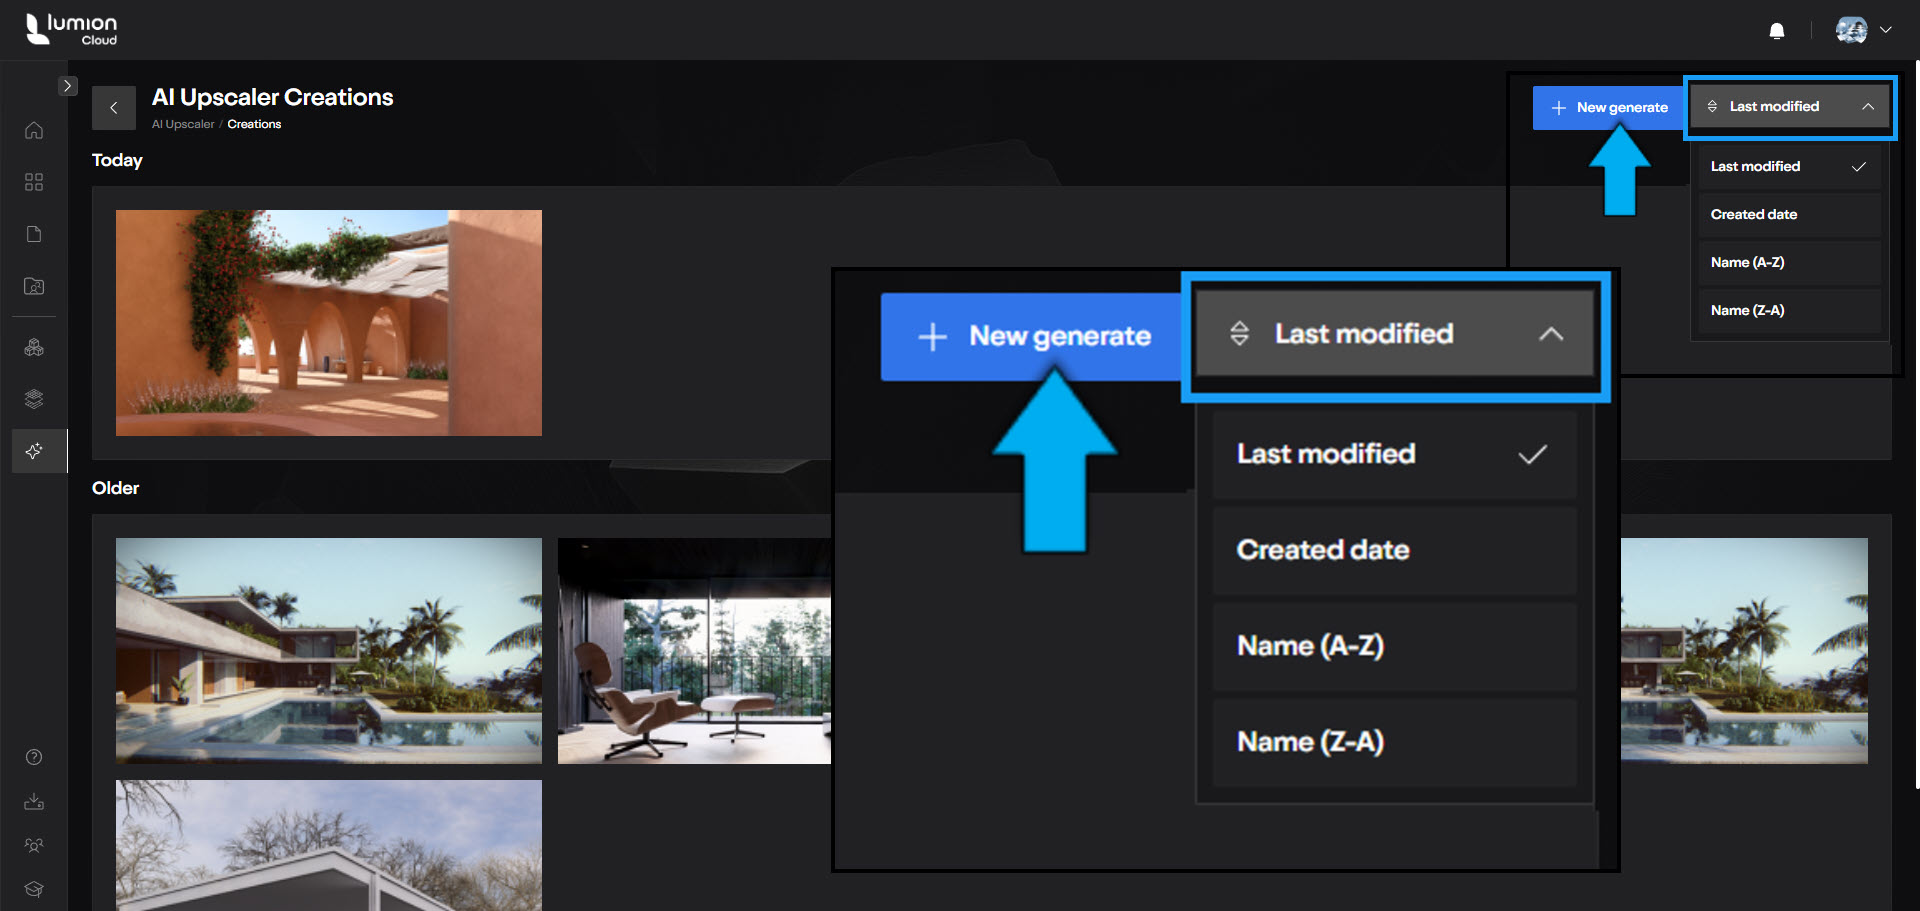
4.1: New Generate
Goes to the screen for you to upload and create a new Upscaled image: Upload Menu.
Last Modified -- Created Date -- Name (A-Z) -- Name (Z-A) for sorting your view of the Upscaled Creations.
5. How does the Upscaling Work:
At the moment, the maximum output resolution for AI Upscales via Lumion Cloud is 96 MP.
Depending on the source image, you can select between 2X, 4X, and 8X. Larger upscales will take more time to process.
Wanting 2x or more scaling up of the Resolution(Dimensions)?


The Upscaling depends on the resolution/size of the source image you have uploaded, as to how much further Upscaling is possible within the bounds of the maximums, (as shown in the screen)
Upscaling Guide:
-
It scales up to an 8x size; 8K Poster size, 7680x4320, with max of 96MP (megapixels).
-
So if you have a 4K Print (3840x2160), it will Upscale only at 2x to the 8K resolution. Nothing beyond that.
-
96MP is about a resolution of 13,064 × 7,349.
-
So how would you get above the 8x upscale? A Lumion Pro rendered Email resolution may upscale all the way to 10240x5760.
A Desktop image 1920x1080 will Upscale either 2x to 4K 3840x2160, or 4x to 8K 7680x4320.
- Here is a table to assist you with the max resolutions and megapixel limits.
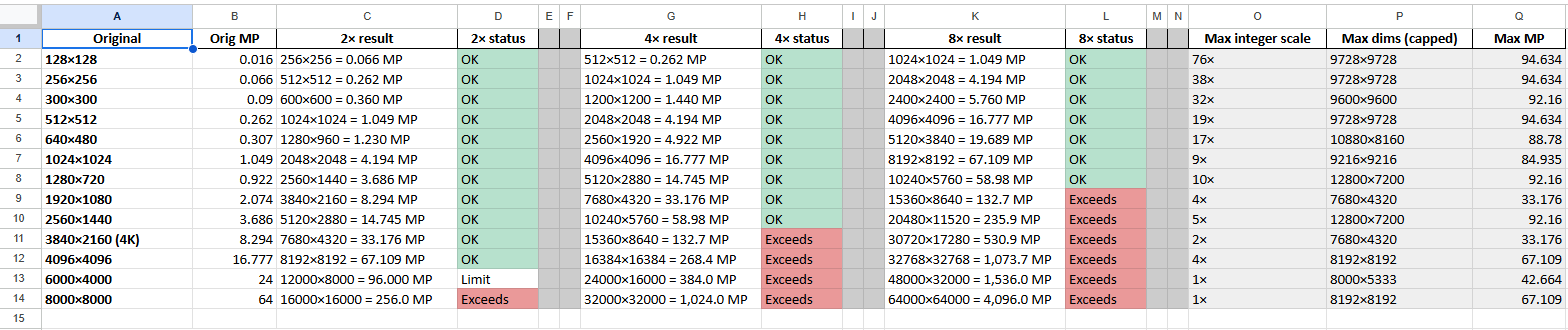
(click on this table to see full sized image:)
-
There are some cases where the resolution can go to 10k.
-
You can go up to 8x for smaller resolutions provided it doesn't exceed the pixel limit of 96MP.
6. Want to do your Upscaling in Lumion Pro rather than Lumion Cloud?
The AI Upscaler in Lumion Pro was introduced for Lumion 2025 and as such uses a certain type of AI Upscaling technology then available.
There is now a newer AI Upscaler introduced in Lumion 2026.0: Section 1.3: AI Upscaler
- Knowledge Base: Lumion 2026.0: Release Notes
See also this article:
- Knowledge Base: How does the AI Upscaler work in Lumion?
The one in Lumion Cloud uses a more recent (than for Lumion 2025), and different technology base. So is likely to provide improved quality in more cases.
It is probably a bit more flexible/a generalist in terms of resolution for input.
But it might have a different timeframe to completing the Upscale compared to what hardware is used locally when using Lumion Pro to get the result. And you would have to add in the upload and download (if needed) times as part of looking at the options and workflows involved.
The workflow for Lumion Cloud could include (among others):
-
Ability to upload from Lumion Pro to Lumion Cloud for further tasks such as Upscaling.
-
Upload at any time.
-
Upscale at any time.
- Multipurpose upscaling requirements, for example for client review, but also for provisional print layout.
- It is also available to those that do not have Lumion Pro, for example, Lumion View.
The workflow for Lumion Pro (only) Upscaling could include (among others):
- Rendering then Upscaling, followed by your own review or sending directly to the client.
- You manage your own 360 design-review processes.
- Depending on hardware, you might find that AI Upscaling locally is a little faster. (note: primarily a CPU process).