

Menu
1. Introduction:
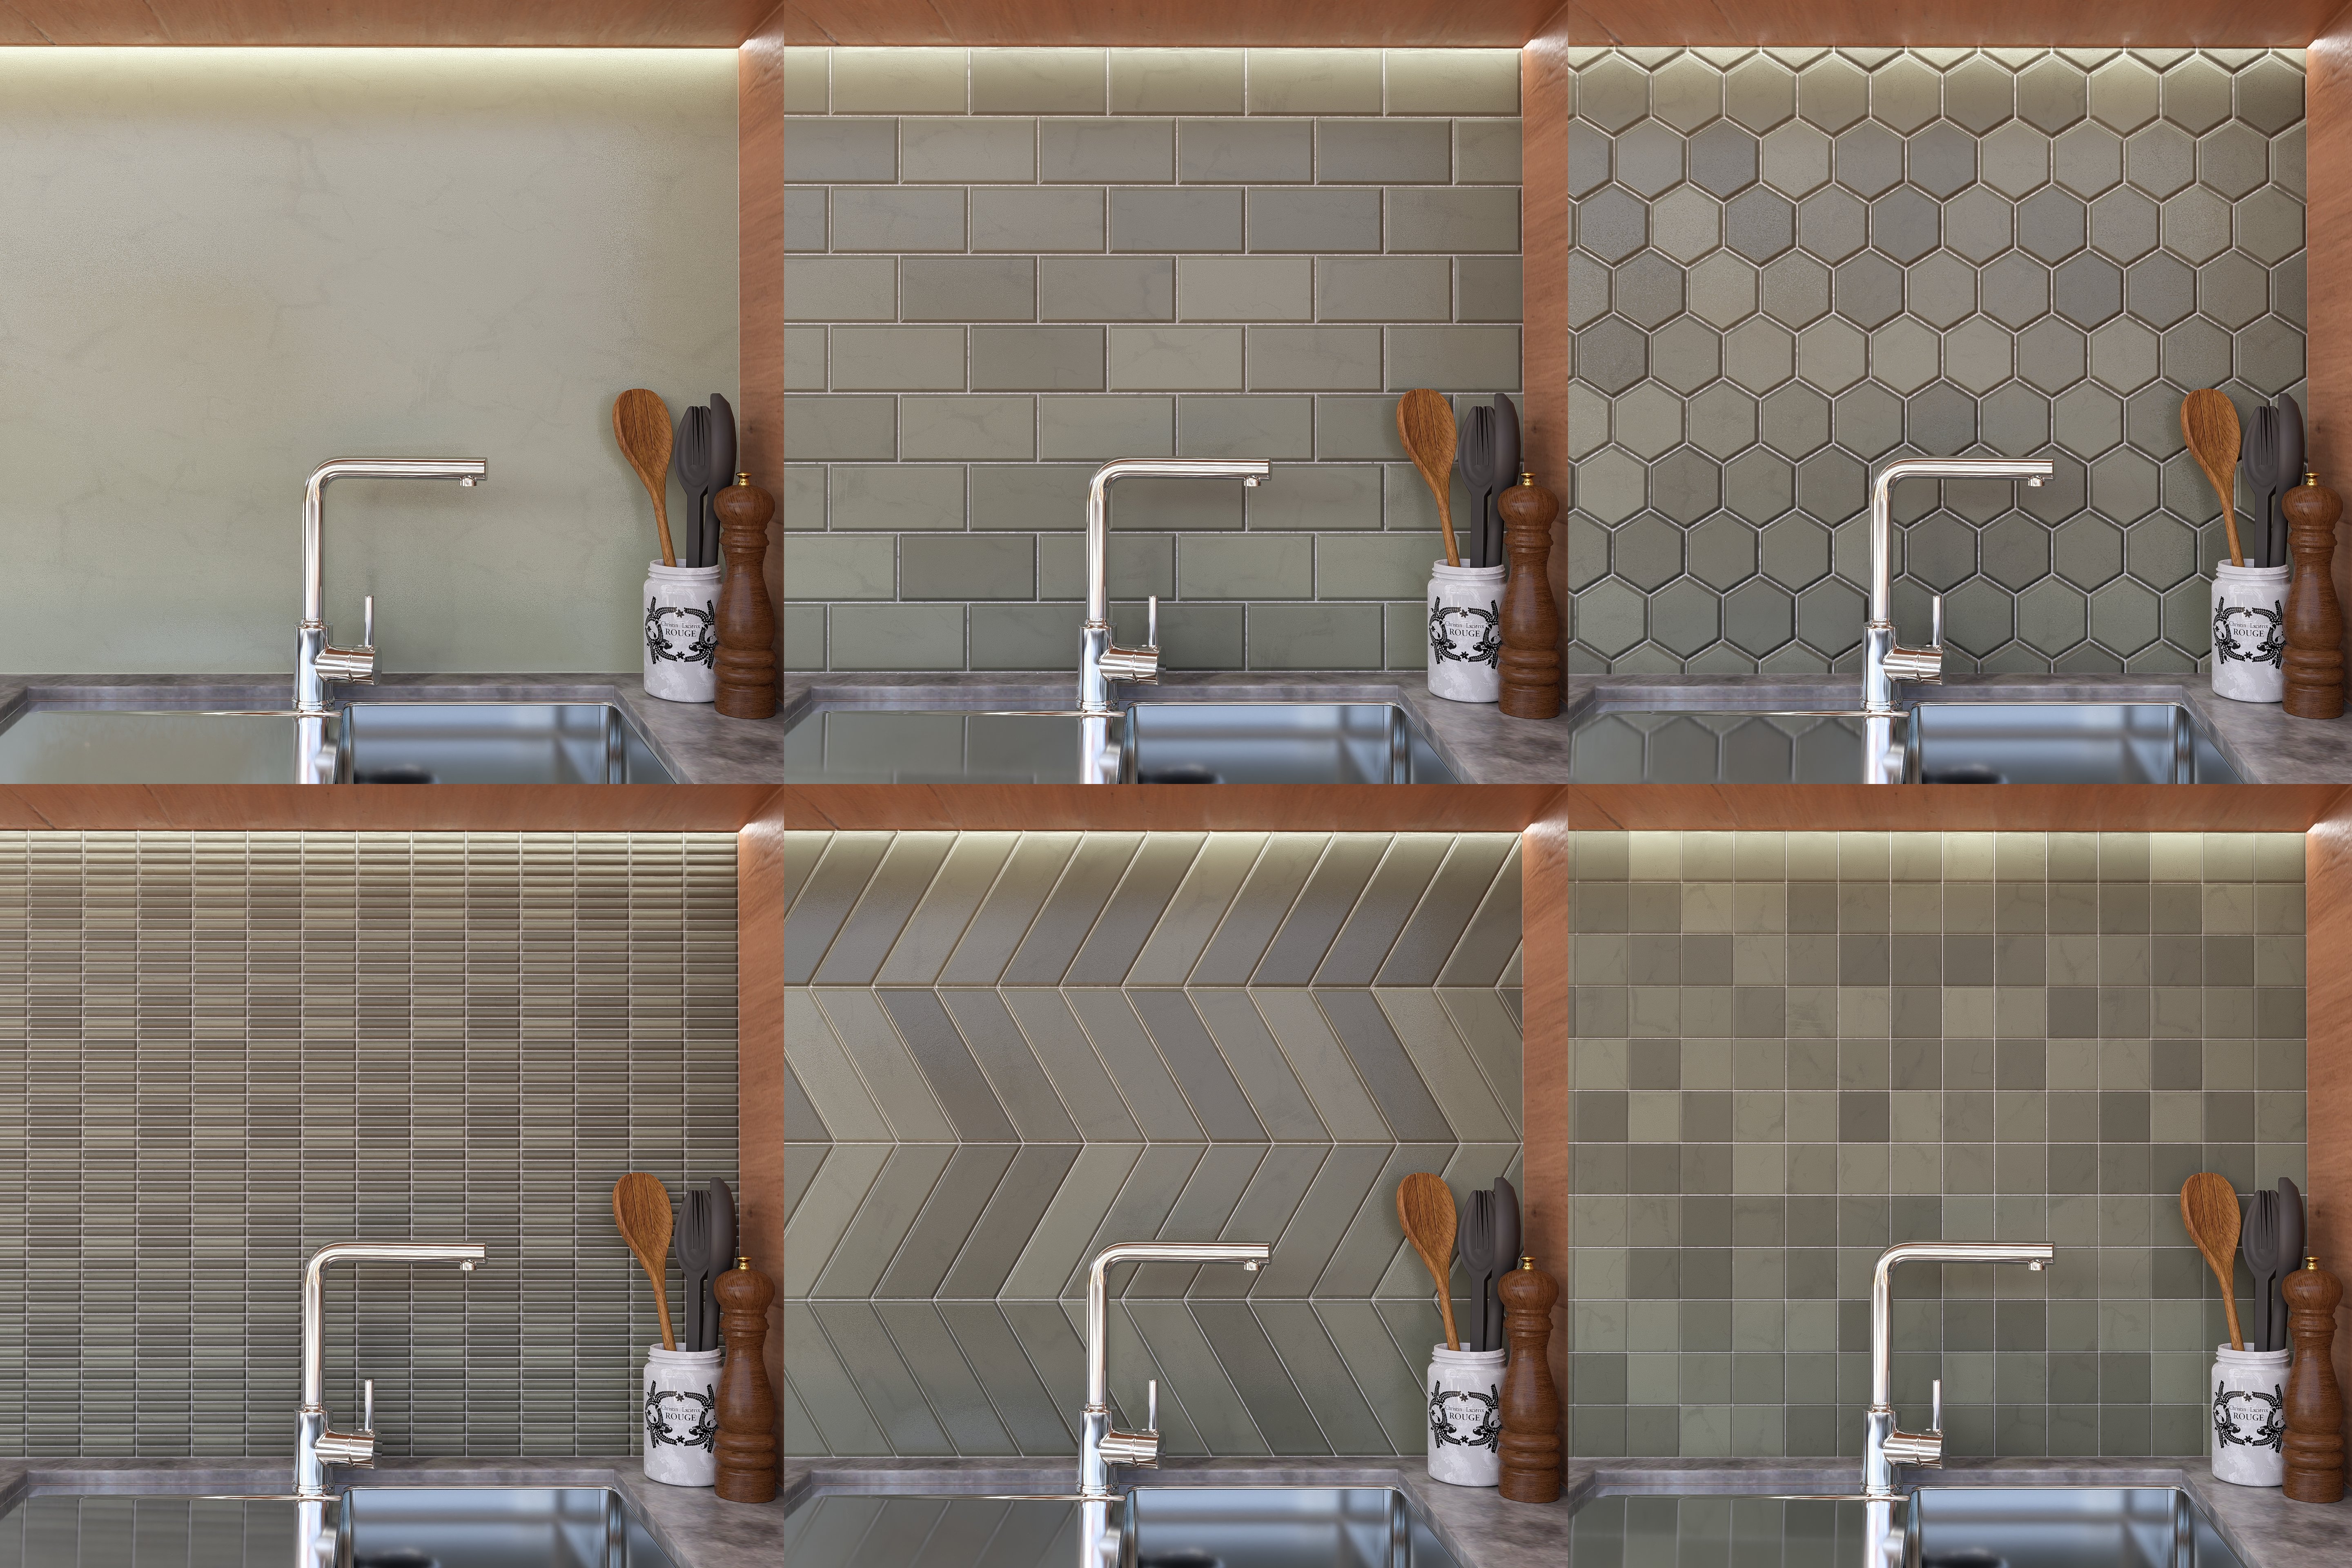
The Pattern Editor feature in Lumion Pro lets you quickly create customizable tile and surface layouts using a single compatible base Material.
Integrated directly into the Standard Material workflow, it includes multiple layout presets and controls for adjusting tile arrangement, grout appearance, offsets, density, angles, and color variation directly inside Lumion. This allows you to rapidly generate and experiment with alternative floor, wall, and decorative surface layouts without needing to create or download multiple separate Materials.
You can use Materials from Lumion's built-in Material Library, create your own in the Lumion Cloud AI Material Generator, or use your own custom and third-party PBR Materials. It can also be combined with Lumion's existing Standard Material controls, including UV Coordinates, Relief, Displacement, Reflectivity, Scale, and Roughness adjustments, to further refine the final result.
Tip: This feature works best with clean or seamless Materials that do not already contain strongly visible grout lines, tile seams, or baked-in layouts.
.gif)
.gif)
2. Getting started with the Pattern Tab
This section covers the initial setup workflow for enabling the Pattern Editor, selecting compatible base Materials, configuring the Pattern settings, and saving the final Material setup for reuse.
The Pattern Editor is not available for the following Material types: Glass, Fur, 3D Grass, Leaves & Water
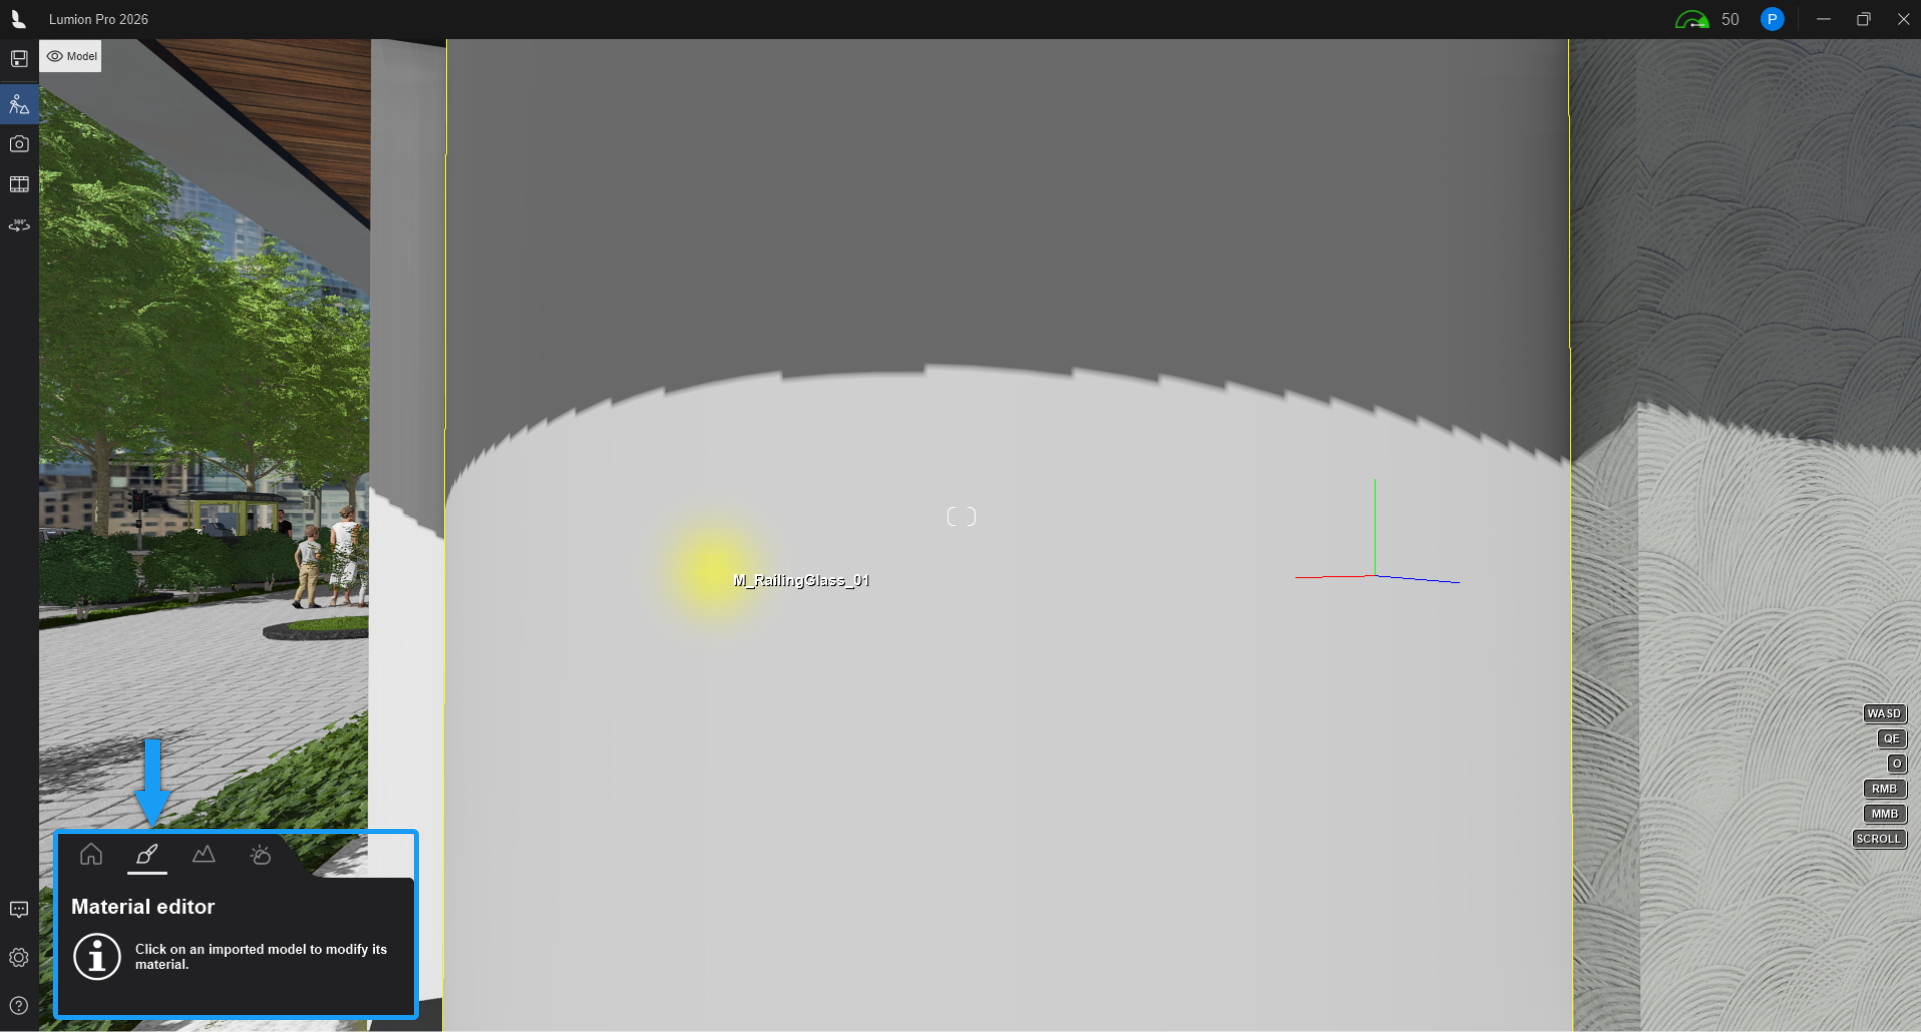
2.1 Select the Surface you want to edit:
In Build Mode, open the Material Editor and click the surface you want to apply the Pattern to.
2.2 Select a compatible base Material:
In the Lumion Material Library, select or apply a compatible base Material to the surface.
Good examples can include Smooth Concrete, Marble, Wood Surfaces, Terrazzo, Plaster, and Stone. Where possible, avoid Materials with large baked-in seams, grout lines, or strong repeating patterns.
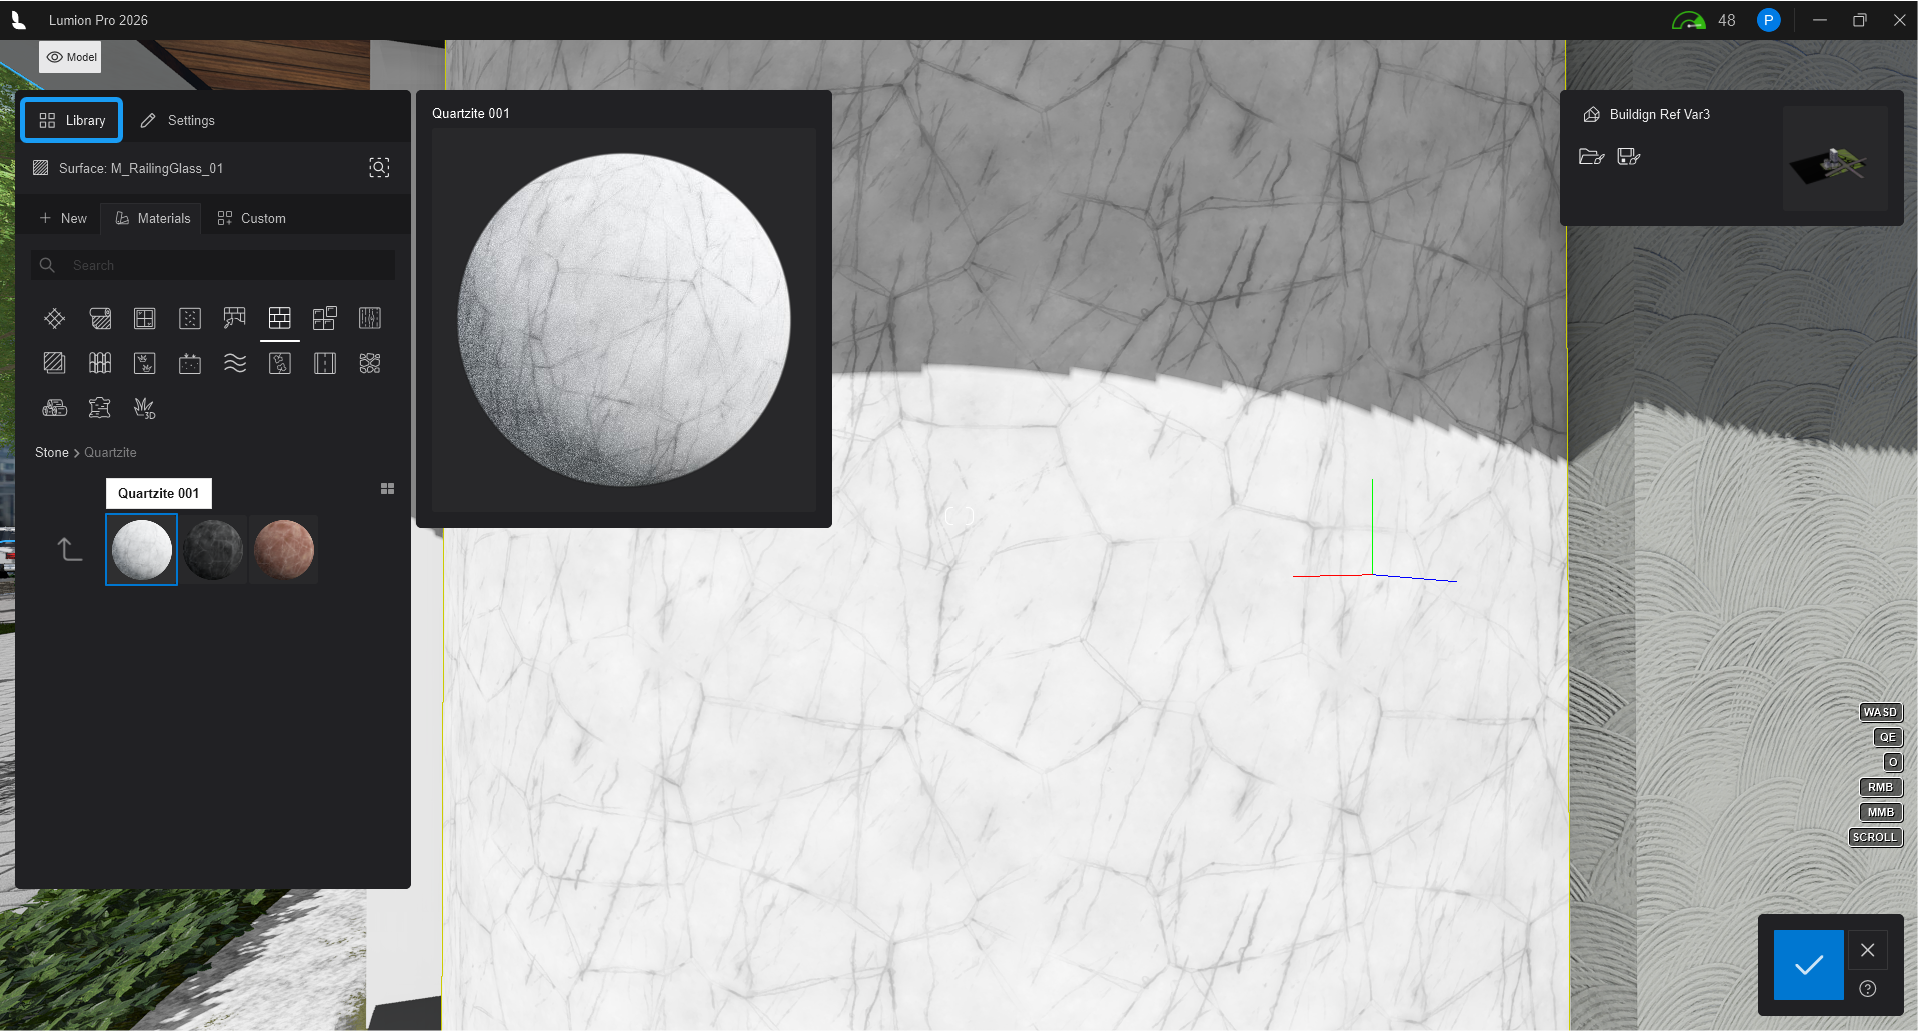
Tip: High-quality PBR Materials with a Displacement Map will add depth to your Grout lines and surface detail.
Looking for additional Materials?
Create custom seamless Materials from photos to use as base Materials with the Pattern Editor:
-
Knowledge Base: How Do You Use The Lumion Cloud AI Material Generator
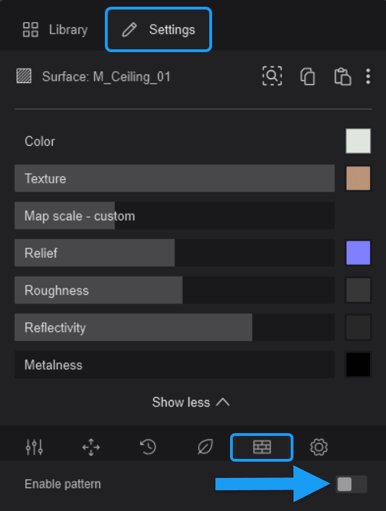
2.3 Enable the Pattern Tab in the Extended Properties
In the Settings tab, go to the Extended Properties section at the bottom of the Standard Material window.
When enabled, the Pattern tab opens and gives you access to the controls and presets.
2.4 Configure the Pattern Settings
Begin by selecting a Pattern Preset, then adjust the Tiling and Grout settings to achieve the desired result.
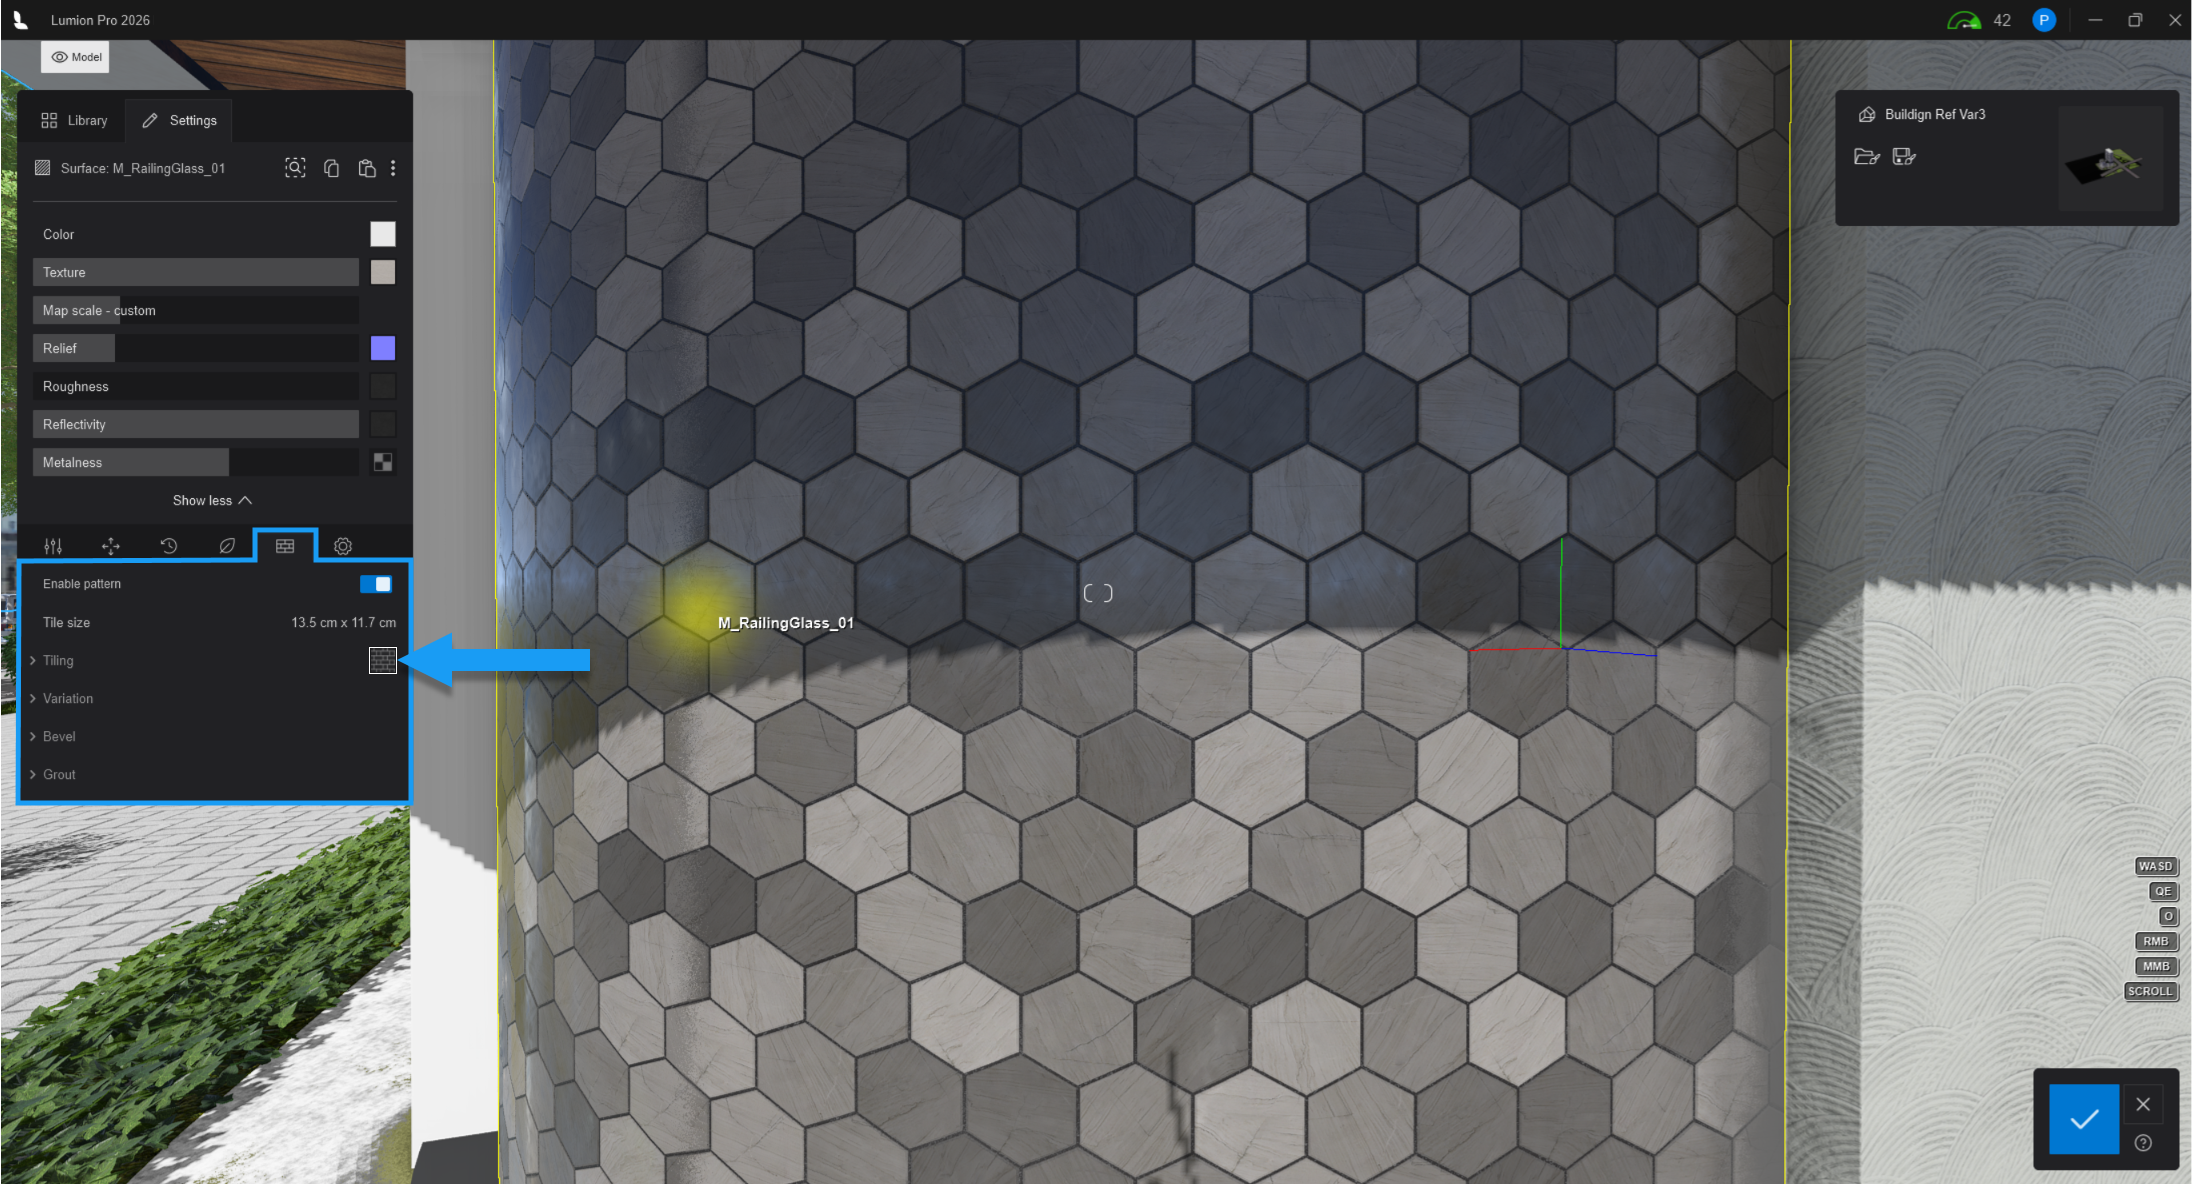
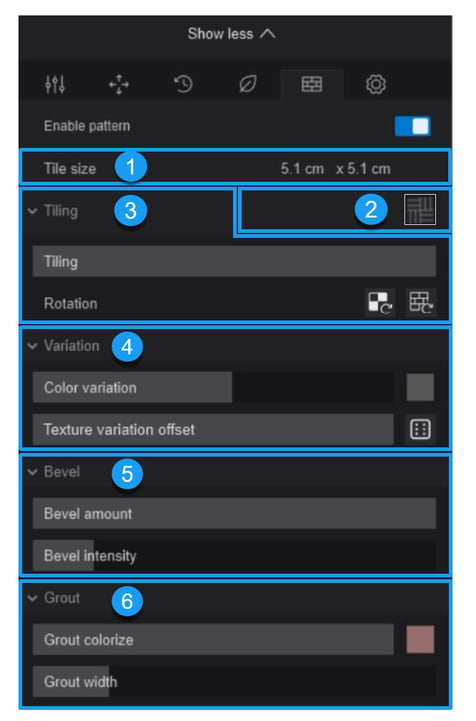
The Pattern Editor is organized into the following sections:
2.5 Refining the appearance:
After configuring the Pattern Editor, the existing Standard Material settings can be used to customize the final appearance. Controls such as Color, Roughness, Relief, Displacement, Reflectivity, and Extended Properties can significantly change the look of a Material while preserving the underlying Pattern structure.
To learn more about the base Material properties and settings used throughout this article, see:
- Knowledge Base: What do the properties of the Standard Material mean in Lumion 2023 and newer?
- Knowledge Base: Lighting (See Materials section)
Additional information on how Pattern Editor works alongside the existing Standard Material settings is covered later in Section 5: How Pattern Editor interacts with Materials.
2.6 Saving and reusing your Pattern settings:
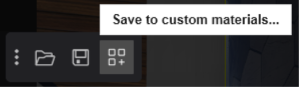
Once configured, your Pattern and Material settings can be copied, saved, and loaded through Lumion's Material workflow.
To learn more, see:
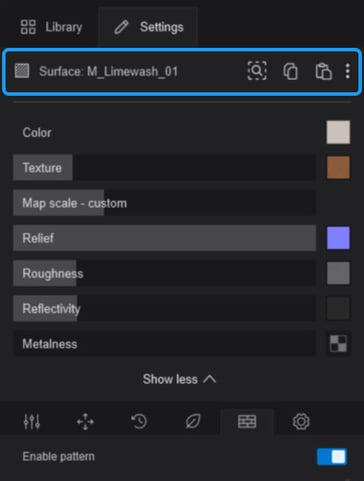
If you're saving your settings to the Custom Materials folder, you can also customize its thumbnail to make it easier to locate and reuse in future Projects.
2.7 Testing multiple Pattern designs with Variations
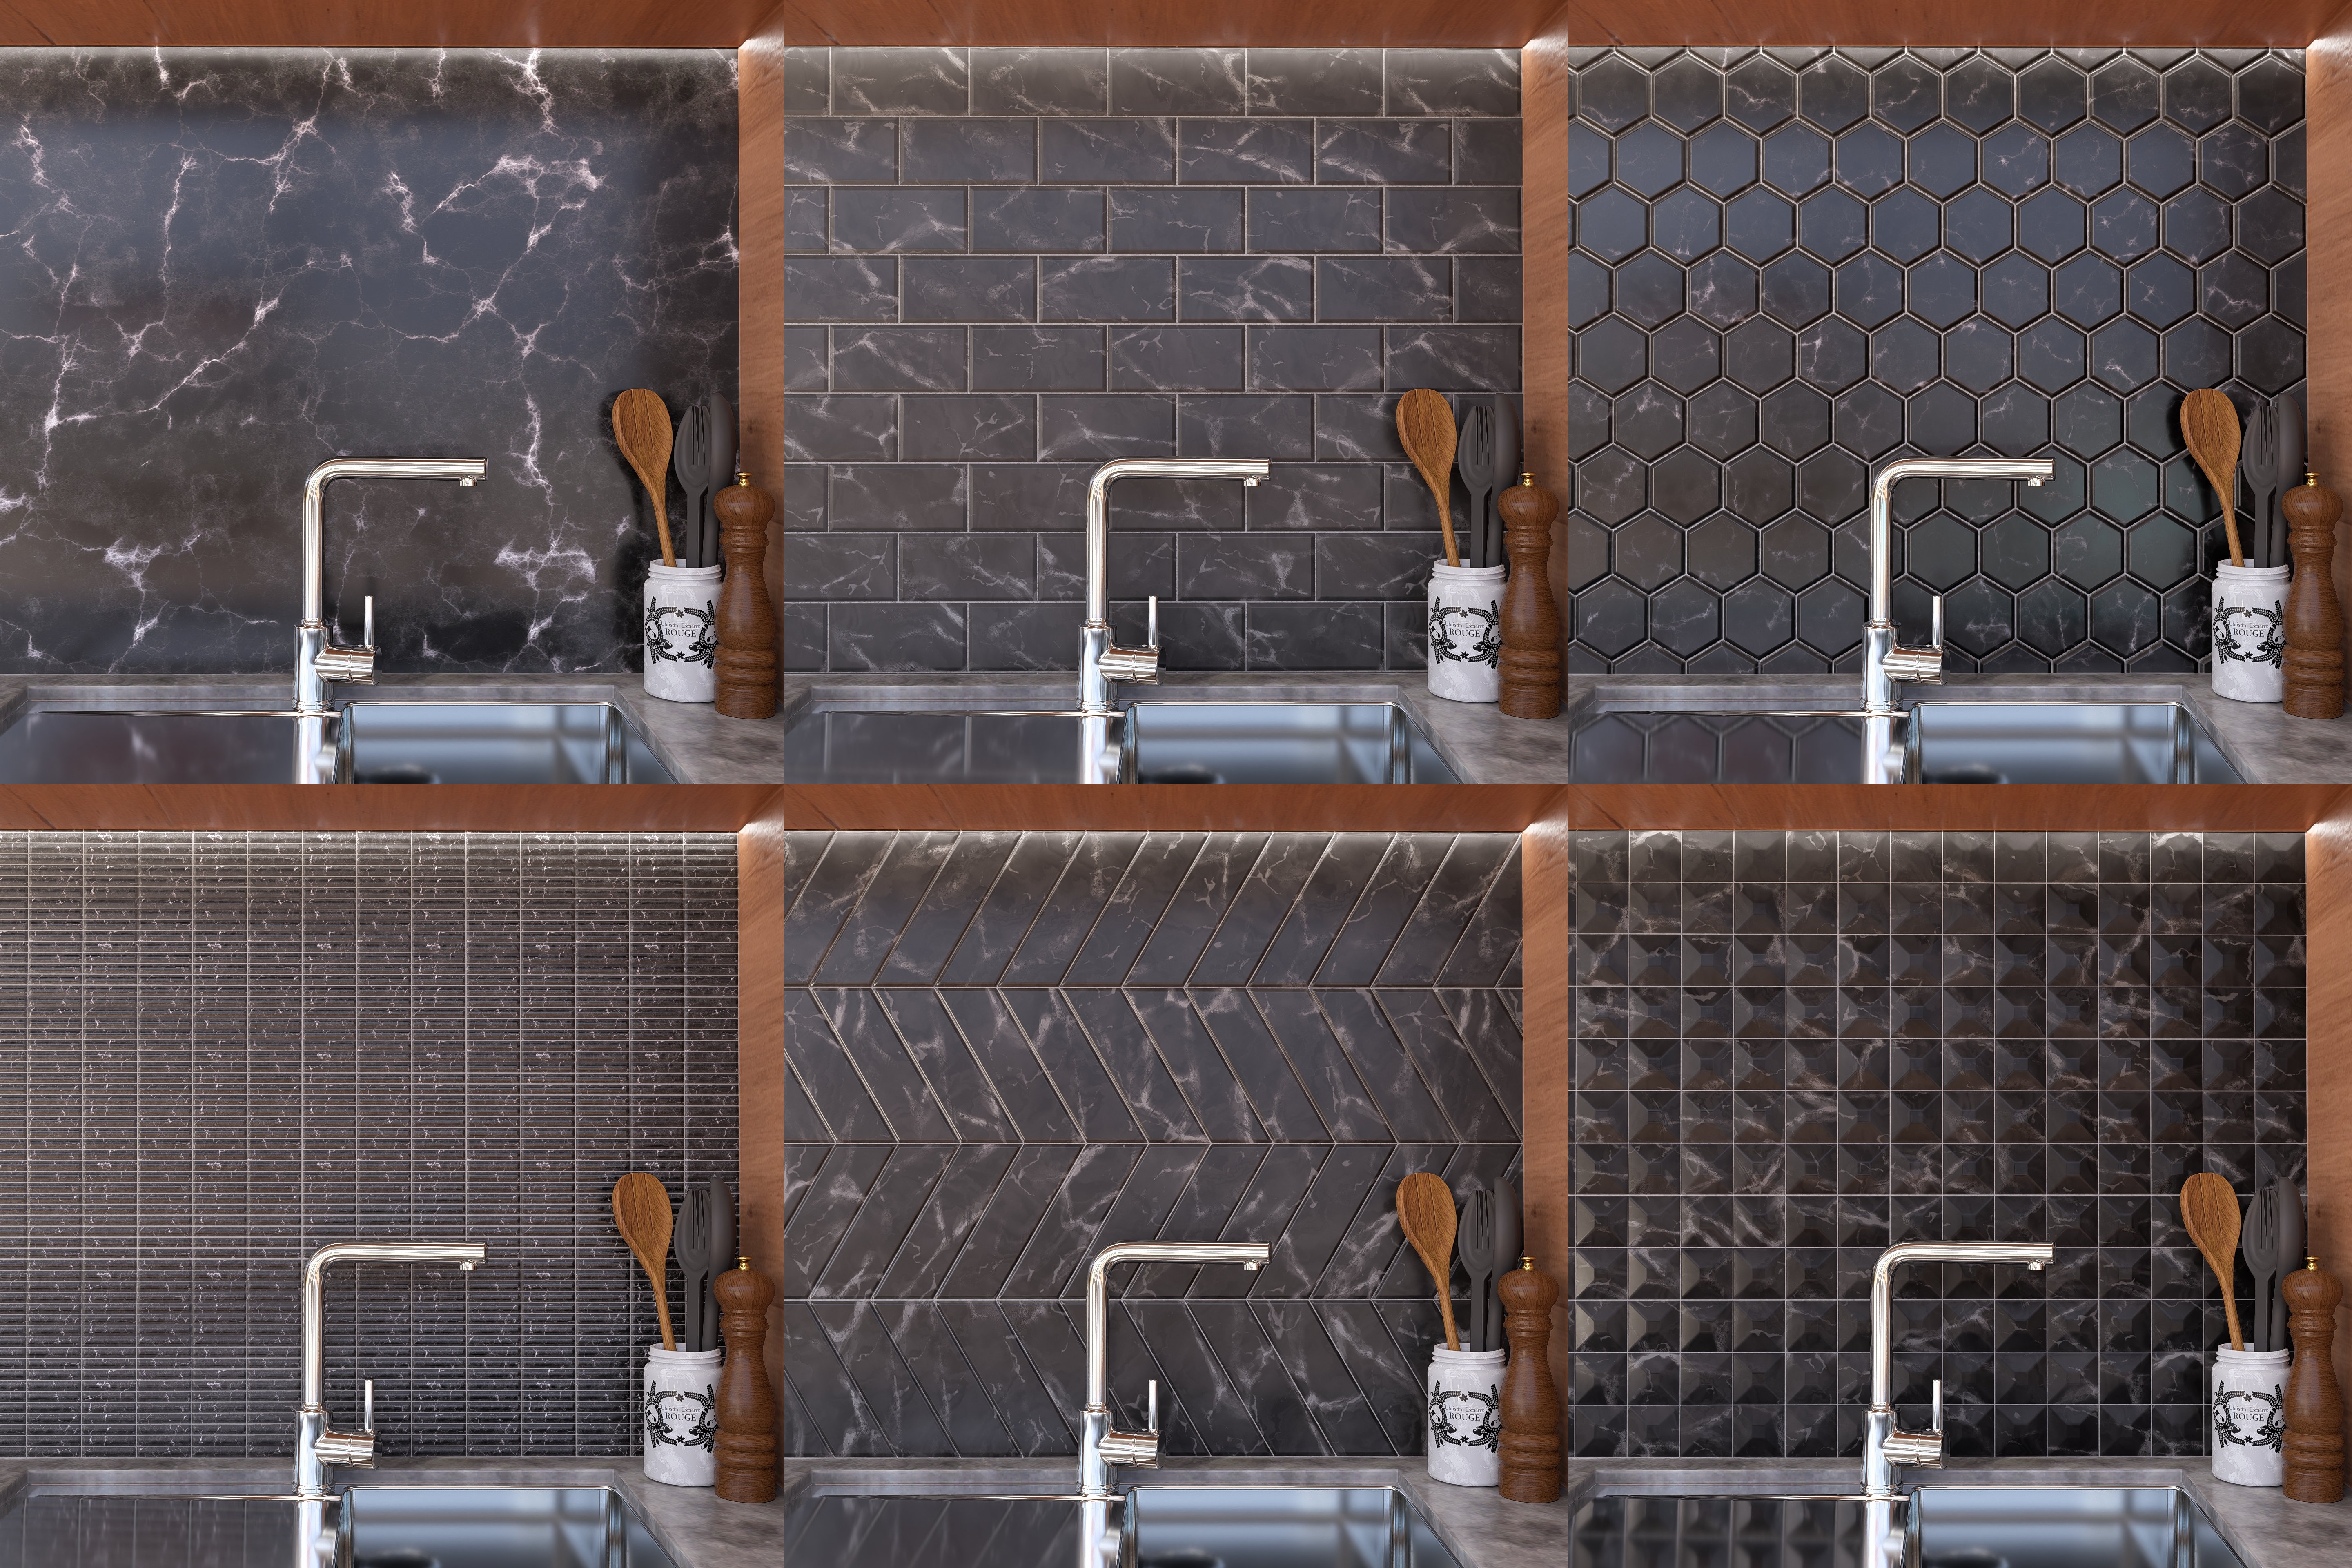
If you want to compare multiple Material and Pattern designs in the same Scene, consider using the Variations feature.
Variations can be useful when testing different Pattern Presets, tile sizes, colors, grout settings, or material finishes without needing to create a separate Project.
-
Knowledge Base: How do you make Variations of a model?
3. Pattern Tab Overview
Once you have enabled the Pattern tab, the settings are organized into collapsible sections for adjusting the Pattern layout and appearance.
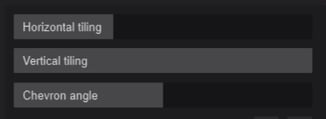
Most sections remain consistent across Pattern Presets. The main preset-dependent controls are found in the Tiling section, where the available settings can change depending on the selected layout. These may include additional Tiling sliders like Chevron Angle, Local Offset, or Global Offset controls. (See Section 4: Pattern Preset Settings)
Tip: If the Tile Size slider does not give you the scale you need, the Map Scale setting inside Standard Material Properties can further increase or decrease the overall Tile size.
The Tile size field provides a real-time reference for the generated tile dimensions.
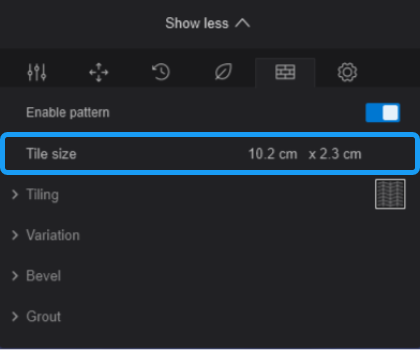
These values update as you adjust the Map Scale setting or the available preset sliders in the Tiling section, helping you check the current tile size while adjusting the Pattern layout.
To change the tile dimensions, adjust the Map Scale in the Standard Material properties or use the available preset-specific Tiling controls. Map Scale changes the overall tile size proportionally, while the Tiling controls can affect the tile layout differently depending on the selected Pattern Preset.
Selects the overall layout style used by the Pattern Editor, such as Basket weave, Chevron, Hexagon, Herringbone, or your choice of a variety of Bond types.
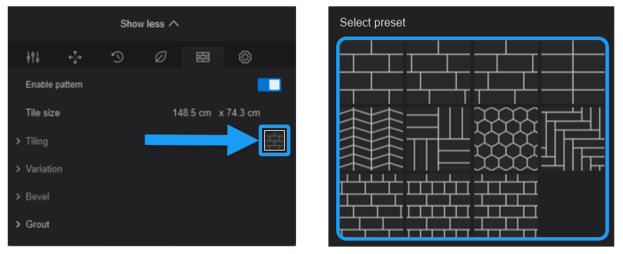
Pattern Presets:
 |
Running Bond 1 | A traditional staggered brick-style layout is commonly used for tiled walls and flooring surfaces. |
 |
Running Bond 2 | Offset variation with a directional stagger pattern flowing in one orientation. |
 |
Running Bond 3 | Mirrored variation of Running Bond 2, reversing the stagger direction across the layout. |
 |
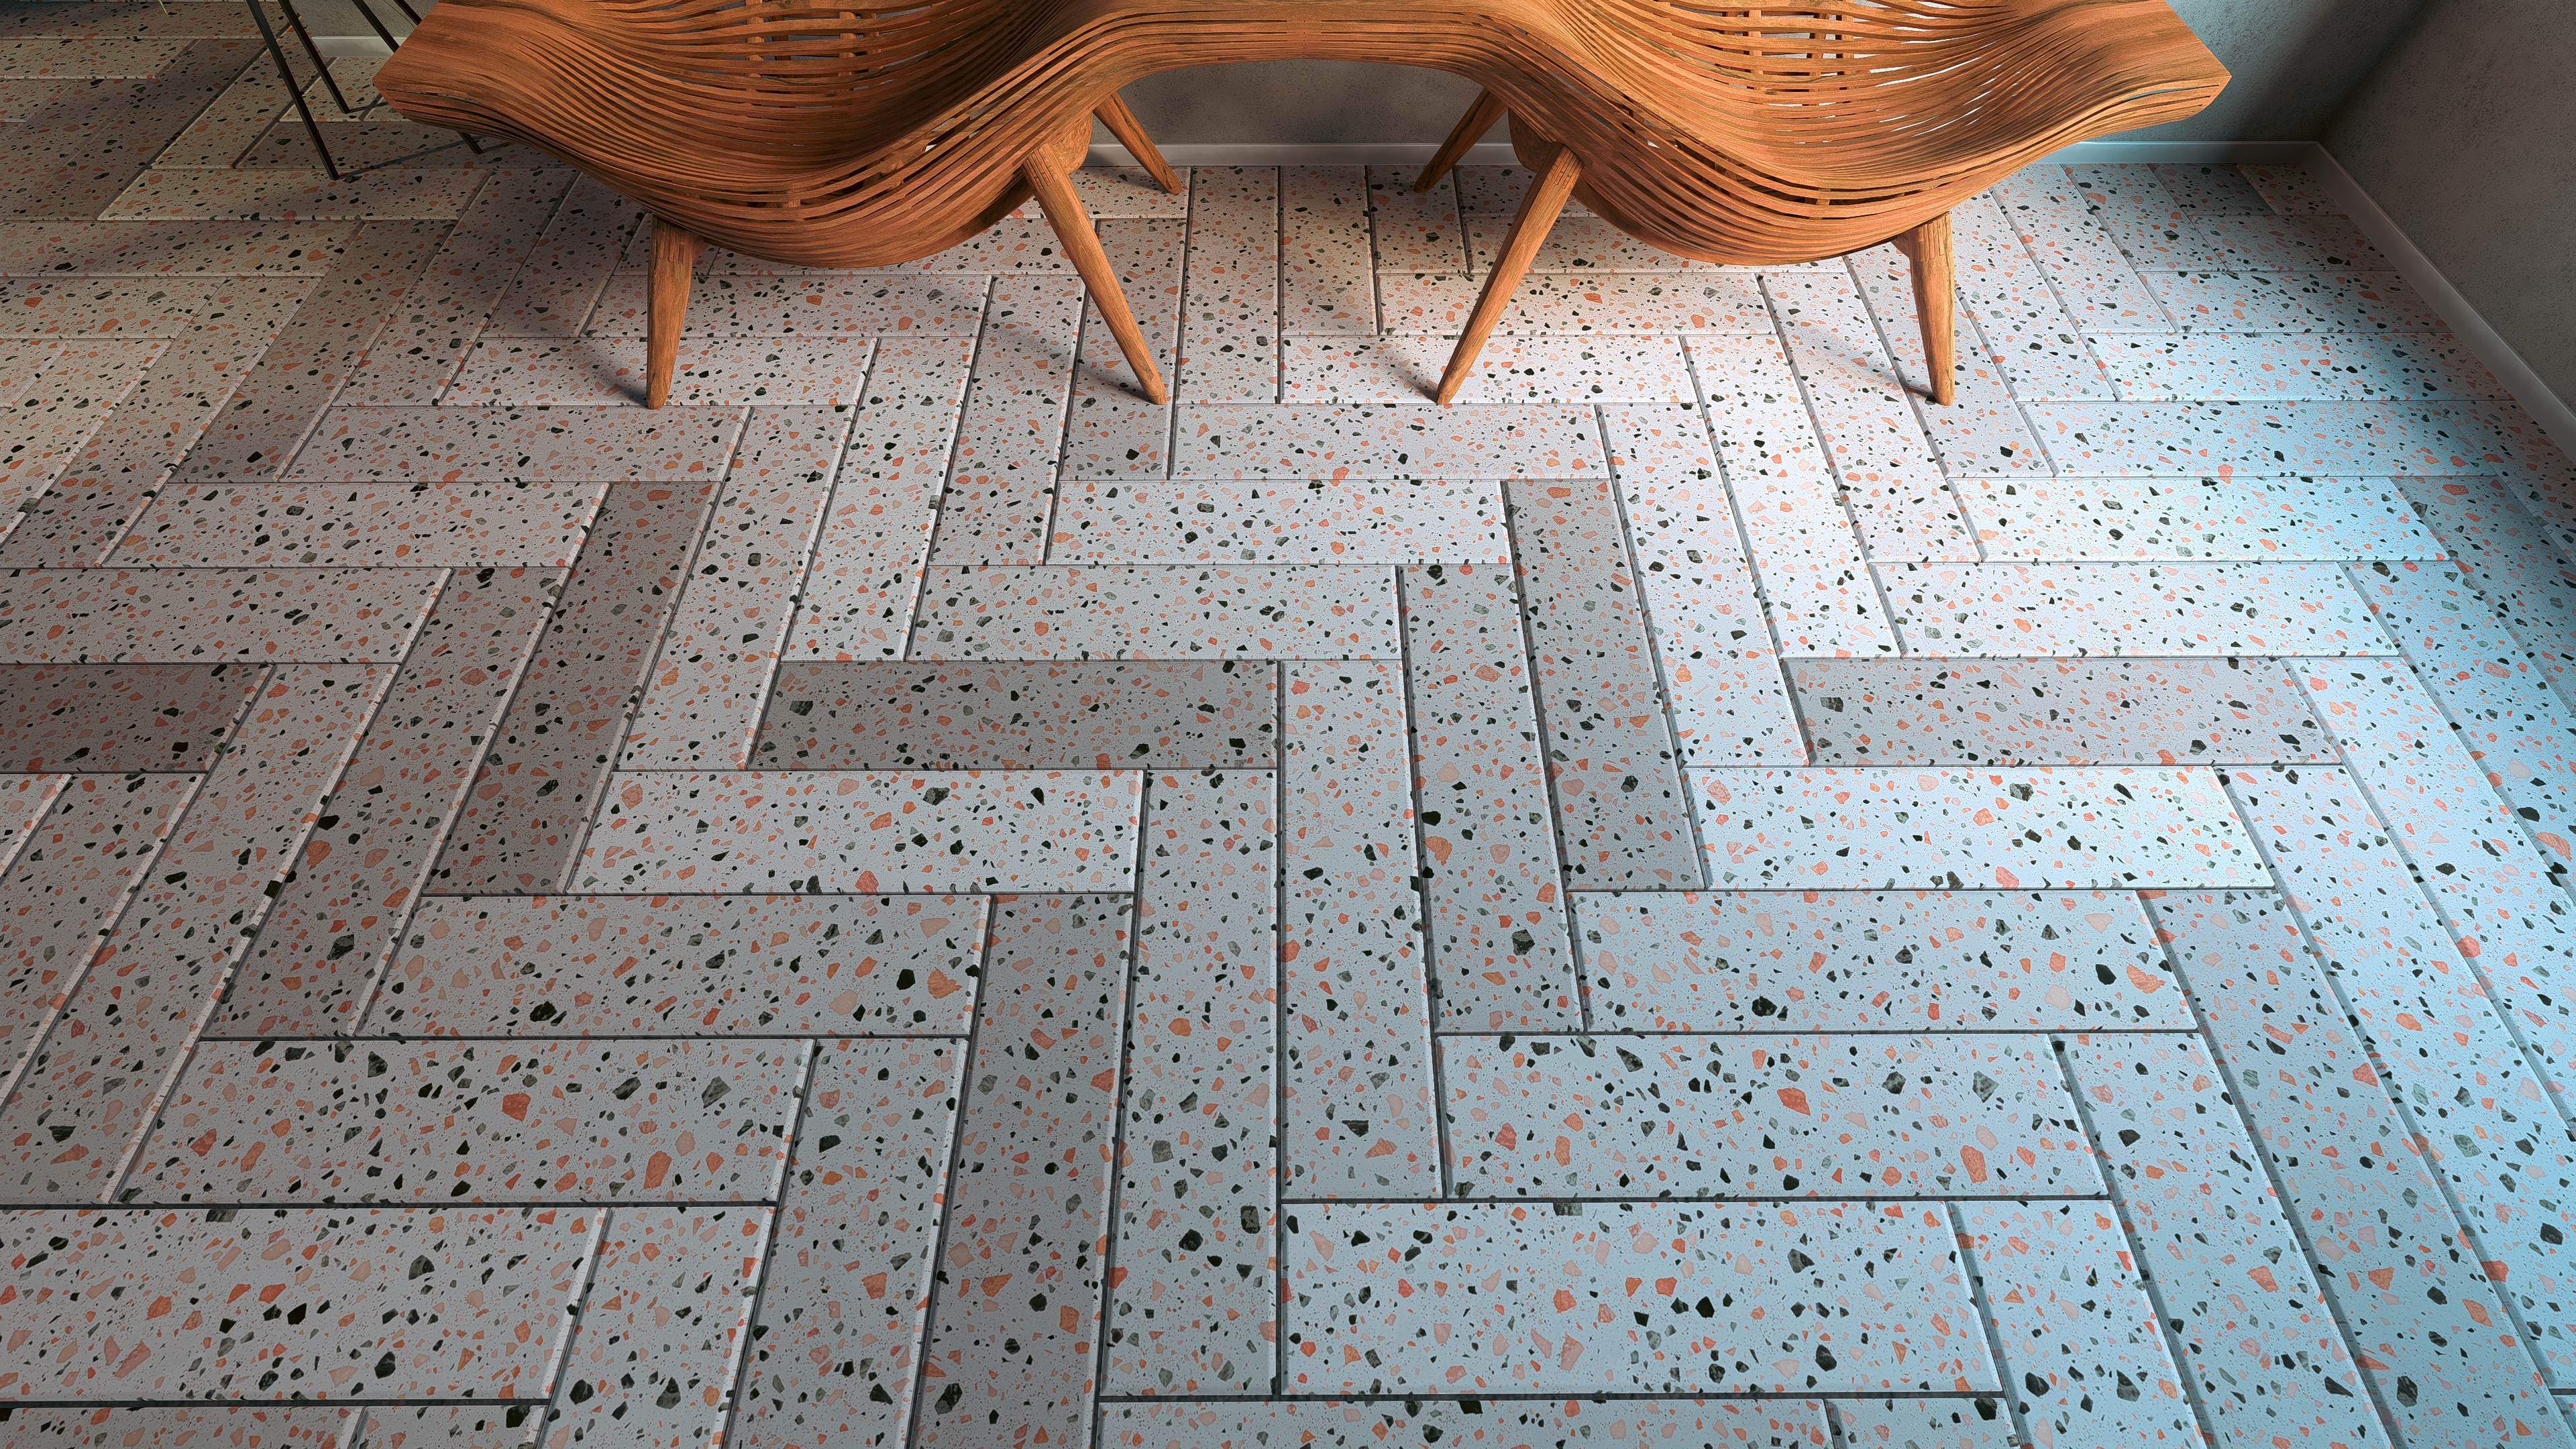
Herringbone | Decorative interlocking 90° angled layout commonly used in parquet flooring and wood surface designs. |
 |
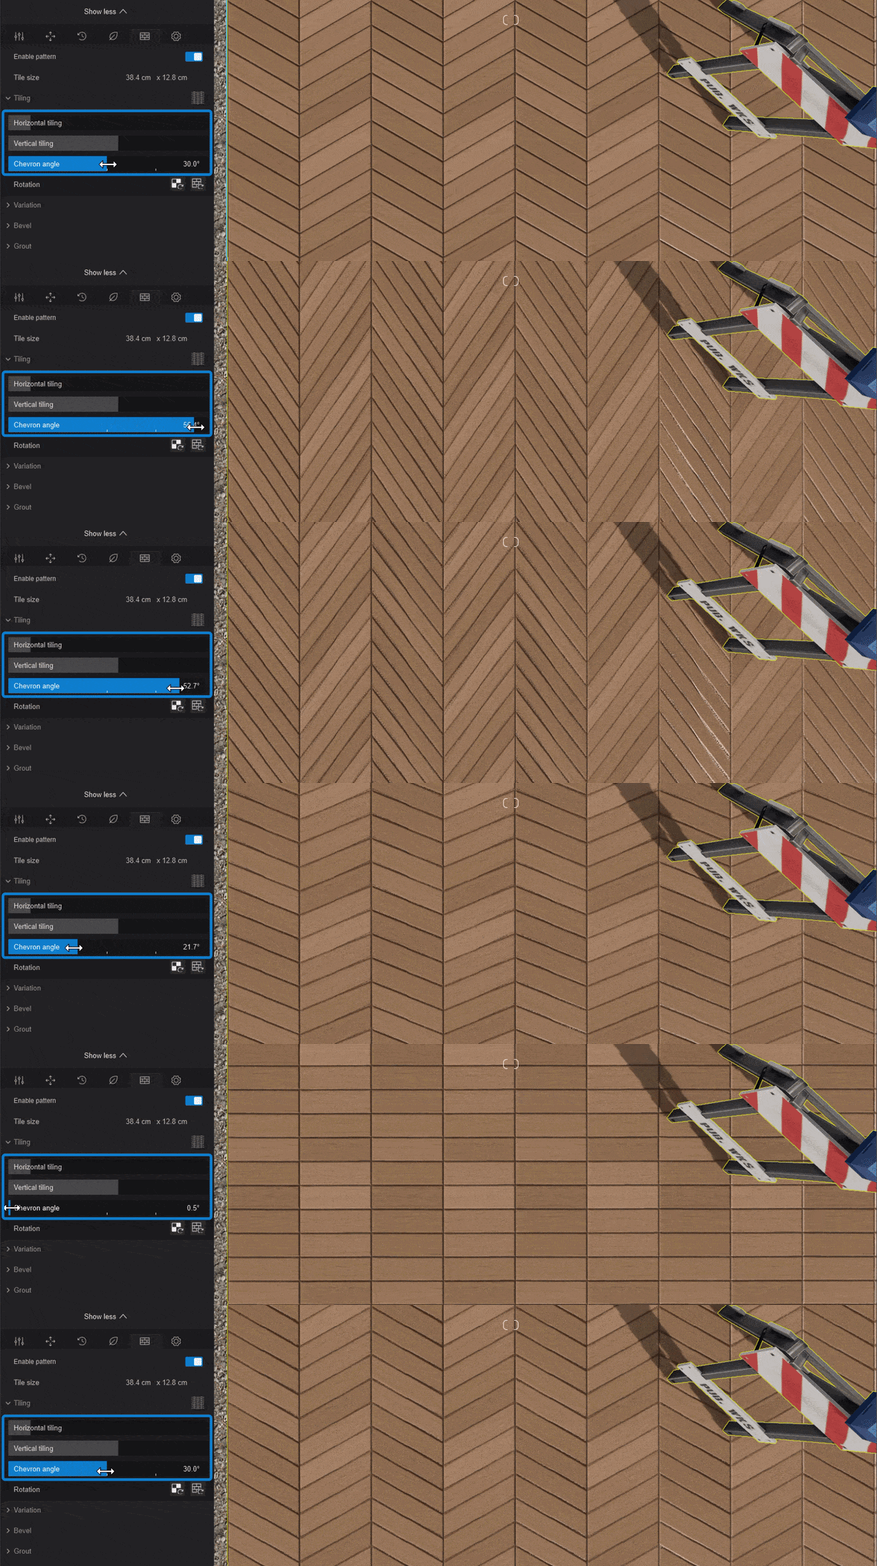
Chevron | Continuous V-shaped tile layout with adjustable Chevron angles for decorative flooring and surface designs (from zero up to 60°) |
 |
Basketweave | Interwoven tile arrangement grouped into repeating sections that create a woven or parquet-style surface appearance. |
 |
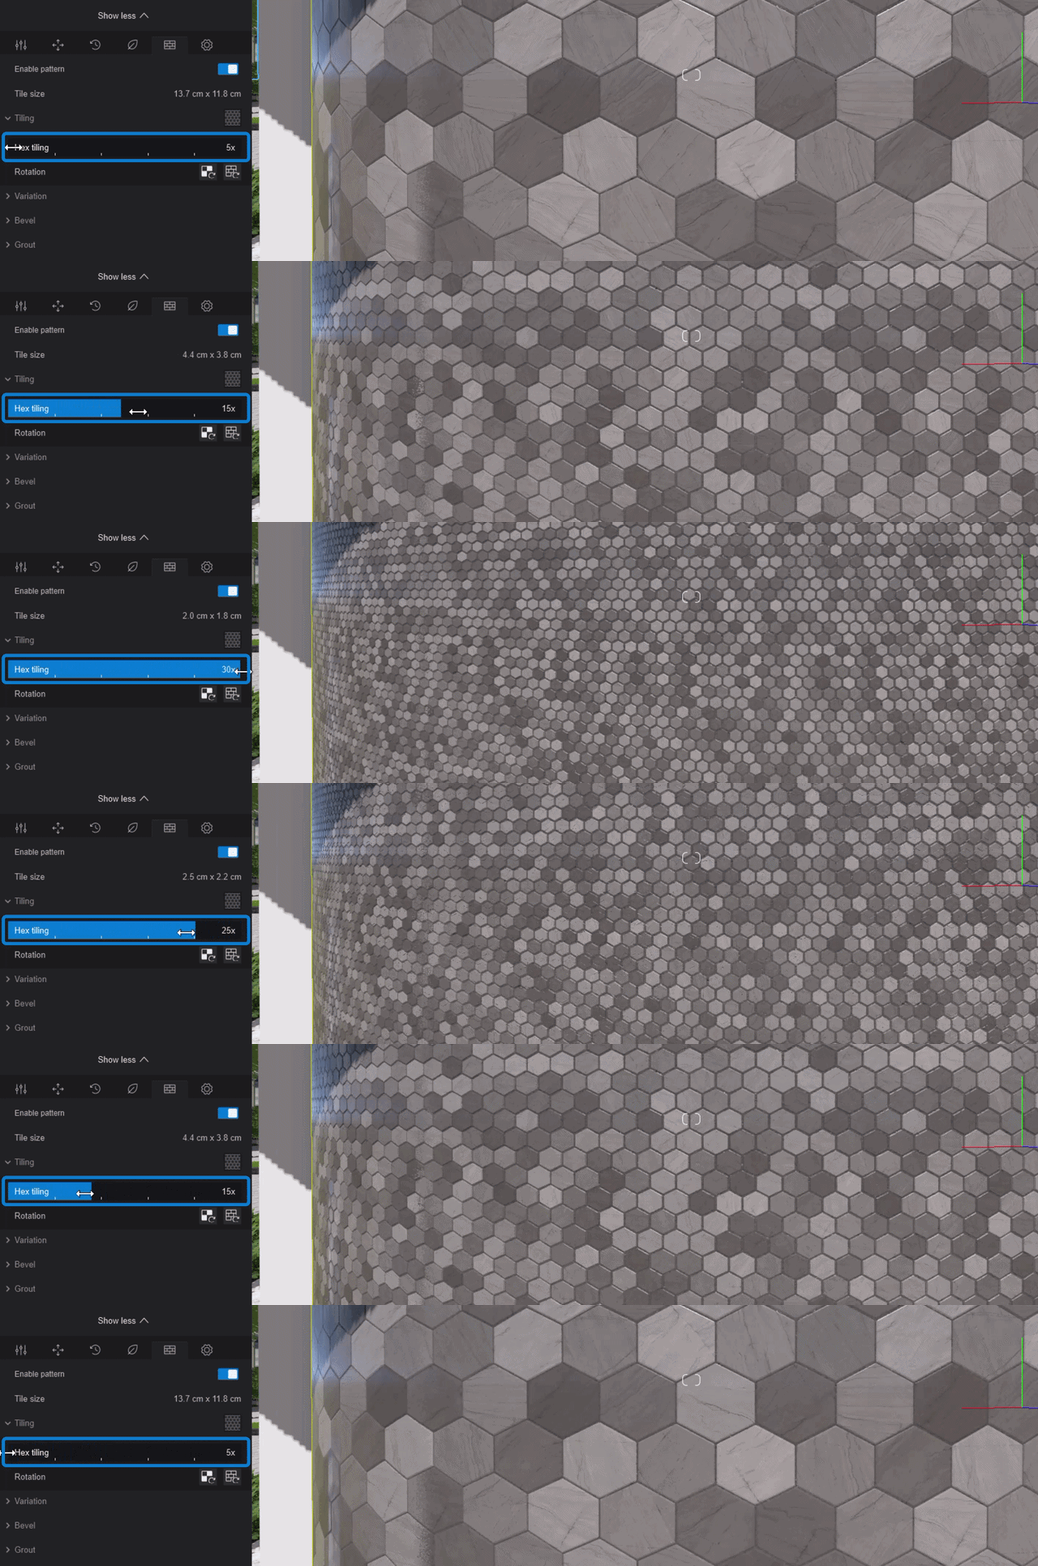
Hexagon | Geometric hexagonal tile layout suitable for decorative floors, walls, and stylized interior surfaces. |
 |
Stack Bond | A Straight-aligned grid-style layout is commonly used for clean, modern tile arrangements. |
 |
American Bond | Traditional brick bond pattern featuring Running Bond courses with periodic header rows. |
 |
English Bond | Structured brick pattern featuring alternating courses of stretchers and headers. |
 |
Flemish Bond | Decorative brick bond pattern that alternates stretchers and headers within the same course. |
See Section 4: Pattern Preset Settings for a detailed breakdown of each preset and its available controls.
The Tiling section is where you select the Pattern Preset and adjust the layout controls for the selected preset.
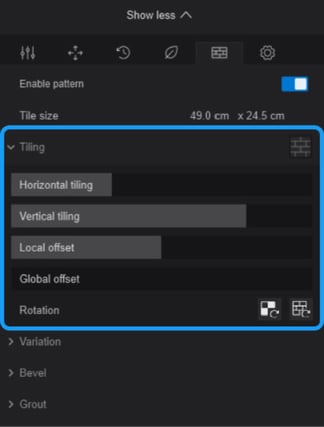
3.3.1 Pattern Preset
Selects one of the available Pattern Presets.
3.3.2 Preset-specific Layout Controls
The controls below the Pattern Preset selector are used to adjust the selected layout. Depending on the preset, this may include tiling, offset, angle, or rotate buttons. These controls are covered in more detail per preset in Section 4: Pattern Preset Settings.
3.3.3 Rotation
The two Rotation buttons let you adjust the orientation in 90° increments, either by rotating only the Texture or by rotating the full Pattern along with the Texture.
-
Use the Rotate Texture 90 Degrees button to rotate the Texture direction, which is useful when the texture detail needs to align with the Pattern
-
Use the Rotate Pattern 90 Degrees button to rotate the Pattern and Texture together.
When the Pattern is rotated by 90°, the Horizontal Tiling and Vertical Tiling values switch automatically to preserve the selected proportions.
Similar visual results can also be achieved with the UV Coordinates rotation settings, depending on whether you want to rotate the Pattern, the Texture, or both together.
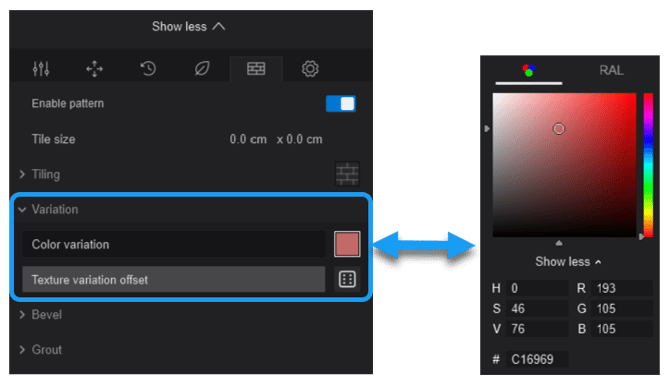
The Variation section controls are common throughout all Pattern Presets and are used to adjust the color and its variation across each pattern.
3.4.1 Color Variation
Adds color variation between individual tiles based on the color selected in the Color Variation Color Picker. At 0%, the setting has no visible effect, and the tiles retain the original base Material appearance. As the slider increases toward 100%, the selected Color Variation color becomes stronger and more dominant across the tiles, while still preserving variation between individual tiles.
This setting only affects the Tiles and does not change the Grout color.
-
Knowledge Base: How do you use specific colors from sources outside Lumion?
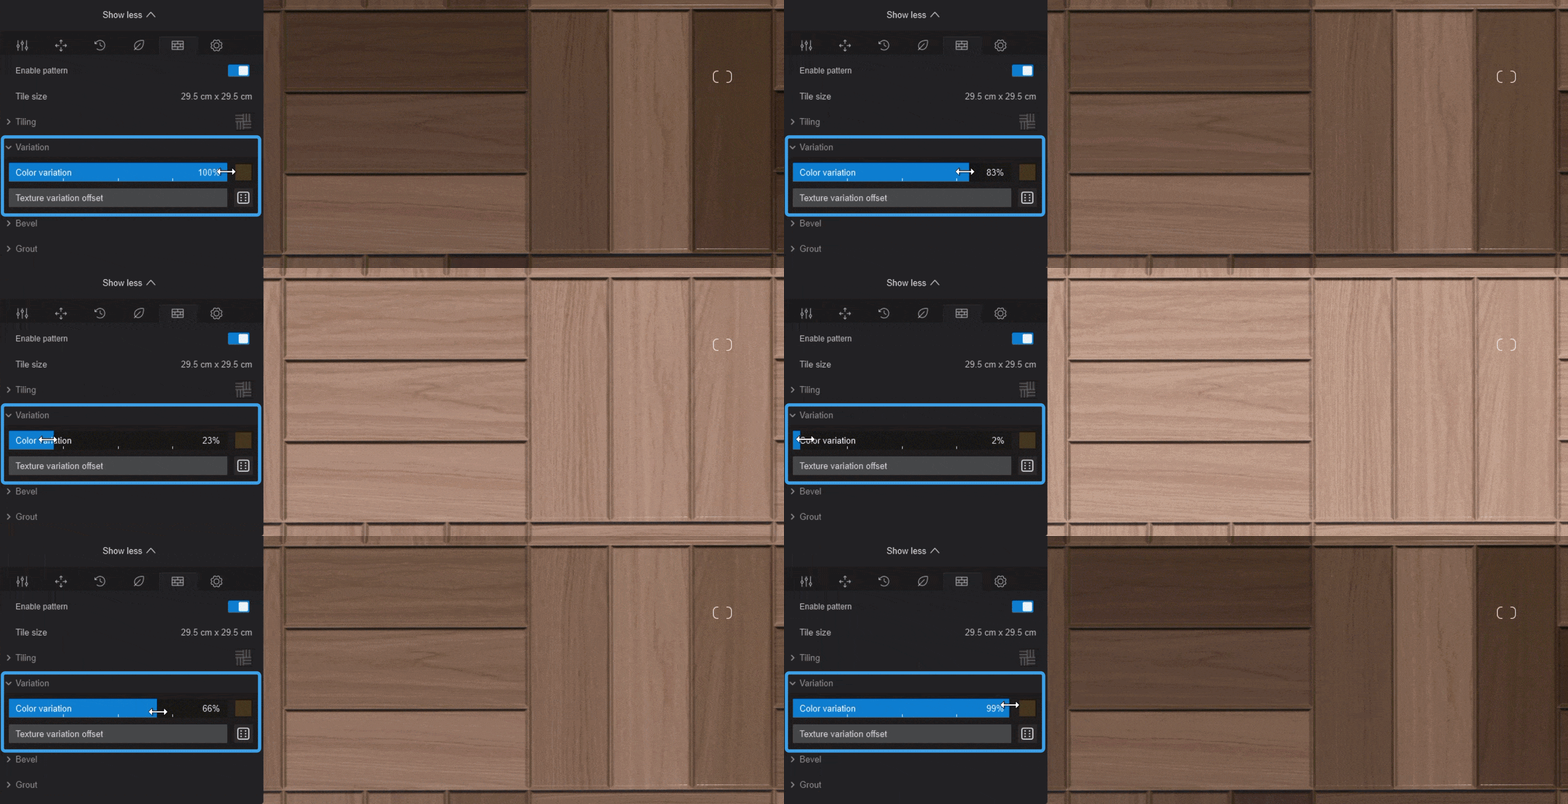
See Section 5.1 Material Color, Texture, and Color Variation for how Color Variation interacts with the base Material Texture and Color settings.
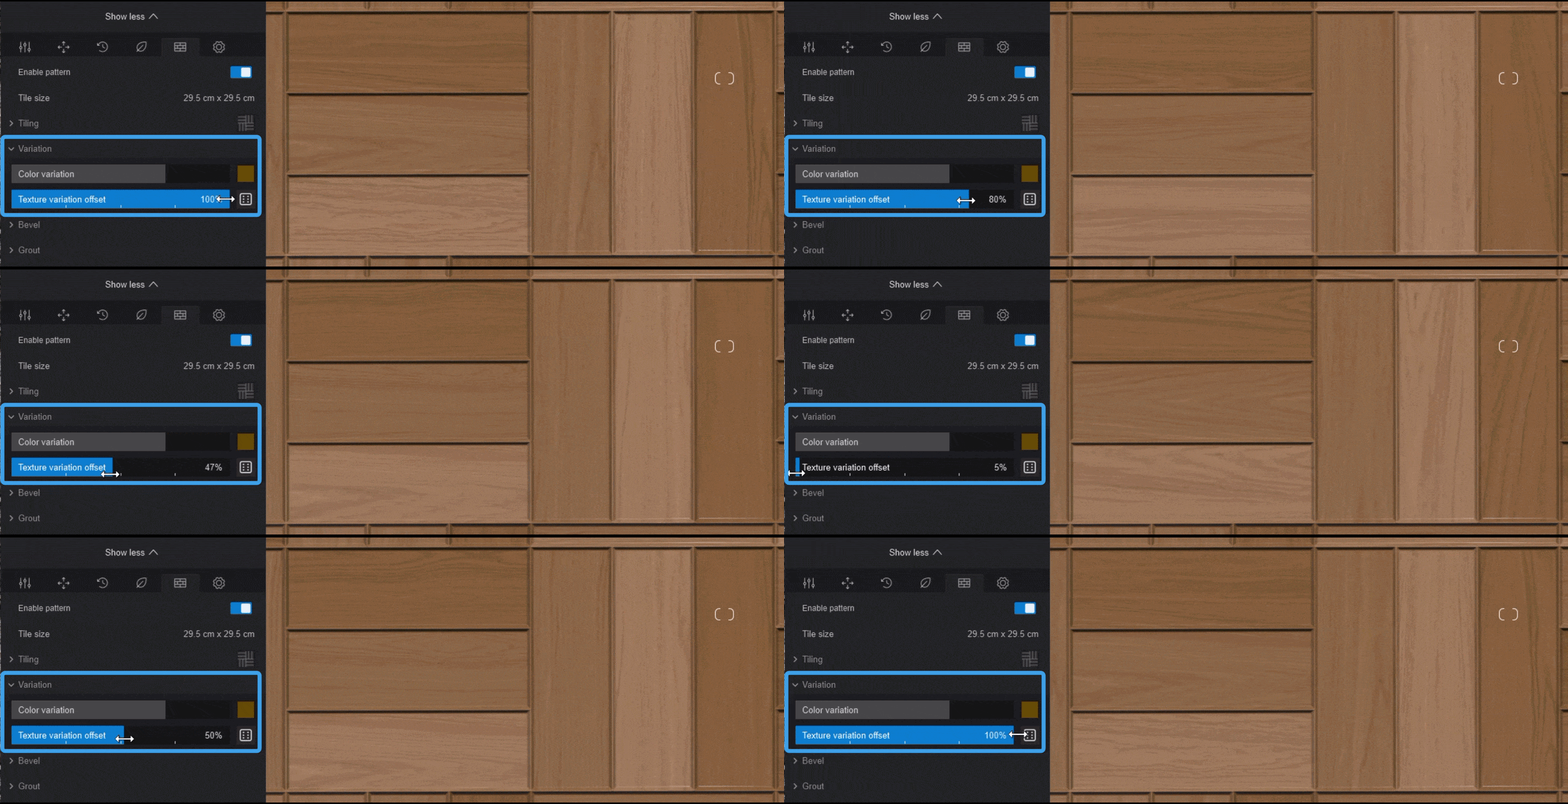
3.4.2 Texture Variation Offset
Shifts the sourceTexture across individual tiles at varying amounts, helping reduce visible repetition by displaying different areas of the Texture.
3.4.3 Randomize
Click to generate a randomized distribution of the Texture for the current Variation setting.
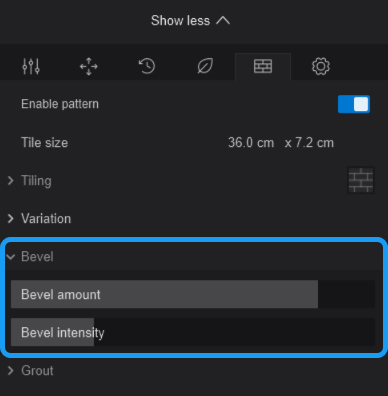
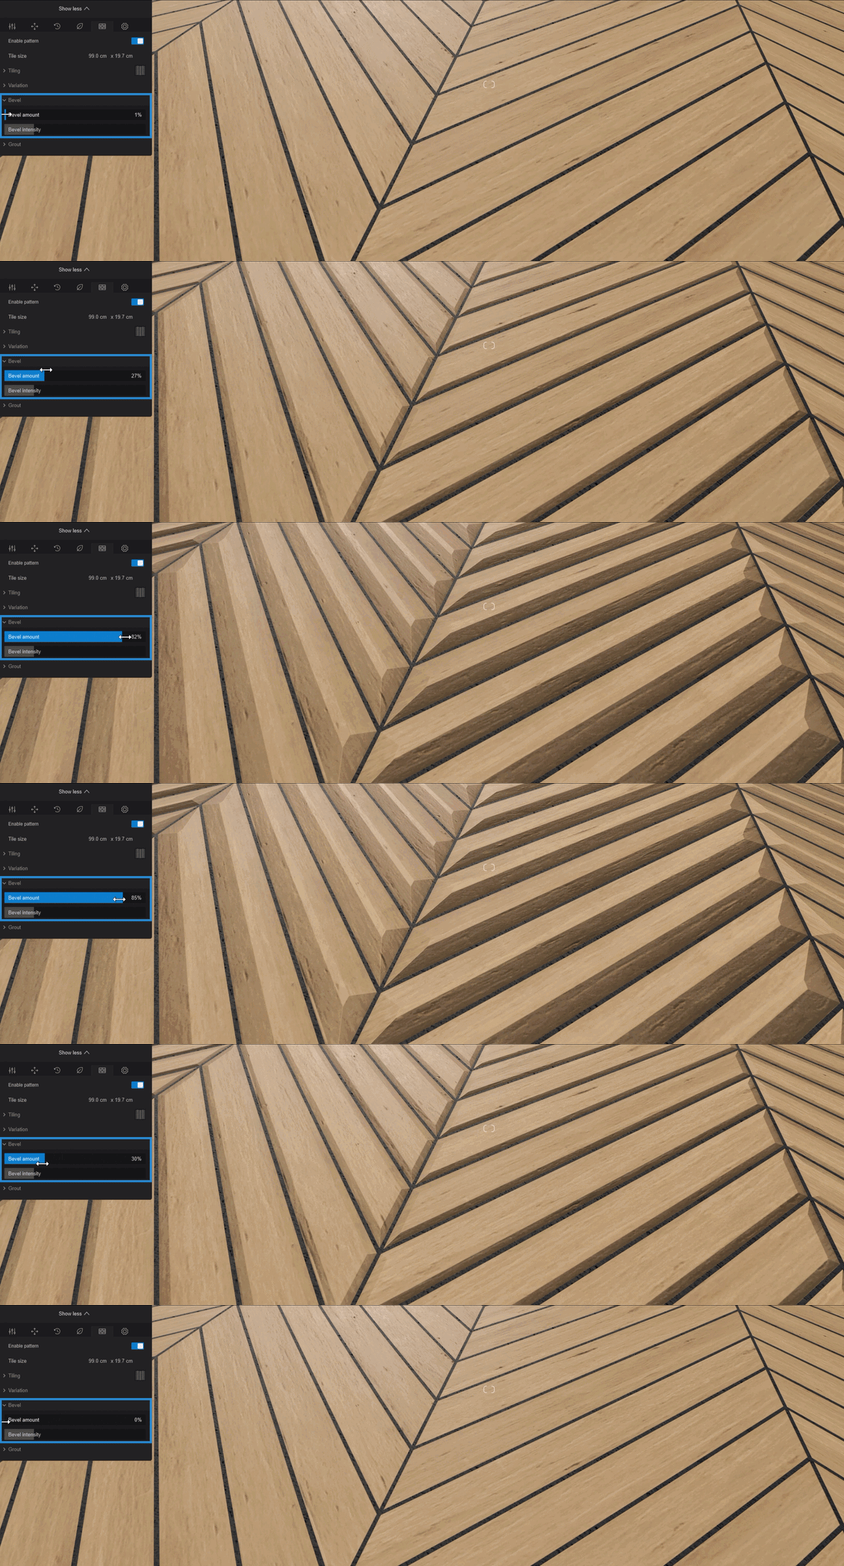
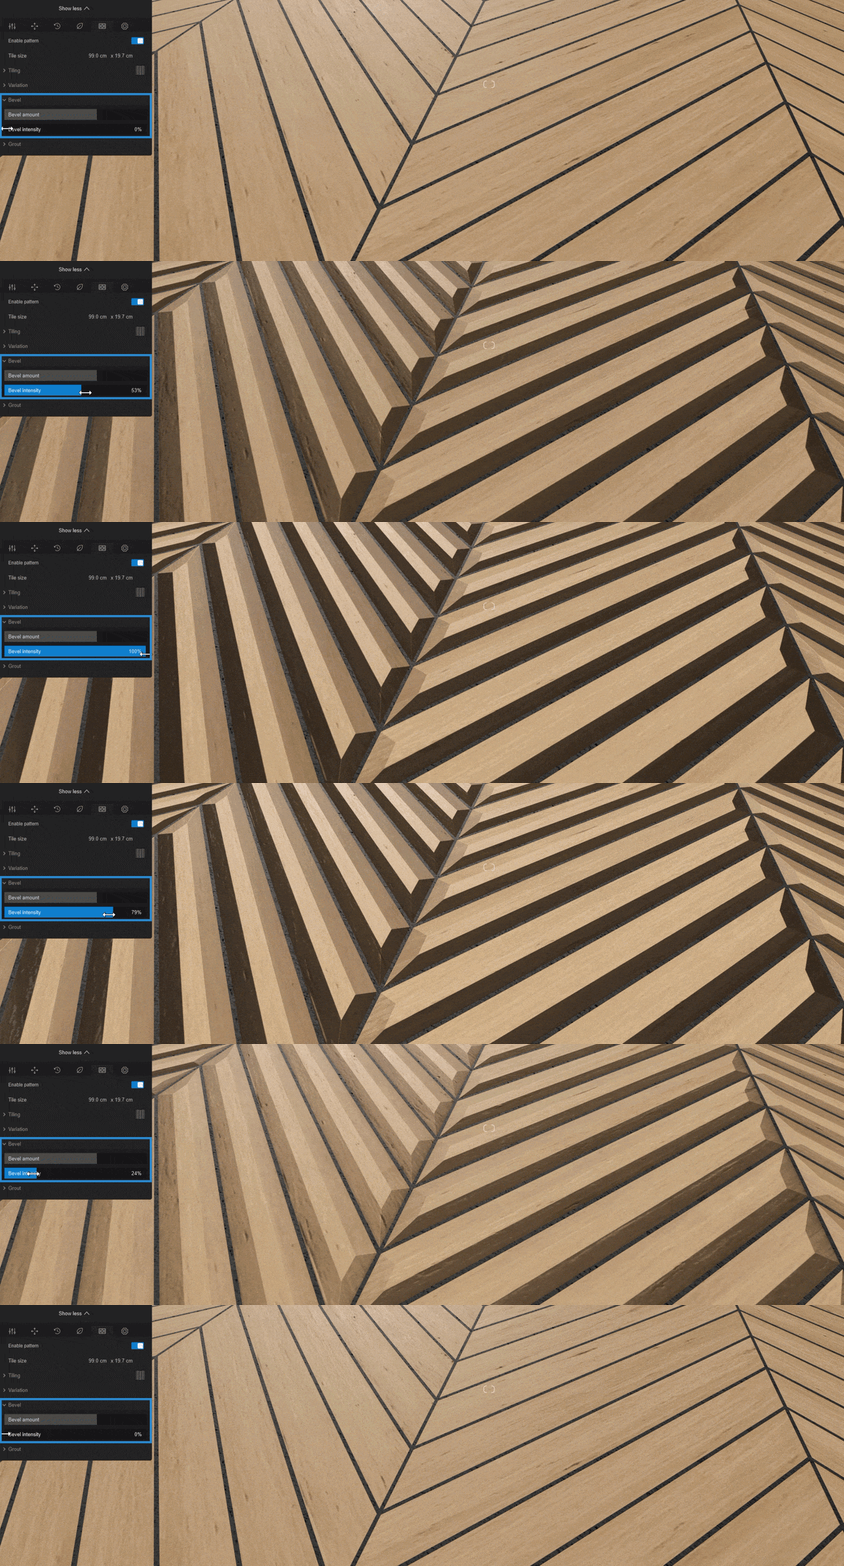
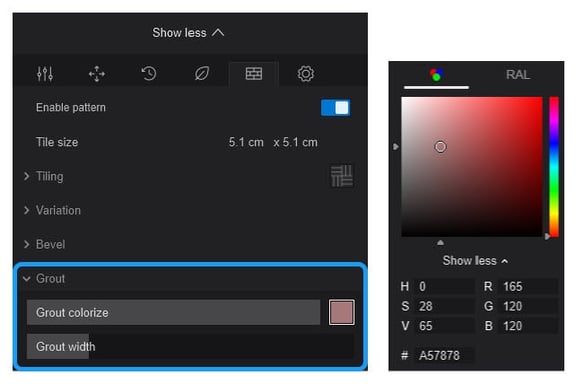
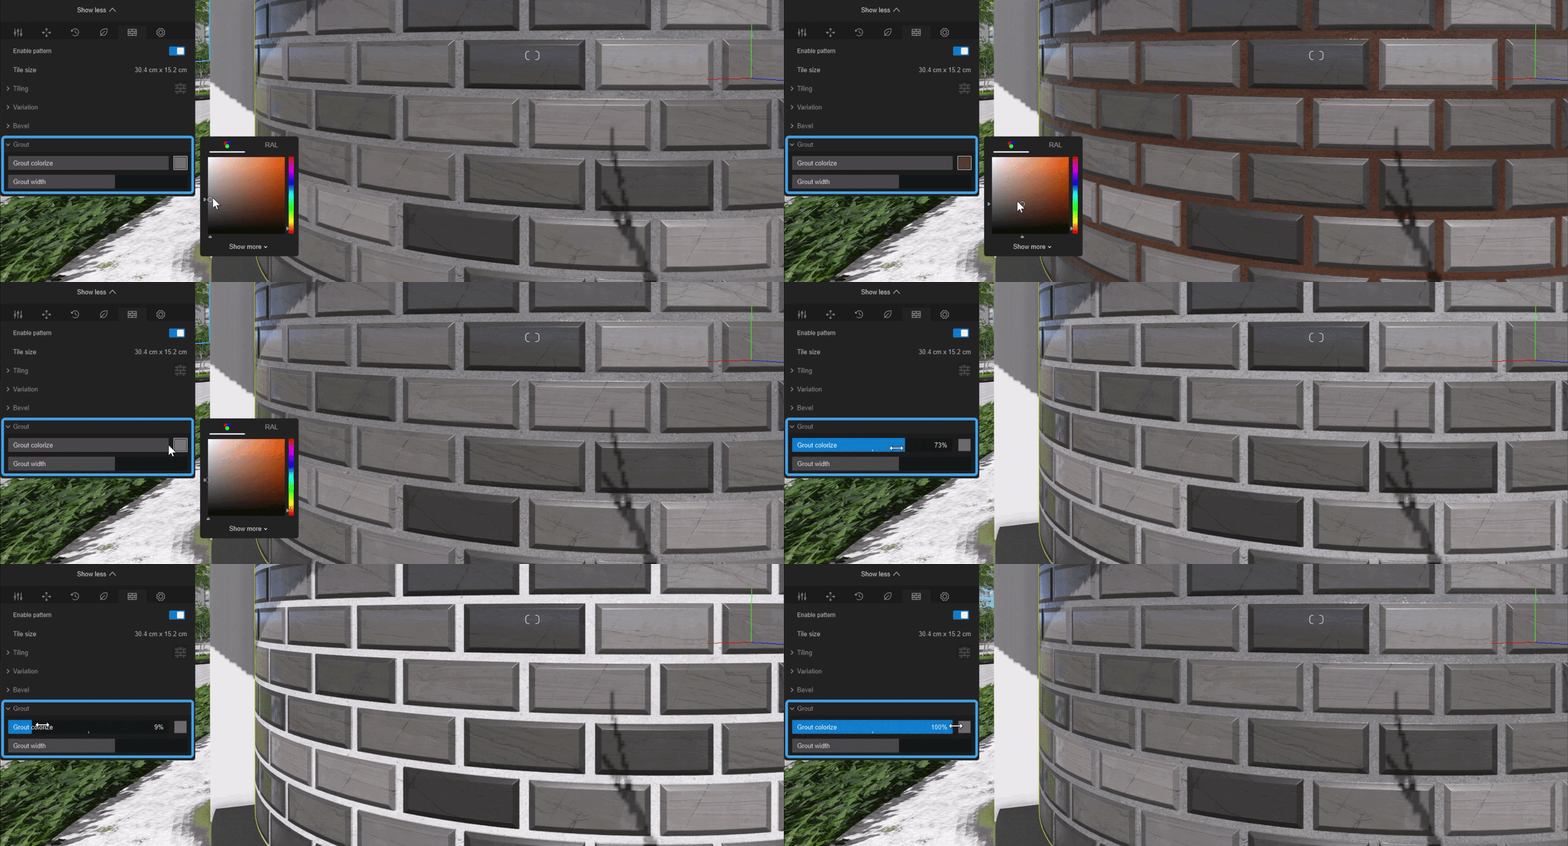
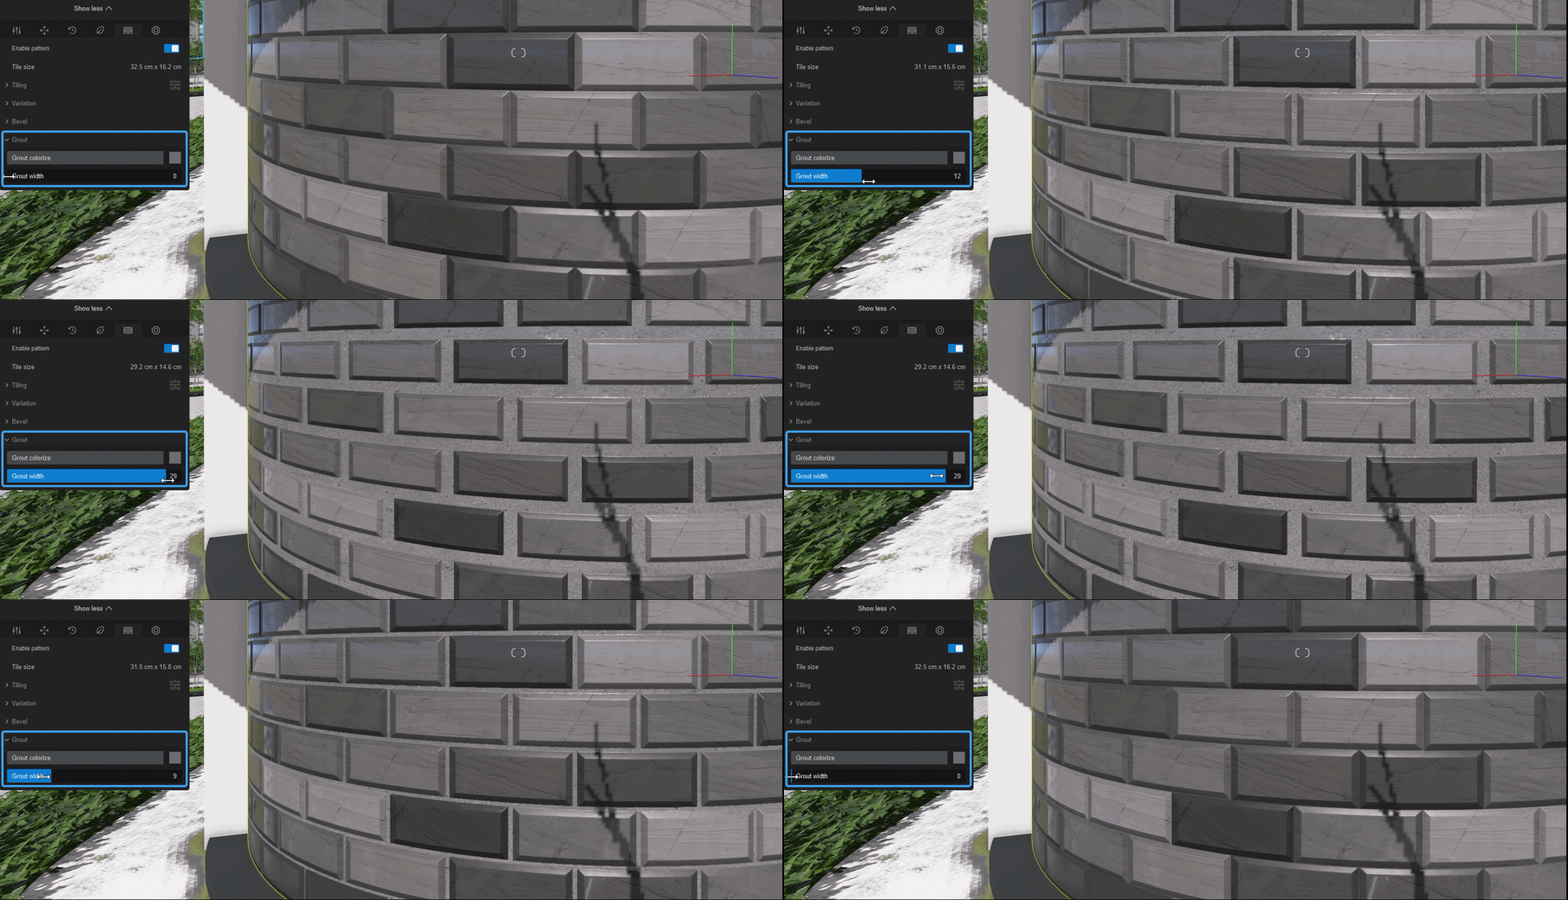
4. Pattern Preset Settings
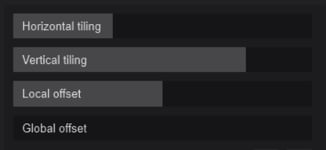
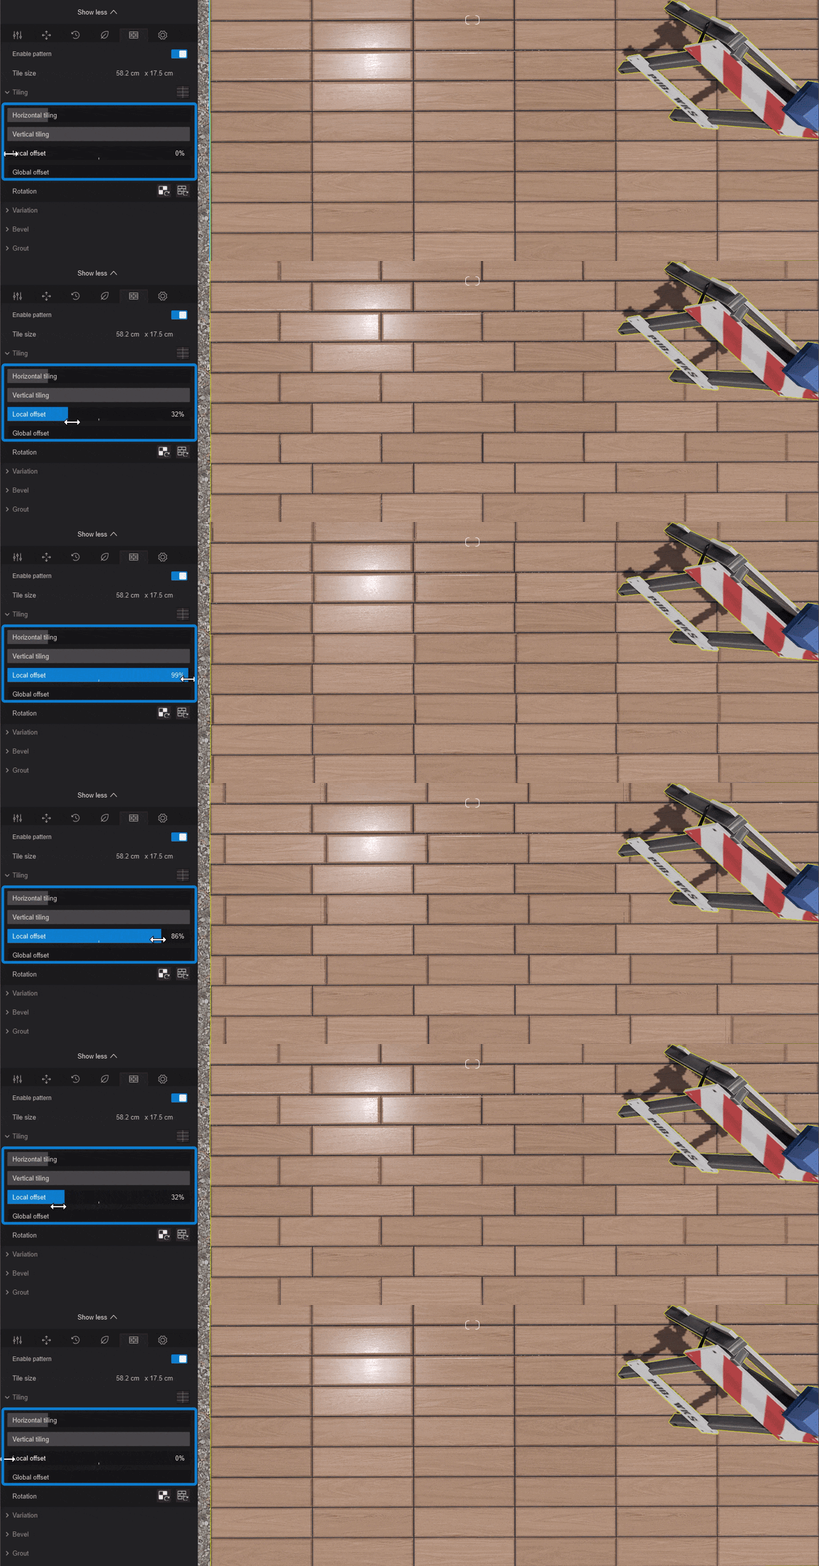
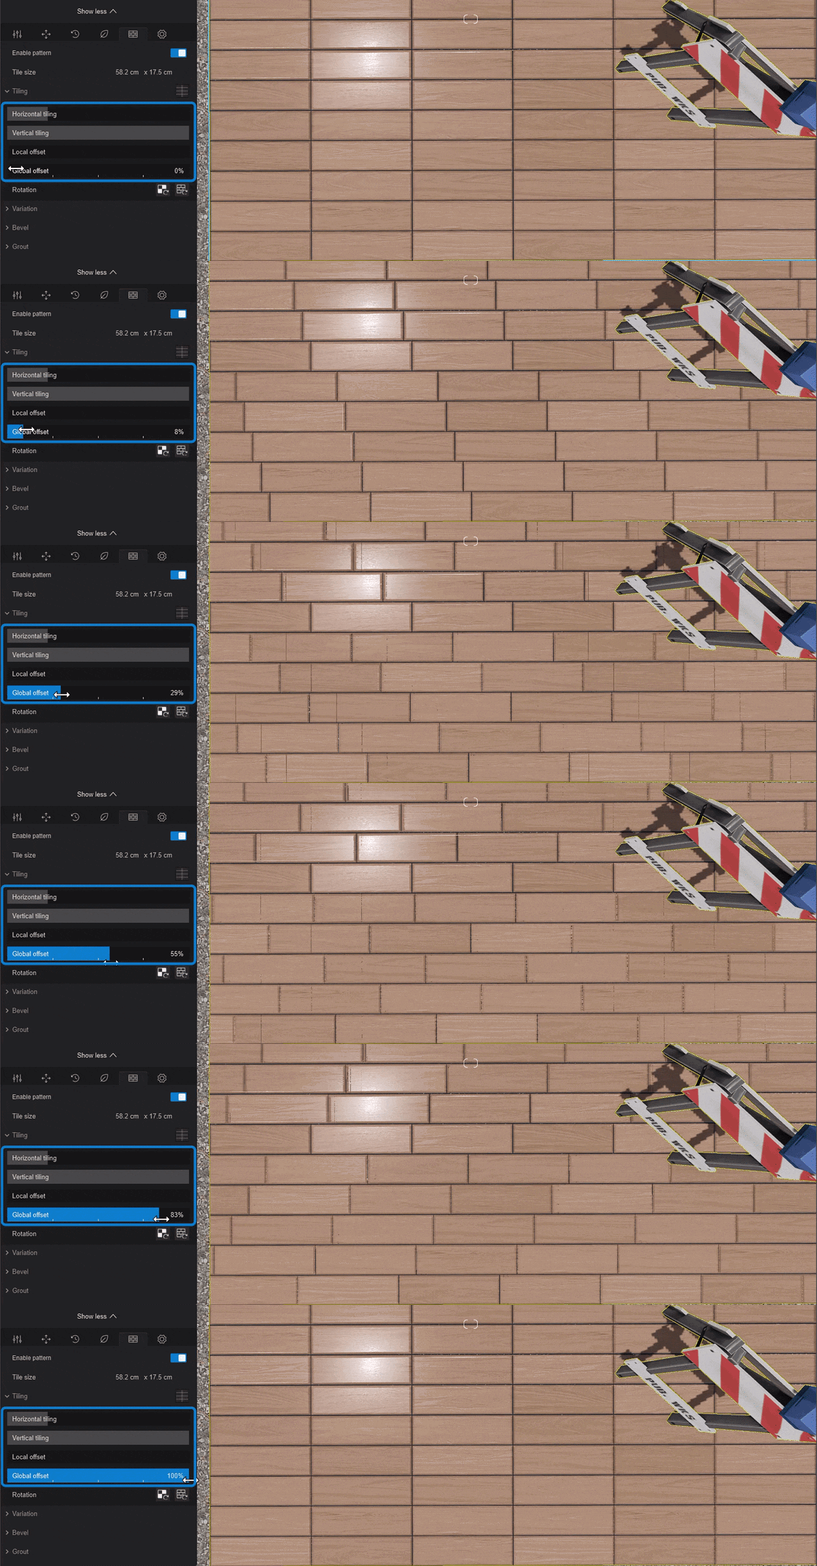
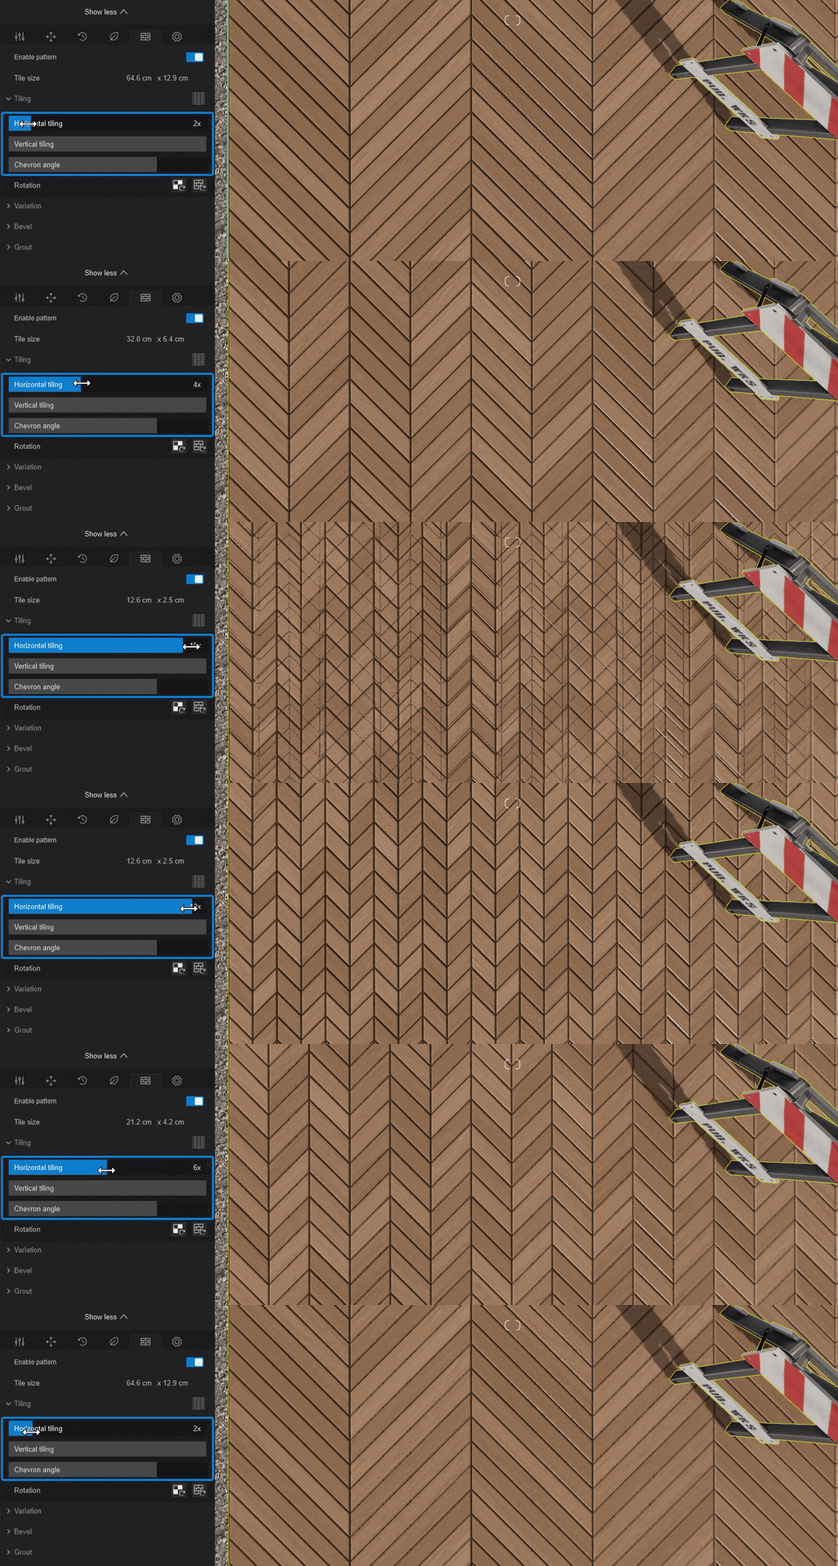
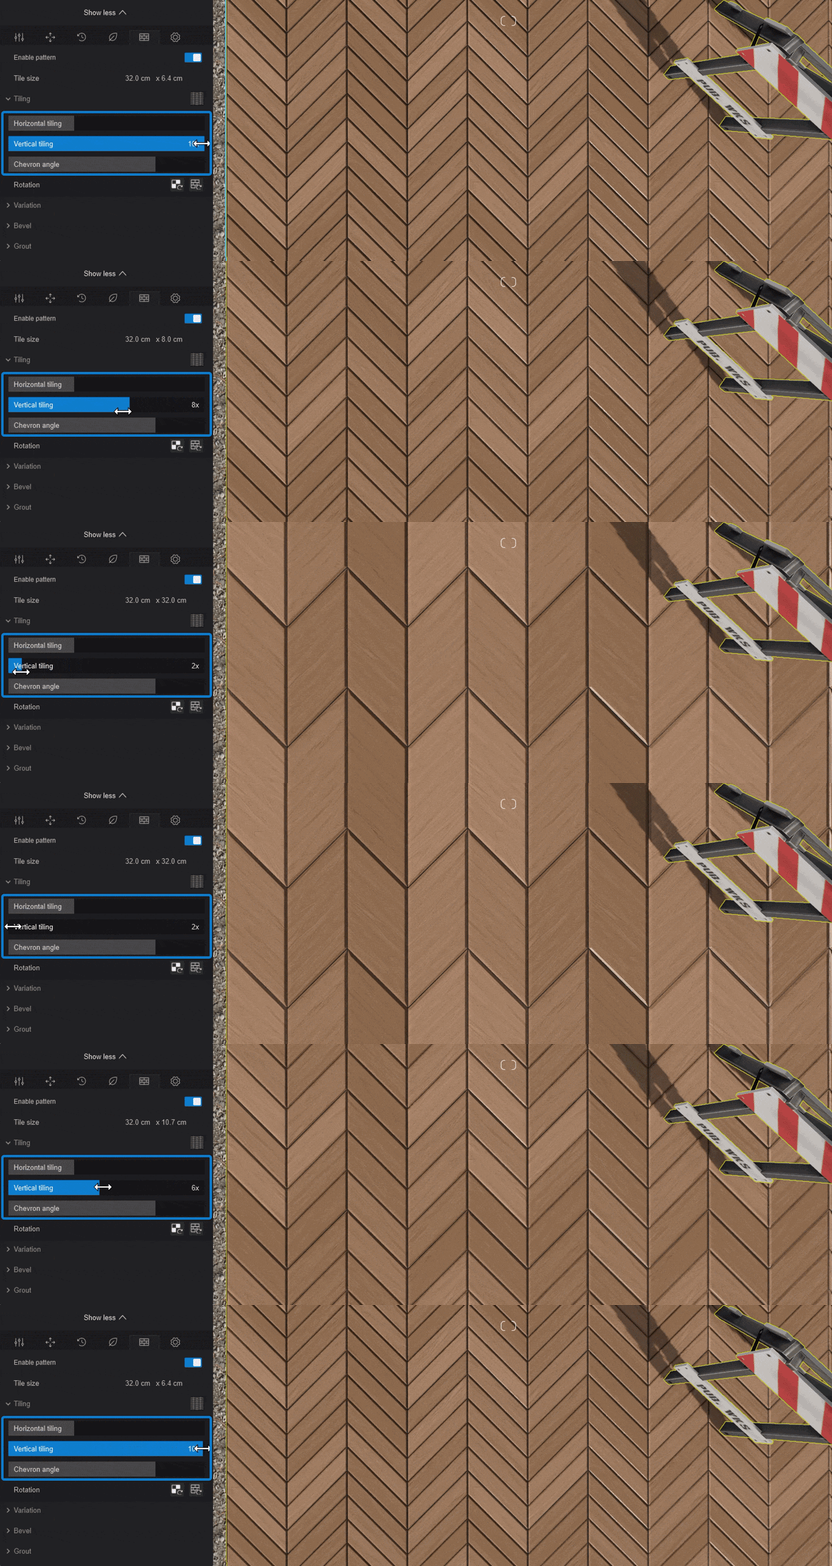
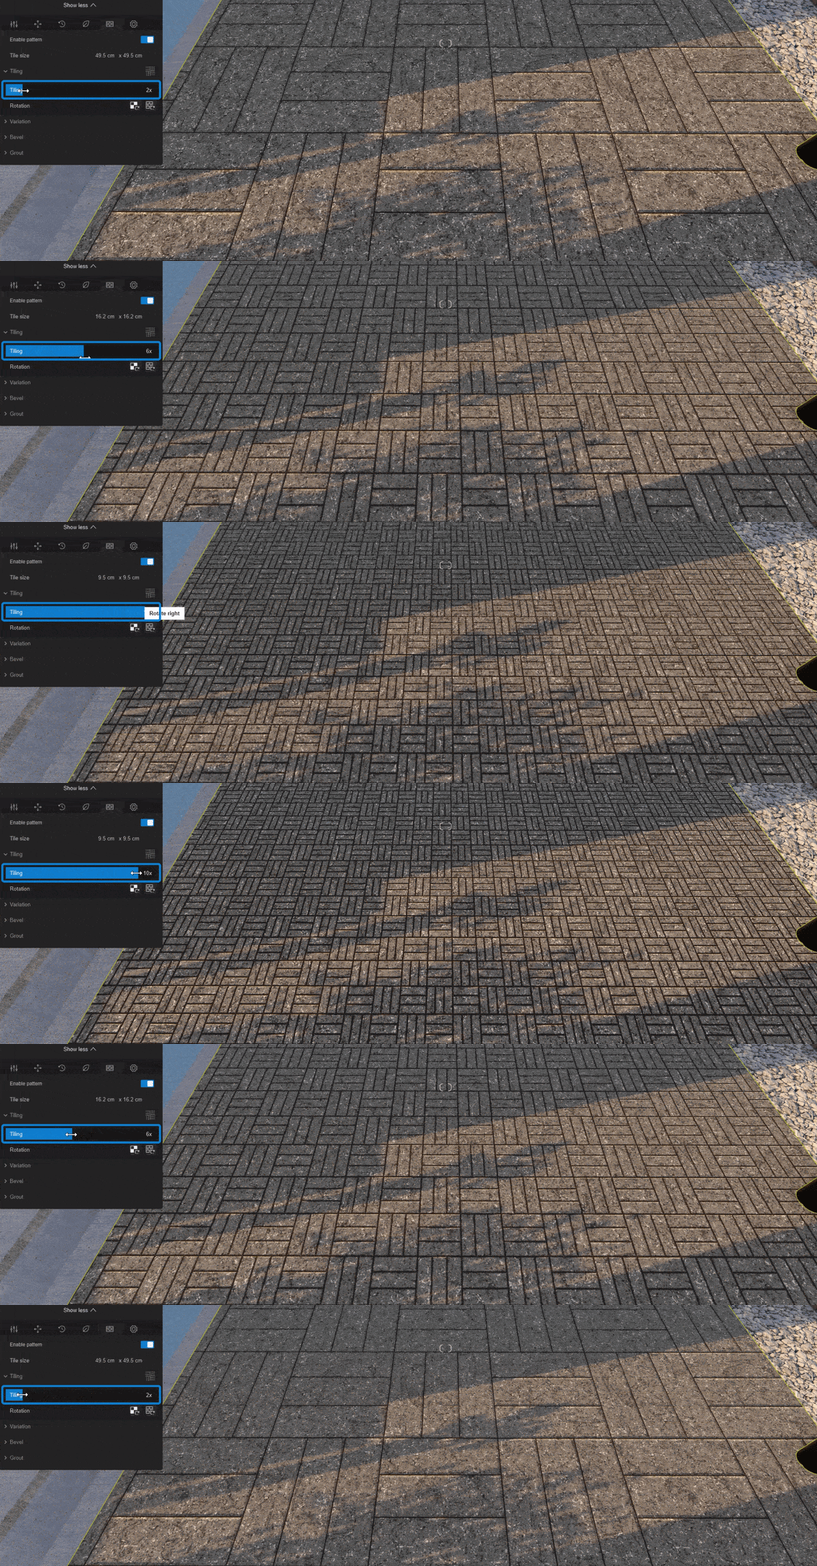
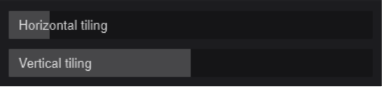
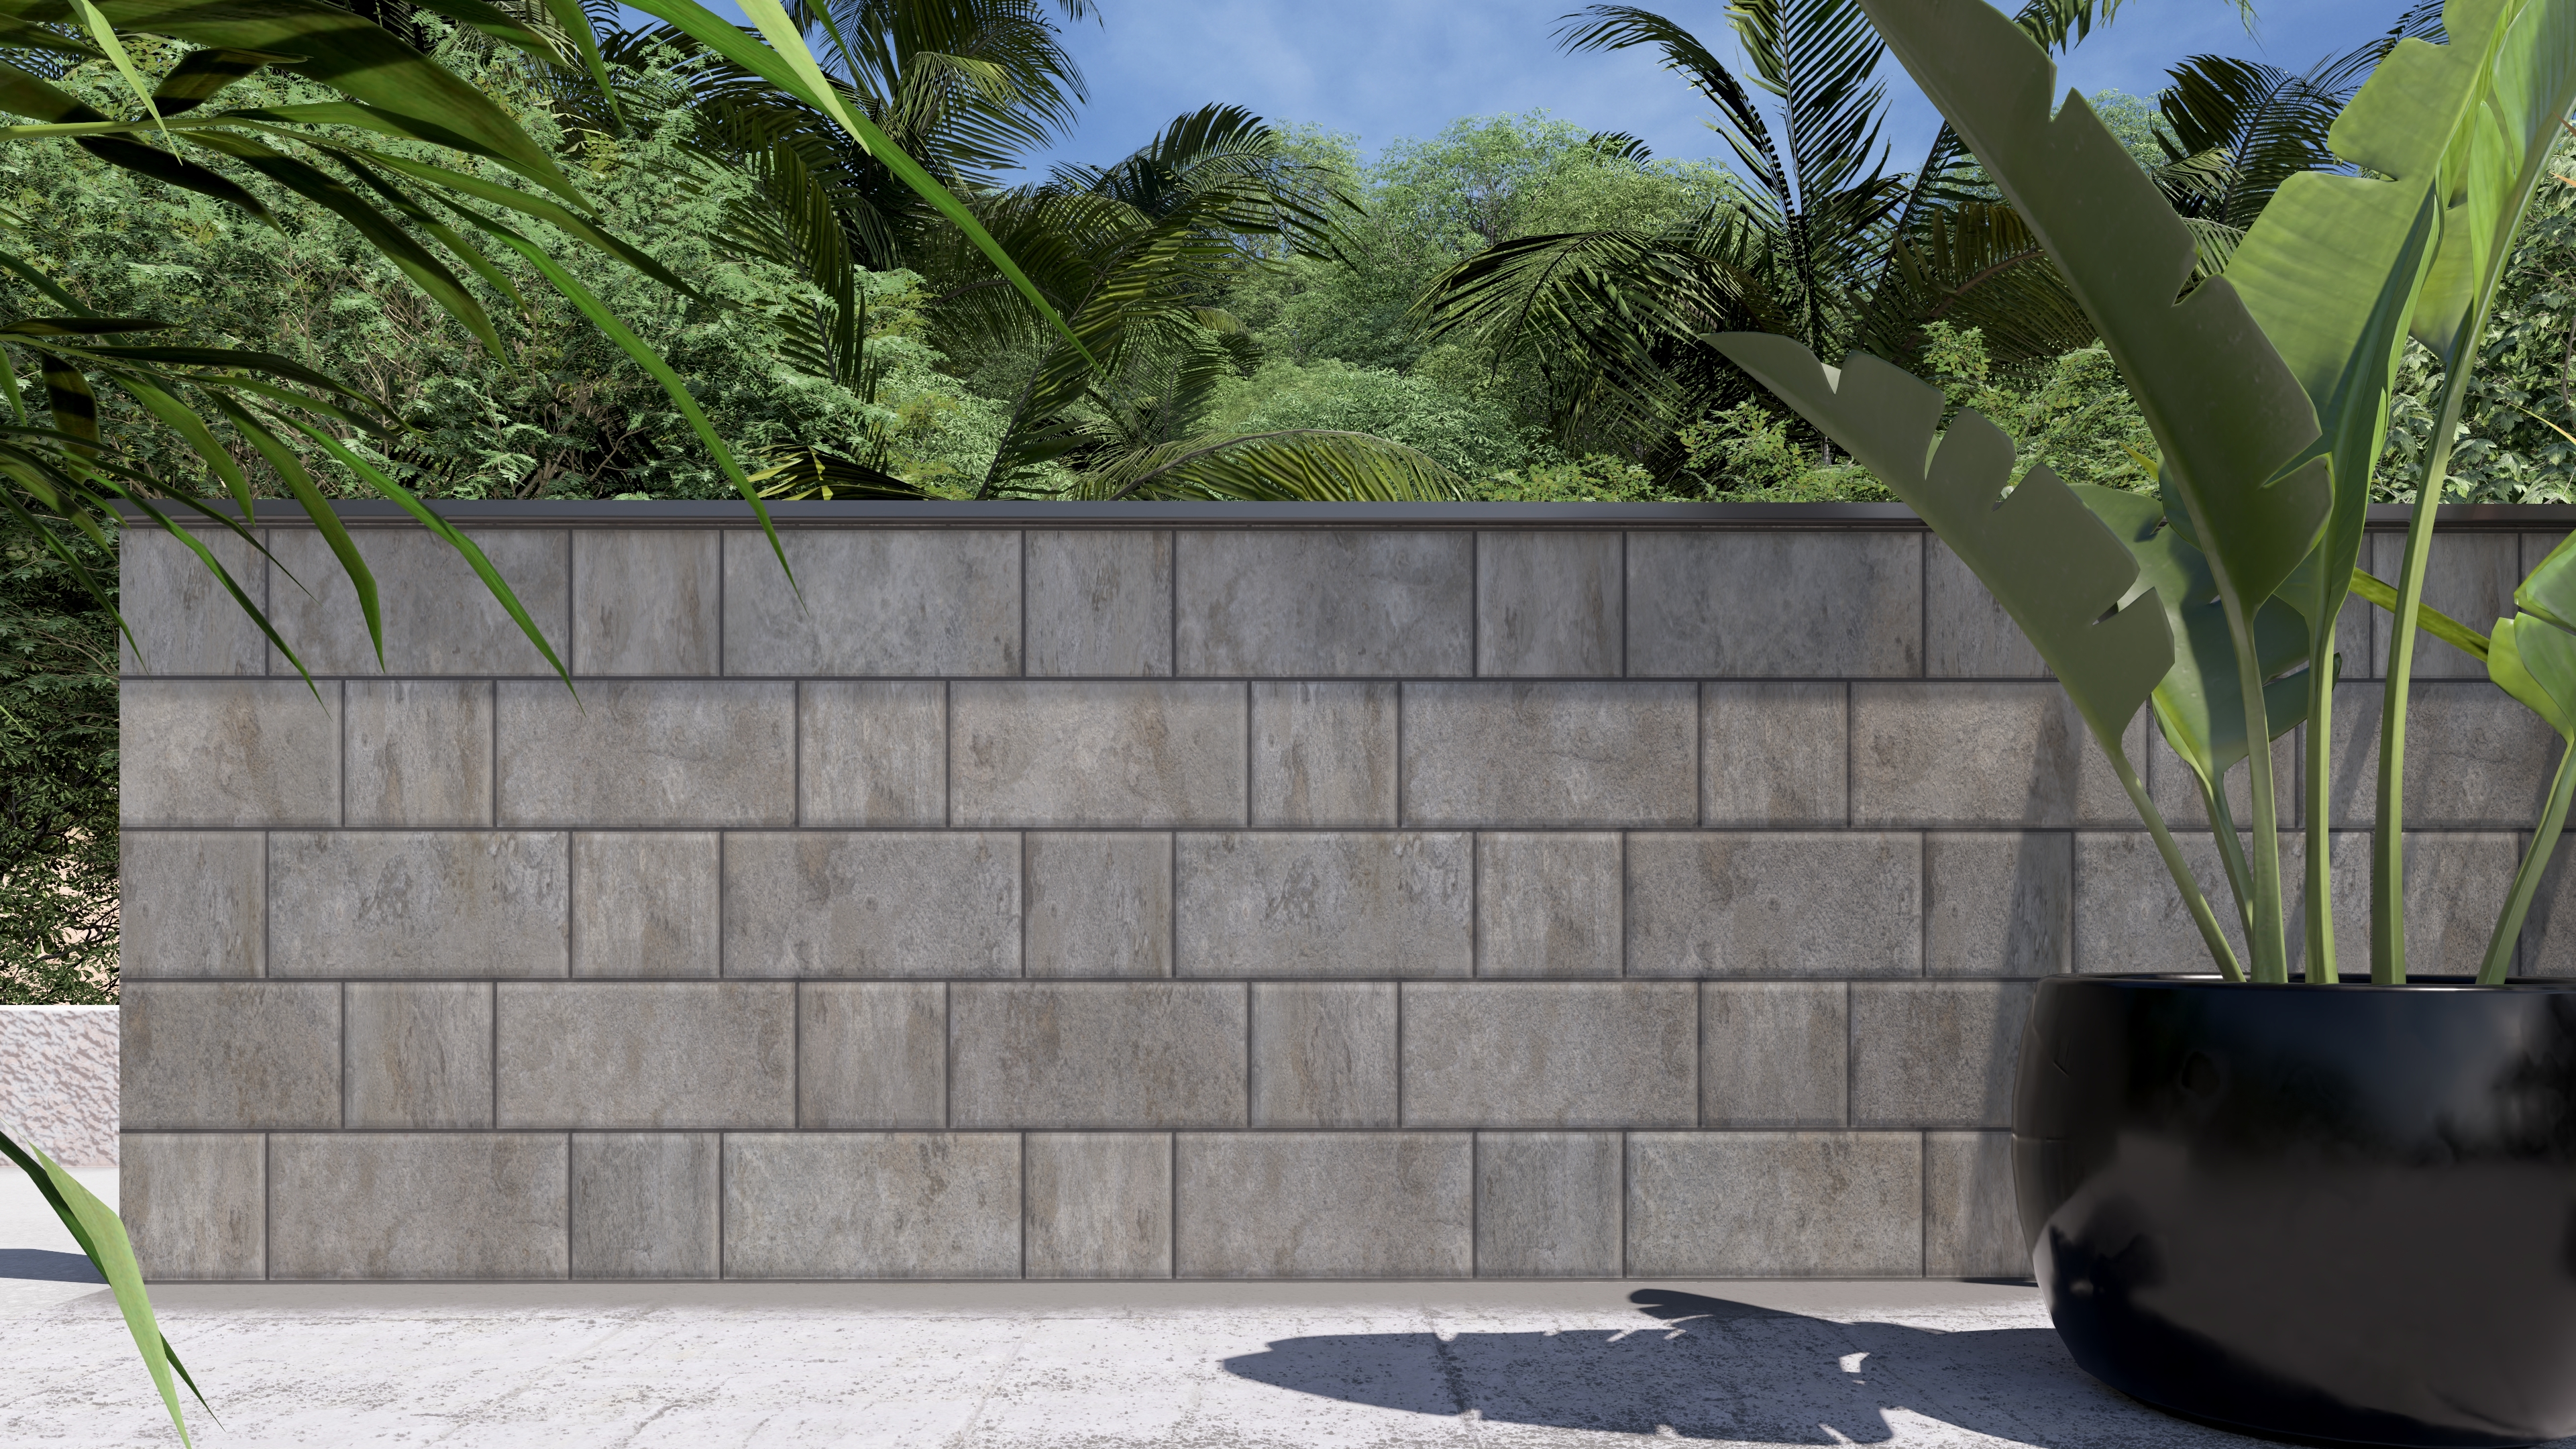
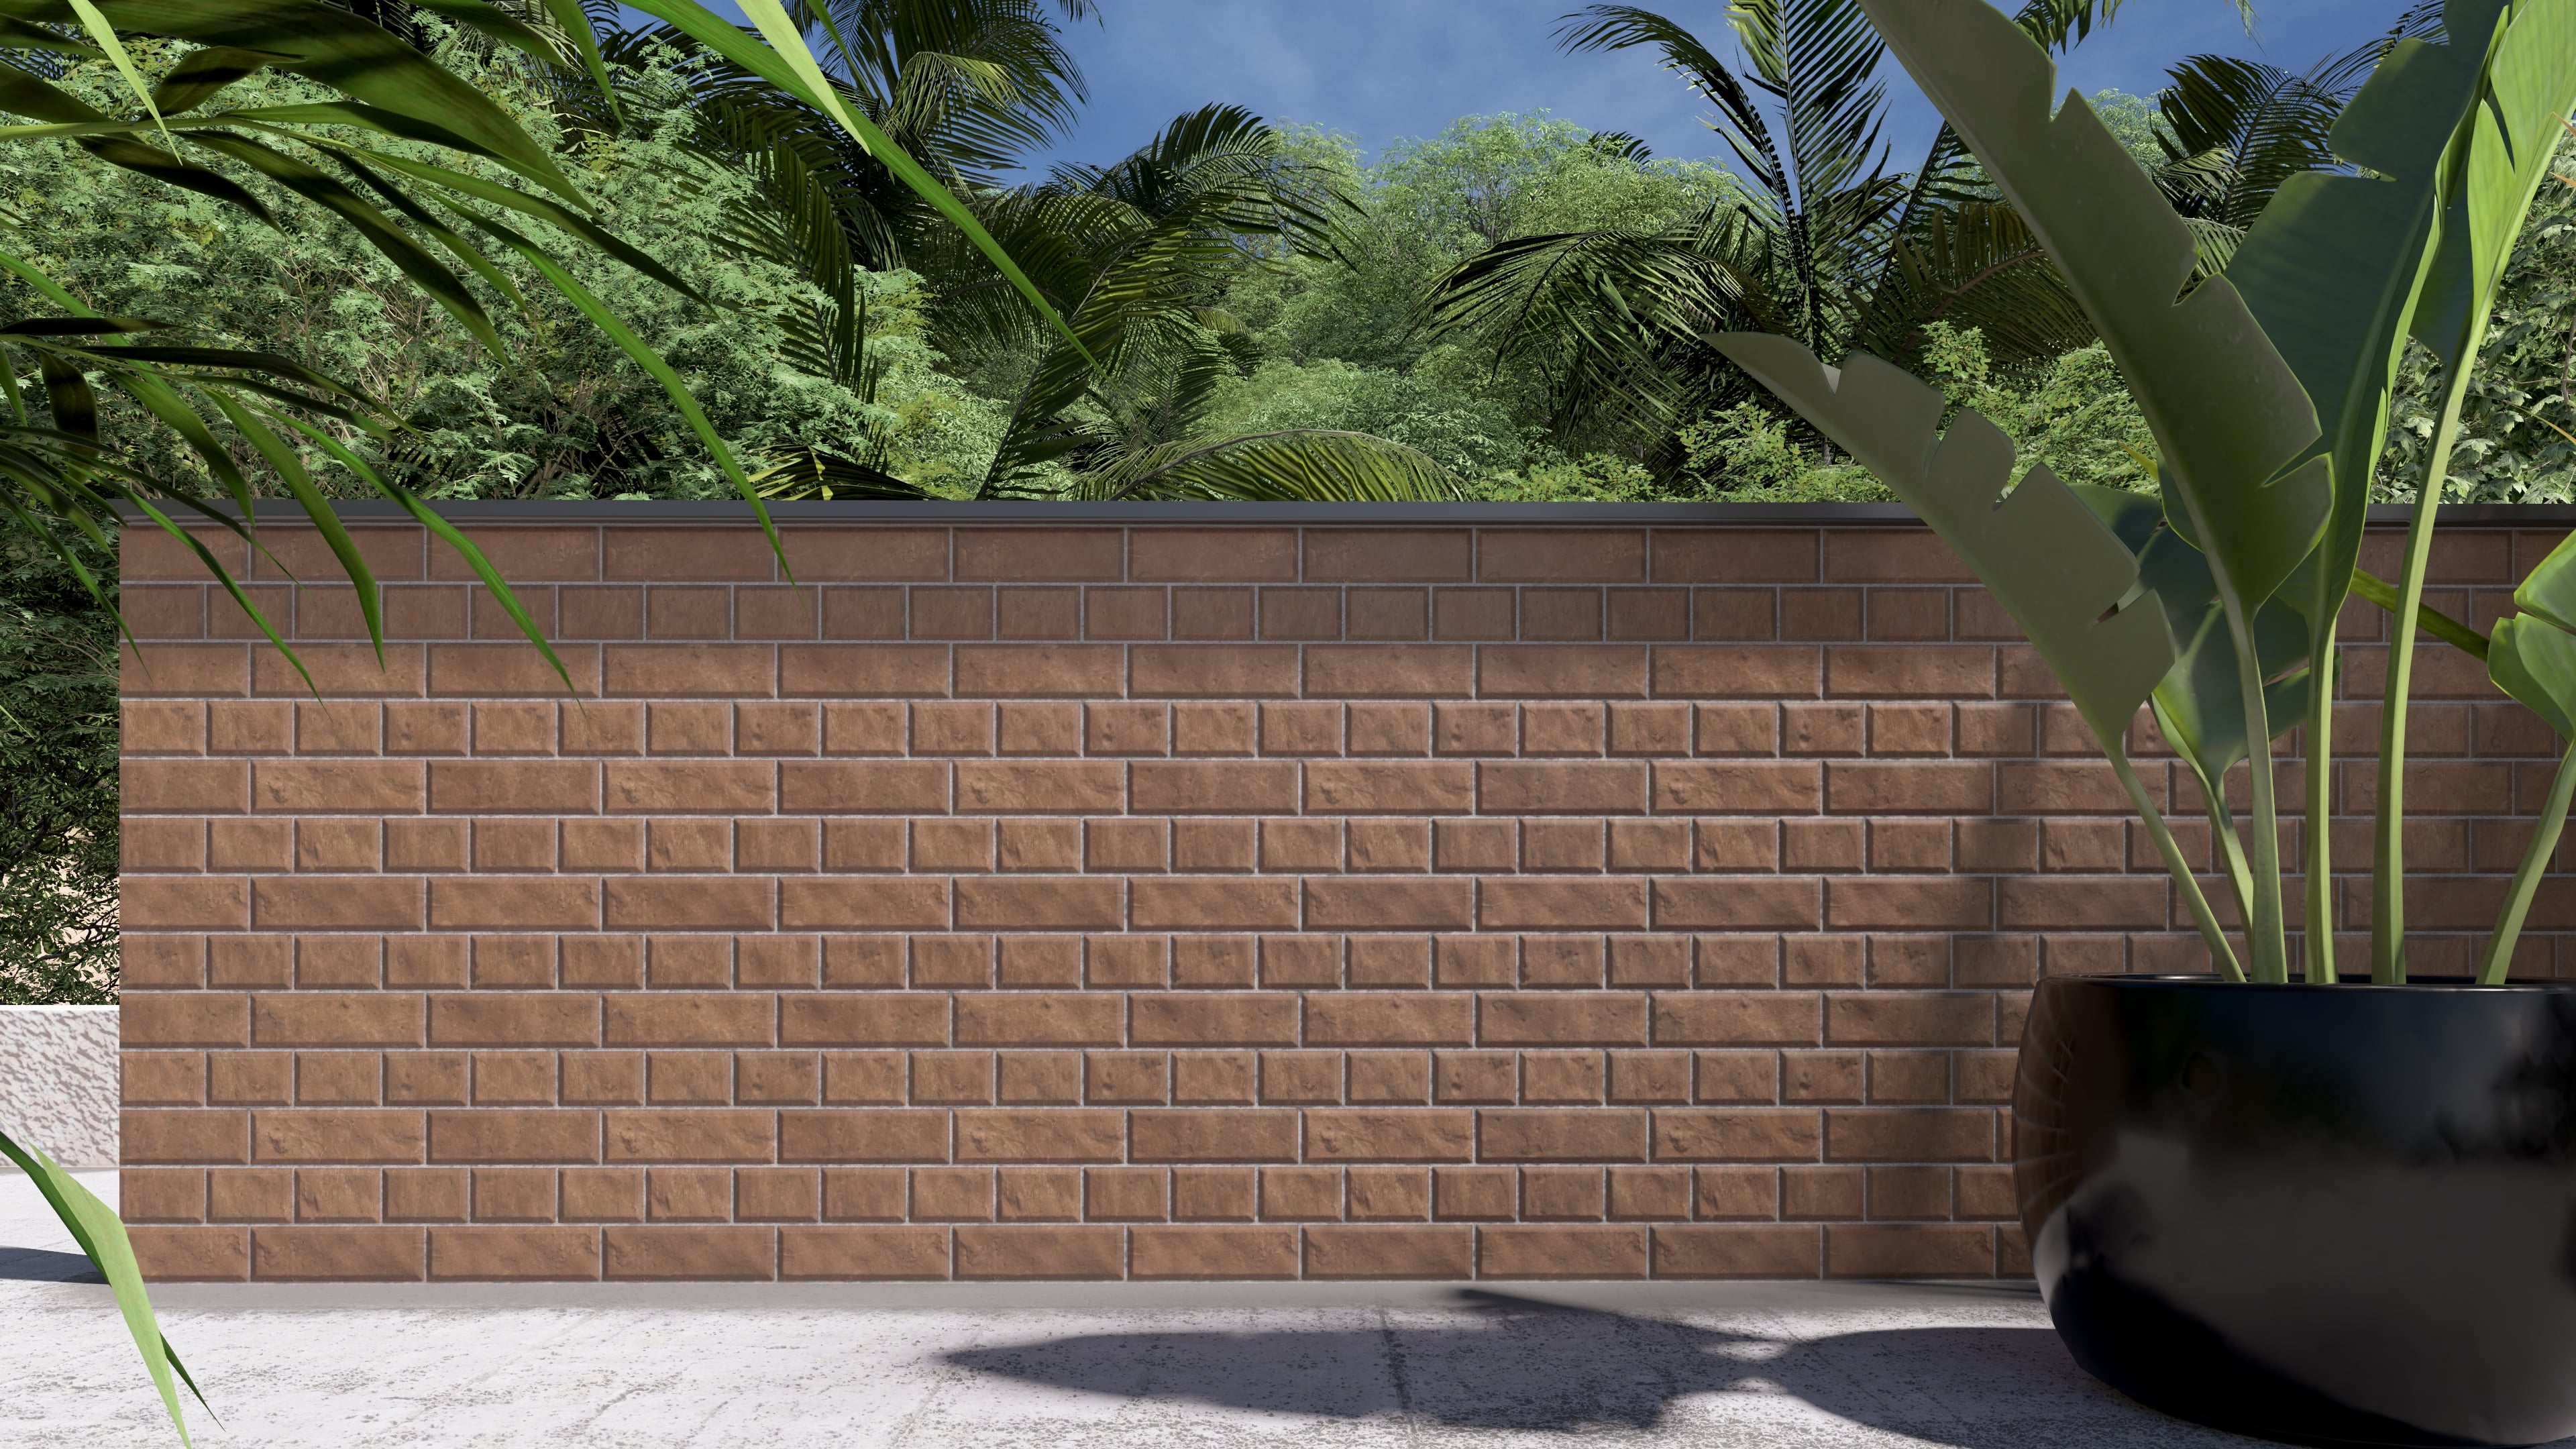
Certain Pattern Presets include additional controls when in the Tiling section, depending on the selected layout. These may include Chevron Angle, Local Offset, Global Offset, or preset-specific Tiling sliders.
Tip: All Tiling sliders across all presets use a range of 2x to 10x (except for Hexagon, which is from 5x to 30x). Lower values create larger layouts, while higher values increase pattern repetition and create a denser arrangement.














5. How Pattern Editor Interacts with Materials
The generated Tiles and Grout continue responding to the underlying Standard Material properties. This allows the Pattern to work together with existing Material settings such as Color, Texture, Relief, Reflectivity, Displacement, and UV Coordinates.
Note: The Landscape Tiling in the UV Coordinates tab is unavailable when the Pattern tab is enabled.
5.1 Material Color, Texture, and Color Variation
The Texture slider controls how much of the original Material texture remains visible on the generated Tiles. As the Texture value is reduced, the original texture detail becomes less visible, while the selected Standard Material Color and Color Variation become more dominant across the Tiles.
Grout is controlled separately by the Grout settings and does not blend with the main Color in the same way as the Tiles.
For example, with Color Variation set to 100%, reducing the Texture slider can remove the original wood grain while still preserving the generated tile variation appearance.
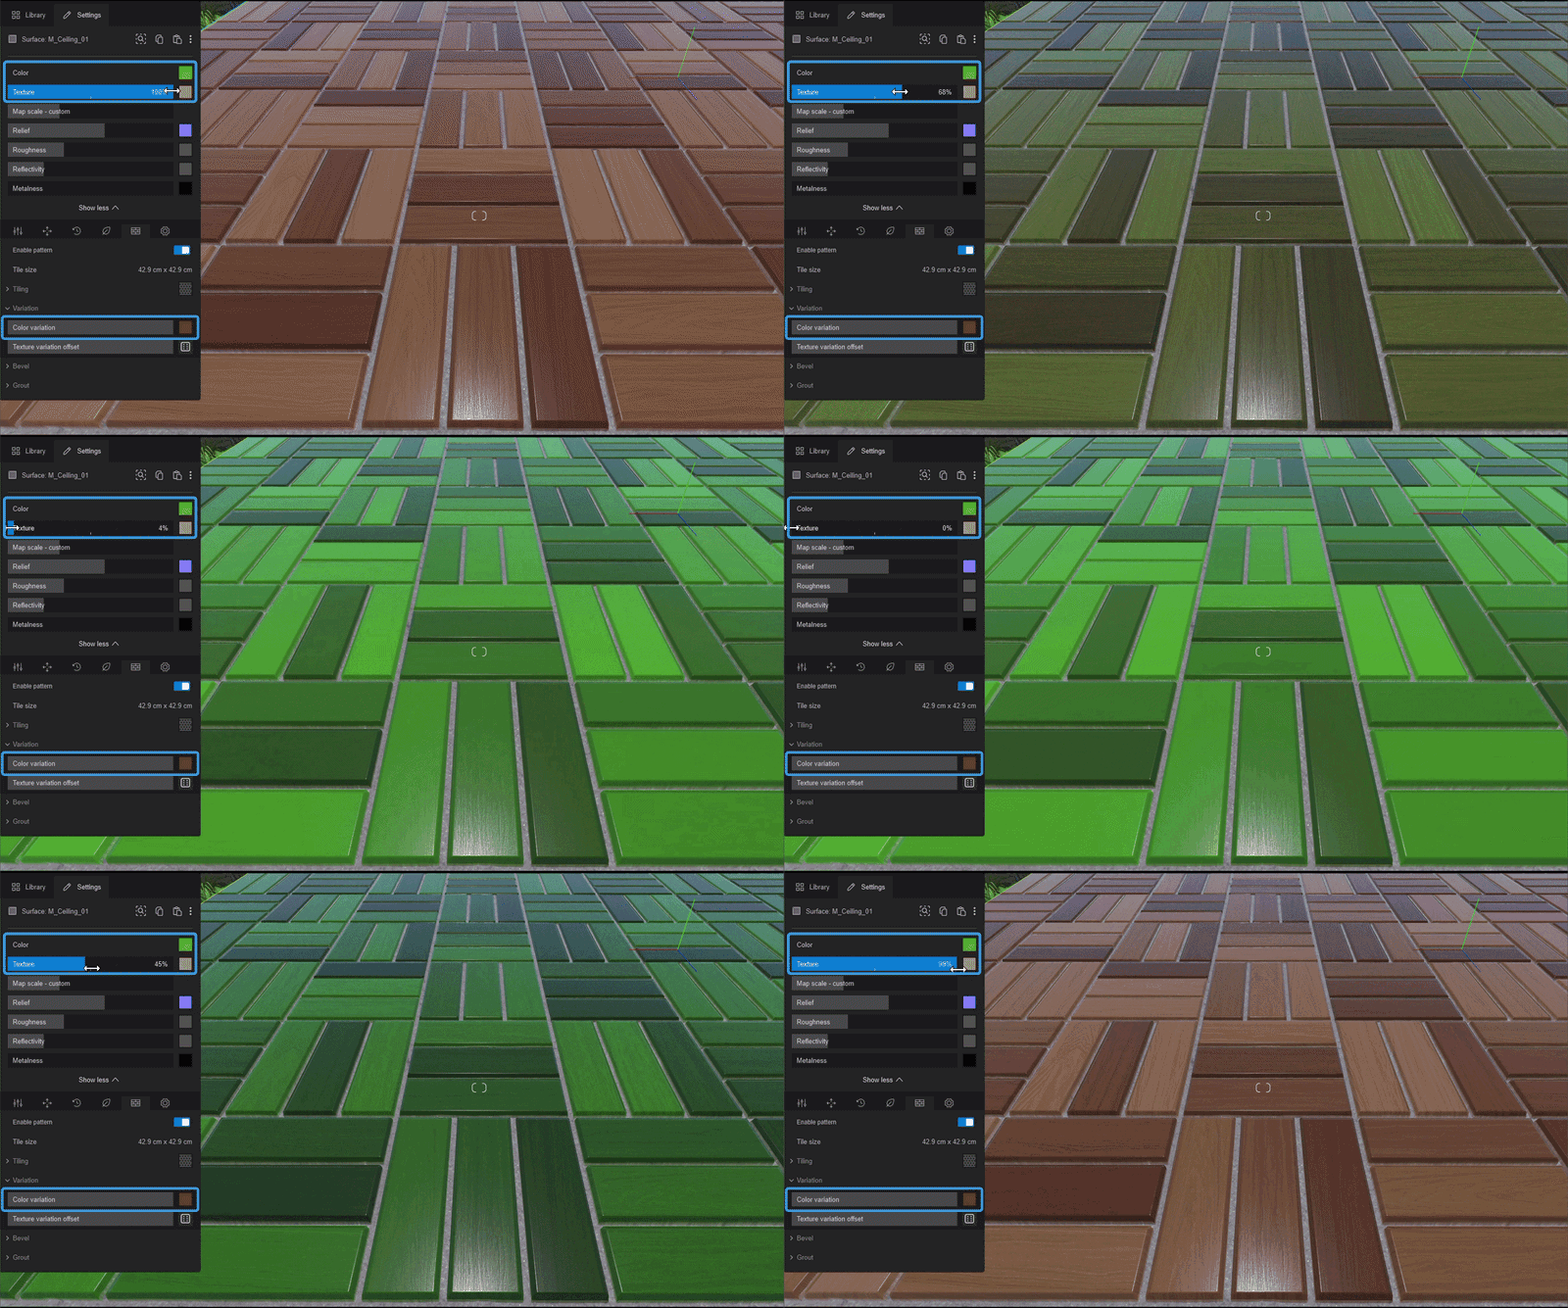
With the Texture at 0%, the Color Variation slider controls how strongly the selected variation color is applied across the generated Tiles.
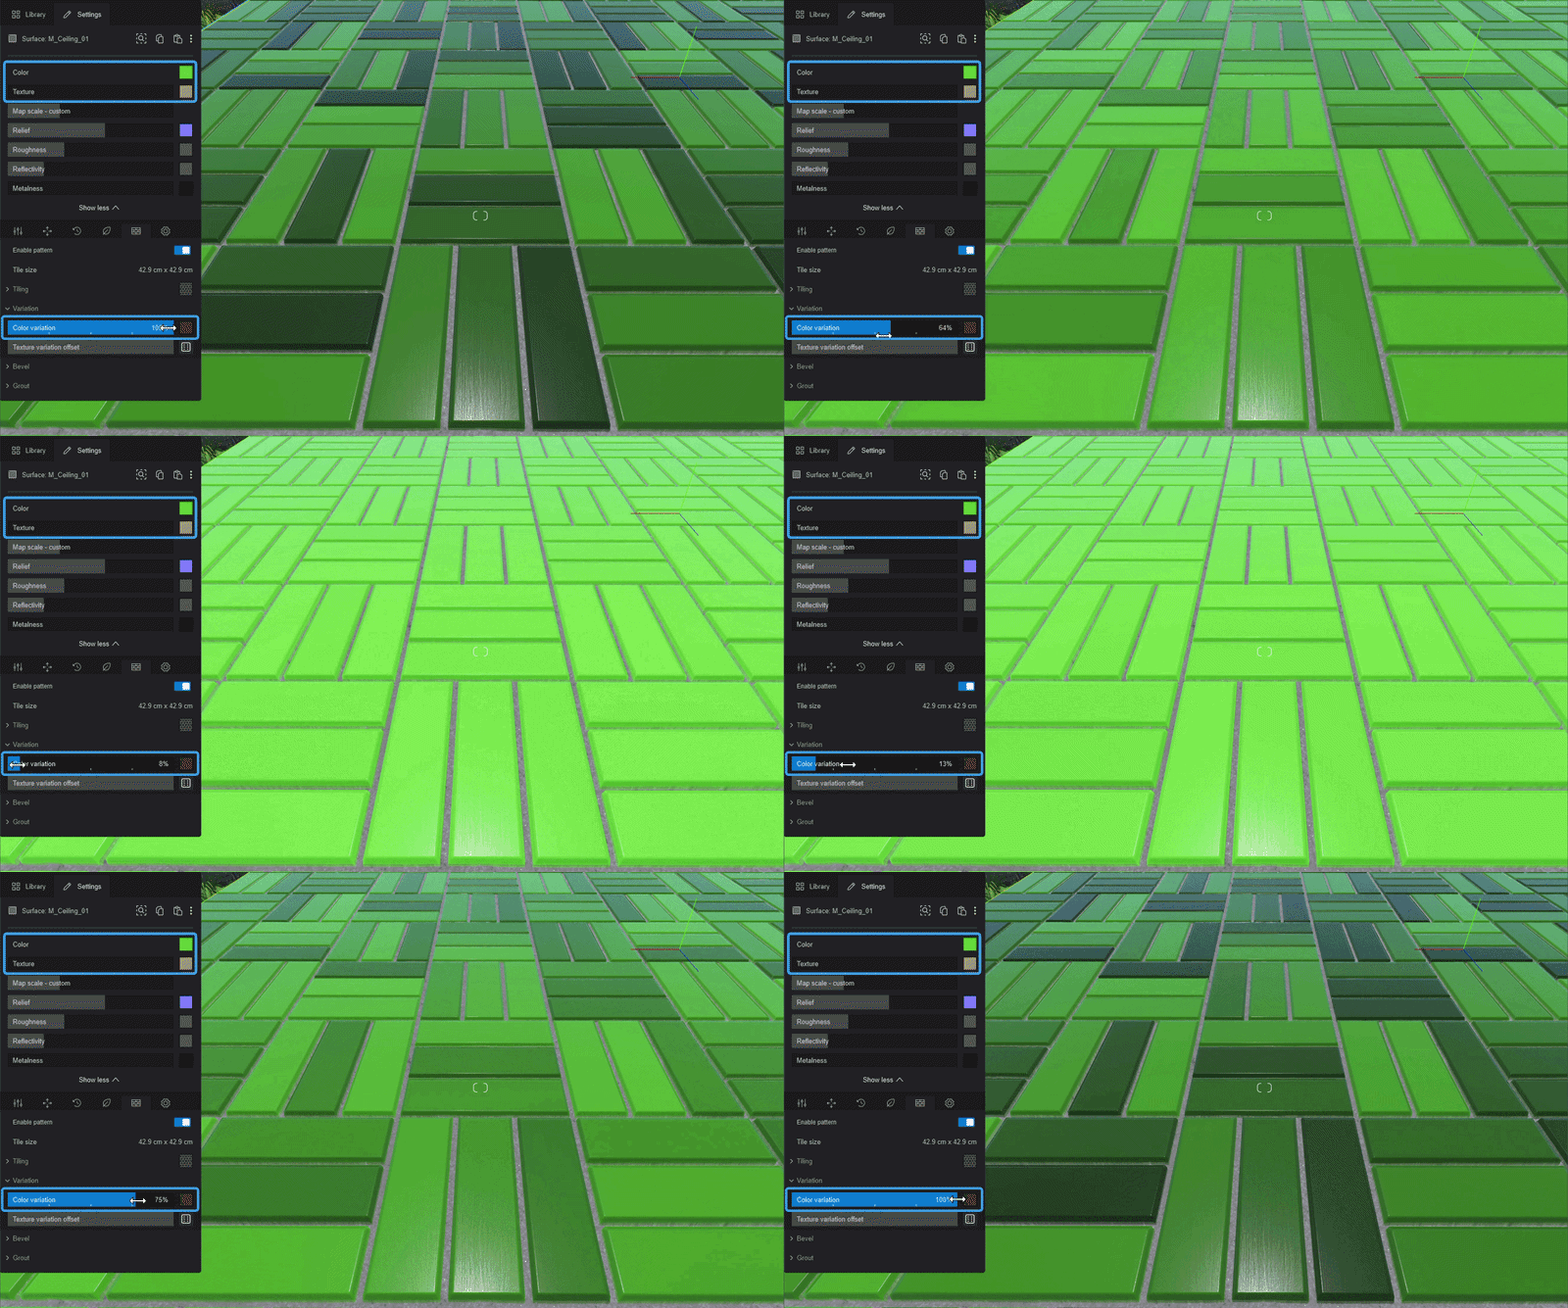
Even with Color Variation set to 100%, the variation may be less visible if the selected Color Variation color is white or very close to the base Material Color. With Texture set to 0%, this can appear similar to having Color Variation set to 0%.
To learn more about how Lumion uses Color Maps, see Section 7.3.6 Texture (Color Map) in:
5.2 Displacement and Relief Interaction
The Relief Map and Displacement Map continue to add surface detail across the generated Tiles and Grout. The Relief Map adds fine surface texture across the material surface.
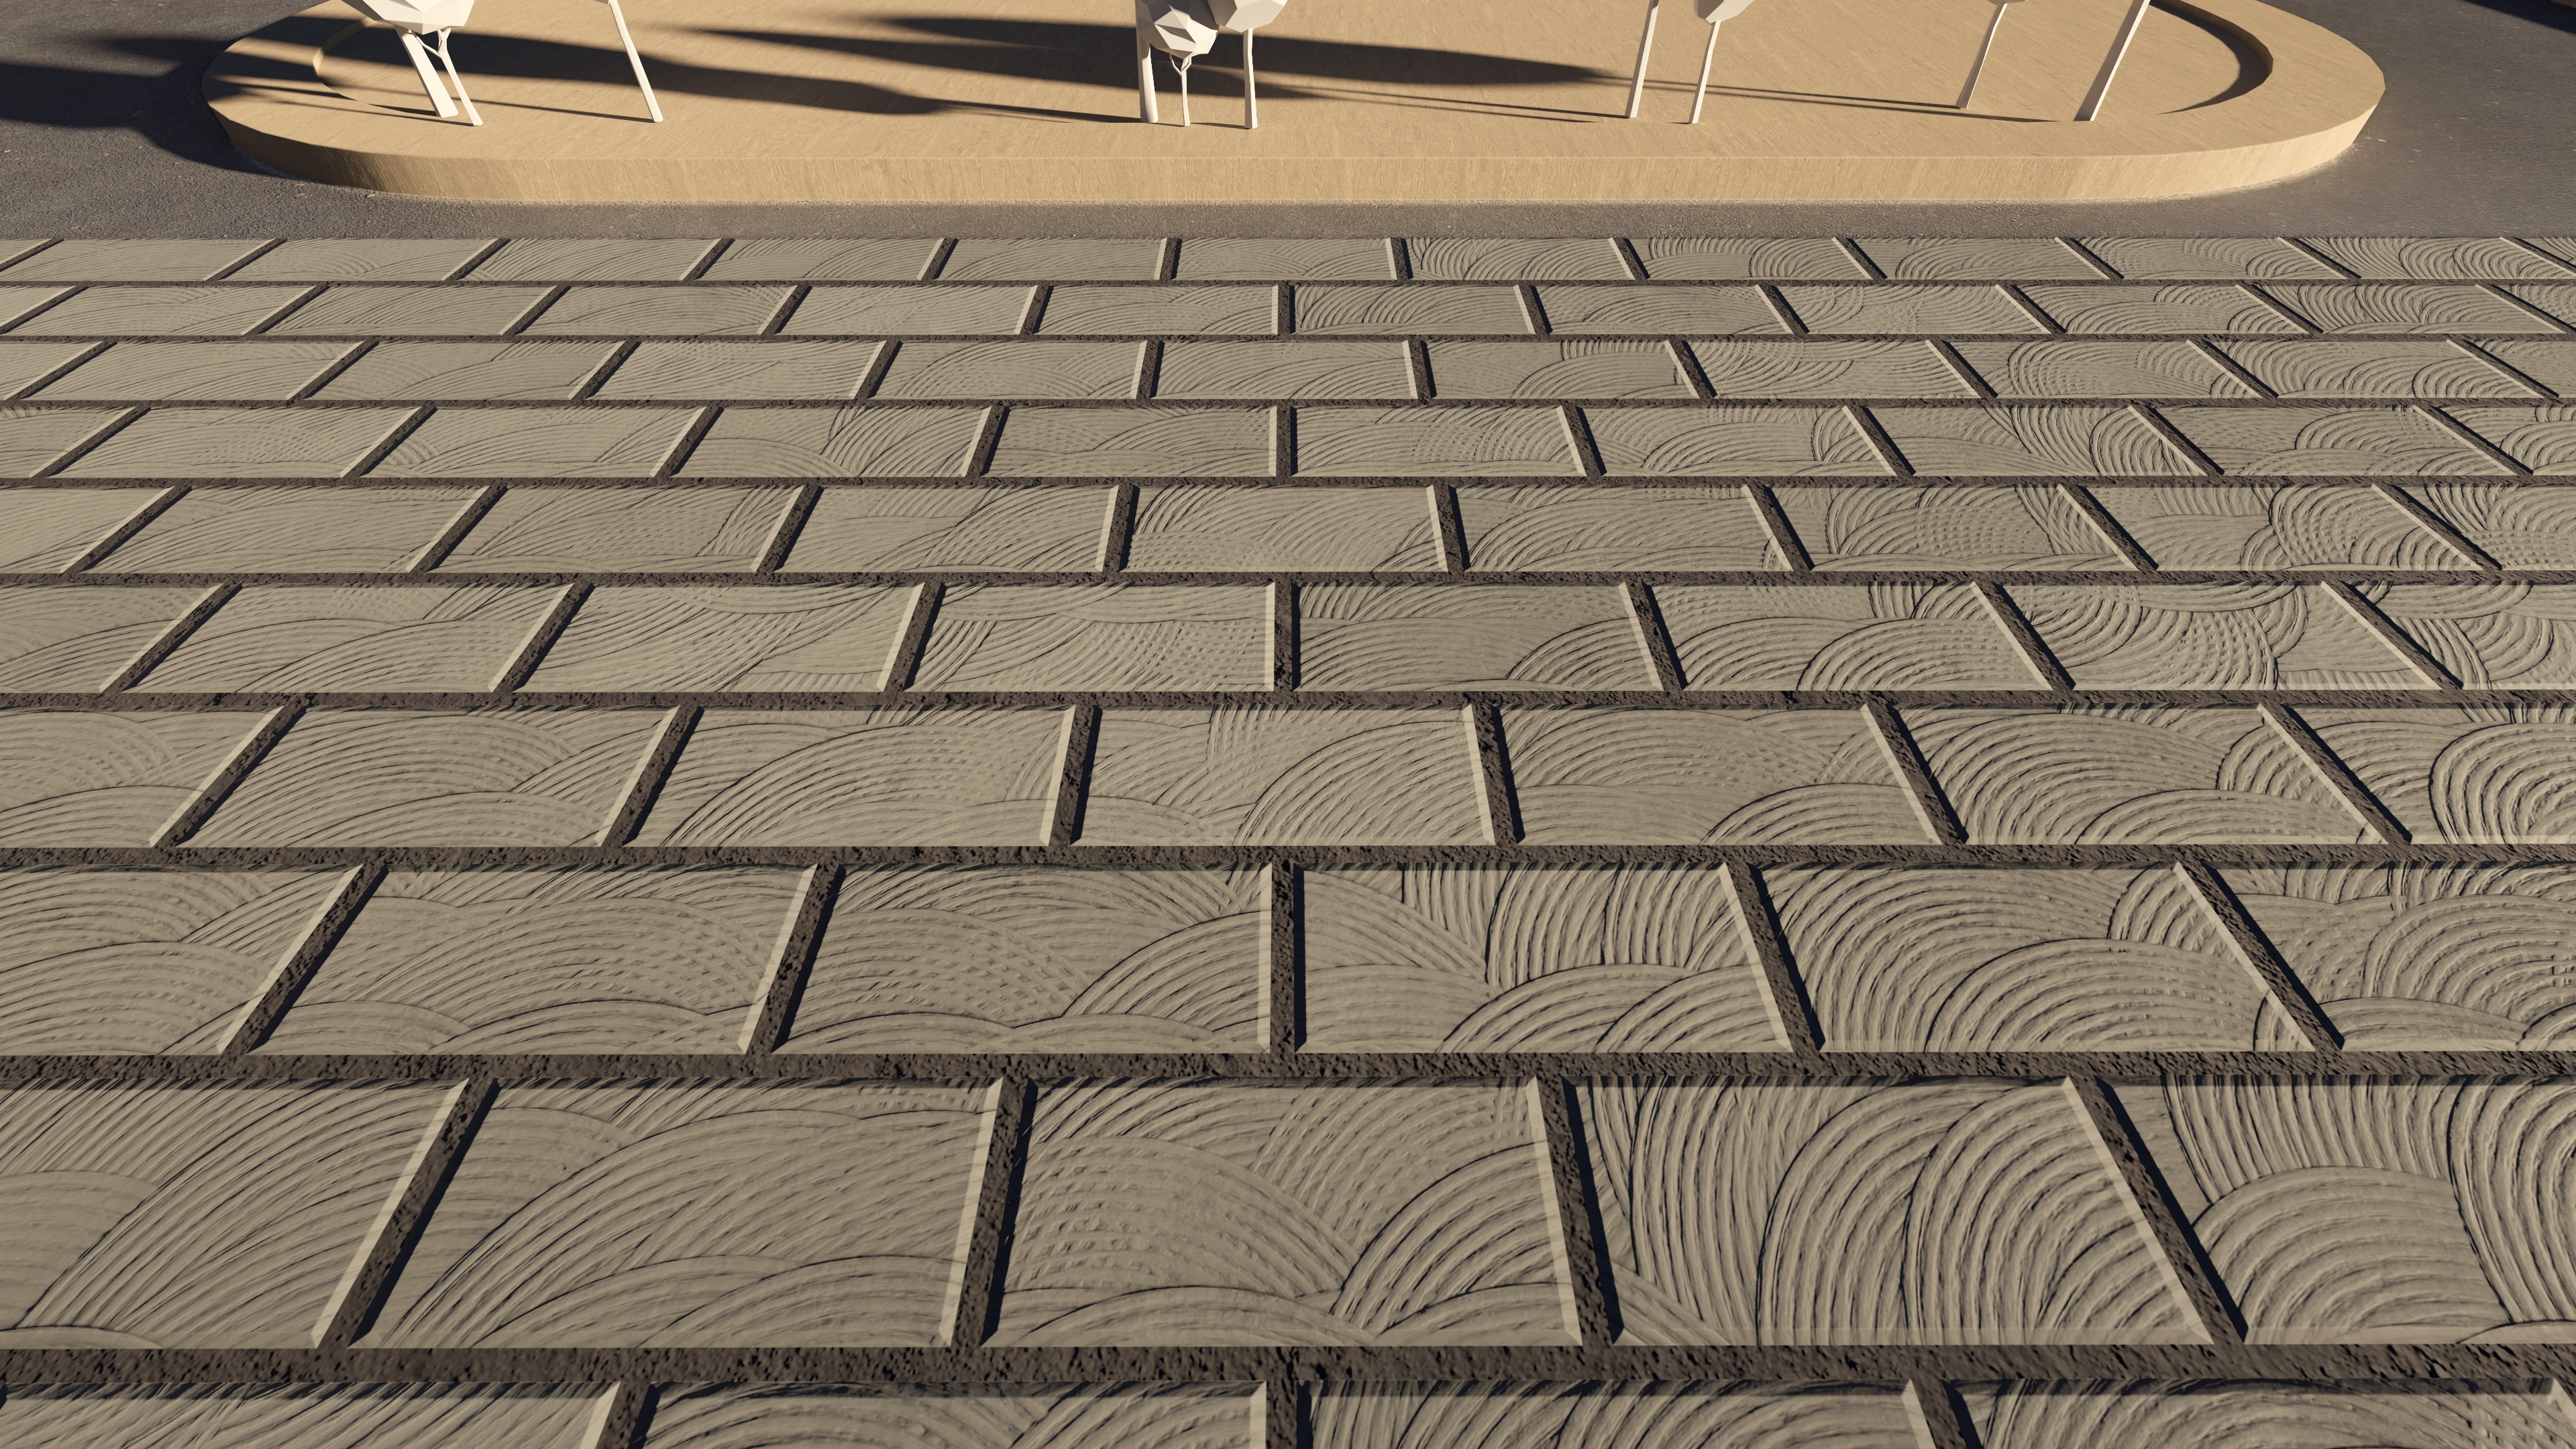
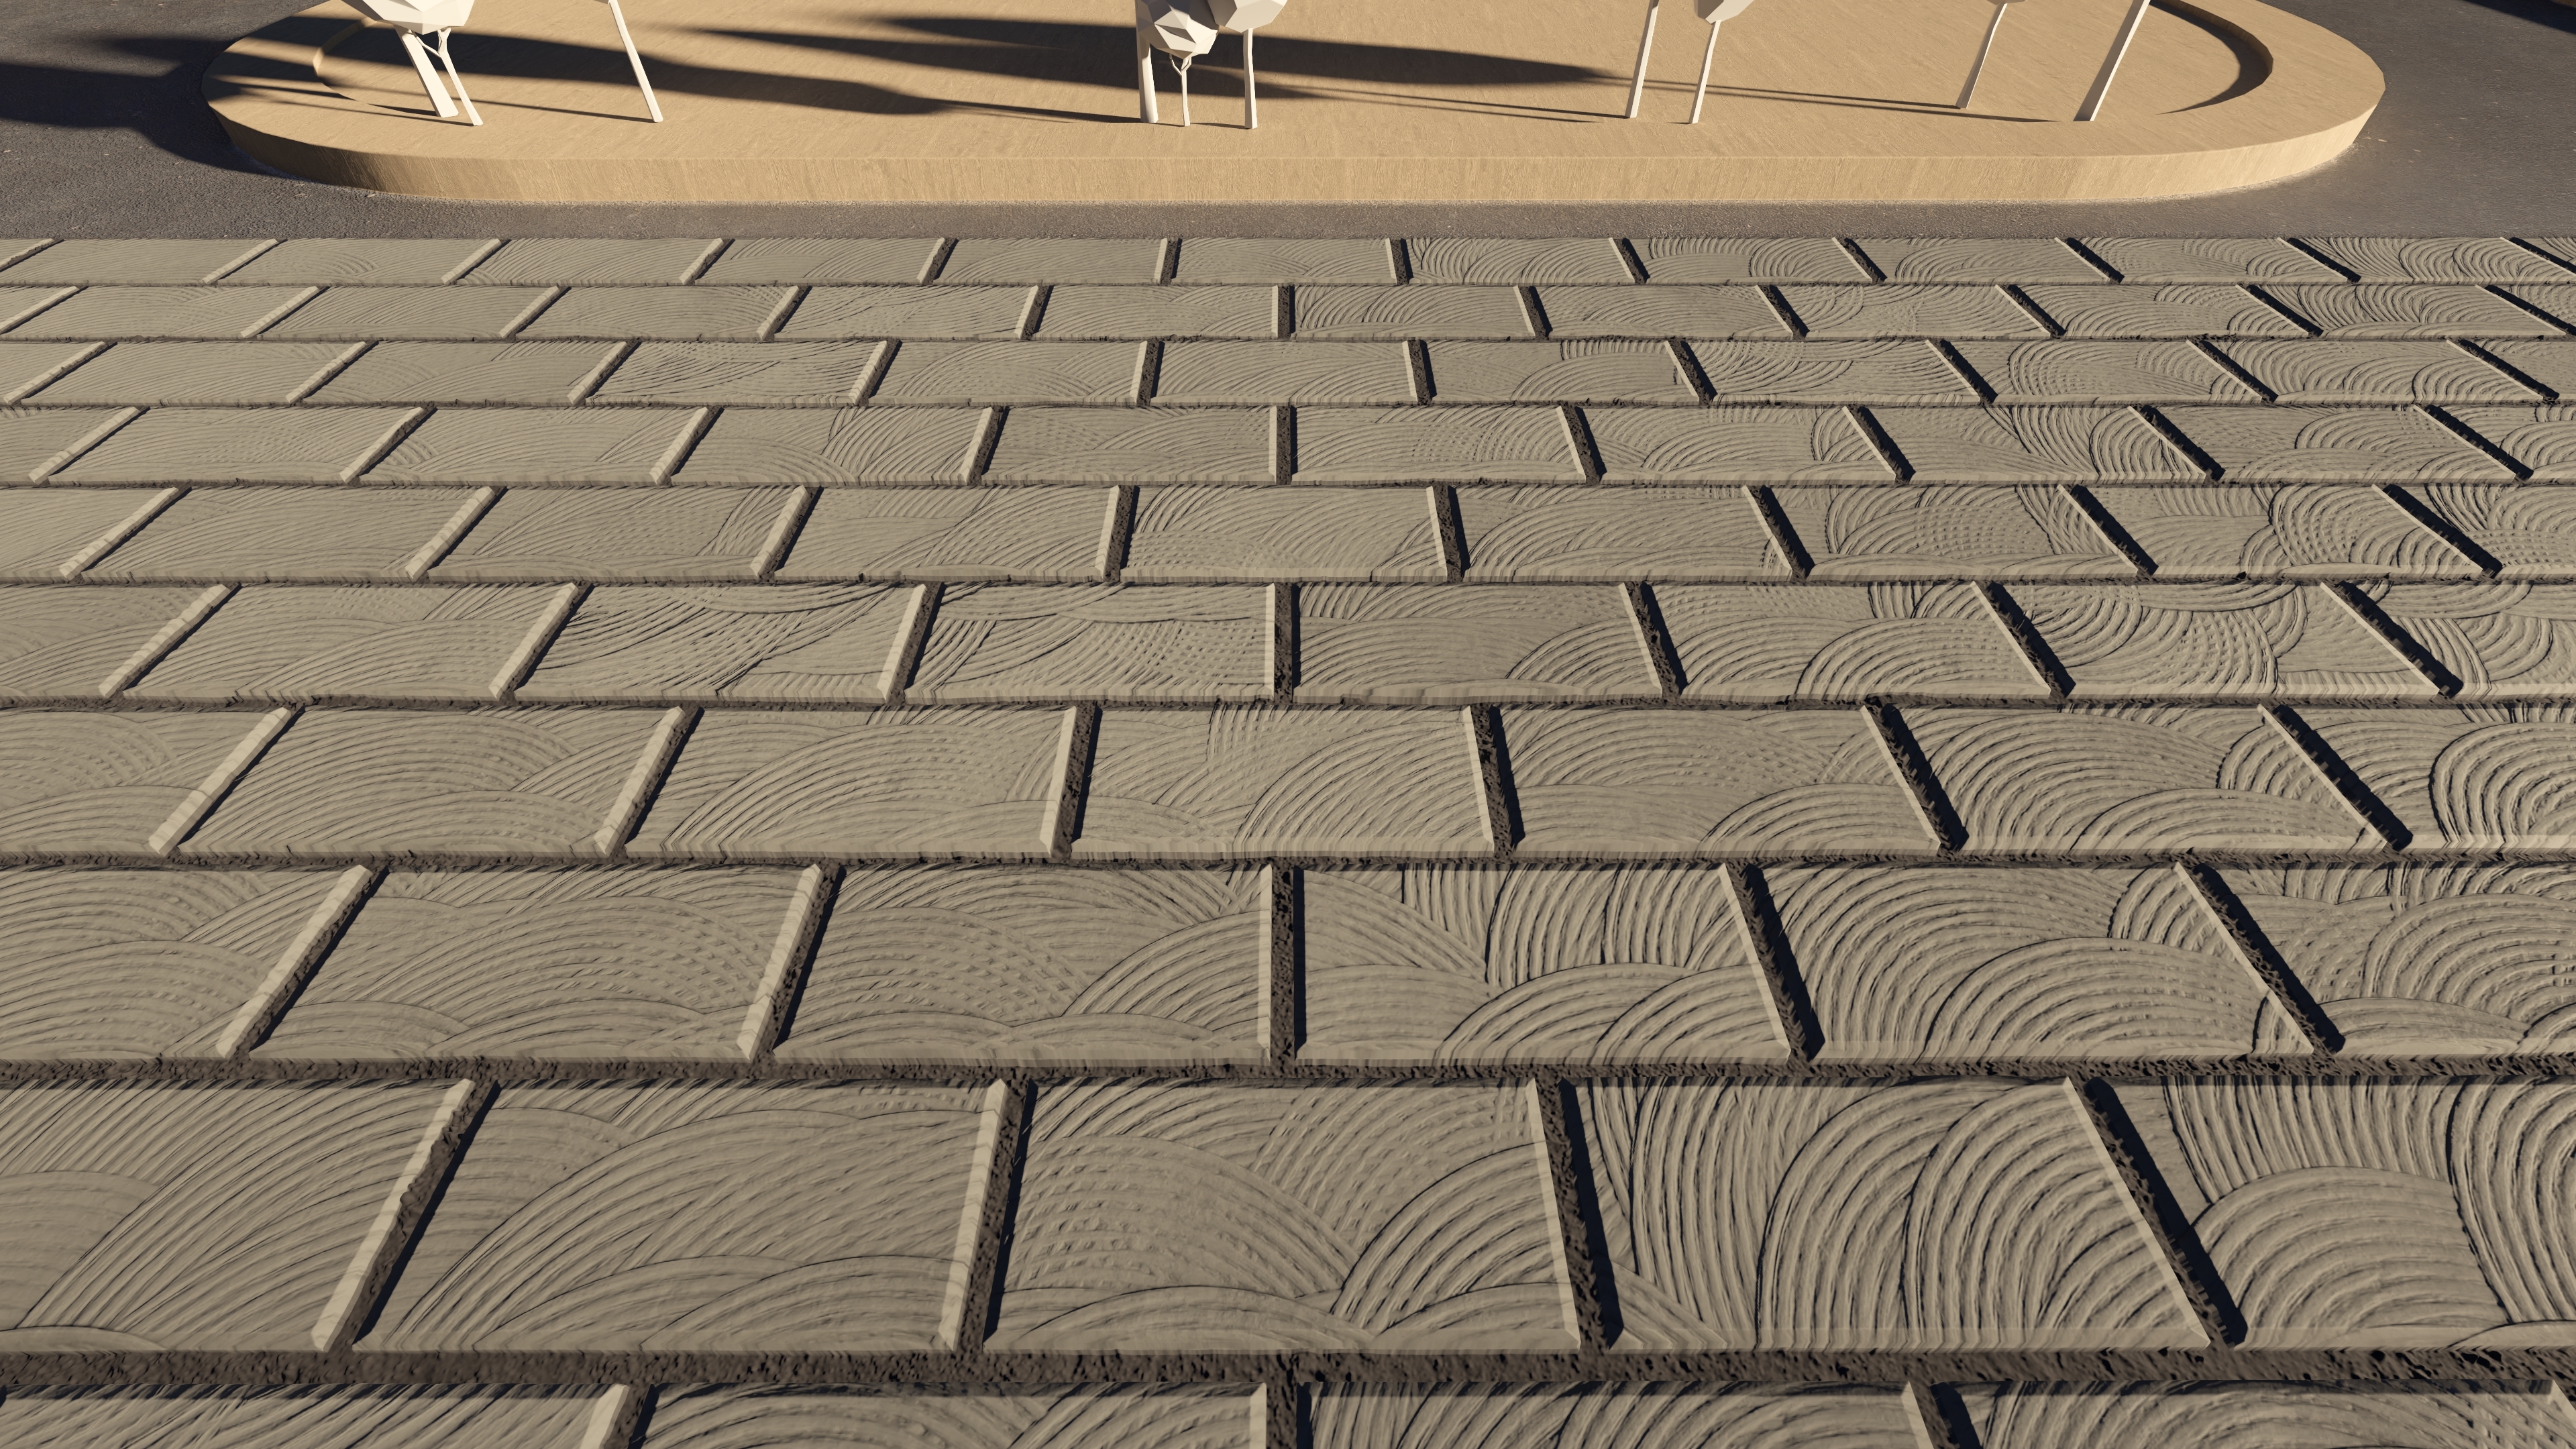
The Displacement Map controls the visible recessed depth of the generated Grout, making the grout lines appear deeper between the Tiles.
No Displacement Map available?
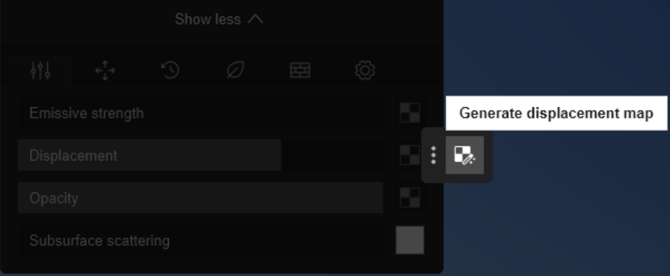
From Lumion 2026.1.3, if your Material already has a Normal Map, Lumion can generate one for you. Open the Displacement Map context menu (3 dots on the right of the slider) and select Generate displacement map.
The generated map uses the same resolution as the Normal Map.
This can provide a useful result when a dedicated map is not available, but for the best quality and accuracy, use a purpose-made Displacement Map where possible.
5.2.1 Grout with Displacement Map (0%-50%)
The comparison below shows the visual change from 0% to 50% Displacement Map.
At 0%, the Bevel setting can already make the Grout feel slightly recessed. Increasing the Displacement Map gives more control over how strongly that recessed appearance is shown in the final Grout result.
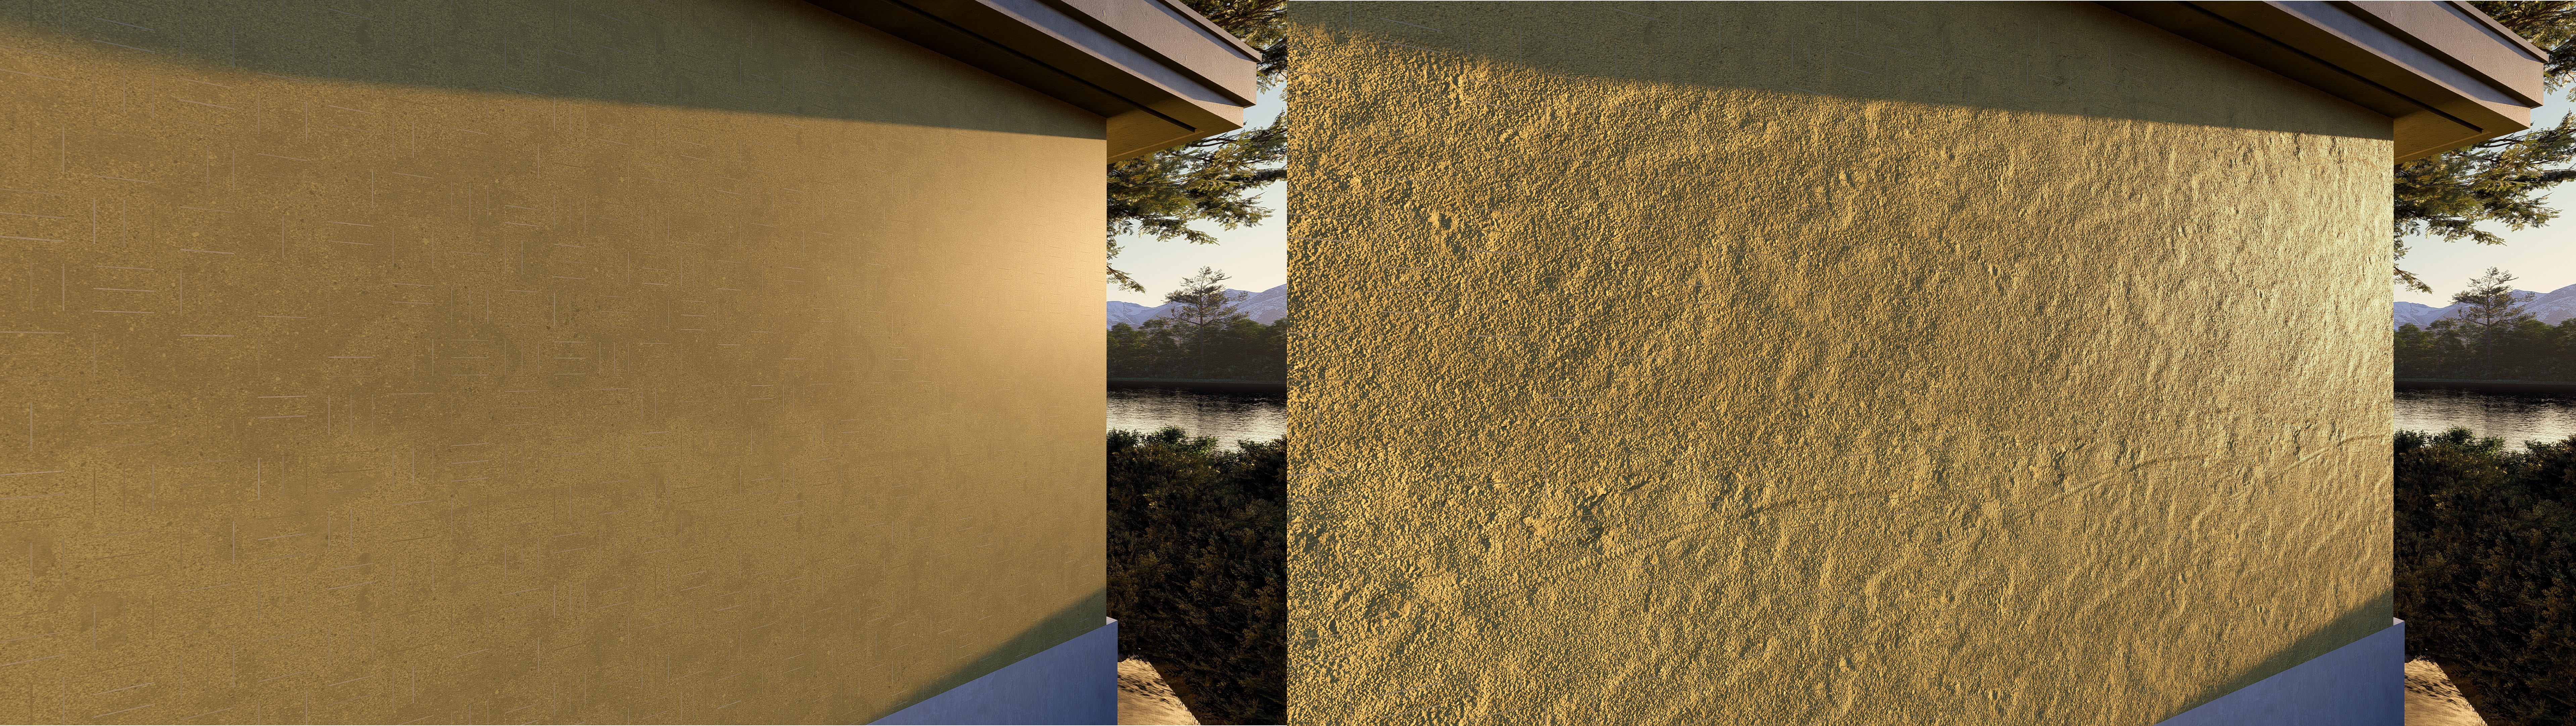
5.2.2 Grout with Relief Map (0%-200%)
The Relief Map also affects the generated Grout, increasing the amount of visible surface texture.
Note: In this example below, the Tiles surface has been made almost invisible to better illustrate how the Relief Map affects the Grout surface.
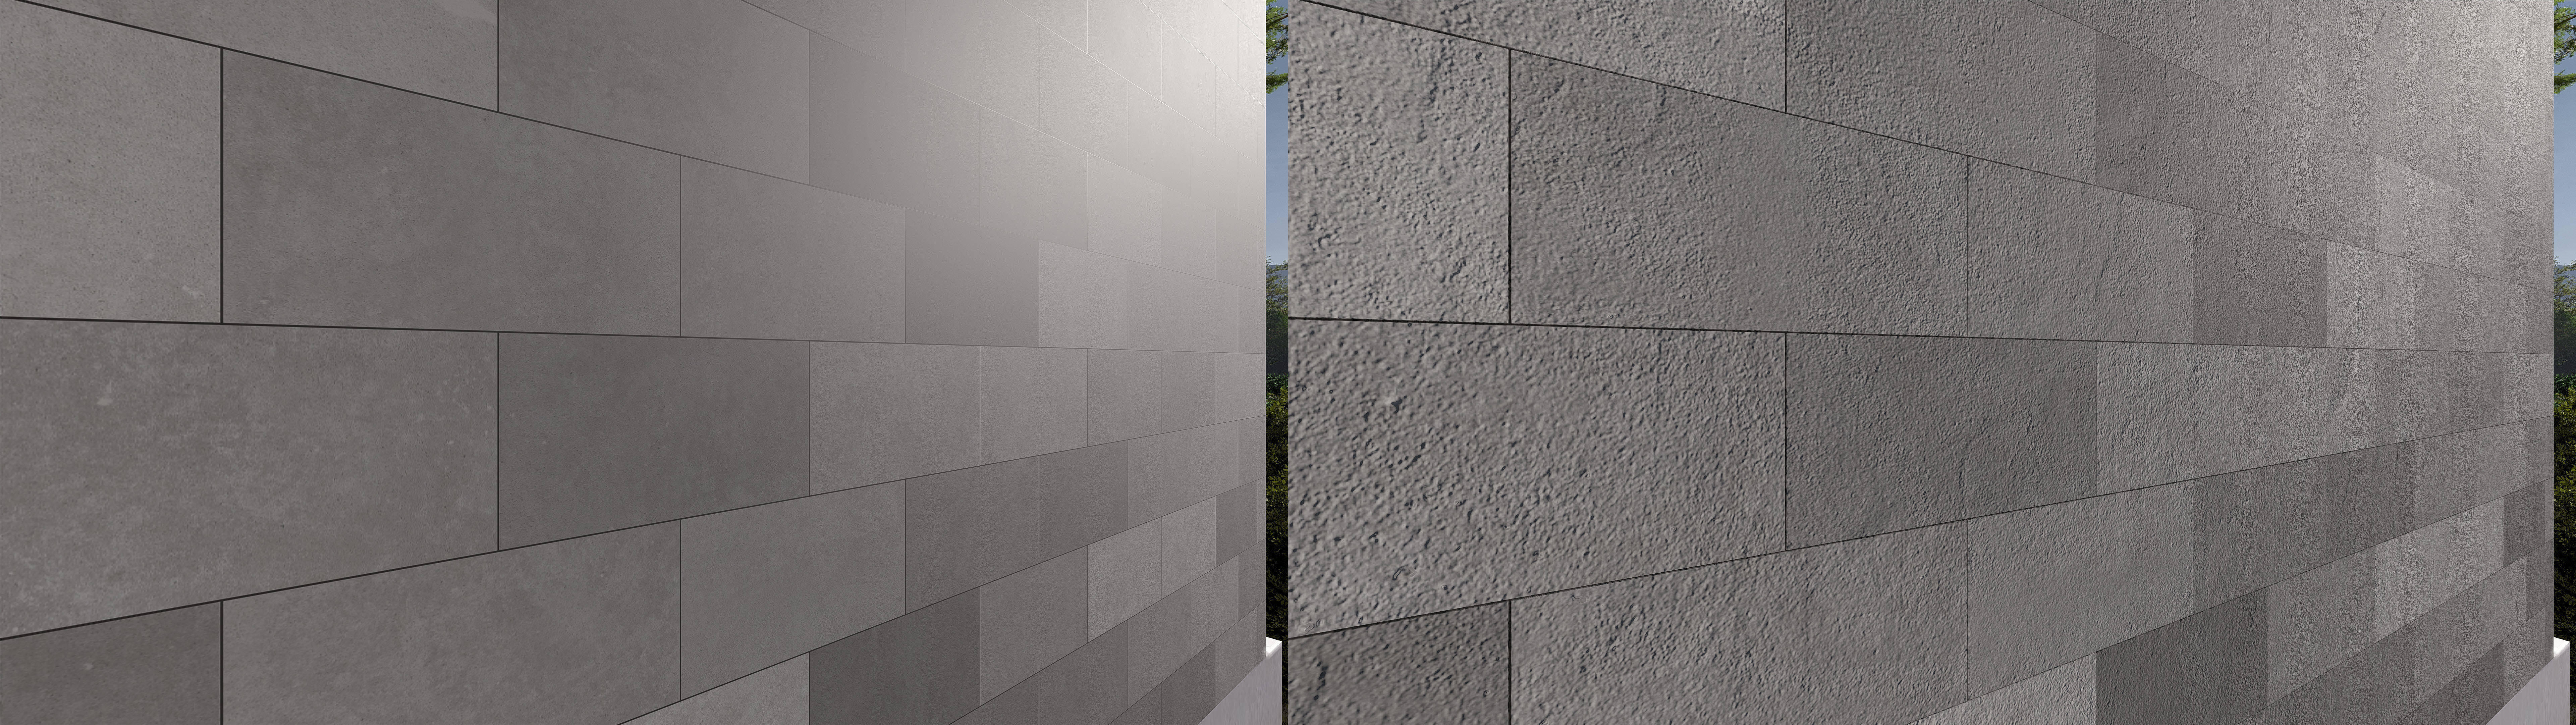
5.2.3 Tiles with Relief Map (0%-200%)
Increasing the Relief Map increases the amount of visible surface detail applied to the generated Tiles.
For more information about Material surface maps and related Material properties, see:
See Also:
-
Lumion Blog: How to make materials feel real
-
Lumion Blog: Enhance the realism of your displacement maps
-
Learning Pathways: Materials Workflow
-
Lumion Website: How to Create PBR Materials in Lumion Cloud: 5 Easy Steps
-
Lumion Website: Complete Guide to Realistic PBR Materials in Lumion Renders for Architectural Design
-
Lumion Website: AI-generate your own PBR materials in Lumion Cloud
-
Video Tutorials: Materials made easy
-
Video Tutorials: Lumion 2023: Create Ultra Realistic Materials in Lumion