---
title: What do the properties of the Standard Material mean in Lumion 2023 and newer?
description: What do the properties of the Standard Material mean in Lumion 2023 and newer?
---
Solutions
[Architectural design All you need to bring your residential, commercial or institutional designs to life](https://lumion.com/product/architectural-design) [Landscape architecture Beautiful terrains and fine-detailed nature for any climate or season](https://lumion.com/product/landscape-architecture)
[Interior design Realistic light, high-quality textures, and an extensive asset library](https://lumion.com/product/interior-design) [Students and Faculties Lumion is free for students, educators, and faculties around the world](https://lumion.com/product/educational-licenses)
[SketchUp](https://lumion.com/compatibility/sketchup-rendering) [Revit](https://lumion.com/compatibility/revit-rendering) [ArchiCAD](https://lumion.com/compatibility/archicad-rendering) [Rhino](https://lumion.com/compatibility/rhino-rendering) [Autocad](https://lumion.com/compatibility/autocad-rendering) [See more](https://lumion.com/compatibility/)
Product
[Discover Axogram New Live architectural diagramming](https://lumion.com/product/axogram) [Lumion Cloud Where design meets collaboration](https://lumion.com/product/lumion-cloud)
[Lumion Pro Advanced visualization solution](https://lumion.com/product/lumion-pro) [Discover AI tools New AI built for architectural work](https://lumion.com/product/ai)
[Lumion Pro 2026.1 is out now! 🚀](https://lumion.com/product/latest-version-pro) [Compatibility](https://lumion.com/compatibility/) [System Requirements](https://lumion.com/product/system-requirements) [Roadmap](https://lumion.com/product/roadmap)
[Pricing](https://lumion.com/product/buy) Resources
[Made with Lumion Get inspired by the stories behind the designs](https://lumion.com/made-with-lumion)
[Tips & Guides Make the most out of Lumion with helpful guides and tutorials](https://lumion.com/tips-guides)
[Knowledge base](https://support.lumion.com/knowledge-base?hsLang=en-us) [Community](https://community.lumion.com/index.php) [Downloads](https://support.lumion.com/downloads?hsLang=en-us)
About
[Who we are Learn about our story and mission](https://lumion.com/about) [Careers - We're hiring Let's build the future of architectural visualization](https://lumion.com/about/careers)
[News Discover the latest product news and more](https://lumion.com/news)
[Find your local reseller](https://lumion.com/about/find-reseller) [Contact us](https://lumion.com/about/contact)
[](http://lumion.com)
[My Account](https://account.lumion.com)
Solutions
[Architectural design](https://lumion.com/product/architectural-design) [Interior design](https://lumion.com/product/interior-design) [Landscape architecture](https://lumion.com/product/landscape-architecture) [Students and Faculties](https://lumion.com/product/educational-licenses)
---
[SketchUp](https://lumion.com/compatibility/sketchup-rendering) [Revit](https://lumion.com/compatibility/revit-rendering) [ArchiCAD](https://lumion.com/compatibility/archicad-rendering) [Rhino](https://lumion.com/compatibility/rhino-rendering) [Autocad](https://lumion.com/compatibility/autocad-rendering) [See more](https://lumion.com/compatibility/)
Product
[Axogram New](https://lumion.com/product/axogram) [Lumion Cloud](https://lumion.com/product/lumion-cloud) [Lumion Pro](https://lumion.com/product/lumion-pro) [Discover AI tools New](https://lumion.com/product/ai)
---
[Lumion Pro 2026.1 is out now! 🚀](https://lumion.com/product/latest-version-pro) [Compatibility](https://lumion.com/compatibility/) [System Requirements](https://lumion.com/product/system-requirements) [Roadmap](https://lumion.com/product/roadmap)
[Pricing](https://lumion.com/product/buy) Resources
[Made with Lumion](https://lumion.com/made-with-lumion) [Tips & Guides](https://lumion.com/tips-guides)
---
[Knowledge base](https://support.lumion.com/knowledge-base?hsLang=en-us) [Community](https://community.lumion.com/index.php) [Downloads](https://support.lumion.com/downloads?hsLang=en-us)
About
[Who we are](https://lumion.com/about) [Careers - We're hiring](https://lumion.com/about/careers) [News](https://lumion.com/news)
---
[Find your local reseller](https://lumion.com/about/find-reseller) [Contact us](https://lumion.com/about/contact)
[My Account](https://account.lumion.com)
[Submit a request](https://support.lumion.com/hc/en-us/requests/new?hsLang=en-us)
Lumion Knowledge Base
How can we help?
- There are no suggestions because the search field is empty.
[Skip to content](https://support.lumion.com/knowledge-base/api/v2/help_center/en-us/articles/7764034284188.json#main-content)
English - United States
Show submenu for translations

Open main navigation
Close main navigation
- English - United States
Show submenu for translations
- Contact us
Contact us
How can we help you?
- There are no suggestions because the search field is empty.
1. [Knowledge Base](https://support.lumion.com/knowledge-base?hsLang=en-us)
2. [Material Questions](https://support.lumion.com/knowledge-base/material-questions?hsLang=en-us)
# What do the properties of the Standard Material mean in Lumion 2023 and newer?
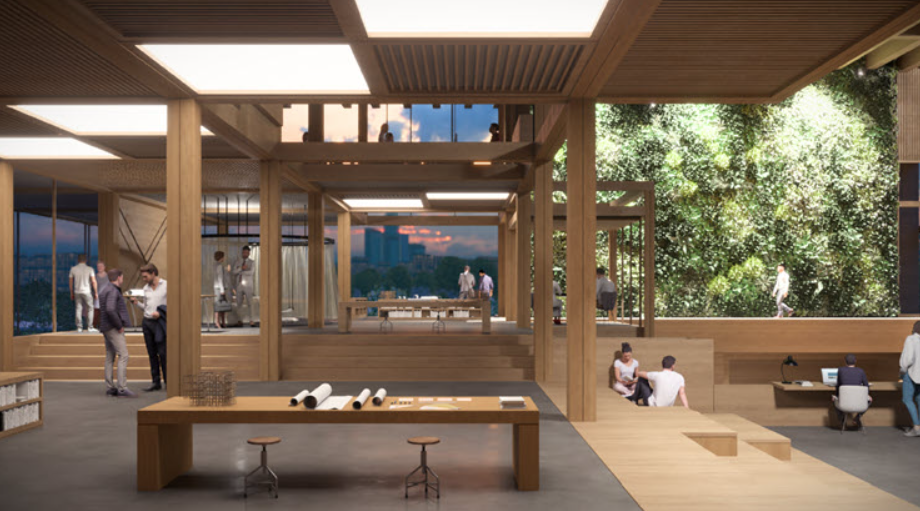
### **Features and Properties**
**Version Changes:**
Lumion 2023 introduced a completely new PBR based materials system, editor and materials types. Including one for the *Standard Material*.
Lumion 2024 added one new feature and some changes/fixes. Those are noted alongside the feature.
The changes are also found in these sections:
- 10.4: Enable Landscape Tiling (Lumion 2024)
**1. Introduction:**
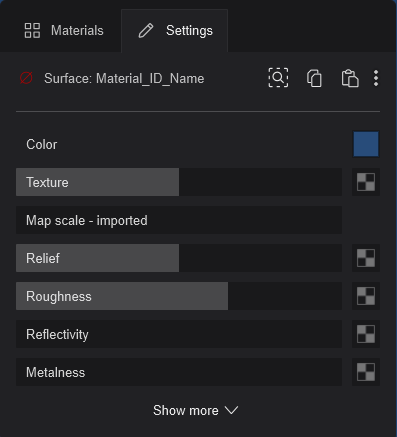
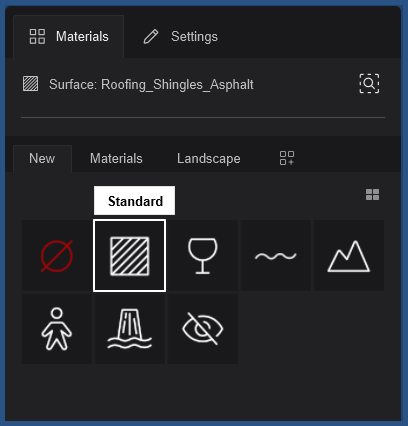
You will use the *Standard Material* when setting the material look for many surfaces of your model.
Initially, all materials are an *Imported Material* for a surface (except those for auto-created *Glass* and *Water*), after *Importing* a model,
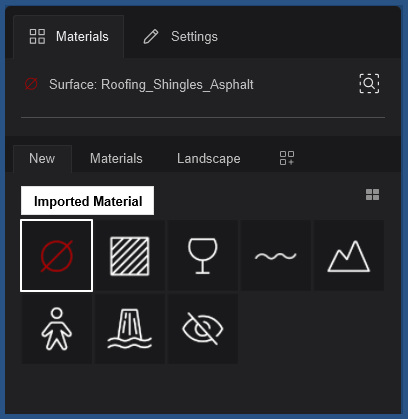
You use a *Standard Material* to apply changes to the look and quality of your model within Lumion.
The *Standard Material* is used for many surfaces and is also the base material type used in many of the *Lumion Library Materials*.
It is available from the *Material Tab* -\> *New Tab*.
You can swap from one material to another. This is the most common type of material.
**Important Workflow change from earlier versions:**
You can edit any of the settings of an *Imported Material*. Before version 2023 that was not possible until you manually changed to a different material such as the *Standard Material*.
For example:
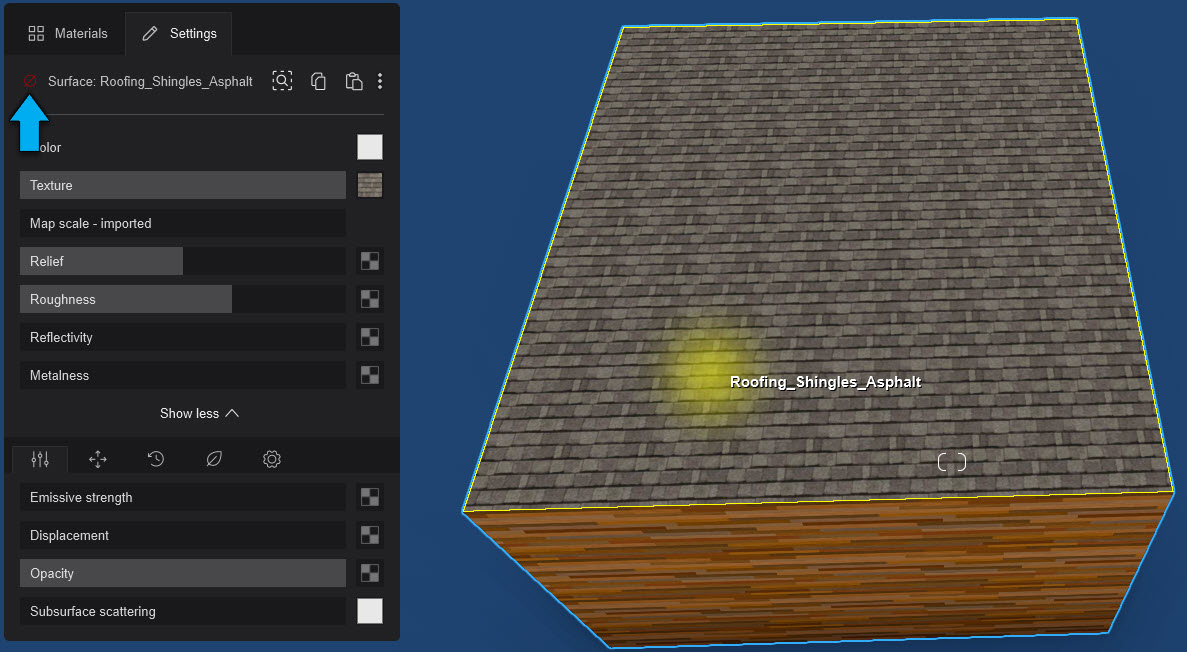
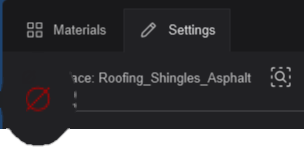
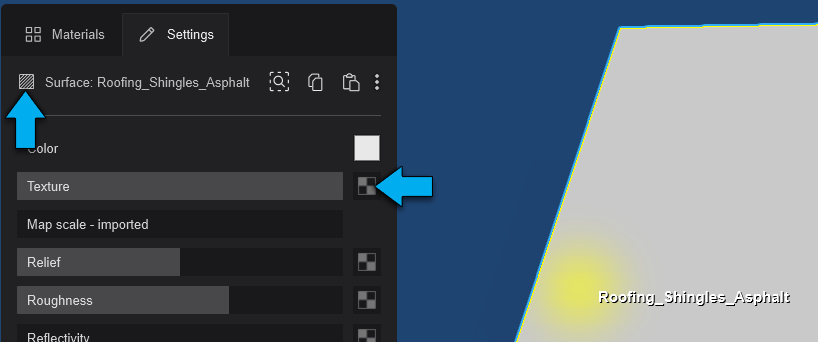
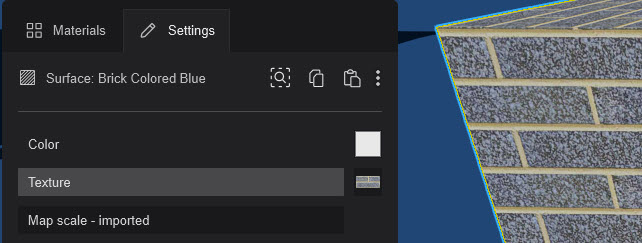
When you make a change, for example, change the *Texture* slider value or remove the *Texture Map*, Lumion will now treat the material as a *Standard Material*.
**2. The Lumion PBR Material Pipeline:**
A *Material* is defined by the color and textures in the *Common/Standard Settings* and the *Extended Settings* that provide its unique look and how it reacts to light.
Lumion now has a full PBR (physically based rendering) material using a *Metalness*/*Roughness* workflow, with the following properties:
- *Color*.
- *Texture*/*Color* *Map*: increasing this value will blend between the set color and load albedo/diffuse texture.
- *Relief*.
- *Roughness*: In the old standard material we used a gloss, but roughness is basically the inverse.
- *Reflectiveness*.
- *Metalness*: now has its own slider to set how metallic a surface is.
- *Emissiveness*.
- *Displacement*.
- *Opacity*: Can use an alpha map.
- *Subsurface Scattering*: similar to waxiness/translucency in the old standard material,
- *Clearcoat*: Now it is possible to create the same kind of material that was first only available for *Lumion Library* car models.
#### **PBR Supported input textures (Maps):**
- *Texture* (Color).
- *Relief*.
- *Roughness* (grayscale, inverse of a gloss map).
- *Reflectivity* (grayscale).
- *Metalness* mask (grayscale).
- *Emissive* mask (grayscale).
- *Opacity* mask (grayscale).
To see more detail on the industry standard materials workflow for real-time environments, see these articles:
- **External Link:** [Marmoset: Physically-Based Rendering, And You Can Too!](https://marmoset.co/posts/physically-based-rendering-and-you-can-too/)
For changes in the *Materials System* before version 2023, see this article:
- **Knowledge Base:** [Transitions: From prior versions to working with the new Lumion 2023](https://support.lumion.com/knowledge/articles/7807462680732?hsLang=en-us)
- **Video Tutorial:** [Lumion 2023: Create Ultra Realistic Materials in Lumion (by Architecture Inspirations)](https://support.lumion.com/video-tutorials/api/v2/help_center/en-us/articles/8644819133980.json?hsLang=en-us)
- **Video Tutorial (Chapter: Material Editor Interface, 6:19):** [Lumion 2023: Top Features You Must Try ft. Nuno Silva](https://support.lumion.com/video-tutorials/api/v2/help_center/en-us/articles/8090112796444.json?hsLang=en-us)
- **Video Tutorial (3:25 Chapter: Feature no.3 - PBR Workflow, 3:25):** [Lumion 2023: Game changing new features ft. Upstairs](https://support.lumion.com/video-tutorials/api/v2/help_center/en-us/articles/8209428326684.json?hsLang=en-us)
**3. Properties:**
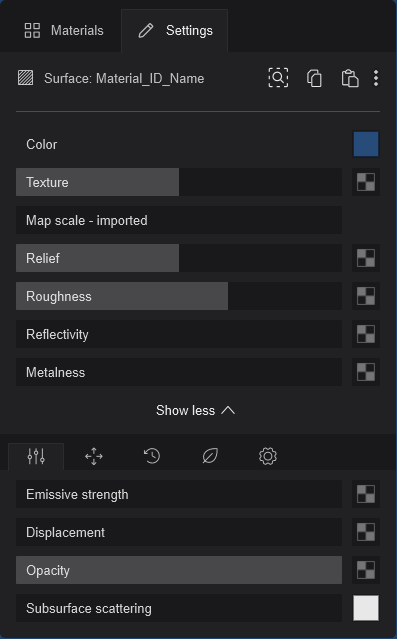
The *Standard Material* has 13 Material (main) Properties, 8 Maps, 2 Color Palettes:

**Common Properties:**
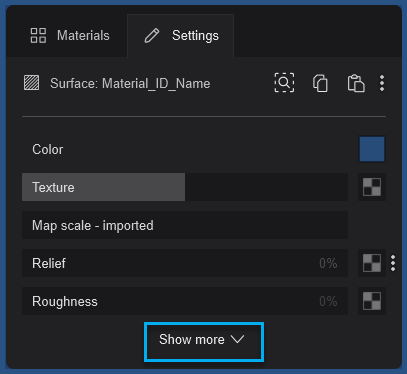
*Color*: Color Palette only (no slider)
*Texture* (Color Map): slider and Map
*Map Scale* -imported: slider
*Relief*: slider and Normal Map
*Roughness*: slider and Roughness Map
*Reflectiveness* and Reflectiveness Map
*Metalness* and Metalness Map
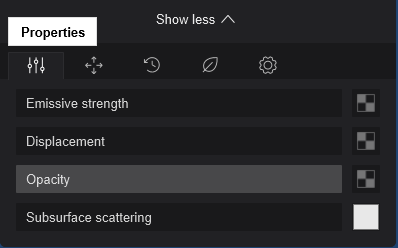
**Slider Properties and Maps in the *Settings Tab* (Extended Properties):**
*Properties*:
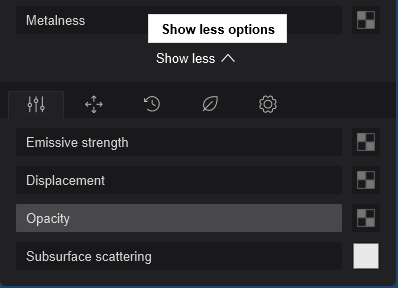
*Emissive Strength* and Emissive Map
*Displacement* and Displacement Map
*Opacity* and Opacity Map
*Subsurface Scattering* and Subsurface Scattering Color
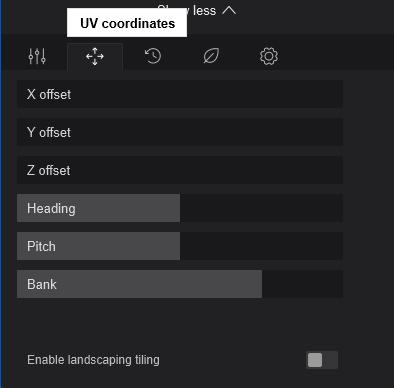
**(Extended Properties):**
*UV Coordinates*
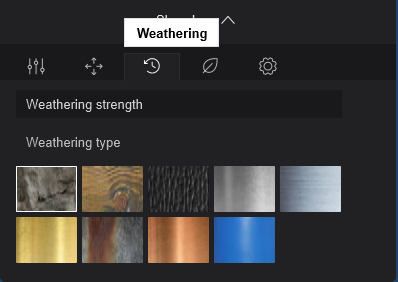
**(Extended Properties):**
*Weathering*
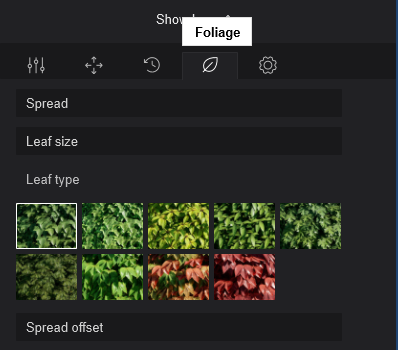
**(Extended Properties):**
*Foliage*
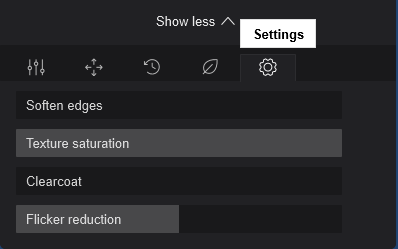
**(Extended Properties):**
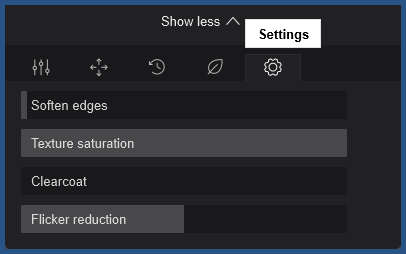
*Settings*:
*Soften Edges*
*Texture Saturation*
*Clearcoat*
*Flicker Reduction*
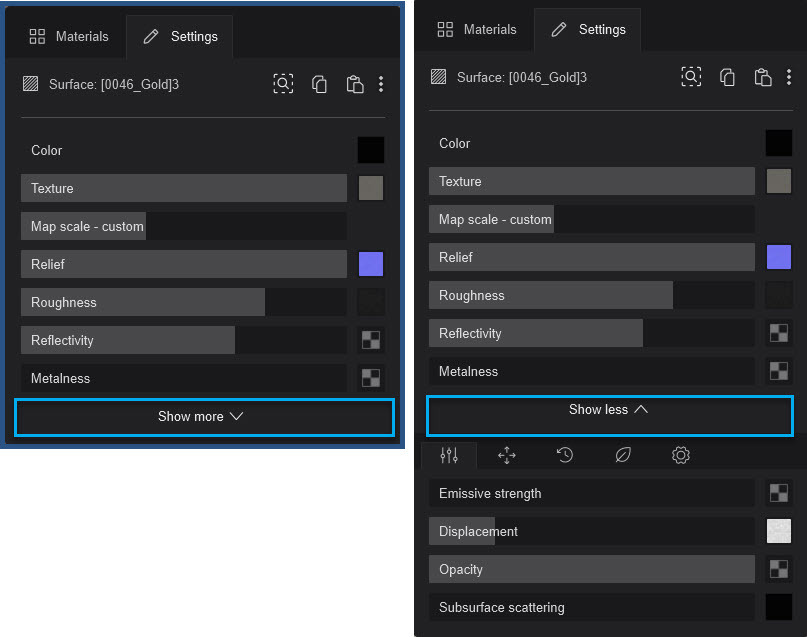
To hide the extra *(Extended) Properties*, use the *Show Less* button:
And then to see those, use the *Show More*:
**3.1: Change in Material Type**
Whenever you make a change of a Property/Setting of an *Imported Material*, Lumion will automatically convert that type to a *Standard Material*, unless you have chosen a specific type of material such as *Glass*.
That can happen when if you *Load* for example a *Texture Map* or *Normal Map* in the *Settings tab*.
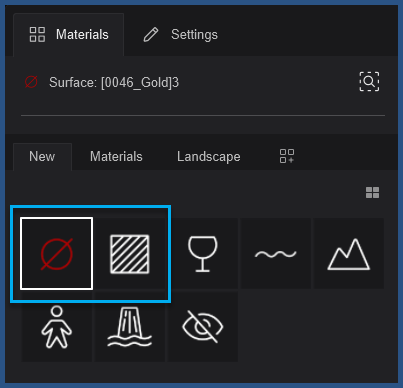
In prior versions, you had to directly choose the *Standard Material*.
**4. Common Tools:**
There are four common tools, that you may also find for other *Material Types*:
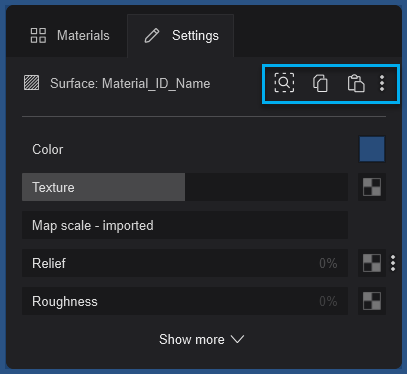
**4.1:** Find the *Material* in the *Lumion Materials Library* (if it is a Lumion *Library Material*) using this button:
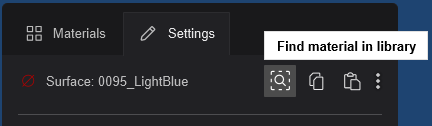
**4.2:** Copy a *Material* and **4.3:** Paste a *Material**. *See article:
- **Knowledge Base:** [How do you copy, paste, save and load Materials in Lumion 2023 and newer?](https://support.lumion.com/knowledge-base/api/v2/help_center/en-us/articles/7764039850396.json?hsLang=en-us)
**4.4:** *Context Menu* for other tools: *Load* and *Save* a *Material* to a File. See article:
- **Knowledge Base:** [How do you copy, paste, save and load Materials in Lumion 2023 and newer?](https://support.lumion.com/knowledge-base/api/v2/help_center/en-us/articles/7764039850396.json?hsLang=en-us)
**5. Access to the Settings for a Material:**
If you single-click on a surface it will open the *Material Editor* to the tab last used.
If you single or double-click a surface it will open the *Material* *Settings Tab*.
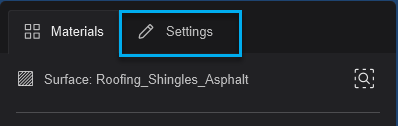
If you leave the editor with one of the other tabs open it will return to that tab the next time you open the editor with a **single click.**
Once you have accessed a *Material Setting* and the Tab is open then you do not need to double-click, a single click will change to the selected *Material* *Settings Tab*.
If you click on a surface and previously had used the *Materials Tab*:
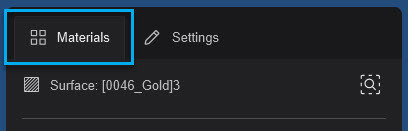
then your view may not show the *Material Settings* for the required surface.
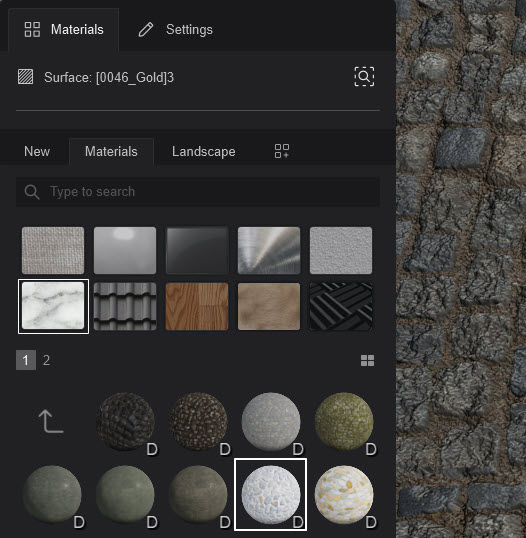
Just click on the *Settings Tab* to see them.
If previously you had been accessing the *Settings Tab* then you will see the settings/properties for the surface you have clicked on/selected.
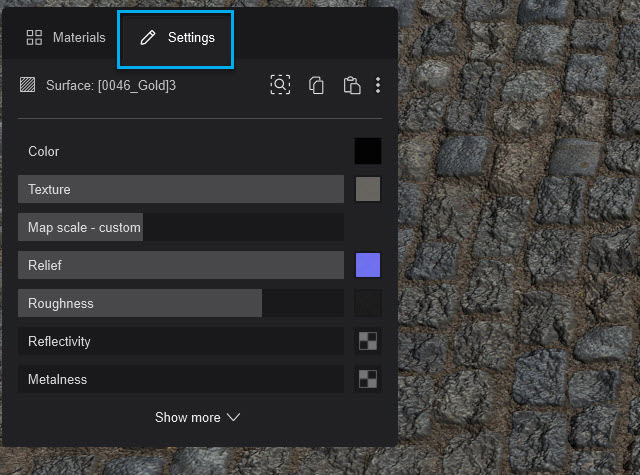
See also using the (new) *Find Materials in Library* button later in the article.
**6. Textures:**
When you change a *Material* for a surface from an *Imported Material* to a *Standard Material*, the *Color value* and the *Color Map* texture are transferred. Other types of *Materials* or *Textures* are not present in *Imported Materials*. So you often need to change or add other *Texture Types* to enhance the surface looks of a model.
You change the look to simulate what that *Material* will do when it reacts to light. A very smooth metal surface will look and react to light very differently from one that is still metal but very rough.
**6.1: Loading a Texture Map **
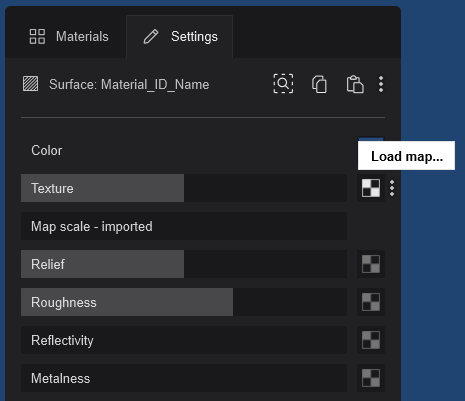
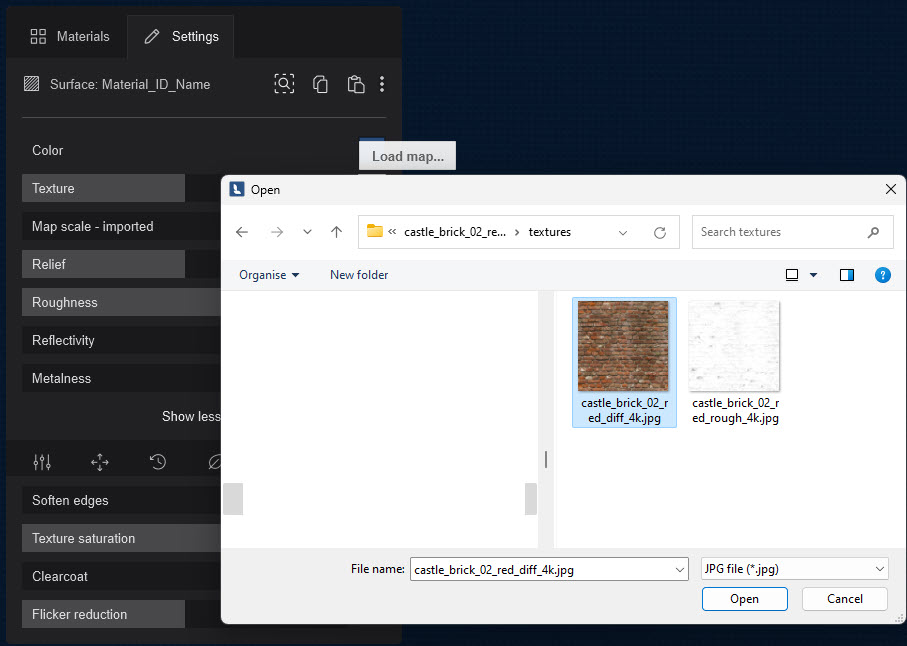
Most of the properties allow you to load an image as a *Texture Map*/Mask. See further in this article how the different properties interact with the texture by changing the slider value.
All Properties that have a *Map* have a slider to set the level/strength that the *Map* will be applied.
And, access to loading the *Map* is simply a one-click button:
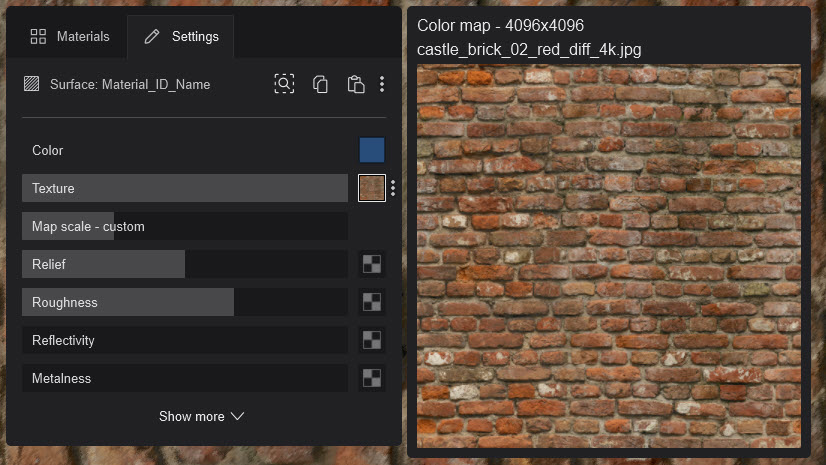
**6.2: Deleting the Texture Maps**
Any *Map* in the *Texture Map Slot* (or any other *Map Slot*) can be deleted using the *Delete (Bin)* button.
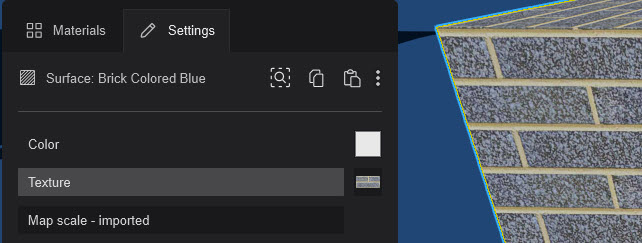
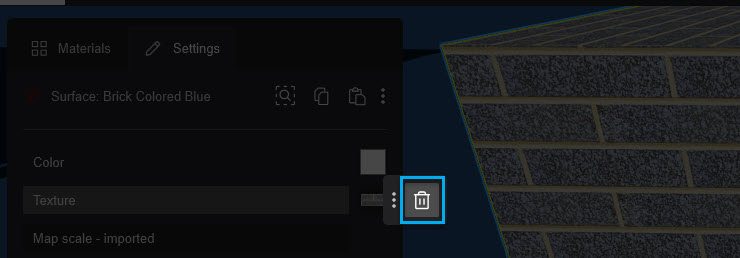
**6.3: Restoring the original Texture Map**
Click on the *Restore Original Imported Texture* button (new as of 23.1.0) to restore the original texture (**if** *Imported*). This button is only available when the *Texture Map* is empty, for example, after you have deleted the *Map* as in section 6.2 above.
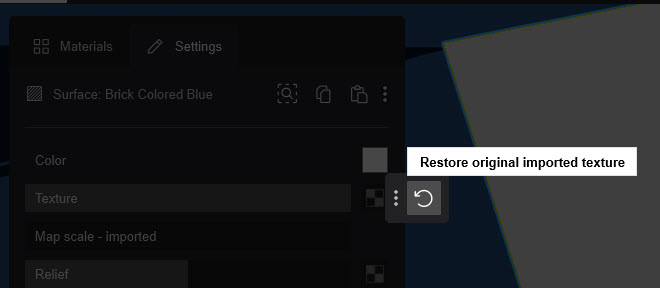
### **Material Settings:**
**7.1: The Main Material Properties**
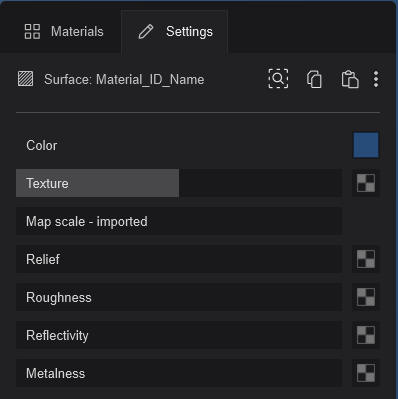
These properties define the base/main look of the surface. A surface will or should have at least:
- *Color and/or Texture*:
Also referred to as Albedo. To define the basic look - color.
In the case of a texture (diffuse texture), it provides multiple colors for one area as an image applied to the surface. Whereas, the *Color* is applied across the complete surface as a single color (*Color Value*).
- *Map Scale - (Imported or Custom)*:
How large or small a texture is and how many times it repeats over the surface.
- *Relief*:
How the top outer part of the surface looks in terms of its smoothness and depth in 3D.
- *Roughness*:
Ability to reflect or absorb, or react to light.
- *Reflectivity*:
Strength of a reflection.
- *Metalness*:
Defines whether the material is an insulator (dielectric) or a metal (conductive).
Examples of metallic materials include metals such as copper, gold, steel, etc.
Examples of insulator materials can include leather, glass, plastic, wood, ceramics, etc.
The *Metalness* property will allow you to add to the **reflectivity**.
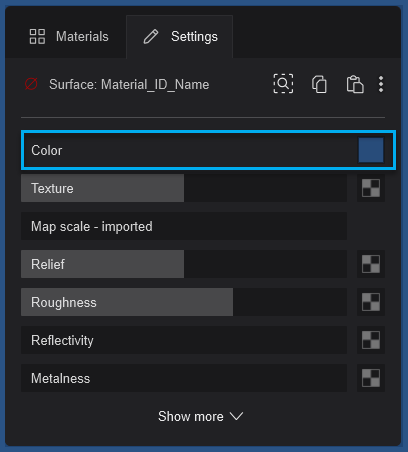
**7.2: Color**
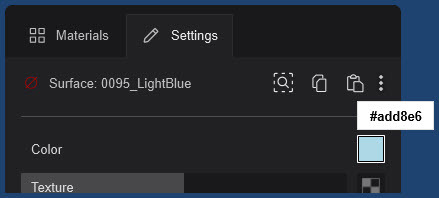
This is the *Color Value*:
and, as defined by using the *Color Palette*:
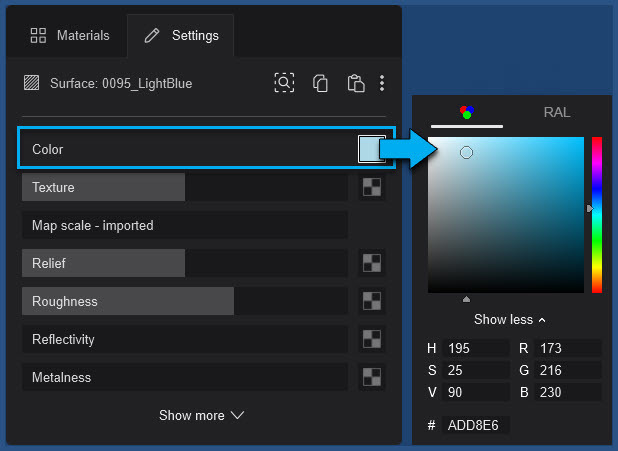
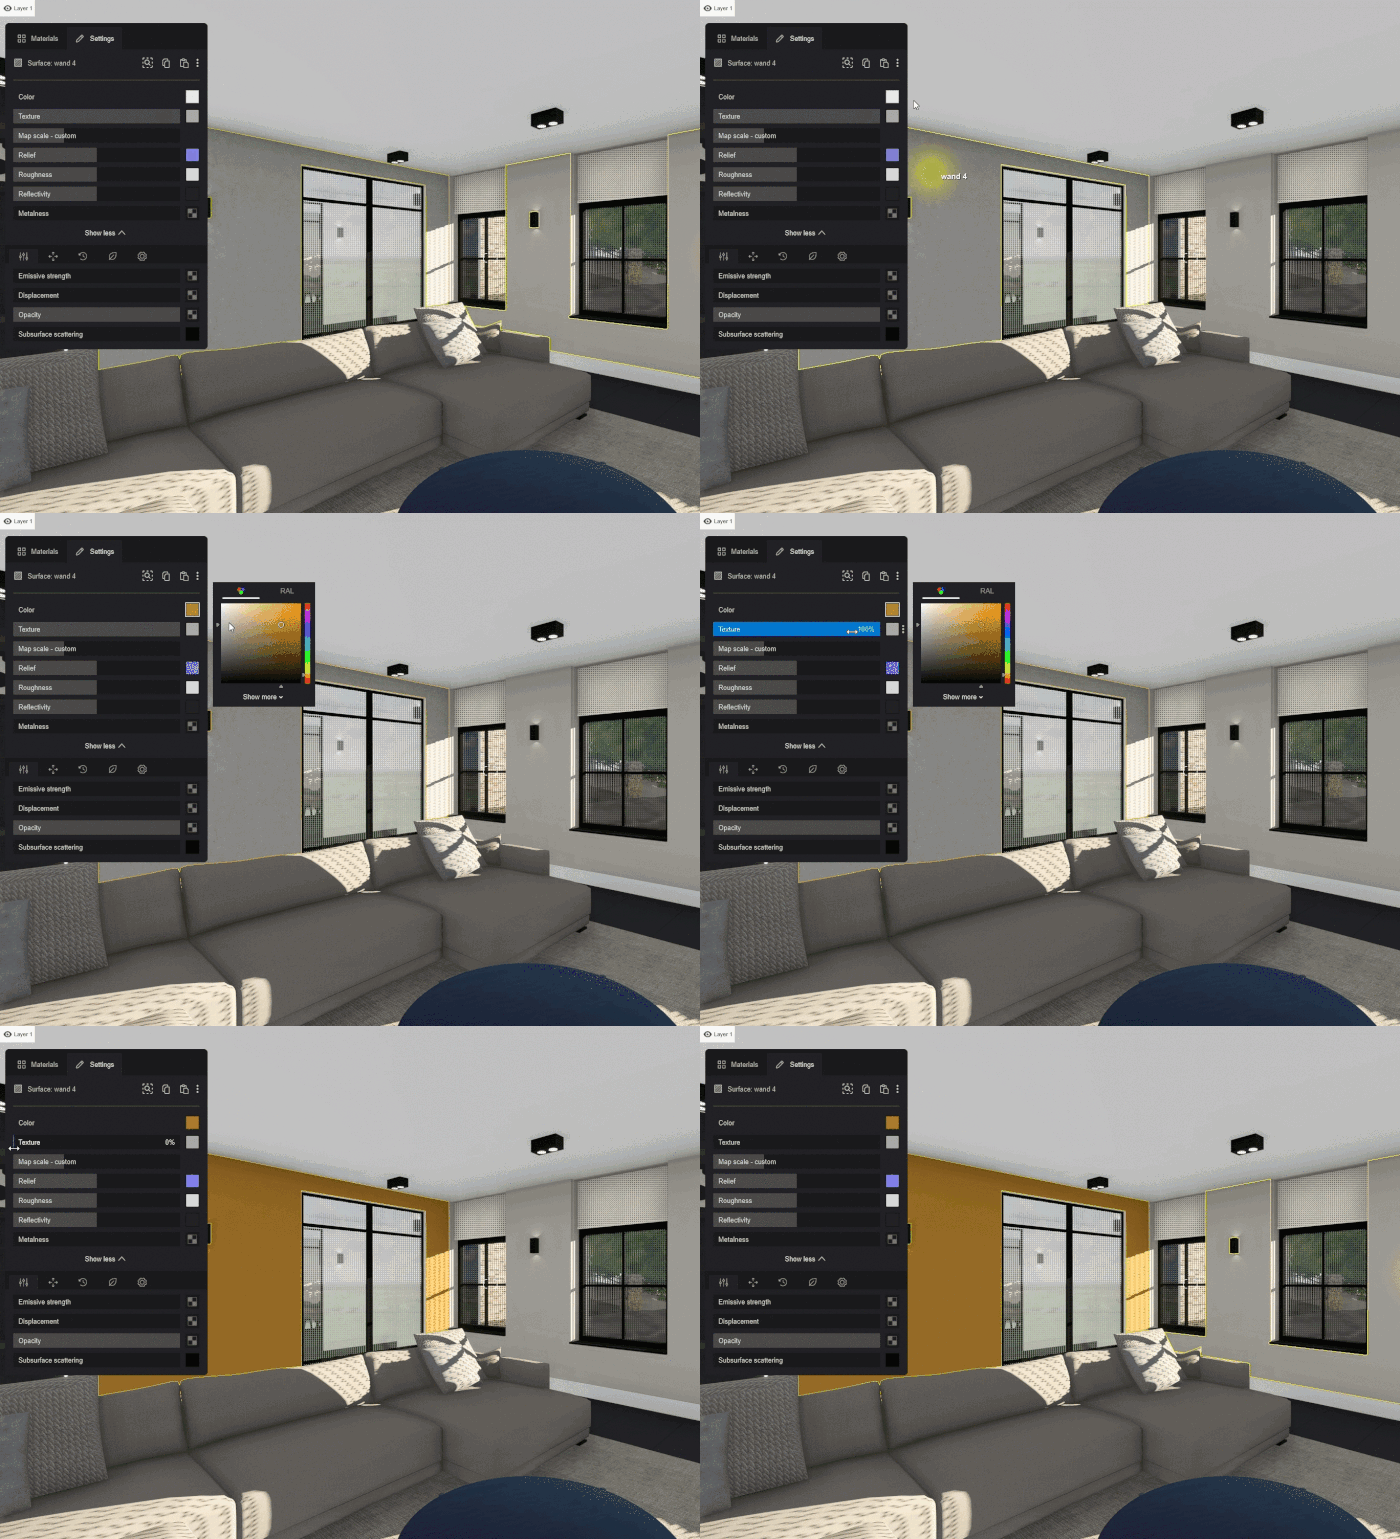
You select only the *Color Value* required. The *Texture Slider* (see more below) will determine how much of the *Color* is included.
**There is no slider for this setting**.
**7.3: Texture Map**
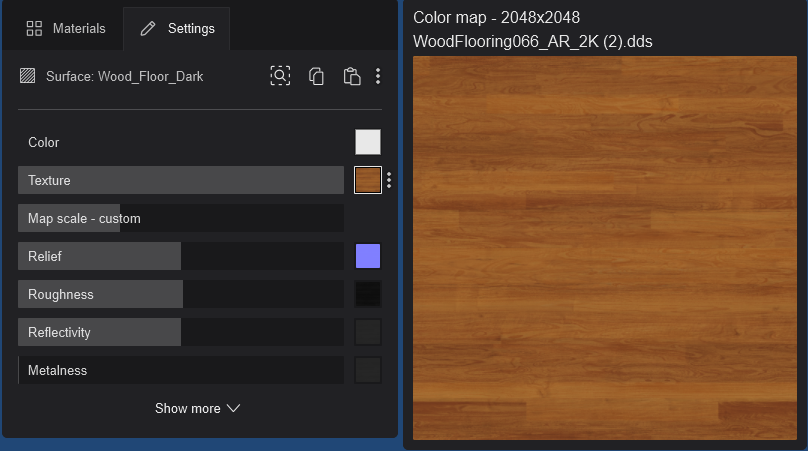
This *Texture Map* allows you to add your own *Color Map* (Diffuse/Albedo) texture image to your model.
You can add an *Opacity* (Transparency) *Map* to clear parts of the *Texture Map*. See details on *Opacity Maps* later on in Section 9.5: Opacity and Opacity Map.
**7.3.1: Loading the Texture Map**
See Section **6.1: Loading a Texture Map** (above).
**7.3.2: Deleting the Texture Maps**
See Section **6.2: Deleting a Texture Map** (above).
**7.3.3: Restoring the original Texture Map**
See Section **6.3: Deleting a Texture Map** (above).
**7.3.4: Applying the Texture Map**
When a texture is applied to an empty *Texture Map slot* or *Relief Map (NormalMap) slot*, the slider is automatically set to 100%.
In versions 23.0.0 to 23.0.3 the *Texture slider* remained as it had previously been set which may not reflect that a Map has now been added. We recommend that you *Update* to the most recent version of Lumion 2023.
**7.3.5: Video Textures**
You can also assign an .MP4 video file to the *Texture Map*. This allows you to display animated textures for a variety of purposes, for example for a TV screen or a video wall. Click on the link below for more information:
- **Knowledge Base:** [How do you add a Video Texture to a TV?](https://support.lumion.com/knowledge-base/api/v2/help_center/en-us/articles/360003455754.json?hsLang=en-us)
Lumion can now make use of the *Opacity Map* to make areas of the *Texture Map* clear, similar to green screening. Note this is not the same as support of an *Alpha Channel* in the MP4 video file, as this is a limitation of the MP4 format itself.
- **External Link (Video):** [Interim example showing use of an MP4 video and transparency of part of the video](https://recordit.co/rh14jJBkBP)
**Note:** *Textures* that were assigned to the model outside of Lumion cannot be copied or saved to a *Material Set*, although currently, they can be for a *Material File*.
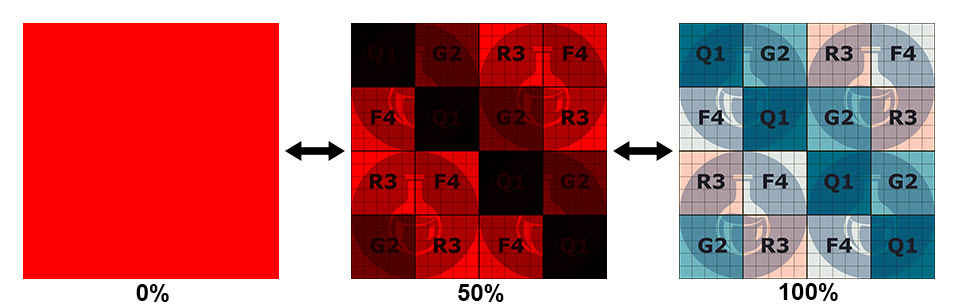
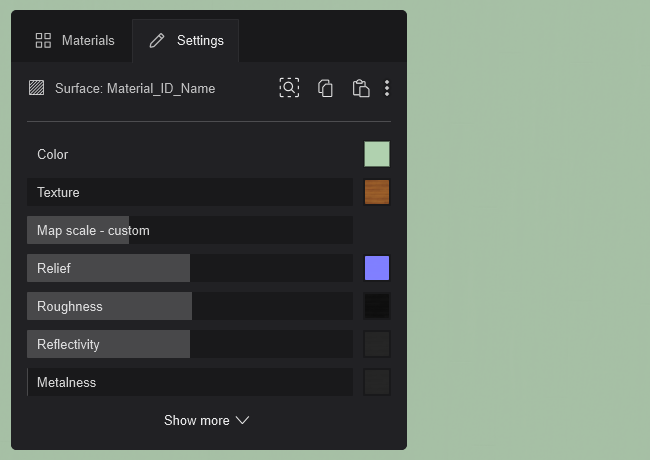
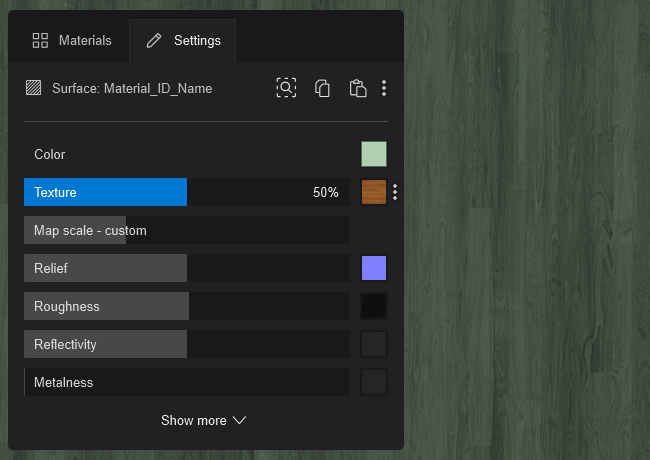
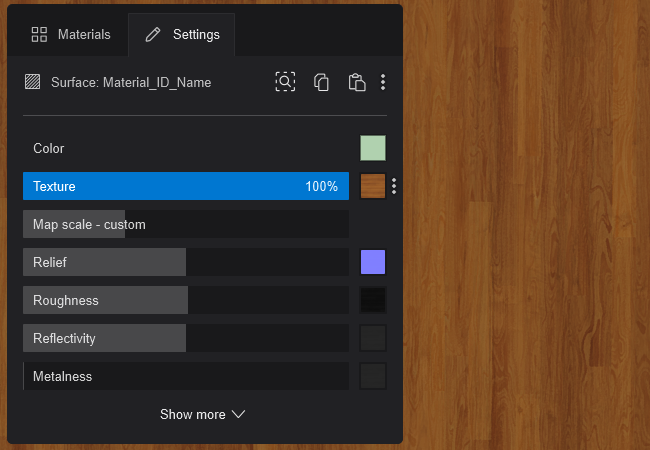
**7.3.6: Texture (****Color Map) 0% - 100% Slider values**
Between 0% and 50%:
- It will blend from the solid color to the solid color 100% multiplied with the texture.
And from 50% to 100%:
- It will continue to blend until it uses only the texture image for color
**When there is no Texture in the Texture Map slot: **
- If there is no *Texture* loaded for a *Material Property*, then Lumion uses a default map.
- For the *Texture Map* texture, the default is a white map.
- If there is no *Texture* in the *Texture Map* slot it will multiply by a default white texture with RGB color of 256,256,256, Hex: #ffffff.
- If you have, for example, a solid light green color, then the *Texture Slider* value is applied as:
- At 0%, solid light green.
- At 0% to 50%, it will stay the same color (solid color x texture color (white)).
- From 51-100%, it will blend from light green to the full white color of the *Texture*.
**7.4: Map Scale - ( Imported or your Custom value)**
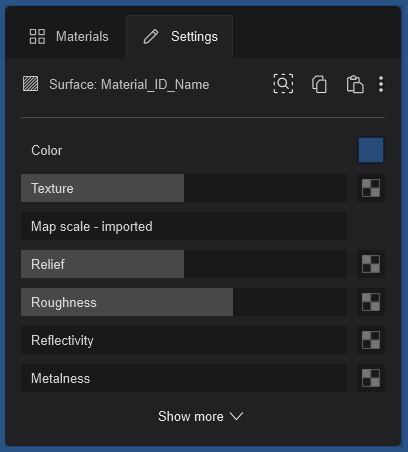
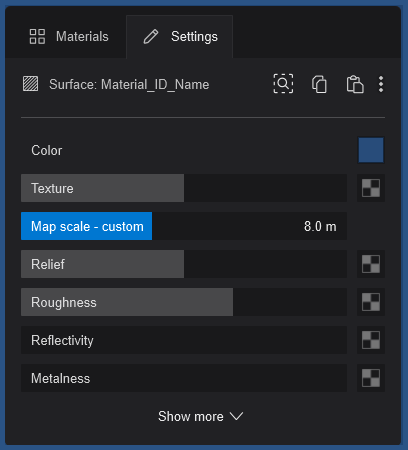
When setting mapping to 0, Lumion will still switch to using imported values. It will use the imported UV mapping that was applied in the 3D modeling software.
When the value is greater than 0 it will use automatic (box) mapping. The value you use sets the actual size the texture will take in **world space** (previously Lumion 12 and earlier: local object space).
Setting the *Map Scale* to 1 means that the texture size will be the equivalent of 1 meter in real life.
(3D modeling software such as 3ds Max allows for UV Coordinates based on real-world units for the texture mapping).
**Examples:**
*Map Scale* = 1m, the texture will measure 1.0 m in world space.
*Map Scale* = 0.5 m, the texture will cover 0.5m.
*Map Scale* = 5m, the texture will cover 5m.
These values are global. So even when the *Imported Model* is scaled up or down in Lumion, the *Texture* will still cover the actual global physical size. It does not scale along with the model. That is, if you were to *Scale* the model itself in *Build Mode*, the *Texture* will no longer scale up or down as you change its size.
This change makes it easier for you to get the *Texture* at the desired size.
**Note:** changing the resolution of a texture to make it bigger or smaller in size will still result in the same UV mapping across the surface.
**7.5: Relief Slider and Normal Map**
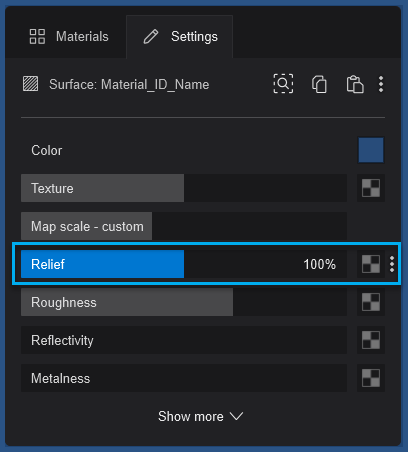
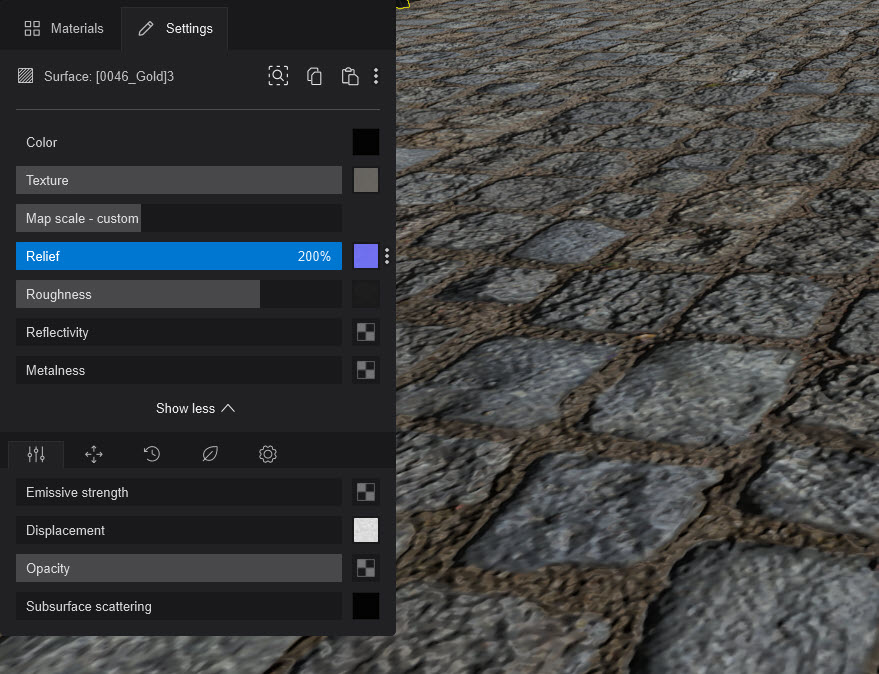
**7.5.1:** *Relief Sliders* - *Normal Map*: *Relief* (0% - 200%)
- Between 0% to 100% it will blend from no *Relief* to the *Relief* amount stored in the *Relief*/*Normal Map* *Texture*.
- Between 100% to 200% it will continue to blend until the *Relief* is twice as strong as stored in the *Texture*.
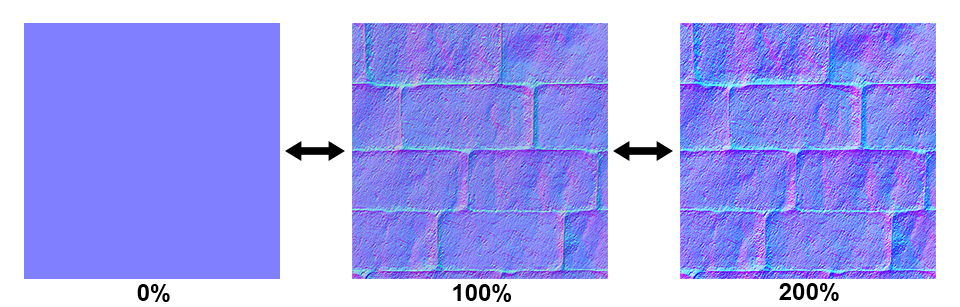
**Note:** If you are also using a *Displacement Map*, the value needs to be greater than 0%. See section 9.4: *Displacement Slider* and *Displacement Map*.
This *Texture Slot* lets you add your own *Normal Map* (*Relief*) texture to your model. *Normal Maps* add depth and better definition to the *Material*.
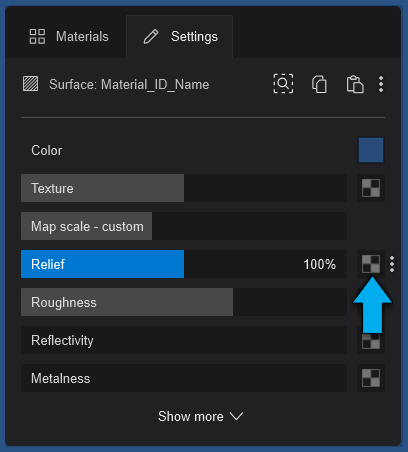
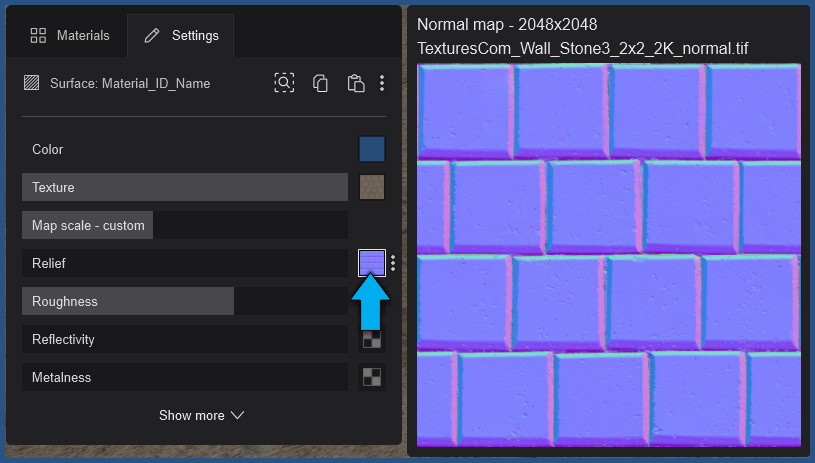
Example of additional depth details from a *Normal Map*:
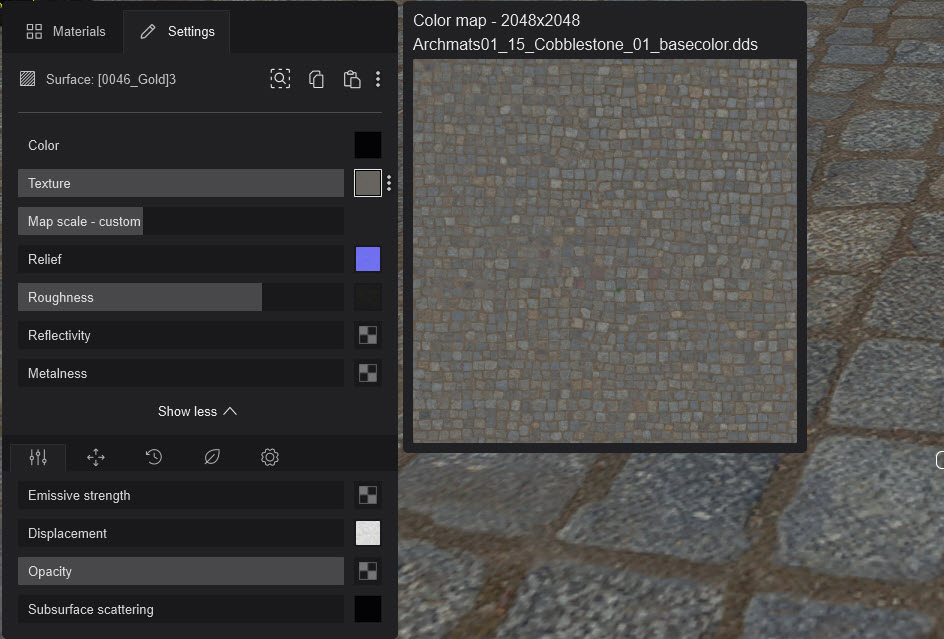
Let's take a look at the *Example Project - Downtown.* Here is the *Material* - *Texture value* and *Texture Map* for the paths - a cobblestone:
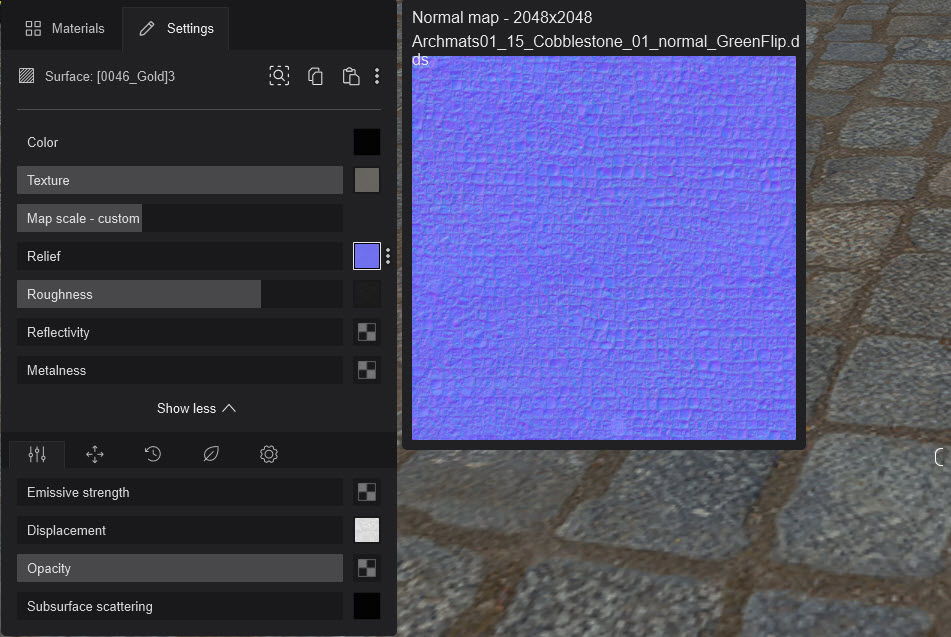
And the *Normal Map*:
This is what the stones look like, looking down and *Relief* set to 0. So no depth was added. Note we've also set *Roughness* to maximum and turned the *Displacement* to 0 so these two don't affect the material here and you only see how *Relief* can affect the look of depth for a *Material* and *Scene*.
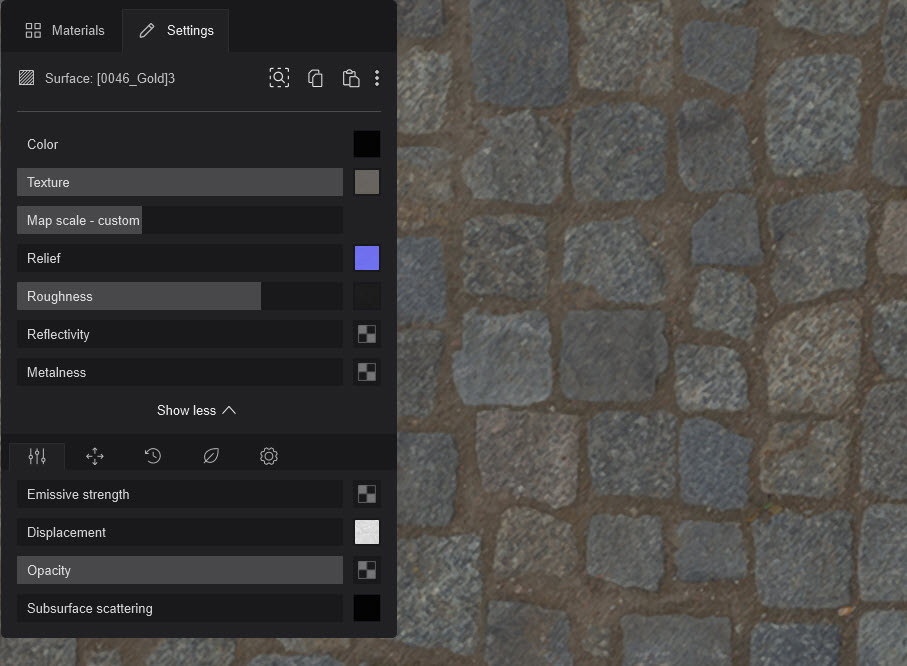
And like this when viewed from an angle so that sunlight is reacting to the edges, giving depth. But here because the *Relief* is 0 there is no depth.
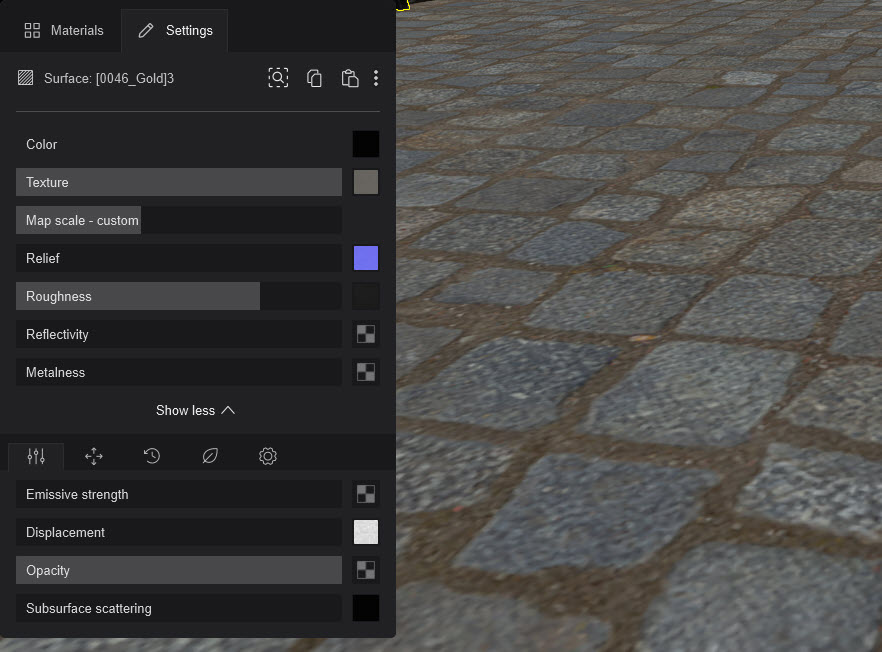
However, now at 100% *Relief,* there is depth:
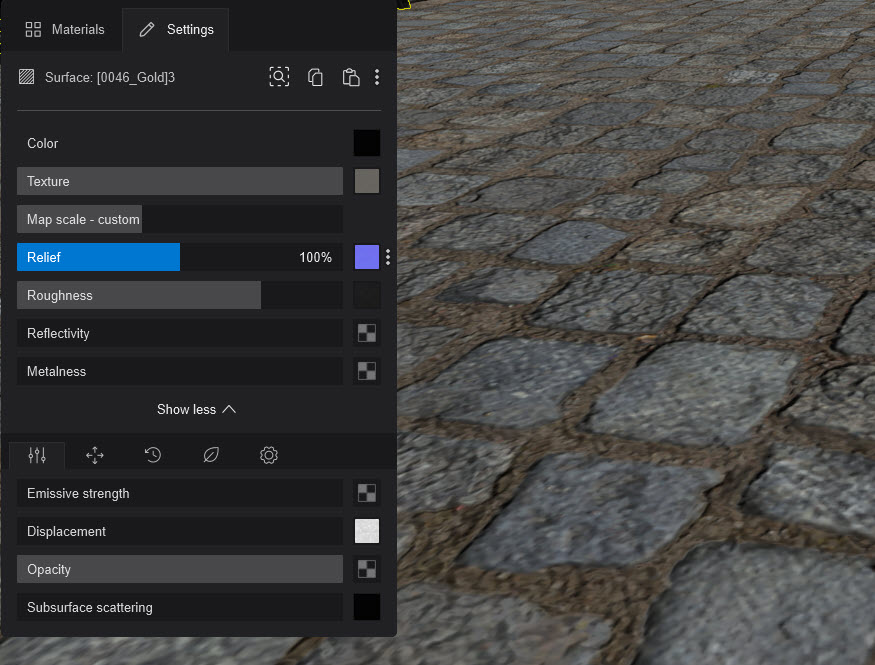
And the maximum of 200% *Relief* there is depth and a natural look we expect:
**7.6: Create or Delete a Normal Map**
**7.6.1: Use Lumion to create a Normal Map**
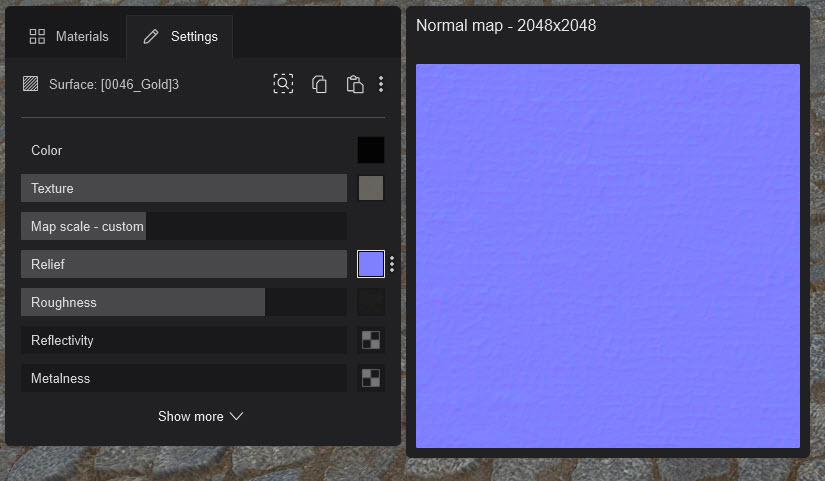
If you add a new *Color Map* *Texture* to your *Material*, Lumion will **not** automatically create a *Normal Map.* It is not always required and costs memory, so only create one when needed.
However, you can easily create one if you think it is needed for the surface.
Make sure a *Texture Map* has been Loaded:
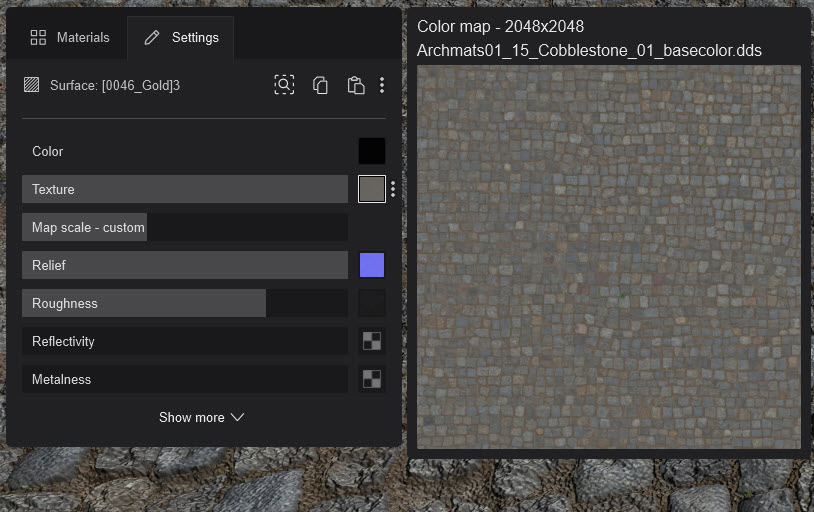
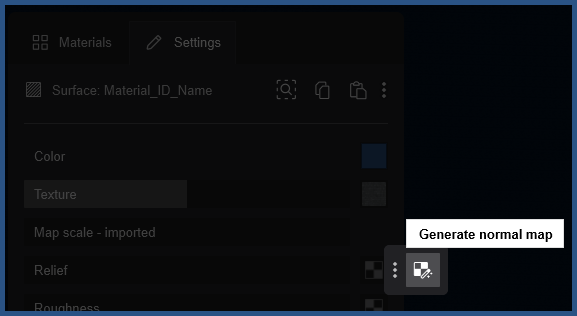
Now you can **Create a Normal Map**, click on the *Context Menu* - *Generate* *Normal Map* button:
**7.6.2: Load a pre-made image for a Normal Map**
Click on the *Normal Map* slot to load a file of your own.
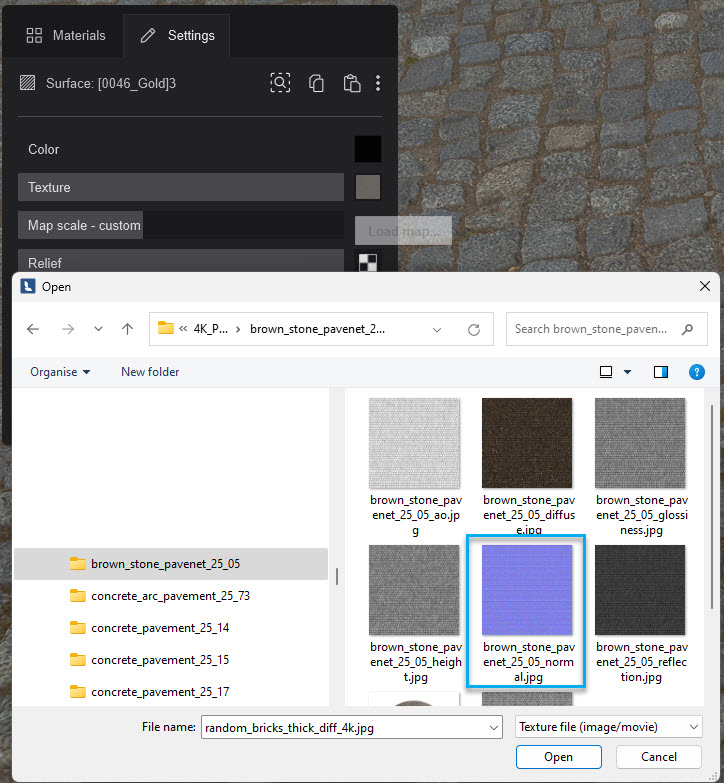
**Note:** that when Lumion generates a *Normal Map* there is no file reference compared to when you load one yourself. The map is stored in the *Imported Models Material* file.
**Important: ** **do not** use maps that are not recognized as *Normal Maps*. Greyscale height map textures are not suitable. For example:
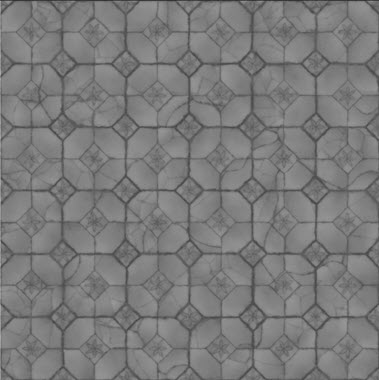
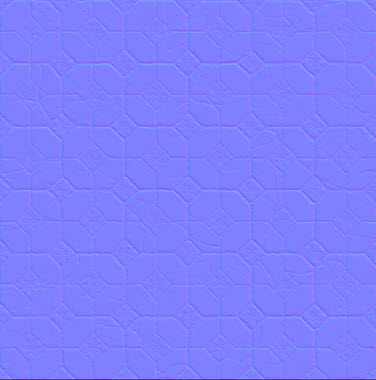
A height map that will cause rendering errors such as black surfaces
A standard (purple) *Normal Map*
**7.6.3: Delete a Normal Map**
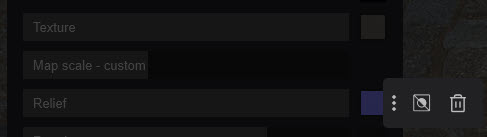
To remove the existing *Normal Map* click on the *Normal Map - Delete Texture* button:

**7.6.4: The surface has a *Texture* *(Color)* *Map* imported from a 3D modeling software**
You need to change the material type from an *Imported Material* to a *Standard Material*.

Then you can use the *Create Normal Map* button to make one for you. Or, load a *Normal Map* image file from a 3rd party resource:
- **Lumion Community: ** [The official Lumion list of texture collections](https://community.lumion.com/index.php?resources/the-official-lumion-list-of-texture-collections.4/)
**7.7: Options for the Normal Map - Inverse and Flip**
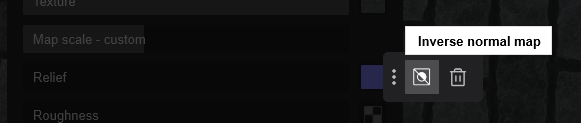
**7.7.1: *Inverse the Normal Map***
You can invert the depth direction by clicking on this button if a *Normal Map* is in the slot.
*Normal Map* as loaded or created:
Inverted
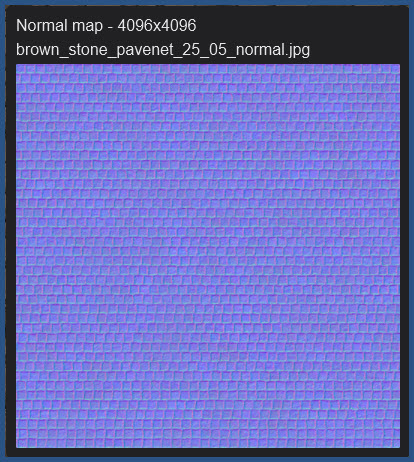
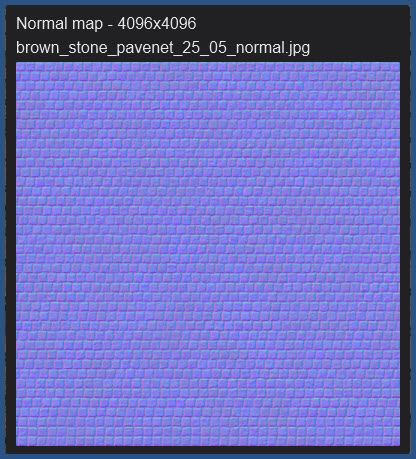
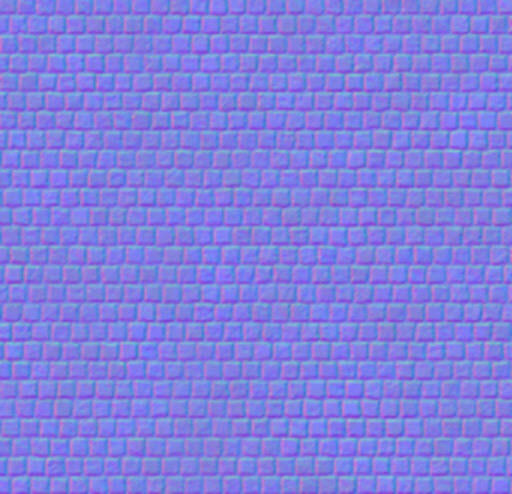
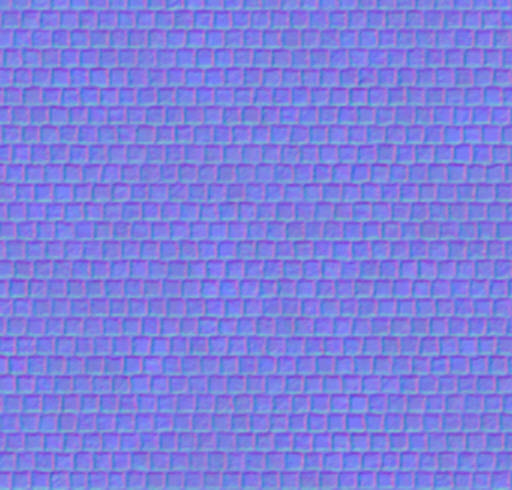
You can flip it again to change the direction of the light from inverted to normal *Relief*:
**7.7.2: Flip the *Normal Map***
Depending on the source of the *Relief* (*Normal Map*) and the render engine that the *Map* was created for, the *Texture* can come with a flipped Y axis compared to what Lumion needs. This will result in the wrong shading of the details for the surface. For example, a brick texture might have correct shading on the left and right sides of the bricks. But incorrect shading from the top and bottom sides of the brick.
This can be fixed with the *-Y, Flip Green Channel button*:

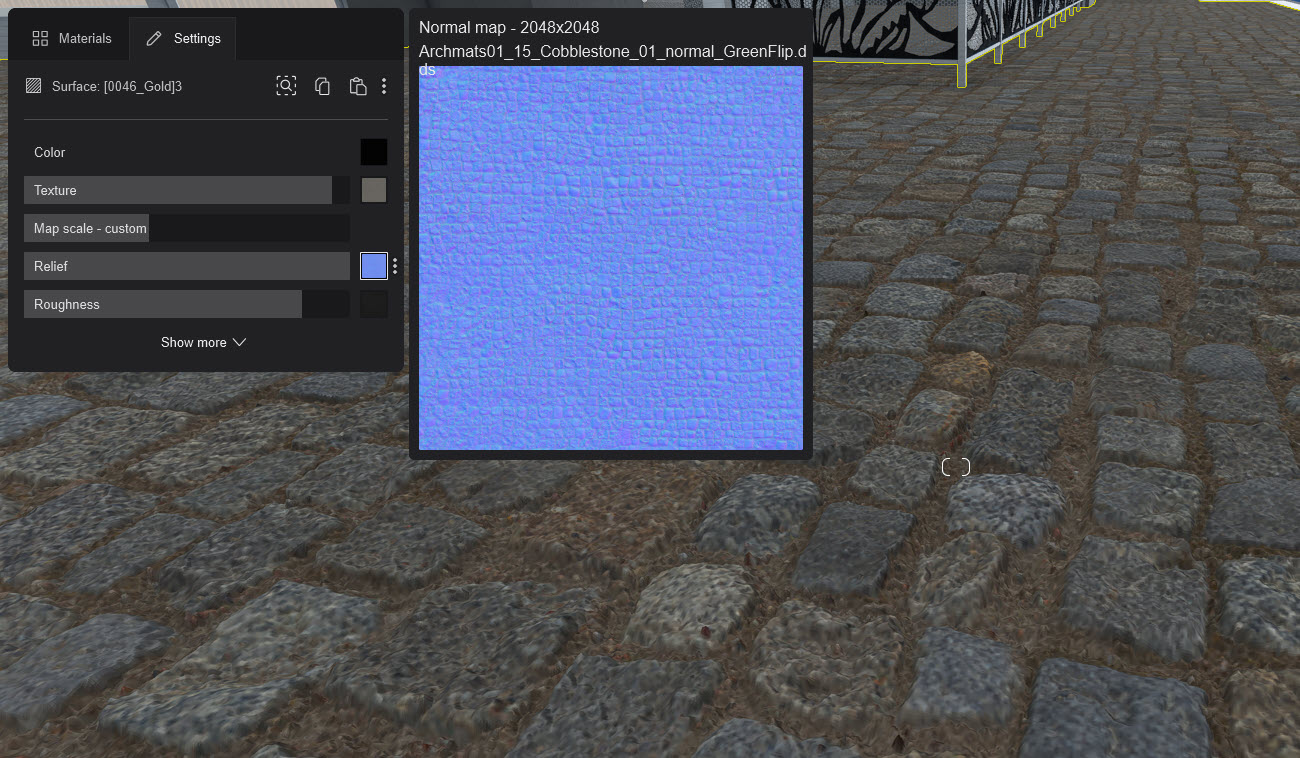
An example of where this is needed is if you use [Poliigon](https://www.poliigon.com/) texture maps. They use OpenGL and Lumion uses DirectX. So the map needs to be changed for any Poliigon map you might use. Easy to use and change - just one single click of the Y button.
**Note:** this is not the same as the *Inverse Normal Map* function in Lumion. This function will flip both the X and Y axes (or the red and green channels from a *Texture*). You use this function when the shading on the details of the *Normal Map* are correct, but the details look to be pushed into or raised out of the model surface.
If Lumion has created the *Normal Map* (7.6.1) then the *Normal Map* is valid for the PBR materials workflow for Lumion and this feature is not available.
**7.8: Roughness Slider and Roughness Map**
To alter the sharpness or blurriness of reflections.
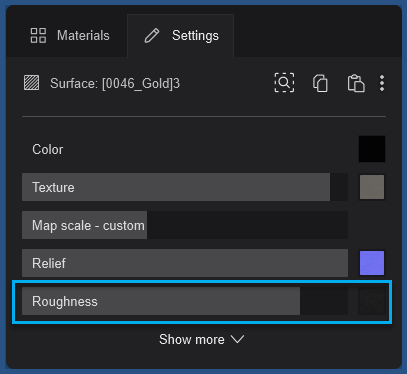
Lumion 2023 now uses a *Roughness Maps* instead of a *Gloss Map*.
If you load a scene created in Lumion 12 or older, the *Gloss Map* gets automatically converted to a *Roughness Map*.
*Roughness* is simply one end of the scale of: rough \<-------------------\> smooth
So if you have a map that's referred to as a *Gloss Map* defining the smooth parts, it still defines the rough parts.
So, if you have a set of textures (usually from 3rd parties) that only comes with a *Gloss Map* or *Specular Map* you can now invert them in Lumion and use them as a *Roughness Map*.
If you have a *Roughness Map* then simply set the slider for the amount of roughness of the surface.
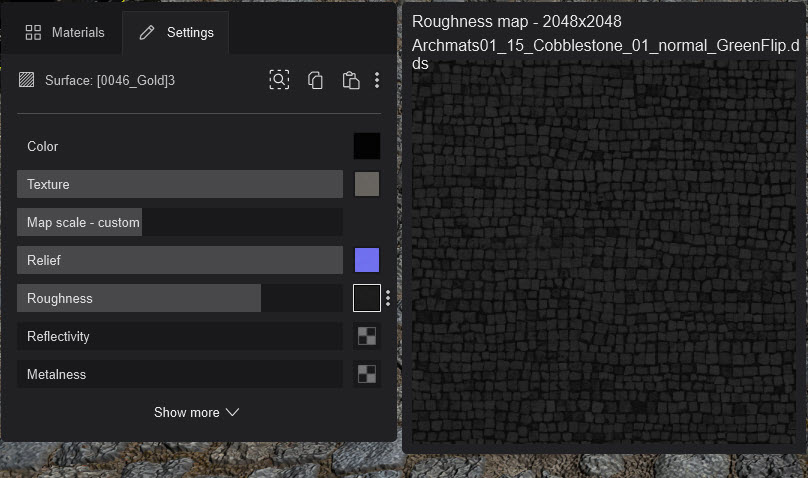
If you have a *Gloss Map* then Lumion allows you to invert the map.
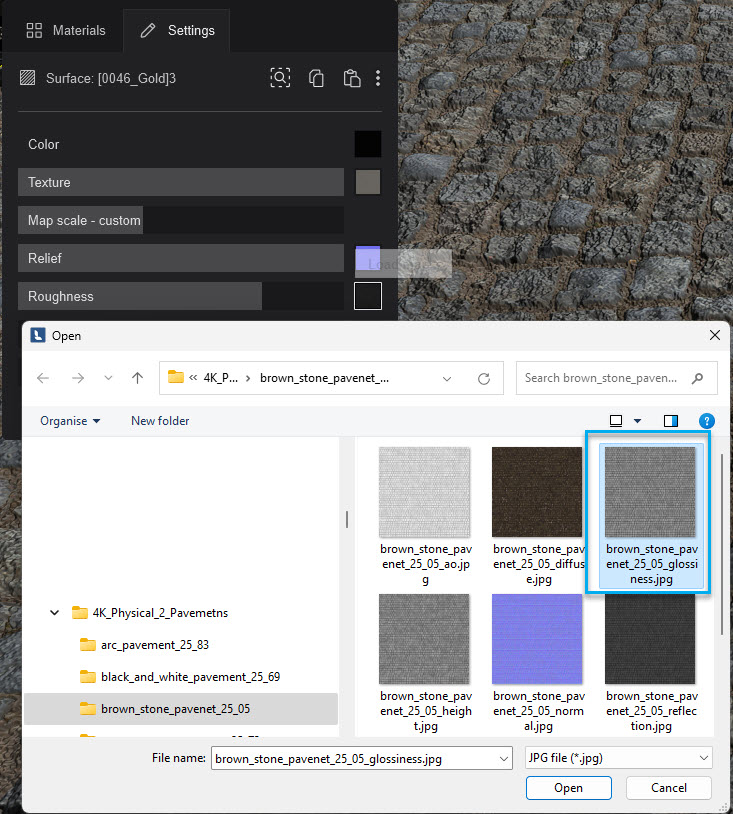
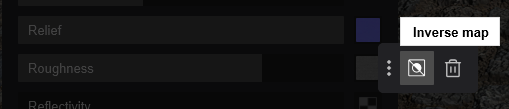
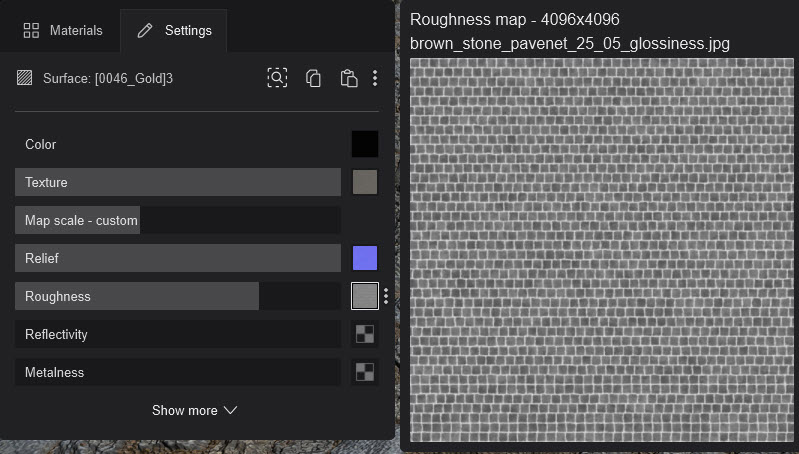
Change the *Roughness* slider value to sharpen or blur reflections.
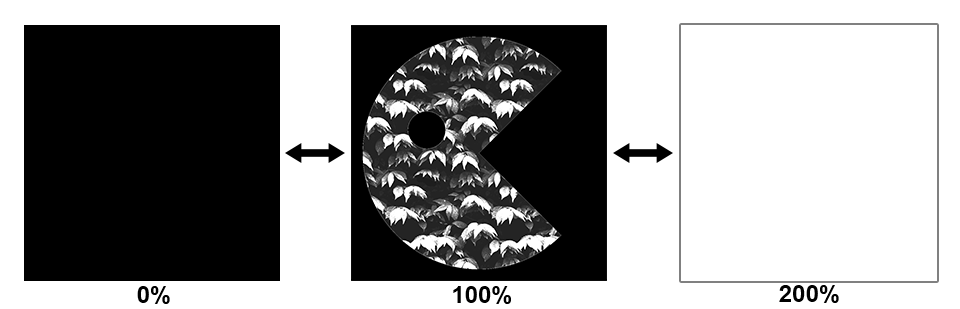
**7.8.1: Slider values for the *Roughness* and *Roughness Map*: (0%-200%)**
- From 0% to 100% Lumion will blend from black (no *Roughness*) to the values stored in the texture mask (grayscale).
- From 100% to 200% Lumion will blend from the texture mask to fully white.
**7.9: Reflectivity and the Reflectiveness Map**
*Reflectiveness* controls where the *Material’s* reflections are stronger.
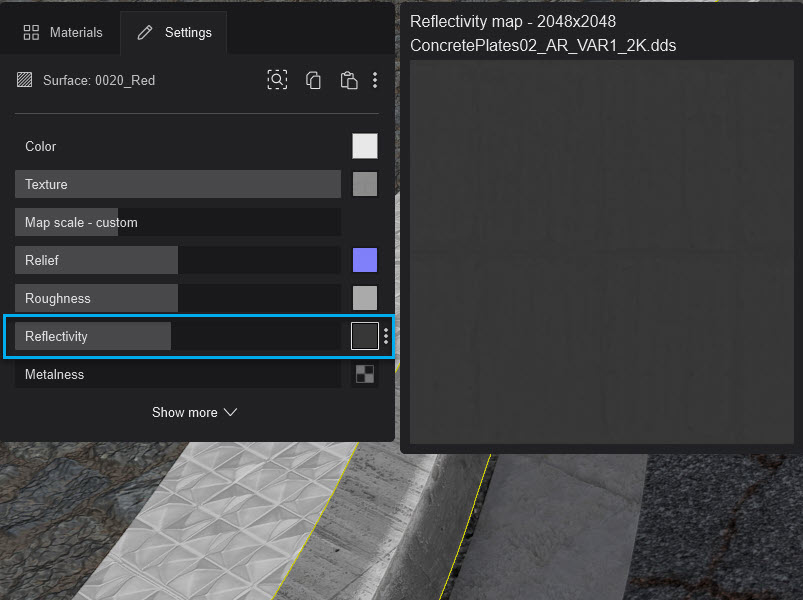
**7.9.1: Slider values for the *Reflectiveness* and *Reflectiveness Map*: (0%-200%)**
- From 0% to 100% it will blend from black (no *Reflectiveness*) to the values stored in the texture mask (grayscale).
- From 100% to 200% it will blend from the texture mask to fully white.

For example:
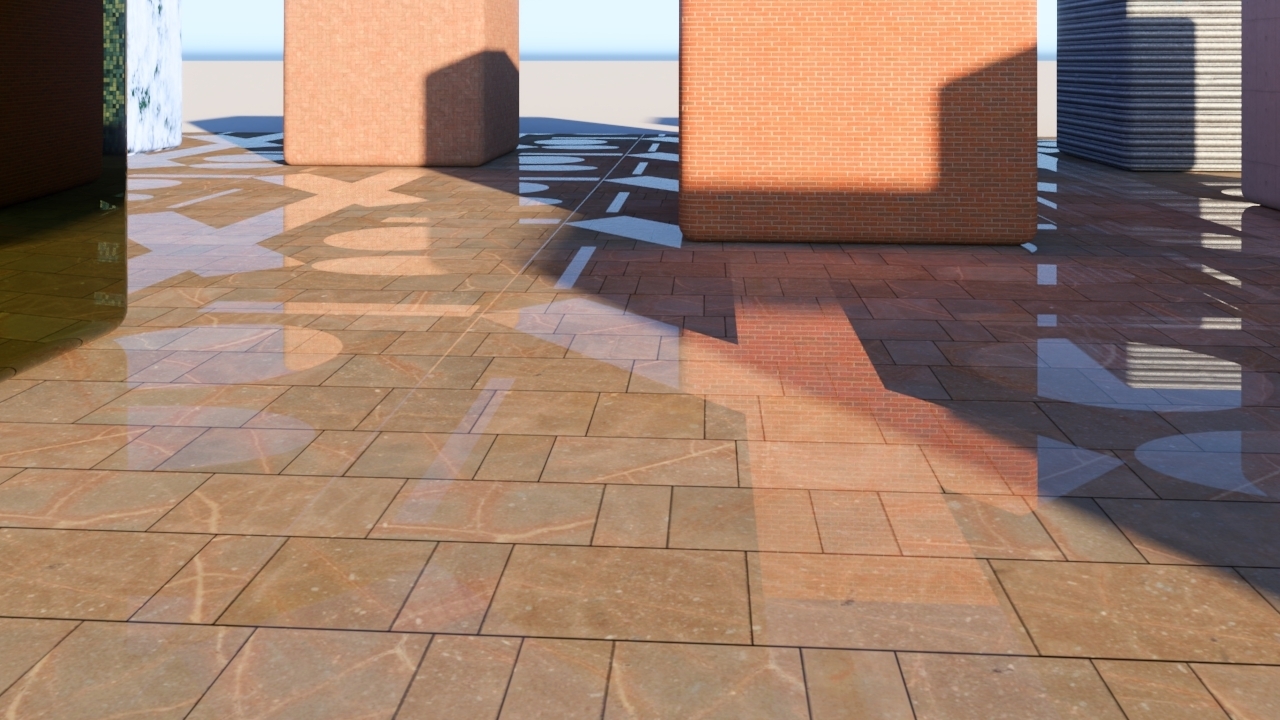
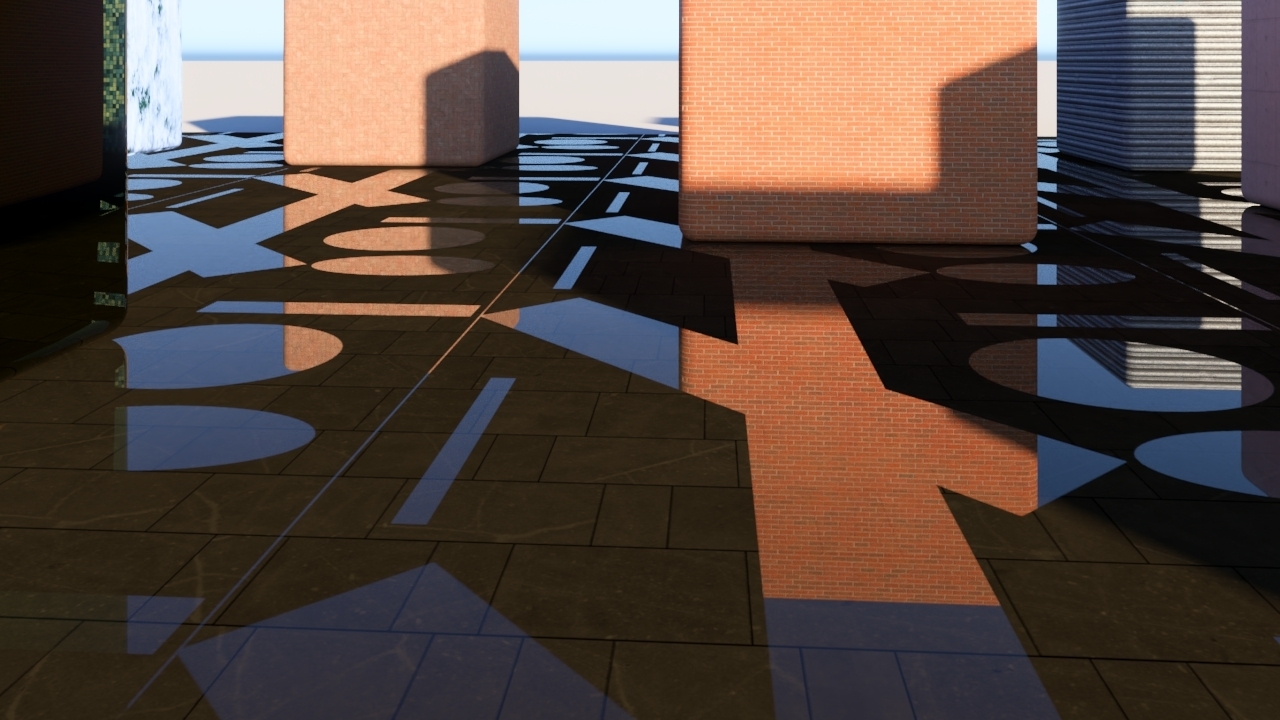
If you used this simple greyscale map to mask out areas of reflectivity (using black) then the white in the mask is fully reflective when the *Reflectivity* value is at 100%.
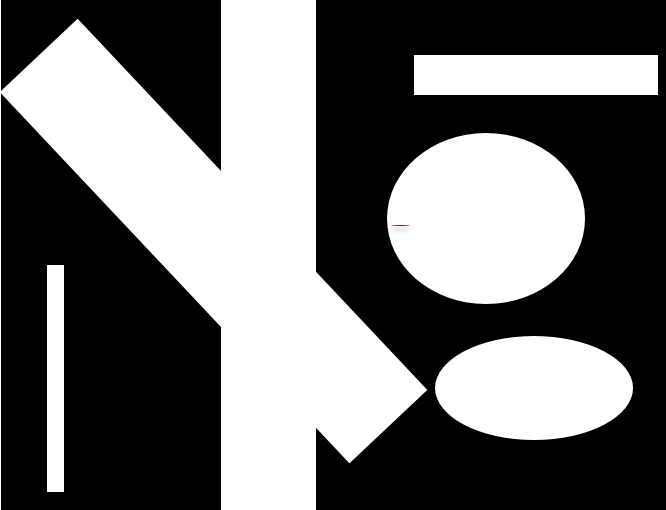
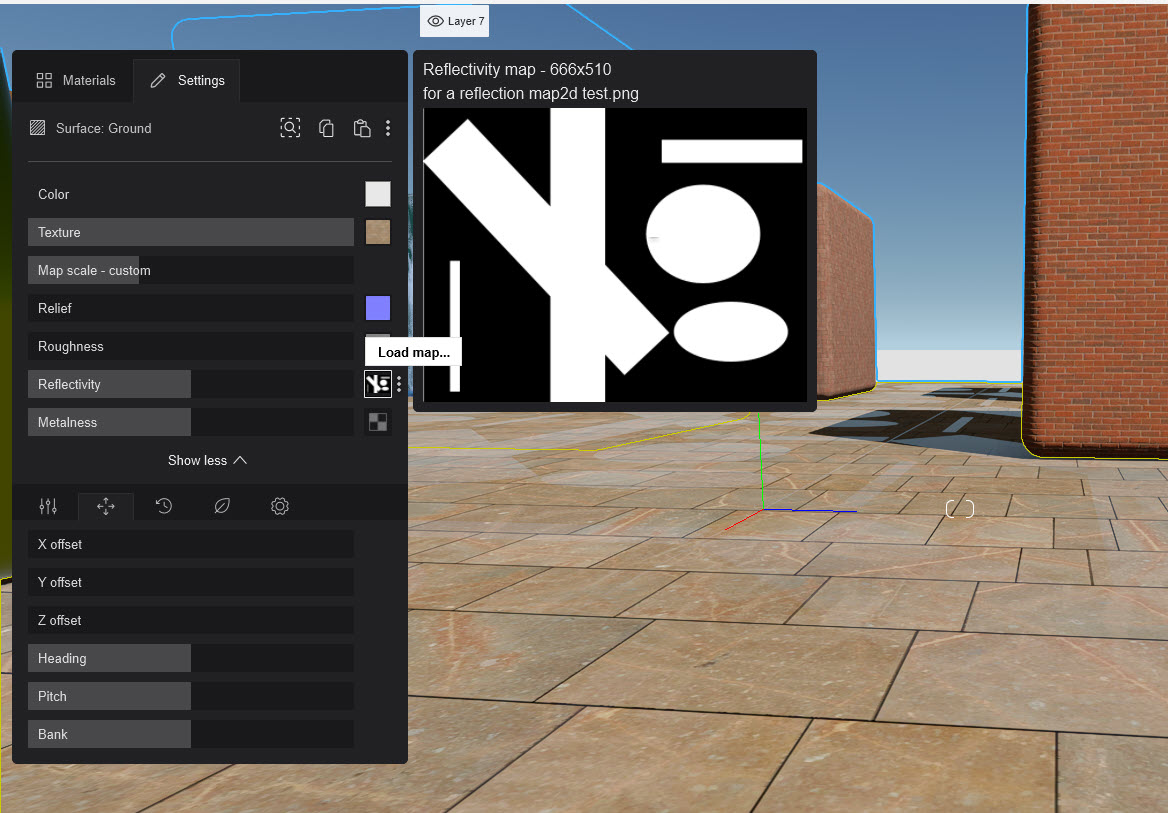
This results in the rendered reflections in the areas of white:
or for a darker floor to show more of the reflections:
**7.10: Metalness Slider and Metalness Map**
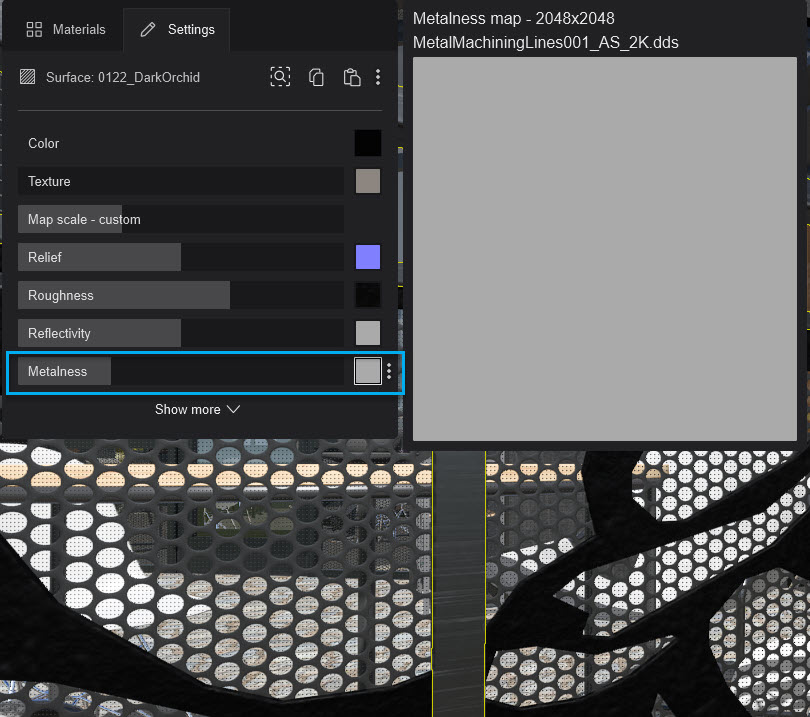
*Metalness* controls how metallic an object is going to be. The *Map* acts as a mask that makes the white areas more metallic and the black ones less metallic.
**7.10.1: Slider values for the *Metalness* and *Metalness Map*: (0%-200%):**
- From 0% to 100% it will blend from black (no *Metalness*/metallic look) to the values stored in the texture mask (grayscale).
- From 100% to 200% it will blend from the texture mask to fully white.

- A material with metalness will be excluded from the *Styrofoam Effect* look and render as it normally would.
### **Extended Properties:**
**8. Show More/Show Less:**
Click on the Show More or Show Less button to expand the interface for the other *Properties* of a *Standard Material*.
**9. Settings Tab (Extended Properties):**
These define other looks of a surface. They are by nature, optional, to the core look defined in the properties of the main material (top part of the interface) of the *Material Editor*.
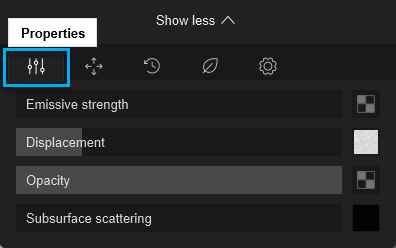
#### **9.1:** *Emissive Strength*
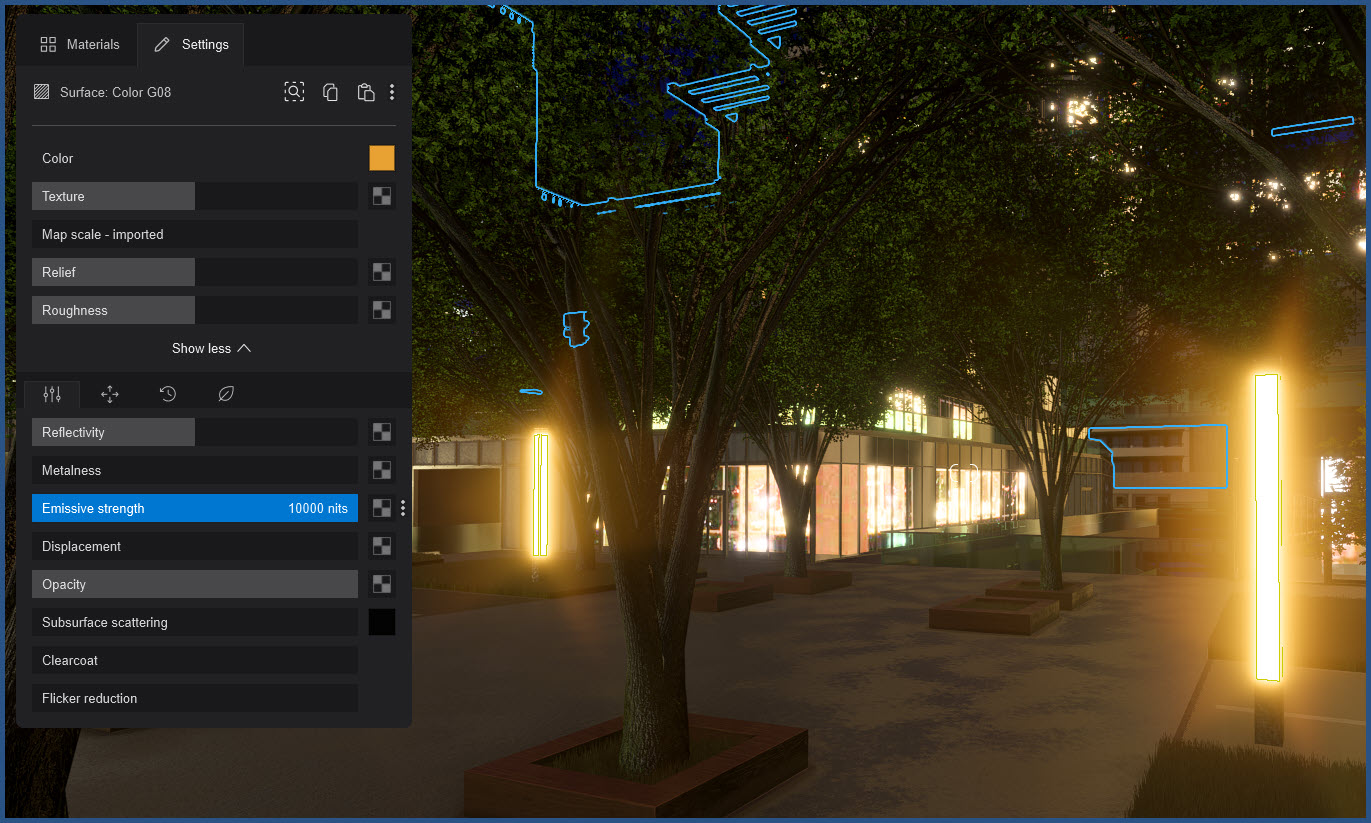
*Emissiveness* determines which areas emit light and shadow. This property is now a light source measured in Nits. The range is between 1 - 10.000 Nits.
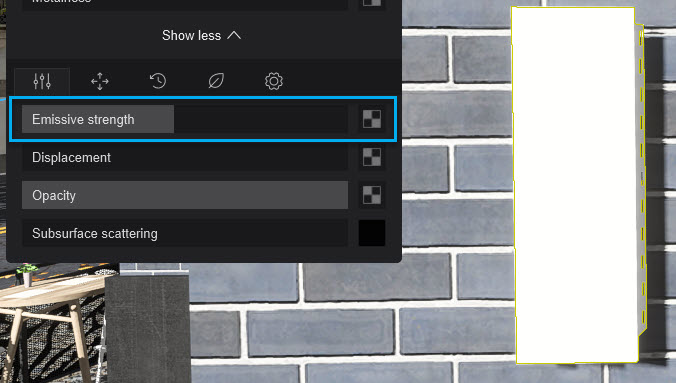
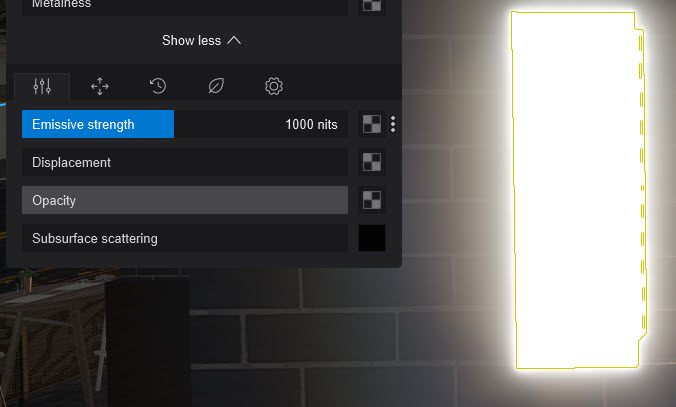
The noon-day sun measures around 1,600,000,000 Nits and the night sky around 0.001 Nits. Lumion's *Emissive Strength Slider* has a maximum value of 10,000 Nits.
It is intended for average emissive surfaces, TV screens (500-1500 Nits), and maybe some emissive surfaces that are light sources. But they cannot compare to the brightness of the sun/sky during the daytime so only show in the dusk/night time.
**9.1.1:** *Emissive Strength Slider* and *Emissiveness Map*: *Emissiveness* (0% - 100%)
This property will blend from black to using the mask.
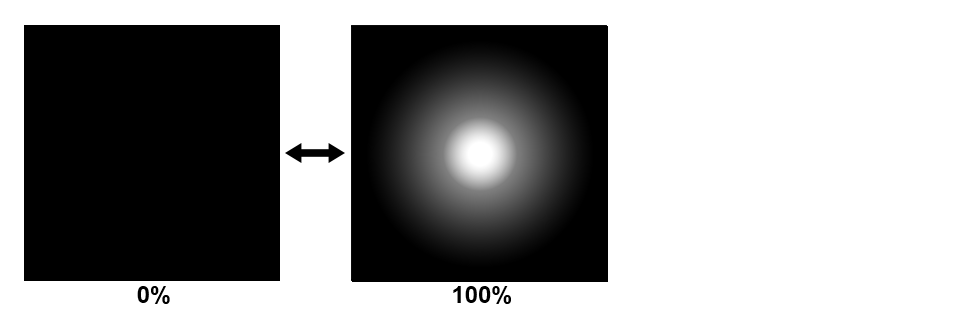
This is an example in *Build Mode* (*Example Project - Streetscape*) of a *Material Set* with *Emissive* and a high value (*Editor* is at 3 or 4 Star).
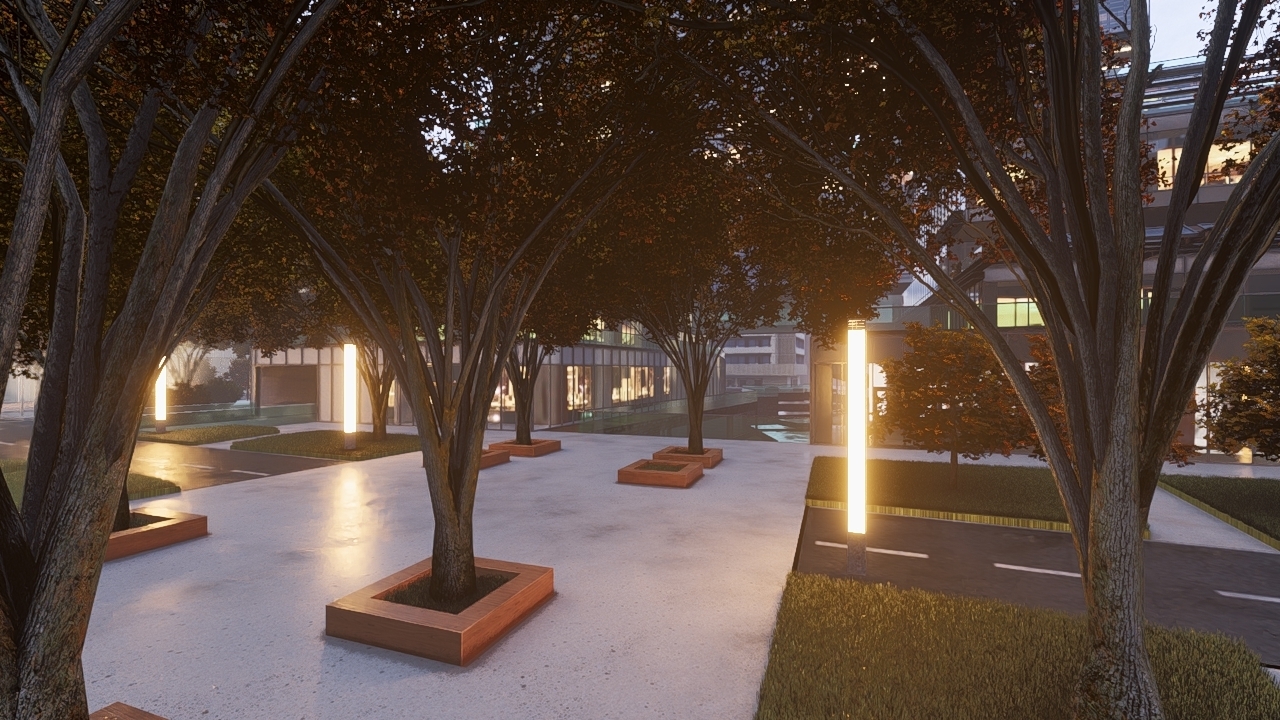
And when rendered to see the light being cast:
#### **9.2:** *Displacement*
*Displacement Slider* and *Displacement Map*
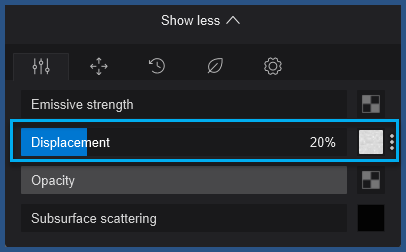
This *Texture* type makes flat *Materials* appear to be 3D dimensional.
A *Displacement Map* is a greyscale mask *Texture* with 256 offset values ranging from black (0) through grey to white (255). The greyscale tones of the *Texture* determine the offset of the surface. Areas with pure black values are not offset at all whereas areas with pure white values are offset the most.
The image should be divisible by 4. For example 2048, 1052.
To avoid artifacts the image should be the same dimension/resolution for width and height. A square. For example 2048x2048, 1052x1052.
If your source *Texture Map* texture file is either not divisible by 4 or square, then you will need to adjust the image in an image editor and *Reload* the *Texture Map* and *Displacement Map*. For an example please see this topic:
- **Lumion Community:** [Custom Textures Displacement Map Issue](https://community.lumion.com/index.php?threads/custom-textures-displacement-map-issue.3473/post-14678)
You can import your own *Displacement Maps *in *Lumion* 10.3 and newer versions.
**No Displacement Map available?**
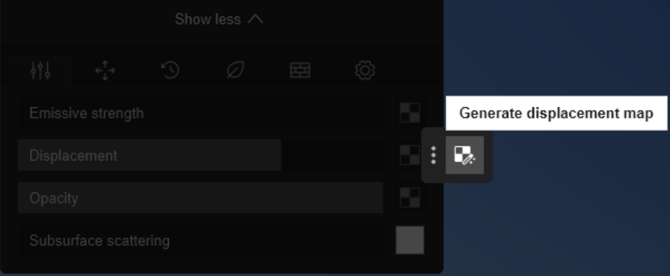
From Lumion 2026.1.3, if your ***Material*** already has a ***Normal Map***, Lumion can generate one for you. Open the ***Displacement Map*** context menu (3 dots on the right of the slider) and select ***Generate displacement map***.
The generated map uses the same resolution as the ***Normal Map***.
This can provide a useful result when a dedicated map is not available, but for the best quality and accuracy, use a purpose-made ***Displacement Map***where possible.
For the **best performance**, import *Textures* only up to a maximum width/height of 4,000 pixels.
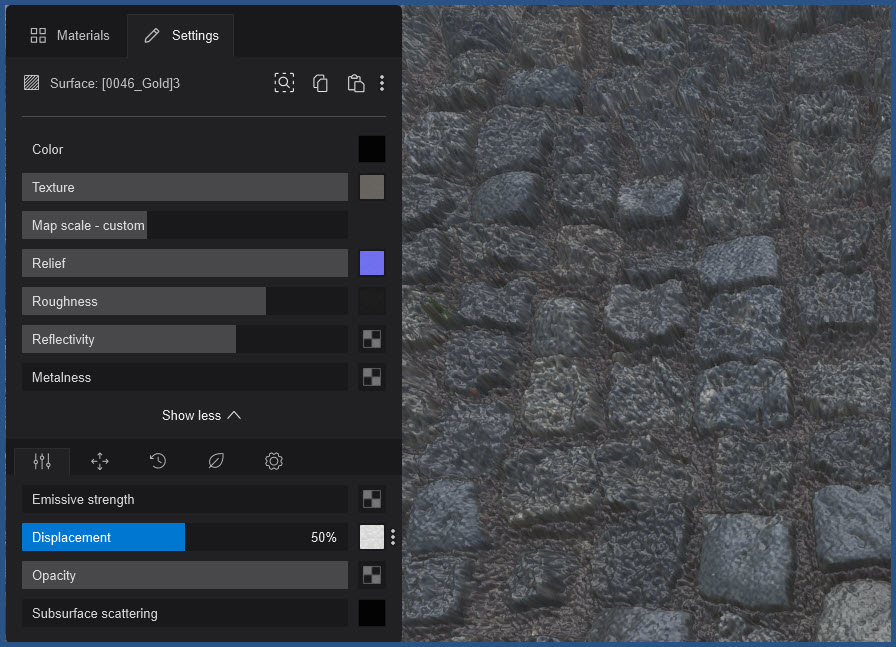
This *Material* and the *Displacement Map* are from the *Example Project - Downtown*.
At 0% *Displacement*, the stones are very flat looking.
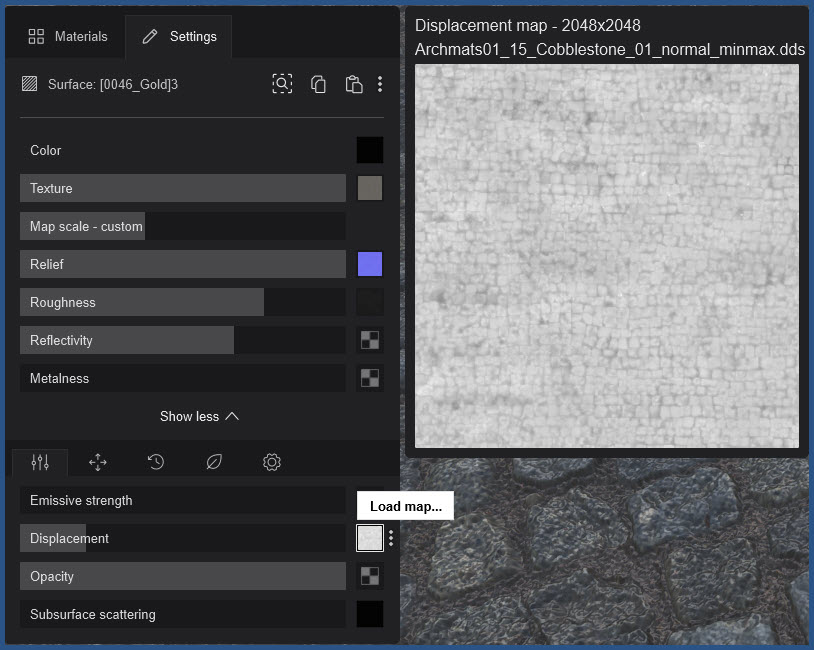
At 50% the stones have a lot of depth and shape to them. This is in addition to the depth via the *Relief Slider* and *Map* *(Normal Map)*.
At 100%, it is perhaps too strong for this example and the stones do not look natural and are misshapen and getting blurry edges:
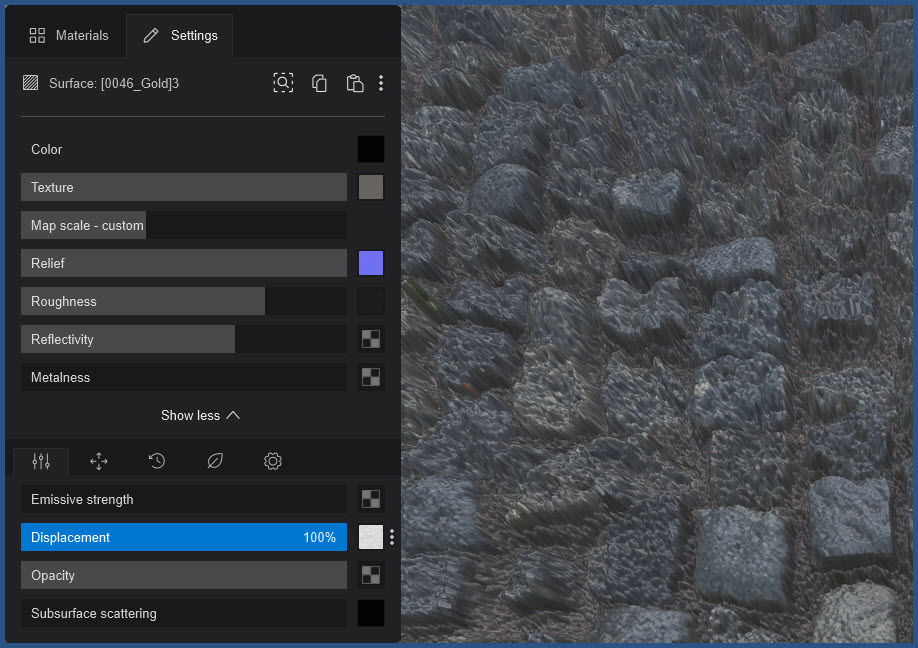
**Note:** **the *Relief* value needs to be greater than 0%** for the Displacement to take place. See section 7.5.1: Relief Sliders - Normal Map: Relief (0% - 200%).
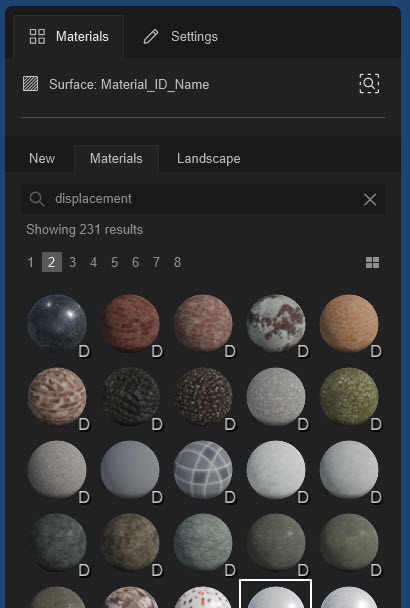
*Materials* with the 'D' icon in the *Material Library* include premade *Displacement Maps*:
#### **9.3:** *Opacity*
*Opacity* will control which sections are transparent and which are not. Those that are not transparent are Opaque. Opaque and transparent are opposite sides of the same coin. Some rendering systems will use one or the other, so where you have a transparency map you would need to edit it and invert to make it Opaque. (there is no in-built function to yet do that)
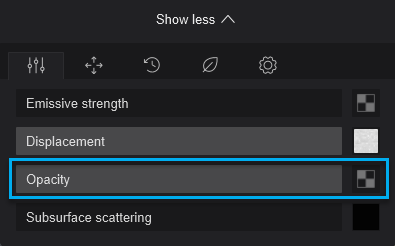
**9.3.1:** *Opacity Slider* and *Opacity Map*: Opacity (0% - 100%)
From 0% to 100% it will blend from black, the surface is completely invisible (Transparent), up to the texture mask being fully applied at 100% (grayscale, black is invisible, white is completely visible)

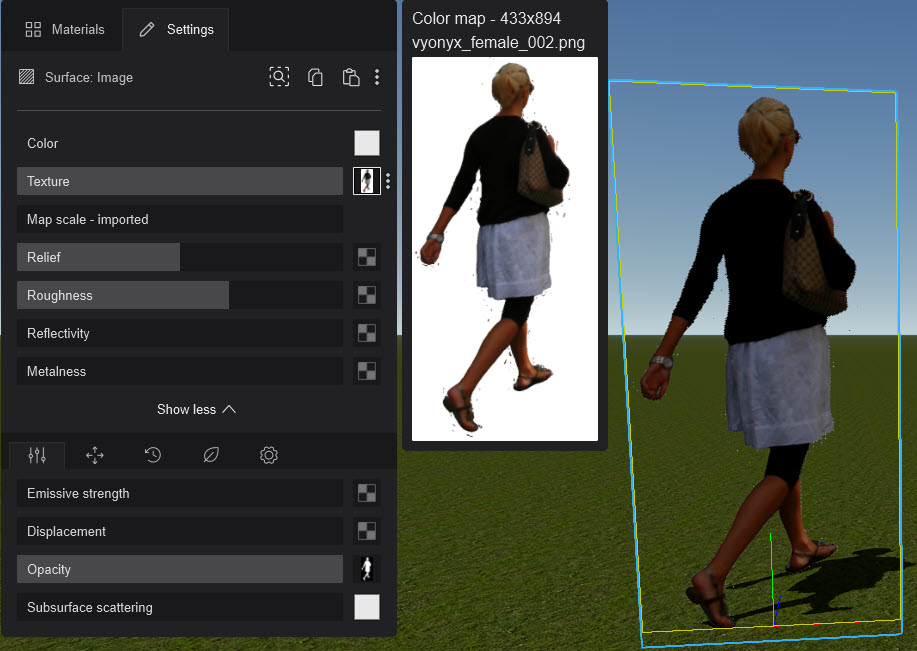
**9.3.2:** Using images with *Transparency*
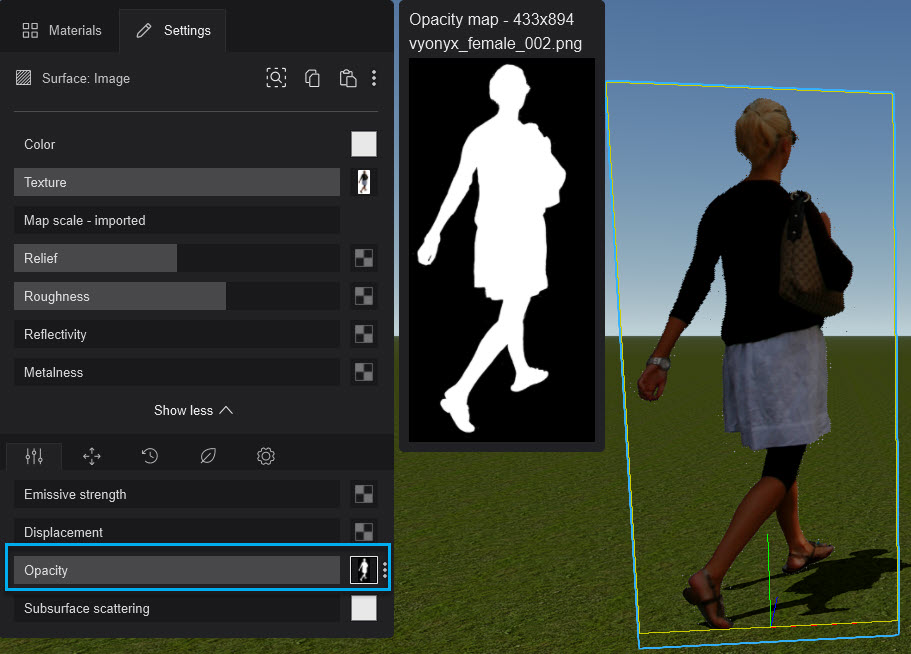
Where the *Color Map* is a format such as .PNG which includes an Alpha Channel/background *Transparency* that gives it *Transparency/Opacity* then you do not have to add in the extra *Opacity Map*.
Lumion will automatically add the *Opacity Map* from the Alpha Channel.
As an alternative, you can go with the non-transparent file formats like JPEG and add the *Texture* and then assign an *Opacity Map* for it.
For example:
#### **9.4:** *Subsurface Scattering (translucency)*
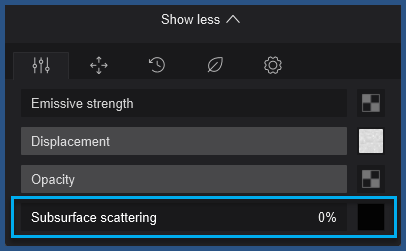
Prior to Lumion 2023, *Waxiness*.
This setting takes into account the physical attributes of an object, especially thickness, and translucency. It is then used to calculate how much light remains inside the object and how much shines through. A couple of good examples? Wax, of course, and the human skin.
**9.4.1: Settings: *Subsurface Scattering Slider* value:**
Set at 0%, *Subsurface Scattering* is disabled and at 100% it is set to the maximum.
**9.4.2: Settings: *Subsurface Scattering Color* value:**
The *Color value* will affect the color that is getting through the surface.
When set to black the transmitted color on the other side will be **not** be visible.
When set to a very dark color it will be partially visible, even if the *Subsurface Scattering* *Slider* is set to the maximum amount.
The result of the *Property* is most noticeable in shadow areas or when an *Object* is in between a camera and a light source.
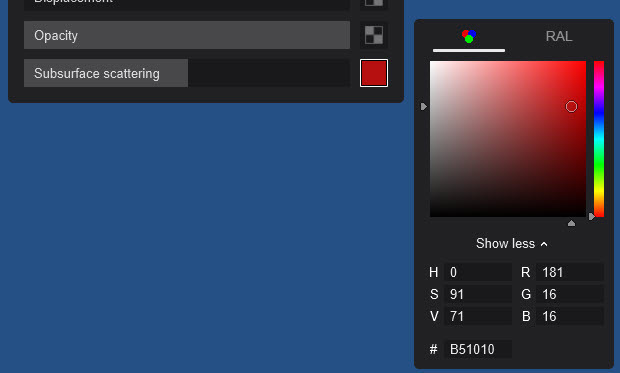
Example of *Subsurface Scattering*:
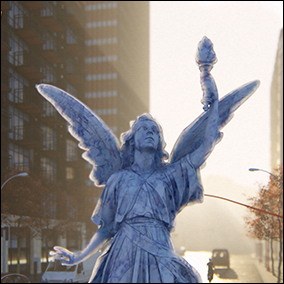
**Limitation for Lumion 2023:**
Because *Subsurface Scattering* is not yet fully converted for *Ray Tracing*, then the values best work at around 0.5-1.5% if you're rendering in *Ray Tracing*.
For 2023.3.0 this property (value) is currently ignored in the *Ray Tracing* pipeline until it is fully integrated.
**9.4.3: Lumion 2024**
Provides for a new, highly accurate implementation of *Subsurface Scattering* that is fully compliant with Ray Tracing.
*Subsurface Scattering* is affected by all light sources, except for where a material also includes an *Emissive* value greater than 0.
For Rasterization rendering *Subsurface Scattering* is affected only by the sunlight.
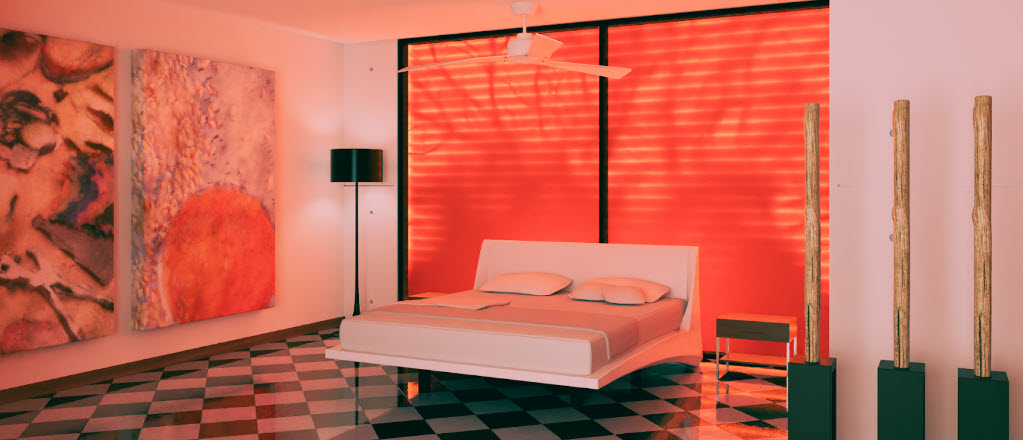
*Ray-traced blinds with translucency. Notice the shadows of the sunshades and trees in the background coming through*.
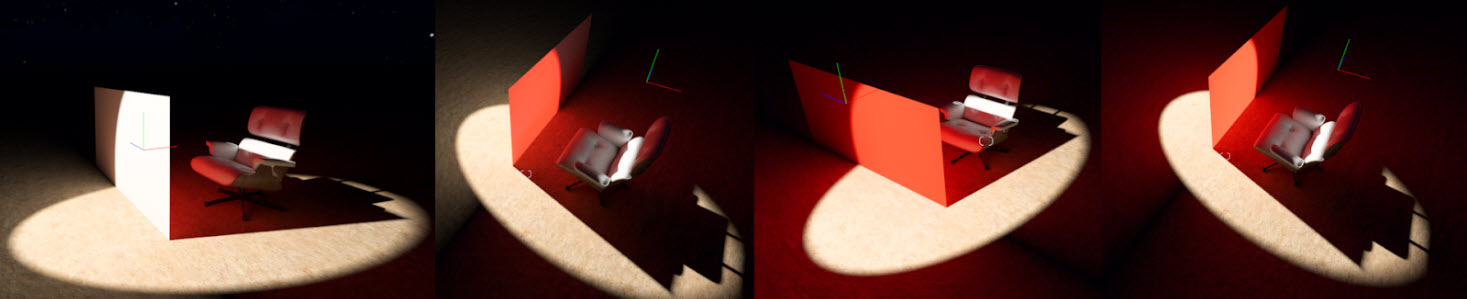
*Left two images; white plane with red translucency. Right two images; red plane with white translucency.*
**10. UV Coordinates Tab (Extended Properties):**
For changing the position or orientation of the *Texture Map*.
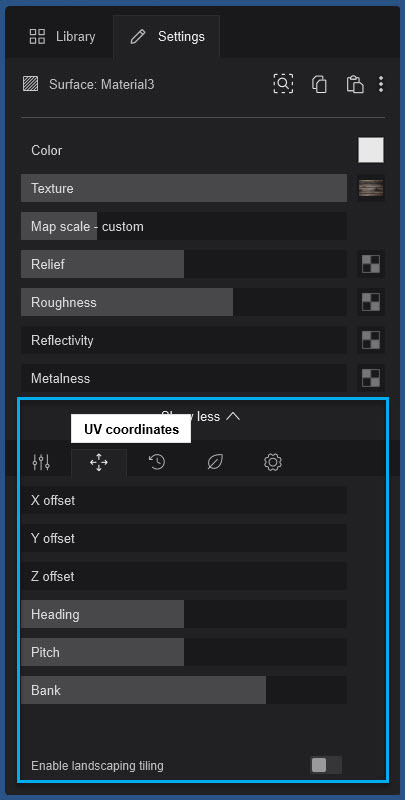
#### **10.1: To change the Coordinates:**
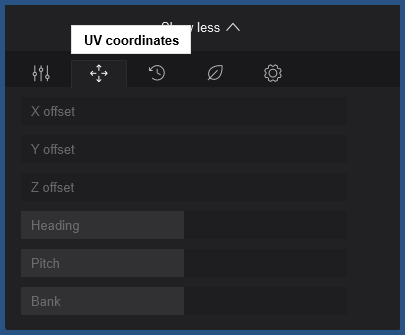
Changing the *X/Y/Z Offset or Heading/Pitch/Bank* is **only possible when the** *Map Scale* ***Slider* value is more than 0. **
If it is 0 then the sliders are disabled and you are not able to change them.
And, the *Material* uses the Imported UV Coordinates of the model (see *Map Scale* earlier in this article).
****
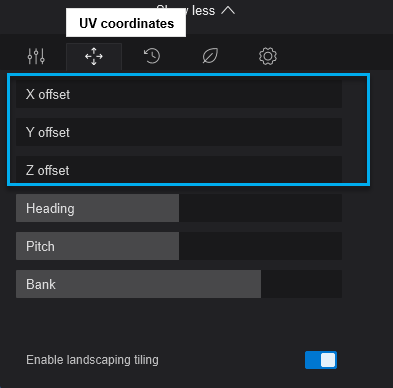
#### **10.2:** *X/Y/Z Offsets*
Adjust these sliders to change the position for that axis of the *Maps*.
#### **10.3:** *Orientation*
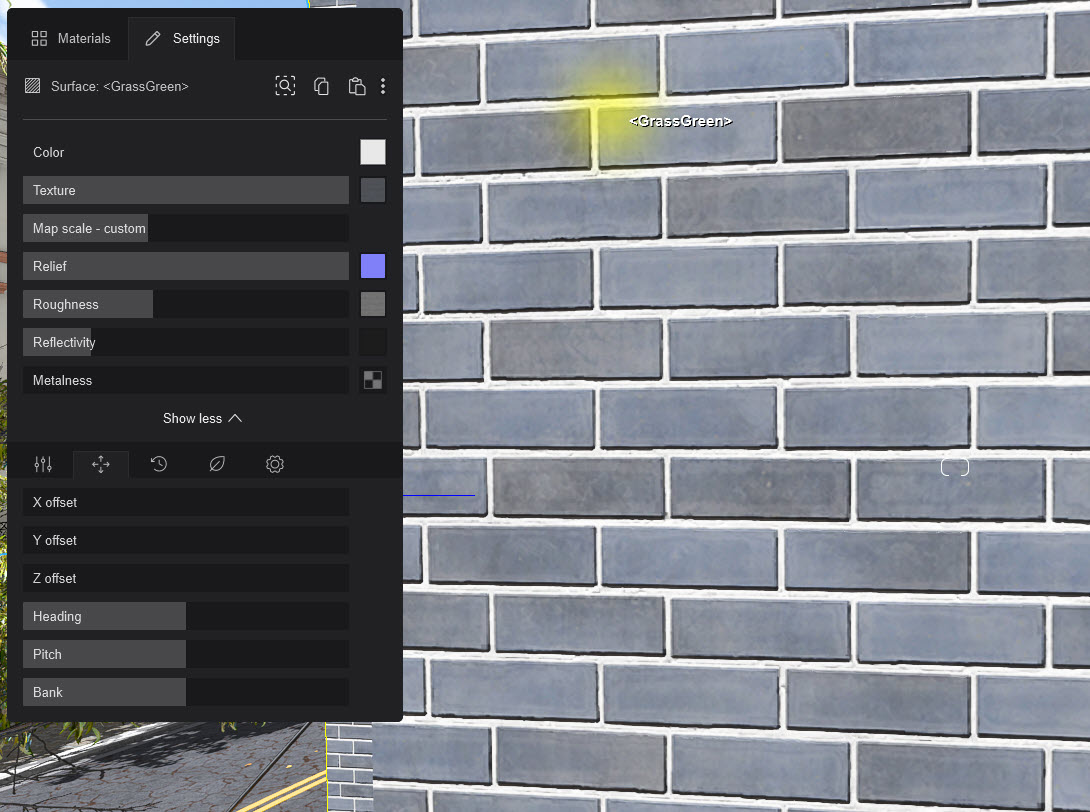
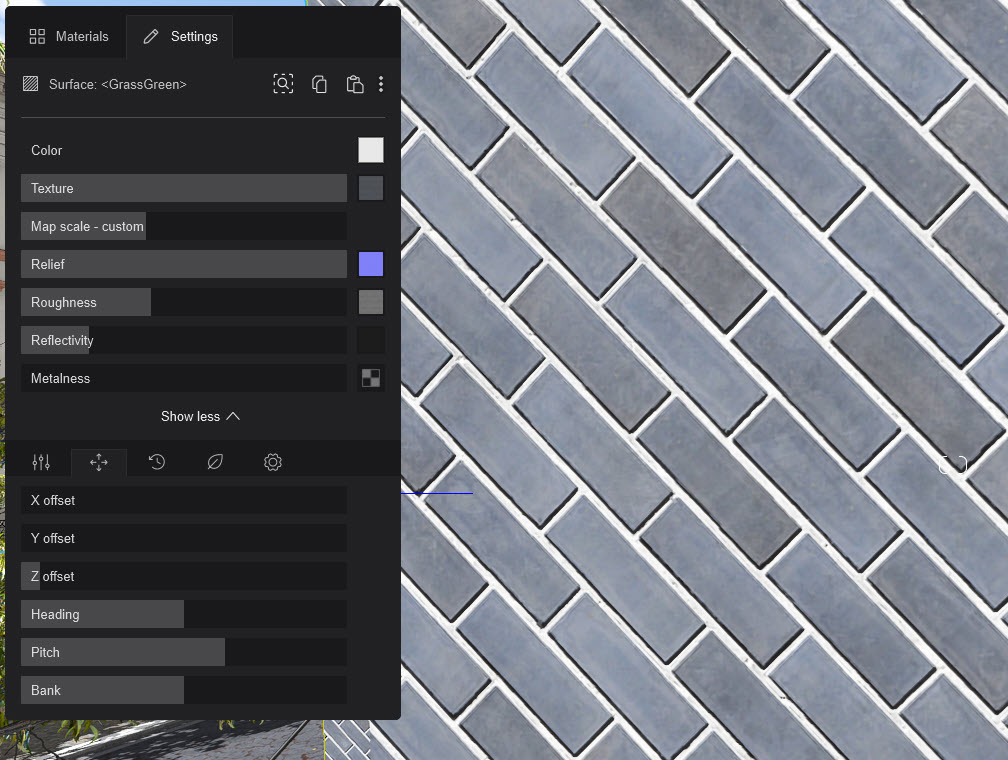
*Heading/Pitch/Bank*: Adjust these sliders to change the orientation of the *Maps*.
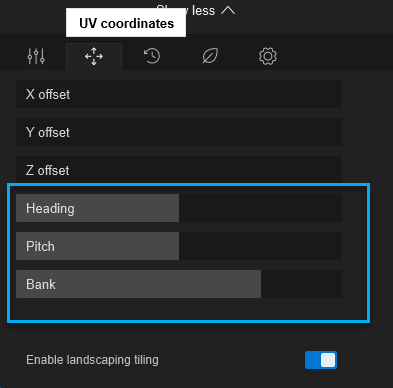
For example, changing these *Maps*:
#### **10.4: Enable Landscape Tiling (Lumion 2024)**
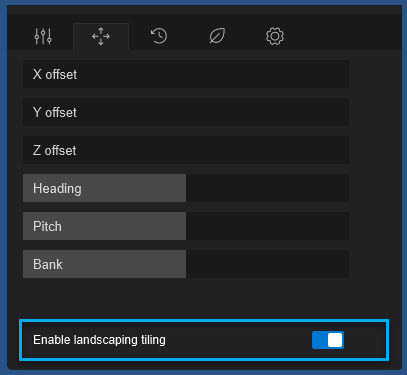
*Landscape Tiling* can be used for all *Standard Material* and the *Standard Material presets* (from the Lumion *Materials Library*)when the *Map Scale* is set to *Custom* ( a value greater than 0).
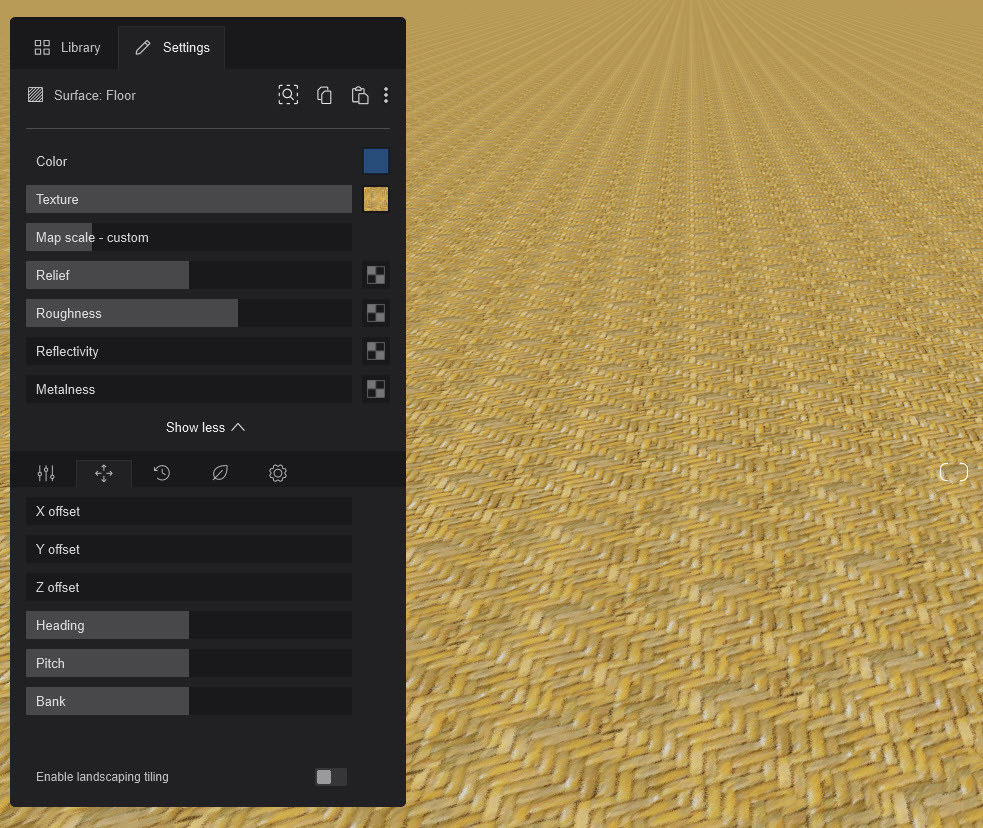
**10.4.1: Landscape Tiling (Hexagonal Tiling/Hex-tiling)**
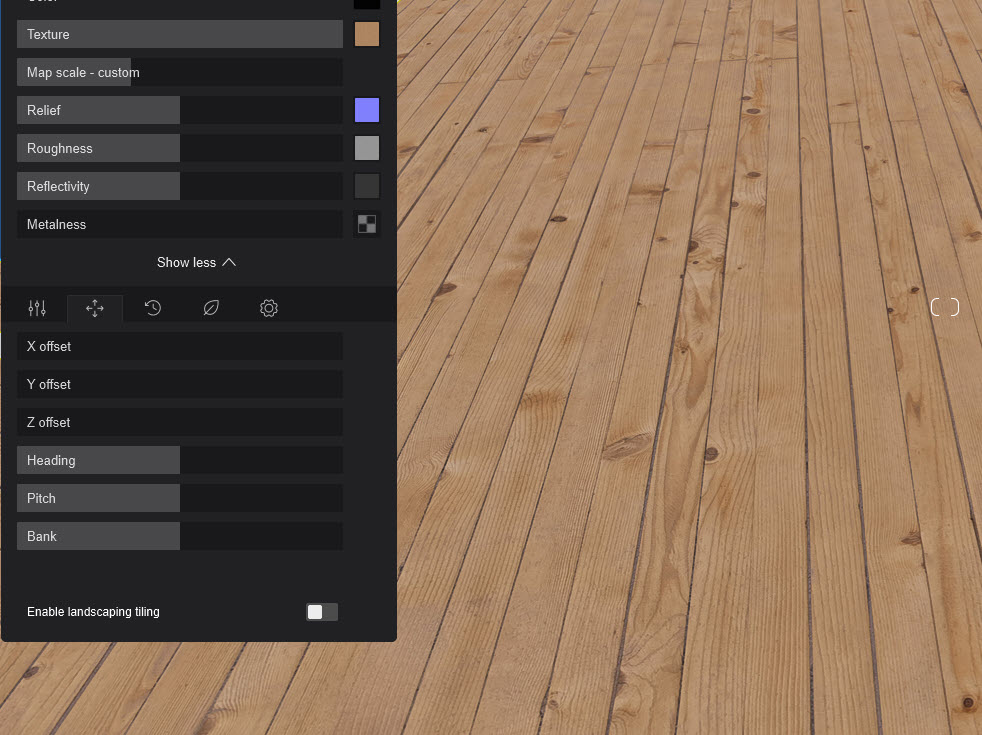
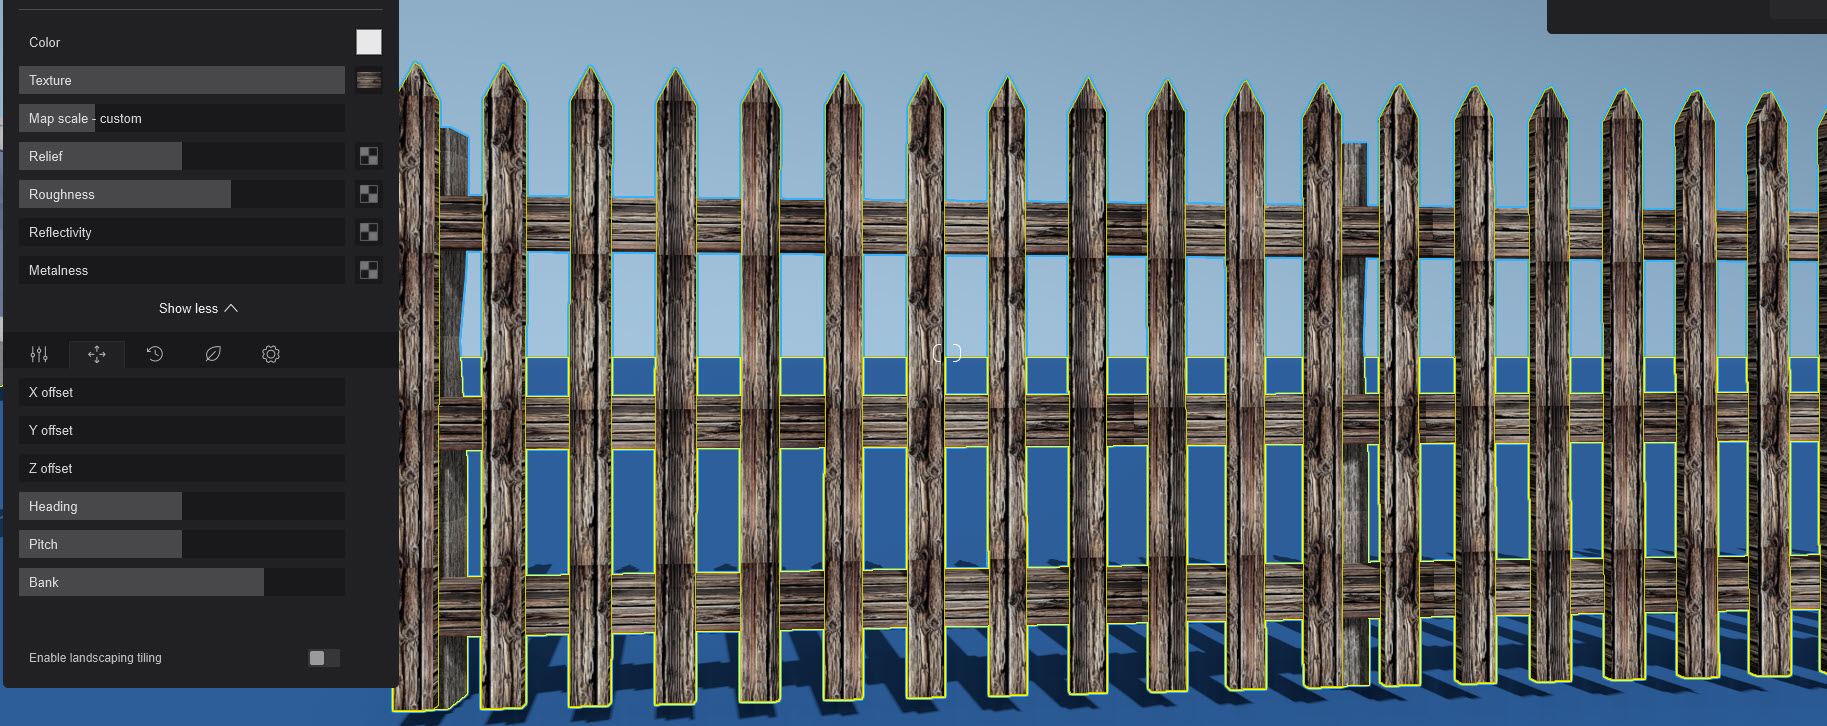
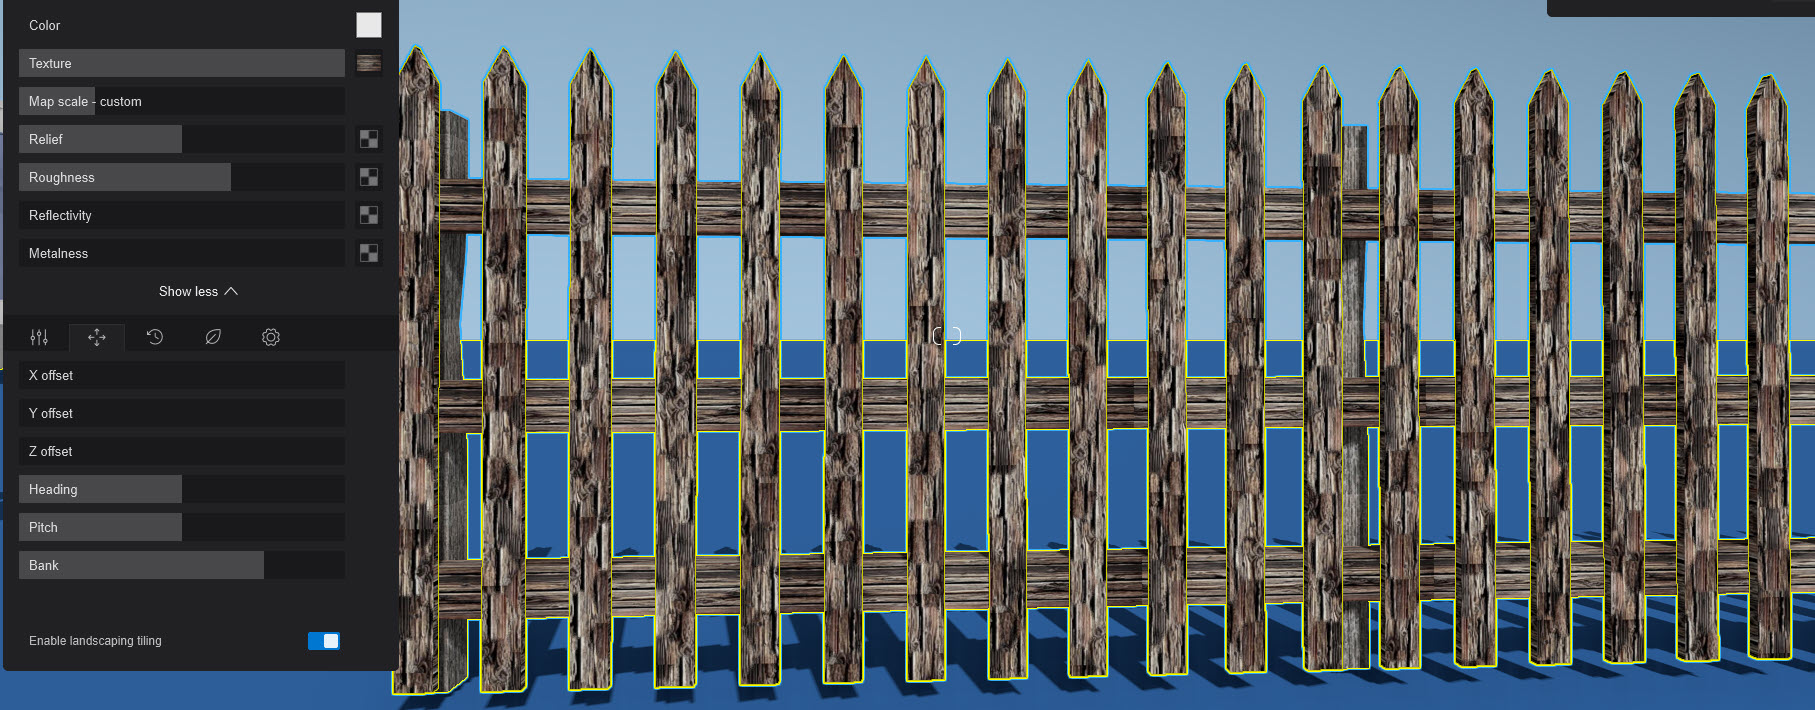
This is a method designed to help prevent repetition in texture tiling while also hiding the seams between the tiles.
No Landscape Tiling:
With Landscape Tiling:
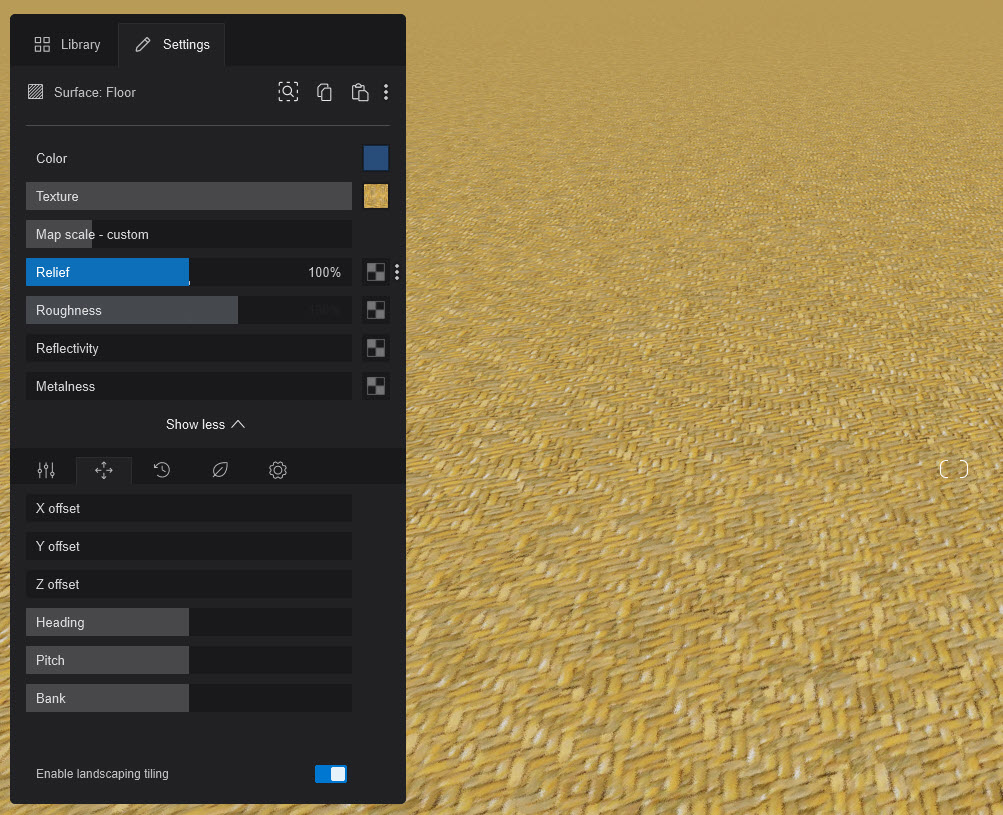
This is particularly useful for large surfaces with “organic textures”, however, it is not recommended for textures that have symmetrical patterns.
No Tiling:
With Tiling:
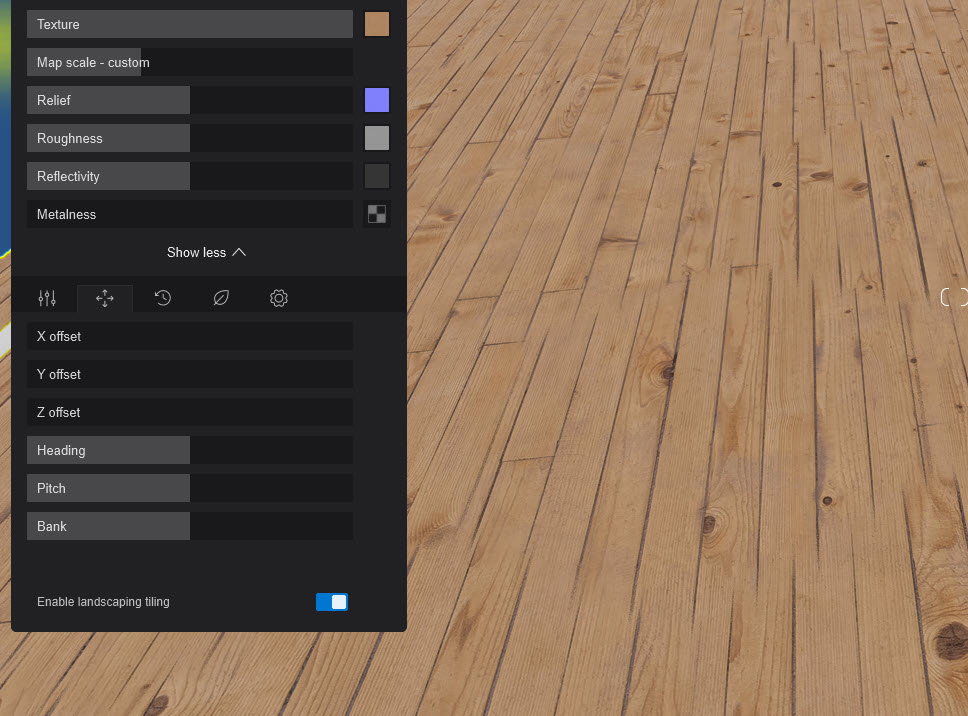
You can use it to give more variation in the material where the tiling becomes repetitive:
See also:
- **Knowledge Base: ** [Lumion 2024.0 - Release Notes](https://support.lumion.com/hc/en-us/articles/12614398780572?hsLang=en-us)
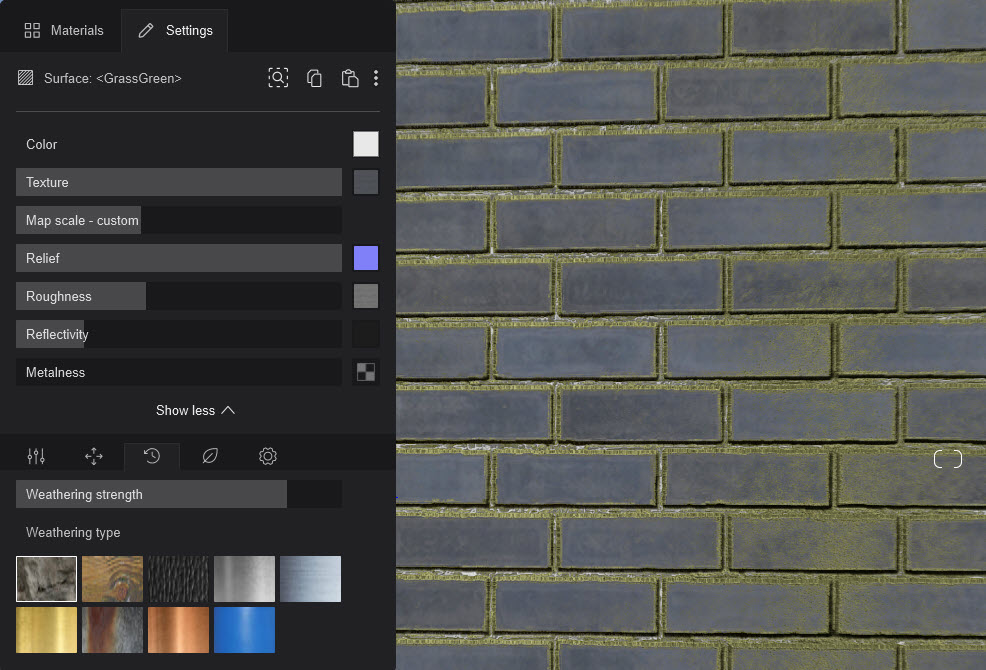
**11. Weathering Tab (Extended Properties):**
****
#### **11.1:** *Weathering*
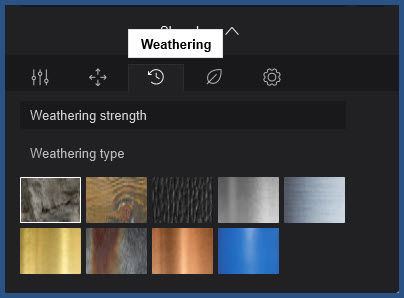
The Presets with the slider add aging and *Weathering Effects*, dirt, worn edges, moss, and rust to *Materials*.
The first step is to select a *Weathering Preset* that matches the *Material* you are using. Then set the slider value.
- Presets (from top left to bottom right):
- A value of 0 means that the *Material* is brand new.
- A value of 0.0 to 0.5 makes it look increasingly old.
- A value of 0.5 to 1.0 makes it increasingly dirty in addition to looking old.
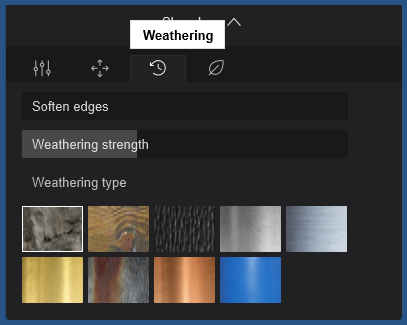
Example of *Weathering*:
**12. Foliage Tab (Extended Properties):**
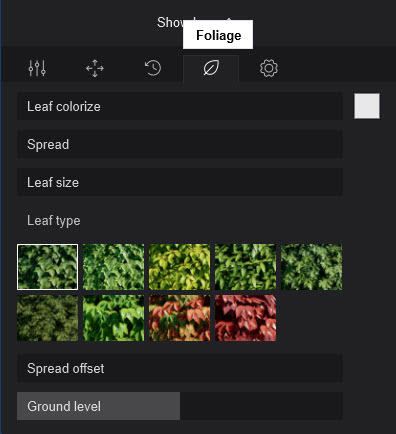
**12.1:** *Leaf Colorize*:
Change the coloring - lightness or color. This applies to all leaves of the material.
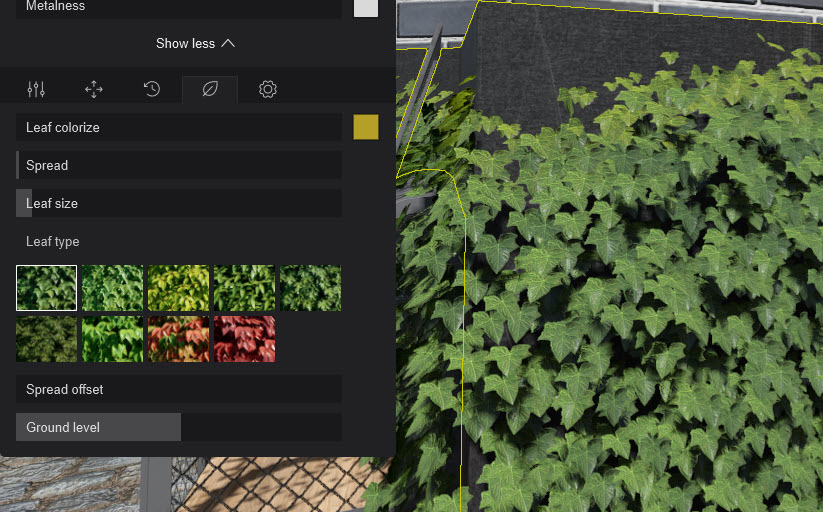
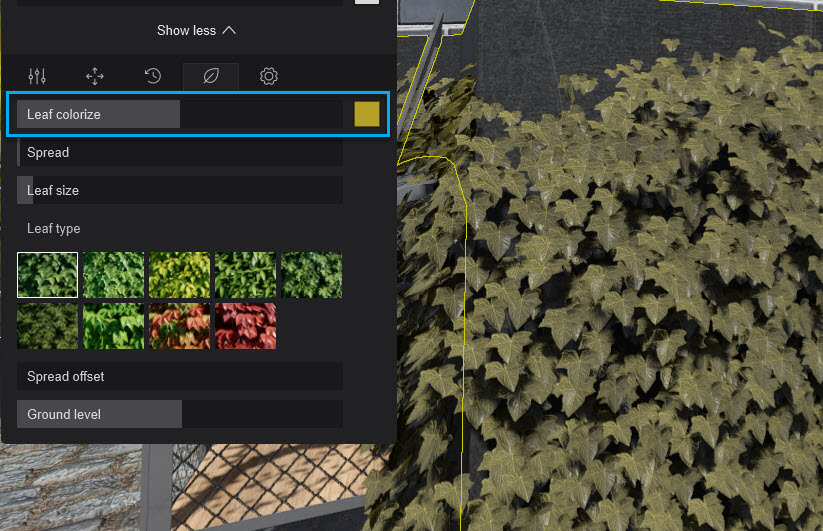
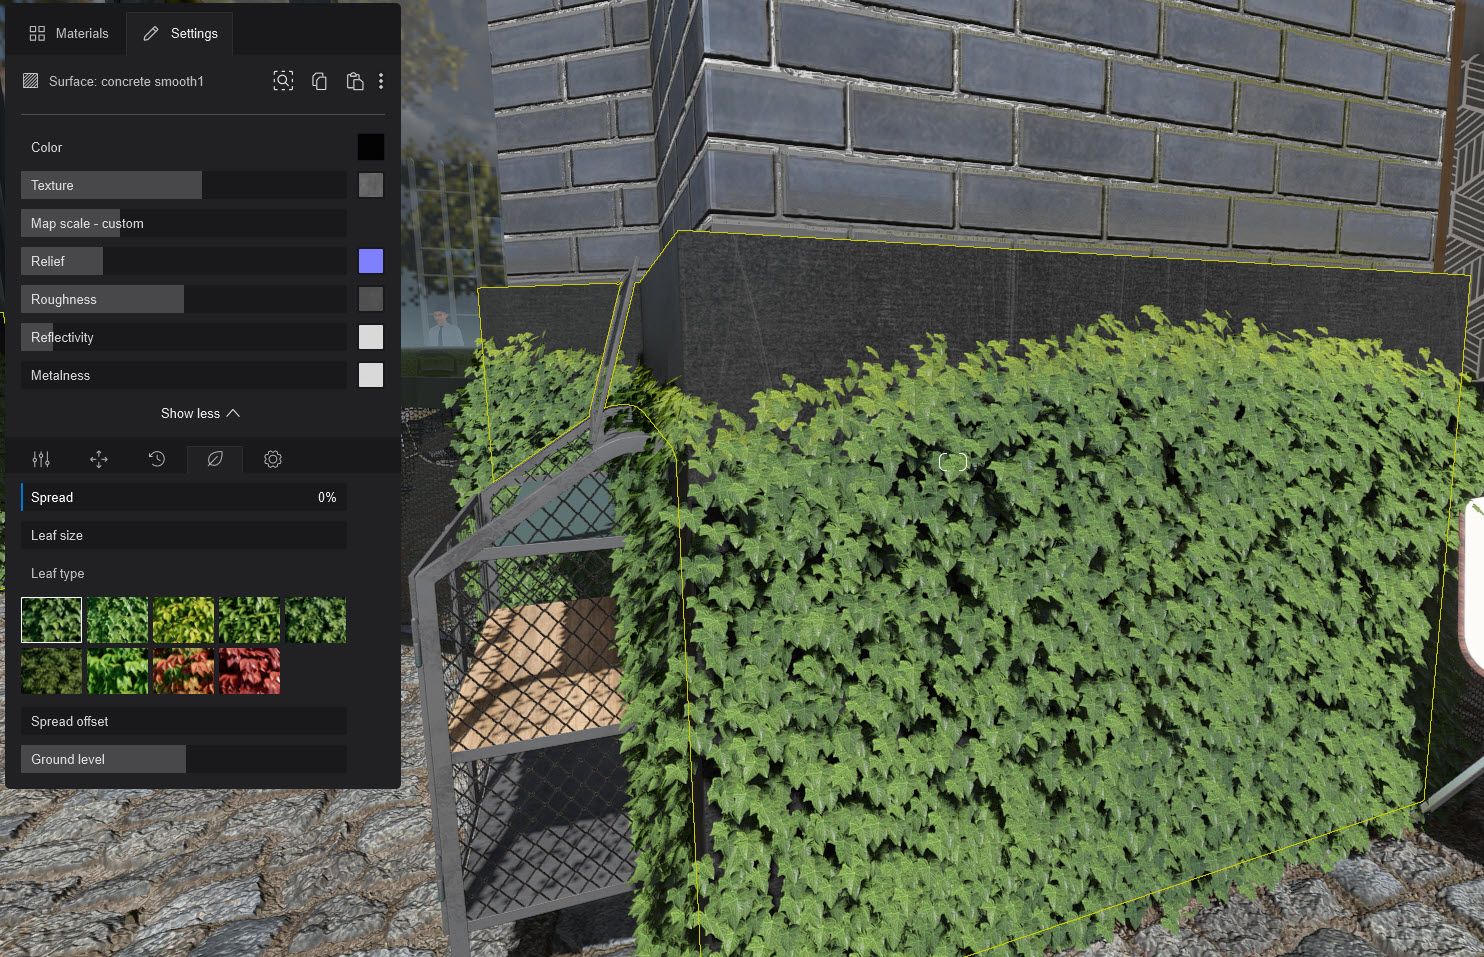
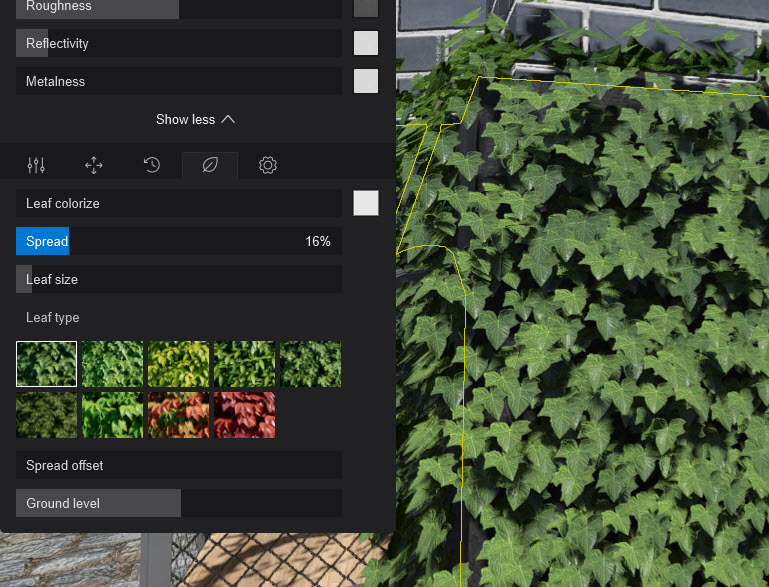
**12.2:** *Spread*
Adjust this slider to change the distribution amount of the leaves.
If your *Foliage *leaves are distributed too thinly or unevenly on your surface, please read this article:
- **Knowledge Base:** [How do you prevent Foliage leaves from being too far apart on your model?](https://support.lumion.com/knowledge-base/api/v2/help_center/en-us/articles/360003475993.json?hsLang=en-us)
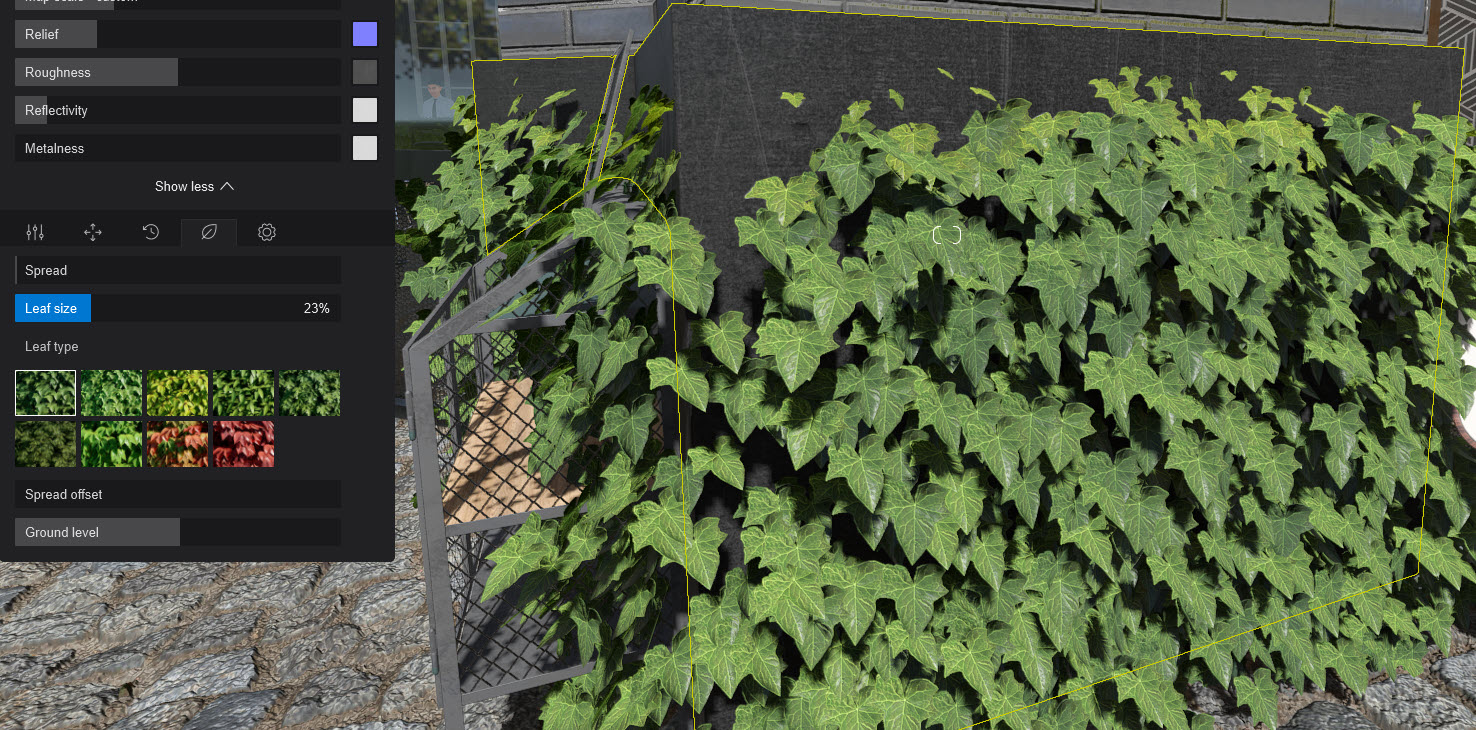
**12.3:** *Leaf Size*
Adjust this slider to change the size of the leaves.
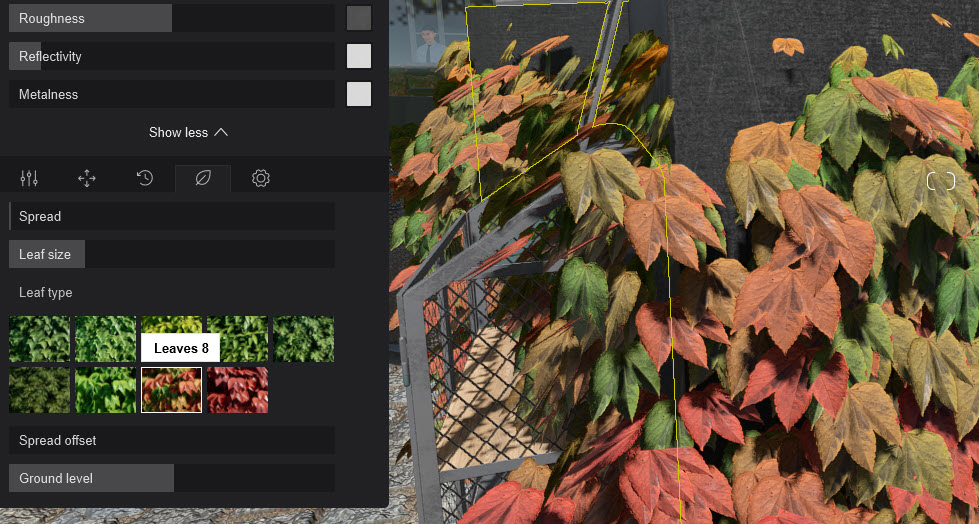
**12.4:** *Leaf Type*
Adjust this slider to change the leaf type. There are 9 presets.
**12.5:** *Spread Pattern Offset*
Adjust this slider to randomize the distribution of the leaves on the model.
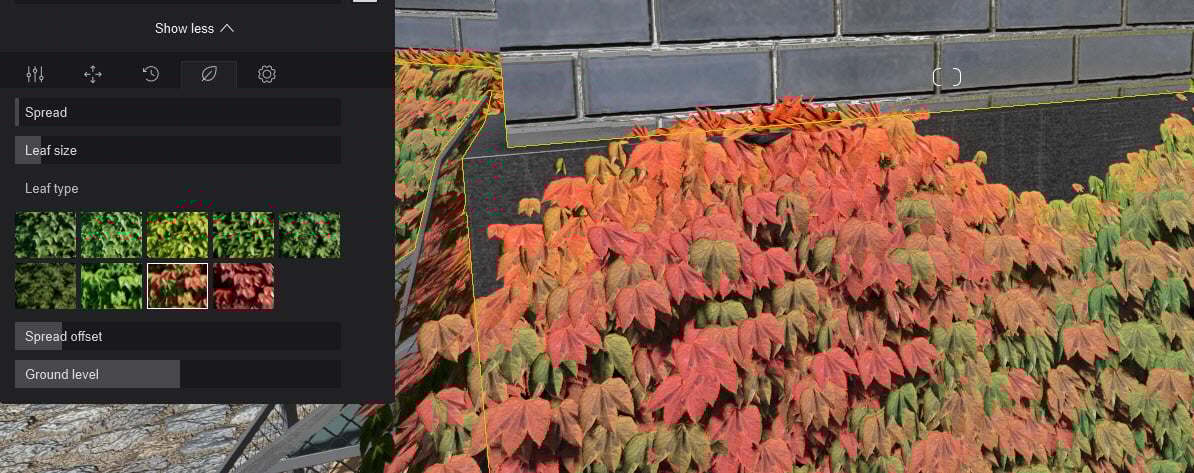
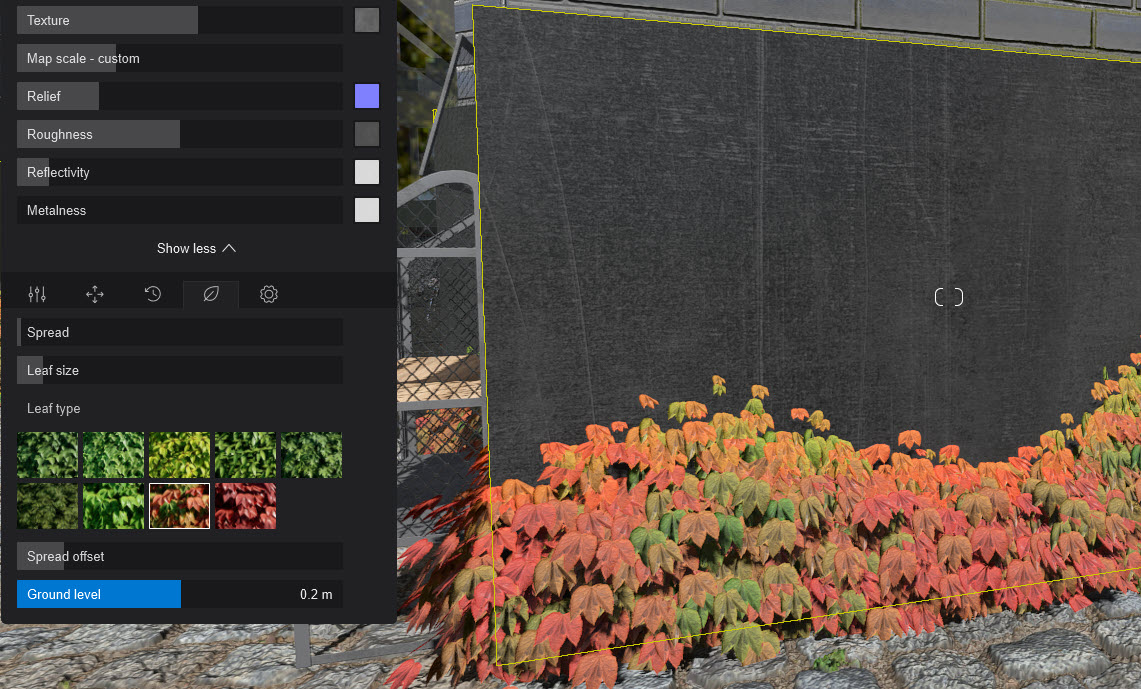
**12.6:** Ground Level
Offset from Landscape. Adjust this slider if your model is above or below the *Lumion Landscape*. The slider value is in meters or feet depending on the chosen *Units* on the main *Settings* screen.
**13. Pattern Tab (Extended Properties)**
The ***Pattern Editor*** lets you add tile, brick, and surface patterns to compatible ***Standard Materials*** without needing a separate texture image.
It's available in the ***Material Settings*** tab, under ***Extended Properties***.
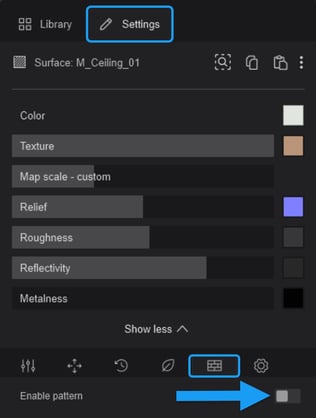
Once enabled, the ***Pattern*** tab provides access to 6 areas with common, and Pattern-specific controls.
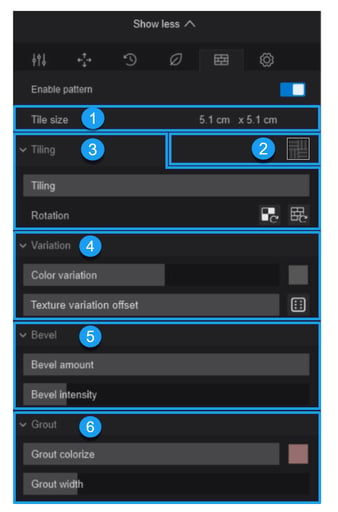
This section gives a brief overview of how the ***Pattern*** tab works inside the ***Standard Material***. For the full workflow, examples, and detailed Pattern Preset controls, see:
- **Knowledge Base:** [How do you use the Pattern Editor?](https://support.lumion.com/knowledge-base/how-do-you-use-the-material-pattern-editor?hsLang=en-us)
#### 13.1 Tiles Size:
The **Tile size** field provides a real-time reference for the generated tile dimensions.
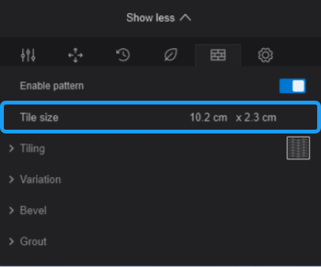
These values update as you adjust the ***Map Scale*** setting or the available preset sliders in the ***Tiling*** section, helping you check the current tile size while adjusting the ***Pattern*** layout.
To change the tile dimensions, adjust the ***Map Scale*** in the ***Standard Material*** properties or use the available preset-specific ***Tiling*** controls. ***Map Scale*** changes the overall tile size proportionally, while the ***Tiling*** controls can affect the tile layout differently depending on the selected ***Pattern Preset**. *
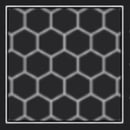
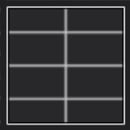
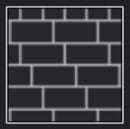
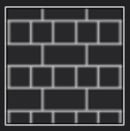
#### 13.2 Pattern Presets:
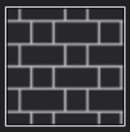
Select from a range of built-in tile layout presets. Each preset generates a different tile arrangement and provides access to different layout controls.
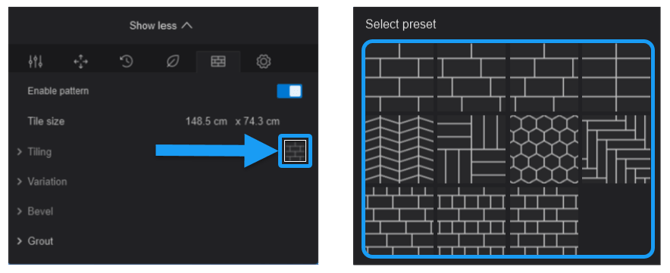
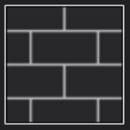
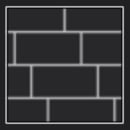
The following ***Pattern Presets*** are available:
| **Running Bond 1** | **Running Bond 2** | **Running Bond 3** |
| --- | --- | --- |
|  |  | 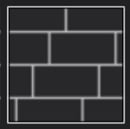 |
| **Herringbone** | **Chevron** | **Basket Weave** |
| 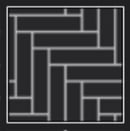 | 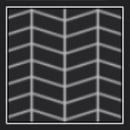 | 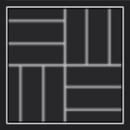 |
| **Hexagon** | **Stacked Bond** | **American Bond** |
|  |  |  |
| **English Bond** | **Flemish Bond** | |
|  |  | |
#### 13.3 Tiling Section:
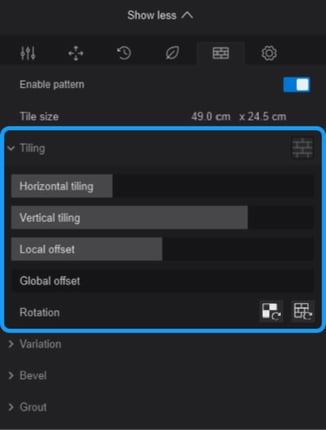
The Tiling section is where you select the ***Pattern Preset*** and adjust the layout controls for the selected Pattern.
***Pattern Presets*** include layouts such as ***Running Bond***, ***Herringbone, Chevron, Basket Weave, Hexagon, Stack Bond, American Bond, English Bond***, and ***Flemish Bond**.*
Most Pattern tab sections remain consistent across presets. The main preset-dependent controls are found in the ***Tiling*** section, where the available settings can change depending on the selected layout. These may include density, offset, angle, or rotation controls.
##### 13.3.1 Preset Layout Controls Section:
Controls the arrangement of the selected ***Pattern Preset*****.** Available controls include density, offset, angle, and other preset-specific settings depending on the chosen***Pattern***.
| - **Hexagon Control: **  | - **Basket weave and Herringbone Control: **  |
| --- | --- |
| - **Running Bond 1, Running Bond 2, Running Bond 3,** and **Stacked Bond Controls: ** 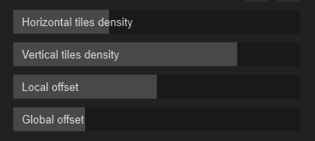 | - **Chevron Controls:** 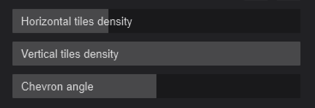 |
| - **American Bond: **  | - **English Bond, Flemish Bond** 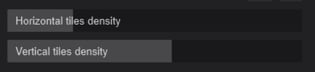 |
#### 13.3.2 Rotation
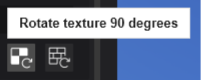
The two ***Rotation ***buttons let you adjust the orientation in 90° increments, either by rotating only the ***Texture*** or by rotating the full ***Pattern*** along with the ***Texture***.
- Use the ***Rotate Texture 90 Degrees*** button to rotate the ***Texture*** direction, which is useful when the texture detail needs to align with the ***Pattern ***
#### ******
- Use the ***Rotate Pattern 90 Degrees*** button to rotate the ***Pattern*** and ***Texture*** together.
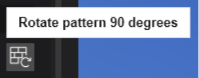
When the ***Pattern*** is rotated by 90°, the ***Horizontal Tiling*** and ***Vertical Tiling*** values switch automatically to preserve the selected proportions.
Similar visual results can also be achieved with the ***UV Coordinates*** rotation settings, depending on whether you want to rotate the ***Pattern***, the ***Texture***, or both together.
#### 13.4 Variation Section:
##### 13.4.1 Color Variation
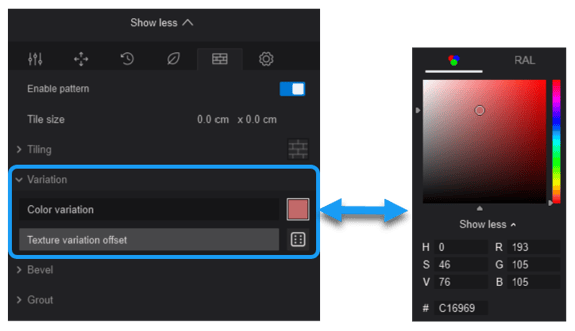
Adds color variation between individual tiles based on the color selected in the ***Color Variation Color Picker***. At 0%, the setting has no visible effect, and the tiles retain the original base ***Material*** appearance. As the slider increases toward 100%, the selected ***Color Variation*** color becomes stronger and more dominant across the tiles, while still preserving variation between individual tiles.
This setting only affects the ***Tiles ***and does not change the ***Grout*** color.
- **Knowledge Base: **[How do you use specific colors from sources outside Lumion?](https://support.lumion.com/knowledge-base/api/v2/help_center/en-us/articles/360003474653.json?hsLang=en-us)
[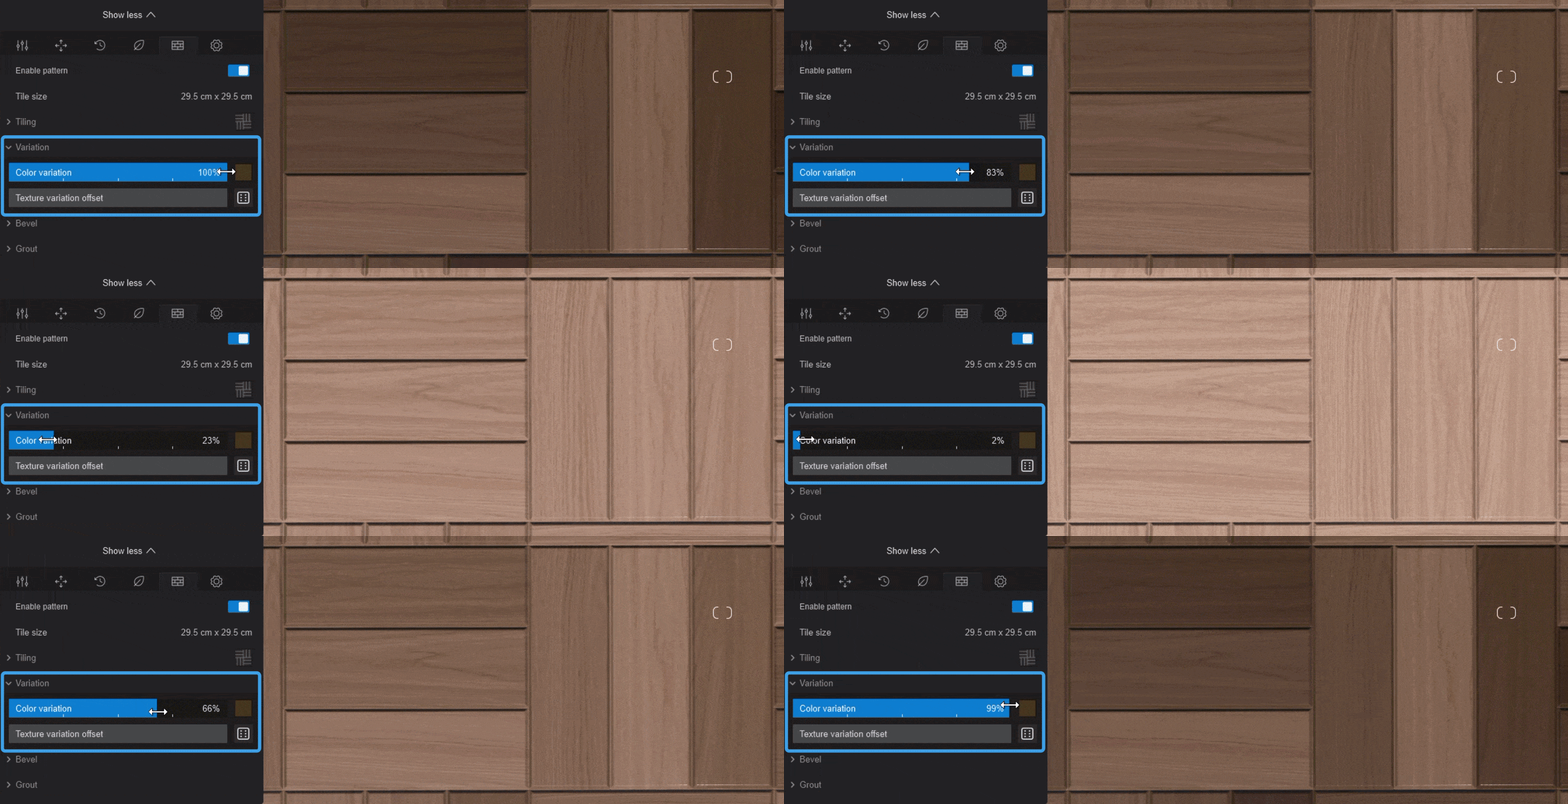](https://support.lumion.com/hubfs/TS%20-%20Knowledge%20Base/Pattern%20Editor/Color_Variation1.gif?hsLang=en-us)
##### 13.4.2 Texture Variation Offset
Shifts the source***Texture*** across individual tiles at varying amounts, helping reduce visible repetition by displaying different areas of the ***Texture***.
[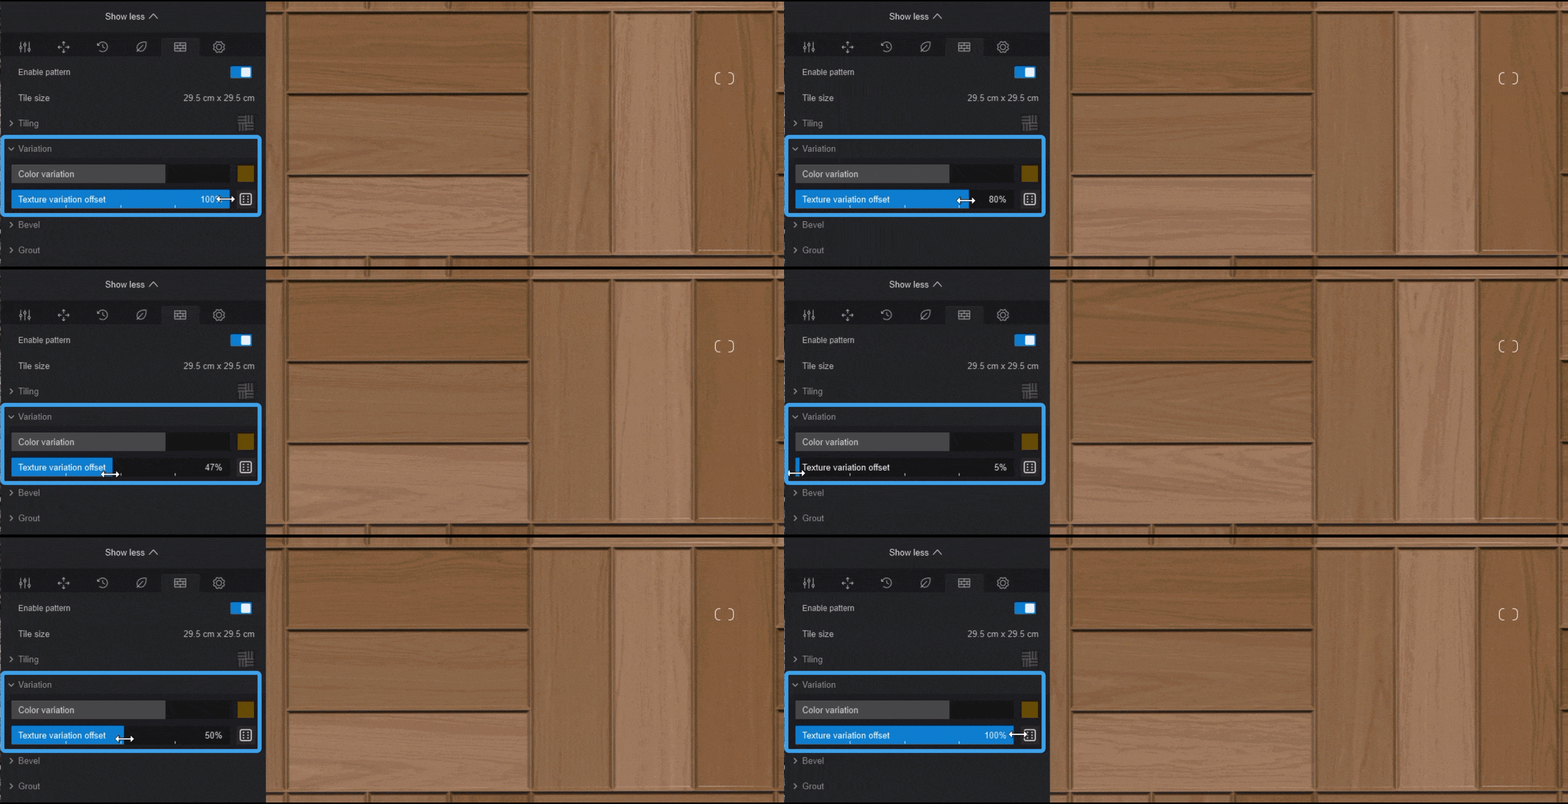](https://support.lumion.com/hubfs/TS%20-%20Knowledge%20Base/Pattern%20Editor/Texture_Variation.gif?hsLang=en-us)
##### 13.4.3 Randomize
Click to generate a randomized distribution of the ***Texture*** for the current ***Variation*** setting.
****
#### 13.5 Bevel Section:
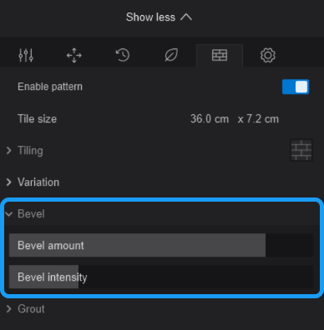
Adding a small **Bevel** to the tiles can make the edges appear raised and give the pattern a sense of depth, even when a ***Displacement Map*** is not being used.
When combined with ***Displacement Map***, the ***Grout*** can appear more recessed below the beveled tile edges, creating a more realistic sense of depth between the***Tiles*** and ***Grout**.*
**Tip:** By adding a small amount of ***Soften Edges*** from the ***Settings*** tab, it can help reduce the sharp edge transitions created by the ***Bevel***.
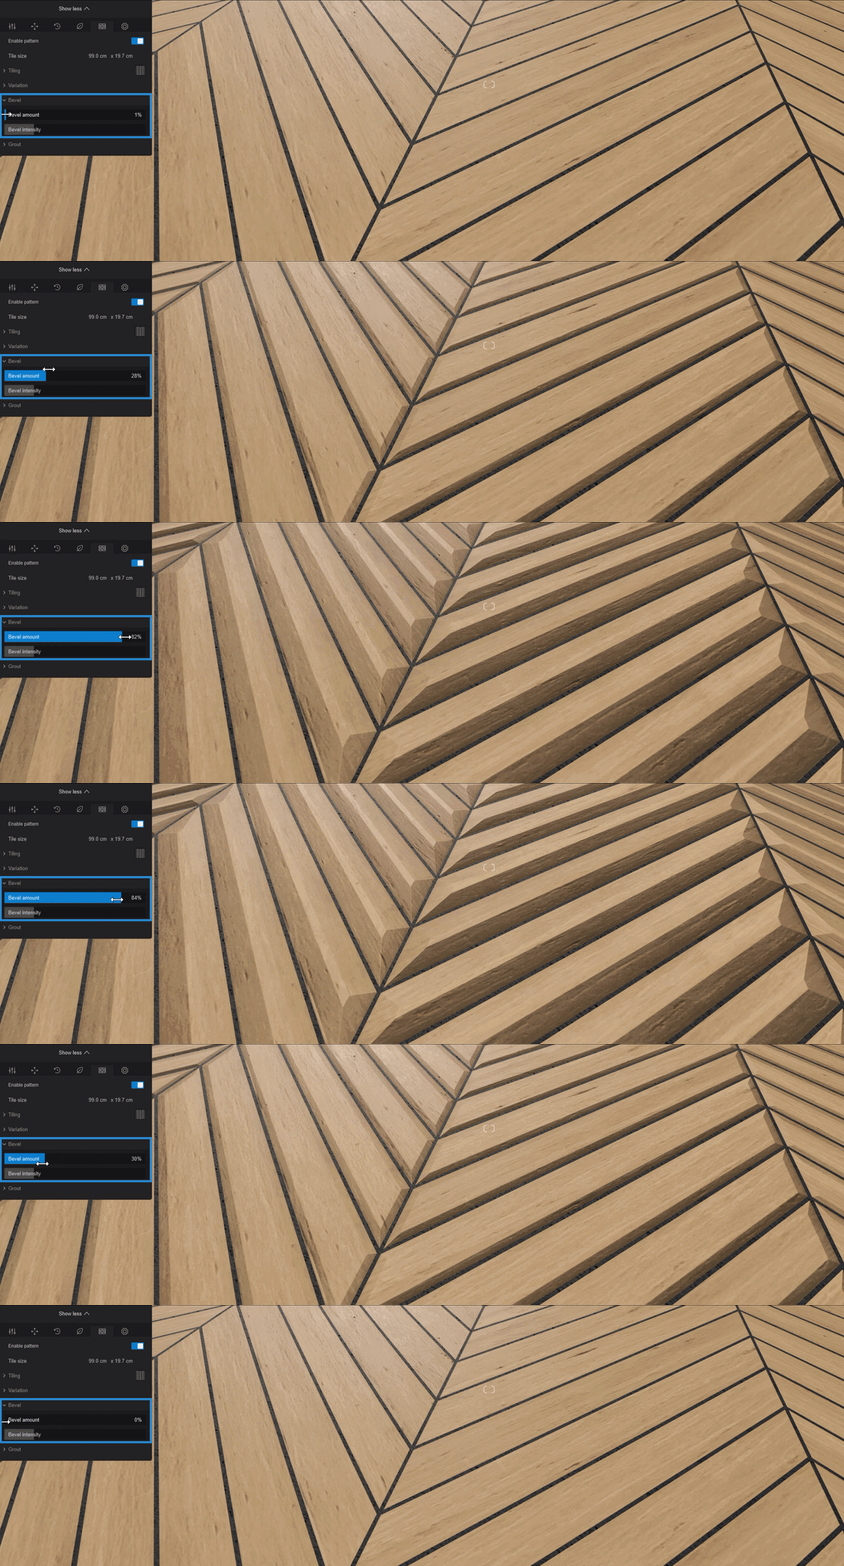
##### 13.5.1 Bevel Amount
Controls the size of the bevel area on each tile. Higher values make the bevel wider. Ultimately at 100% the bevel will meet in the middle of the tile.
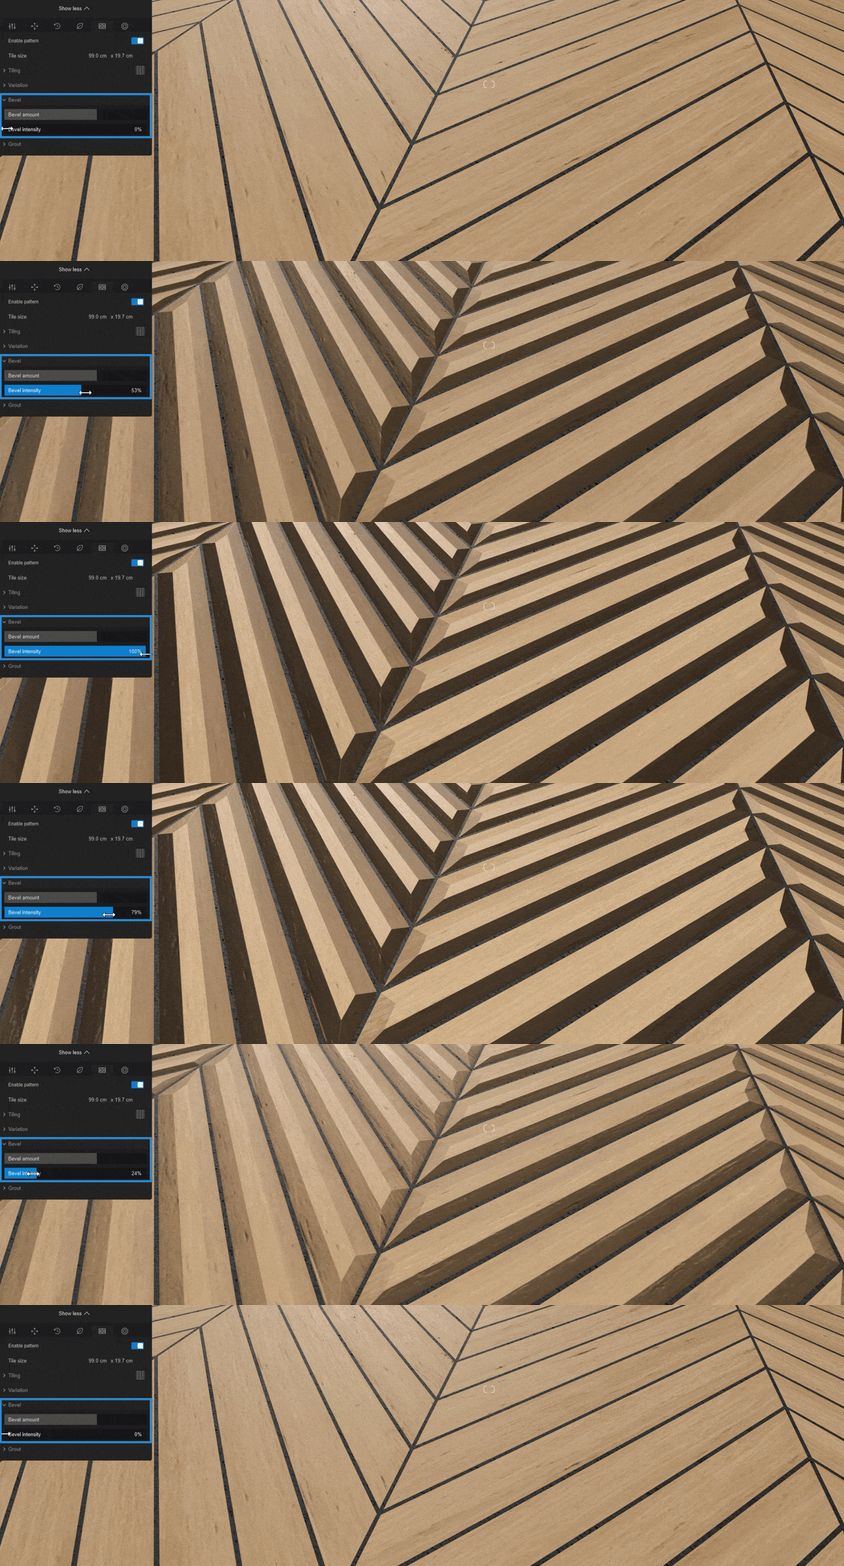
##### 13.5.2 Bevel Intensity
Controls how strongly the bevel appears and its shadowing. Higher values will make the bevel more visible. Depending on the angle of your light source, you will need to play with the right amount to get your desired look.
#### 13.6 Grout Section:
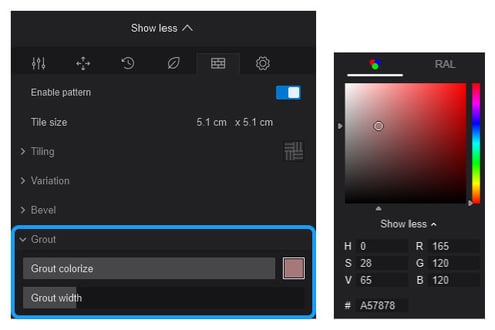
Controls the appearance and spacing of the ***Grout*** between generated tiles. ***Grout*** settings can be used to adjust the width, color, and the color’s Intensity slider.
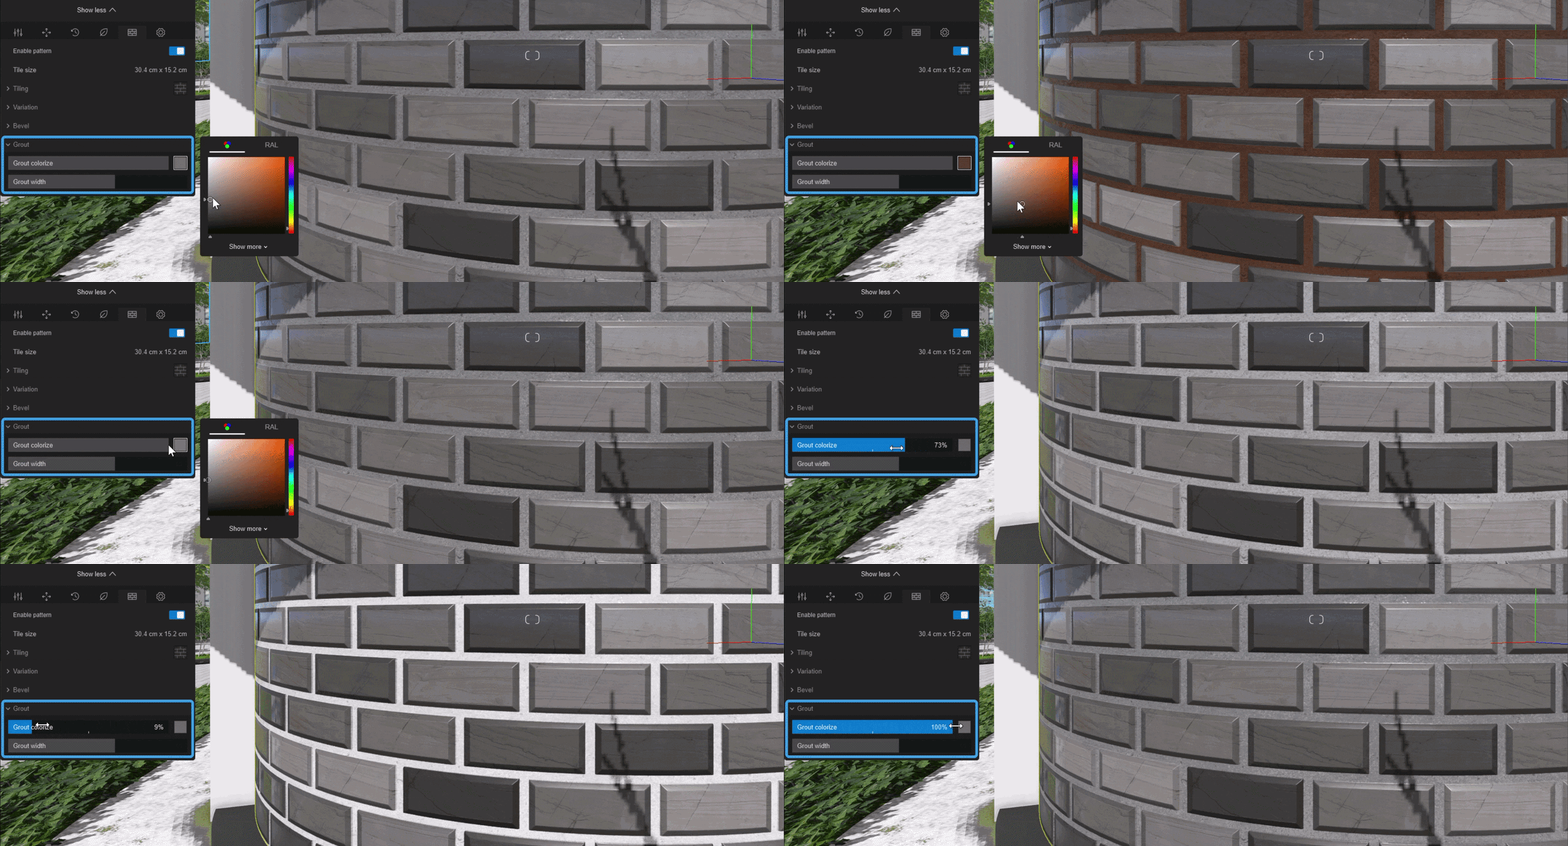
#### 3.6.1 Grout Colorize
Applies a custom color to the grout using the selected ***Grout Color Picker*** color and controls its intensity using the slider. At 100%, the grout fully displays the selected color. Lower values gradually reduce the color intensity until the grout returns to white at 0%.
This setting only affects the ***Grout*** and does not change the tile color or underlying ***Texture***.
### [](https://support.lumion.com/hubfs/TS%20-%20Knowledge%20Base/Pattern%20Generator/Grout_Colorize1.gif?hsLang=en-us)
#### 3.6.2 Grout Color Picker
Opens Lumion's Color Selection Window, allowing you to choose or adjust the color of the generated grout lines.
For an overview of the Color Selection Window and its available color input options, see:
- **Knowledge Base: **[How do you use specific colors from sources outside Lumion?](https://support.lumion.com/knowledge-base/api/v2/help_center/en-us/articles/360003474653.json?hsLang=en-us)
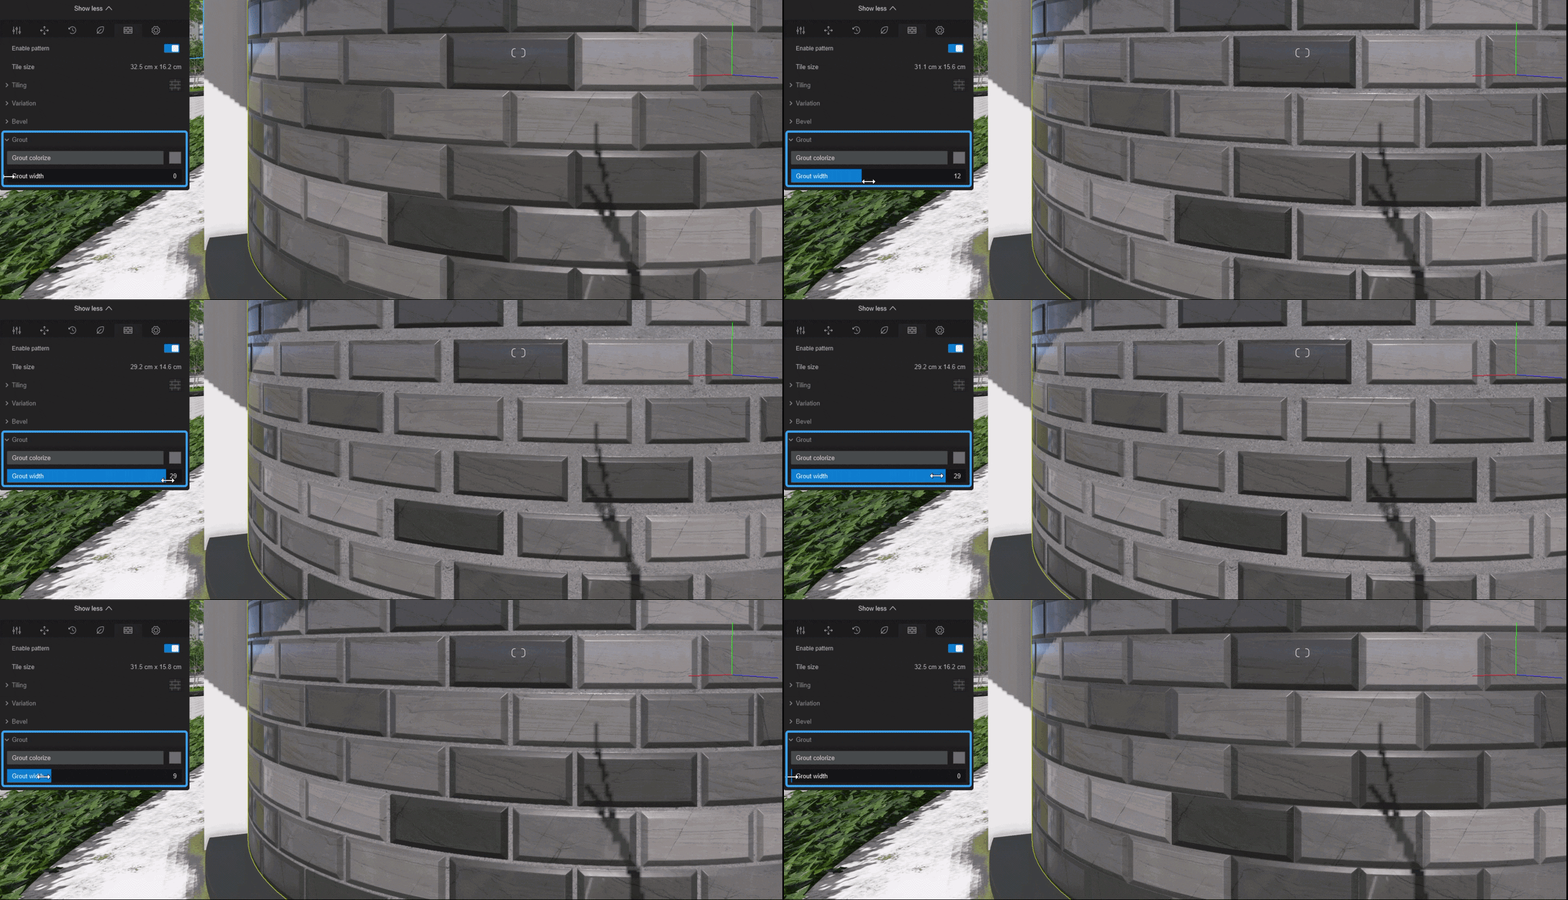
#### 3.6.3 Grout Width
Controls the width and visibility of the grout line between the generated tiles. Lower values create thinner and more subtle grout lines, while higher values increase the spacing and separation between individual tiles. The slider range is from 0 to 32.
[](https://support.lumion.com/hubfs/TS%20-%20Knowledge%20Base/Pattern%20Generator/Grout_Width1.gif?hsLang=en-us)
##### 13.6.1 Grout Colorize
Applies a custom color to the grout using the selected ***Grout Color Picker*** color and controls its intensity using the slider. At 100%, the grout fully displays the selected color. Lower values gradually reduce the color intensity until the grout returns to white at 0%.
This setting only affects the ***Grout*** and does not change the tile color or underlying ***Texture***.
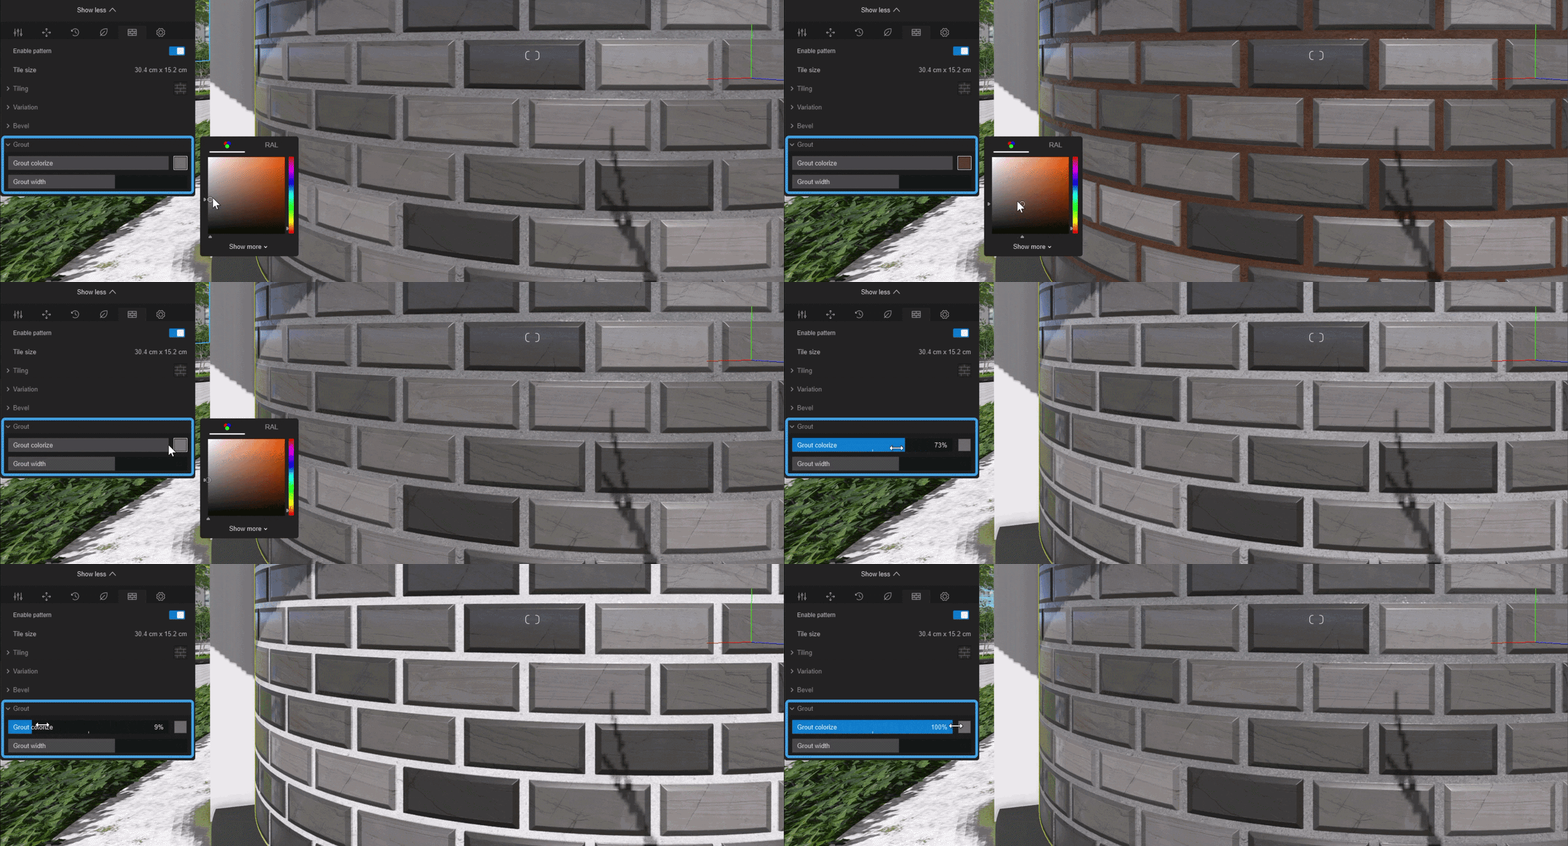
##### 13.6.2 Grout Color Picker
Opens Lumion's Color Selection Window, allowing you to choose or adjust the color of the generated grout lines.
For an overview of the Color Selection Window and its available color input options, see:
- **Knowledge Base: **[How do you use specific colors from sources outside Lumion?](https://support.lumion.com/knowledge-base/api/v2/help_center/en-us/articles/360003474653.json?hsLang=en-us)
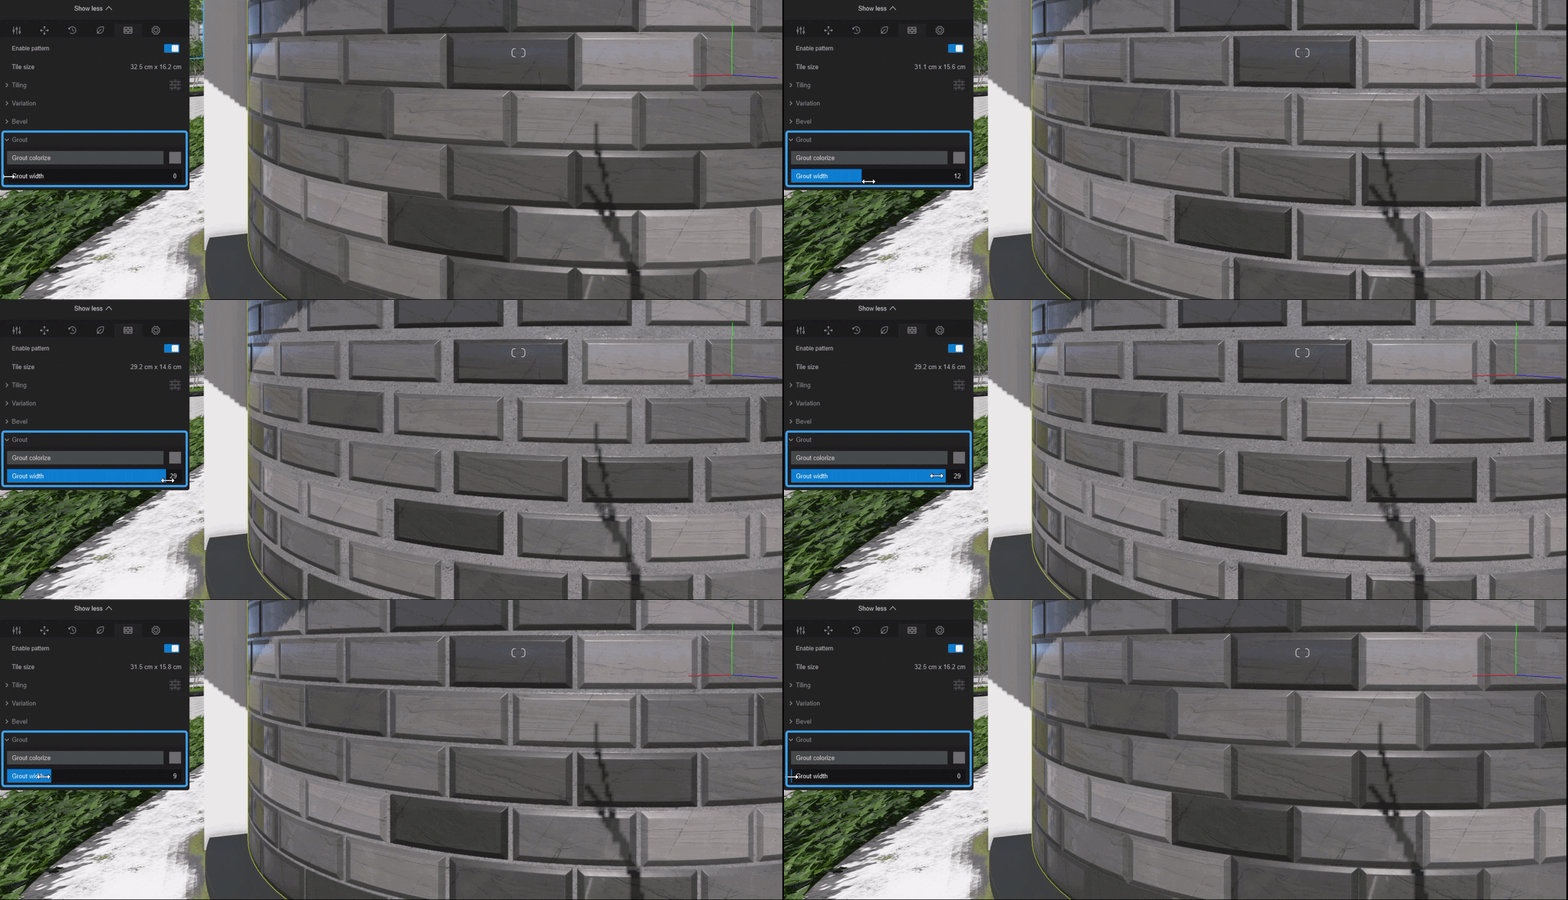
##### 13.6.3 Grout Width
Controls the width and visibility of the grout line between the generated tiles. Lower values create thinner and more subtle grout lines, while higher values increase the spacing and separation between individual tiles. The slider range is from 0 to 32.
For the full in-depth workflow, examples, and pattern controls, see:
- **Knowledge Base:** [How do you use the Pattern Editor?](https://support.lumion.com/knowledge-base/how-do-you-use-the-material-pattern-editor?hsLang=en-us)
**14. Settings Tab (Extended Properties)**
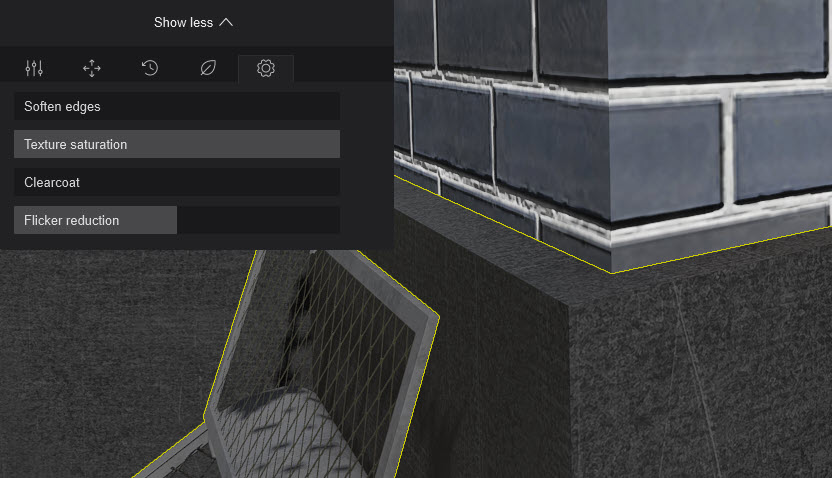
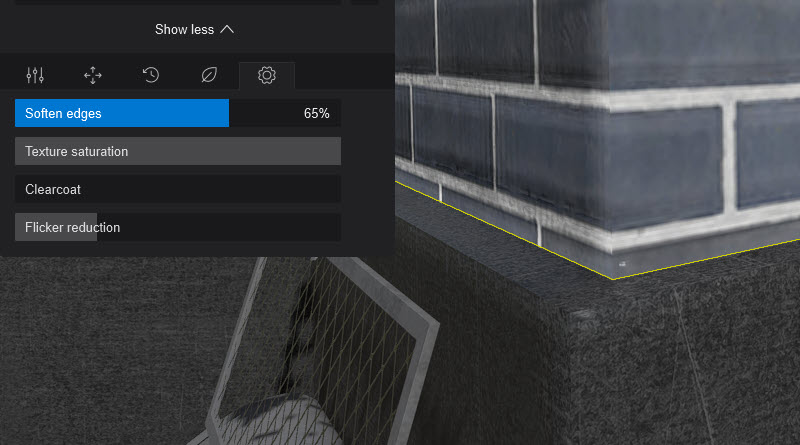
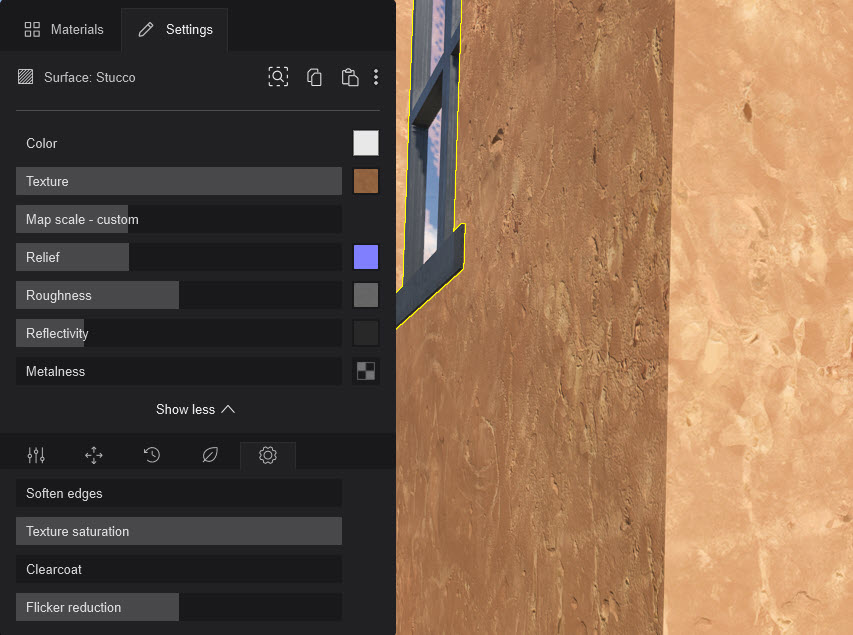
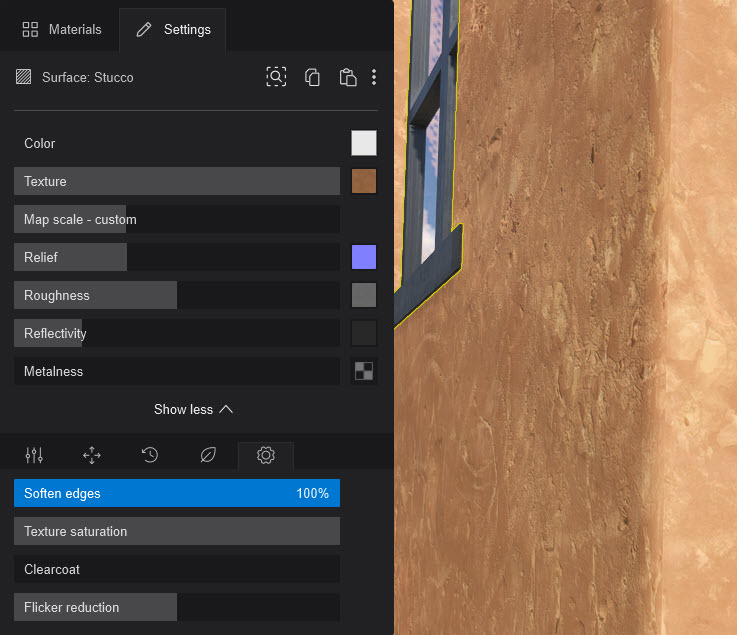
#### **14.1:** *Soften Edges Slider*:
This slider smooths the edges of objects.
#### **14.2: ** *Texture Saturation*
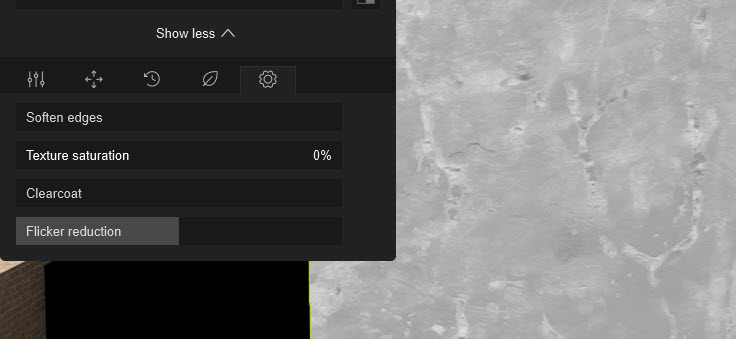
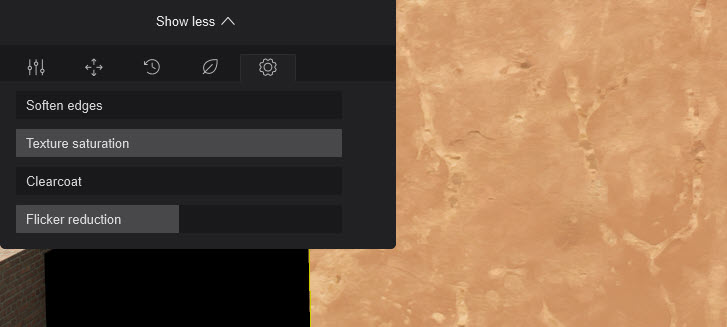
A low value desaturates (changes the pixels towards grey) for the *Texture Map* image and a high value makes it more saturated up to the color for each pixel in the *Texture Map*.
#### **14.3:** *Clearcoat* **(slider only)**
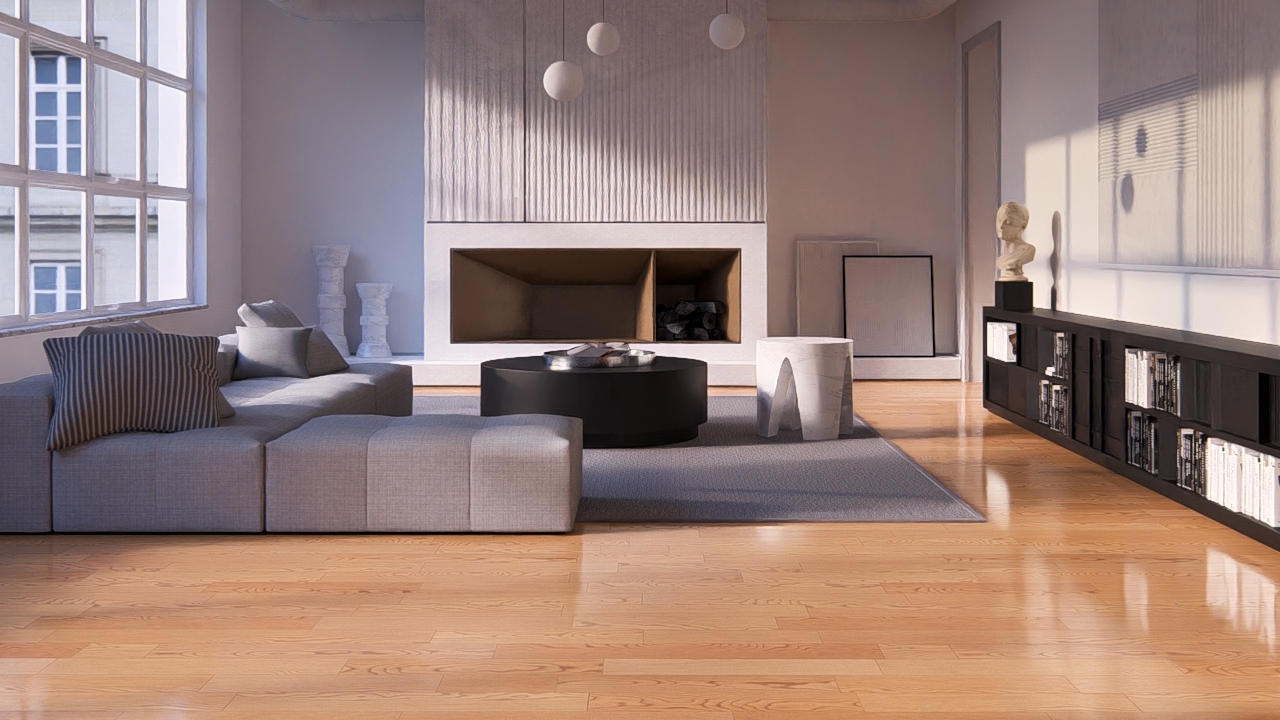
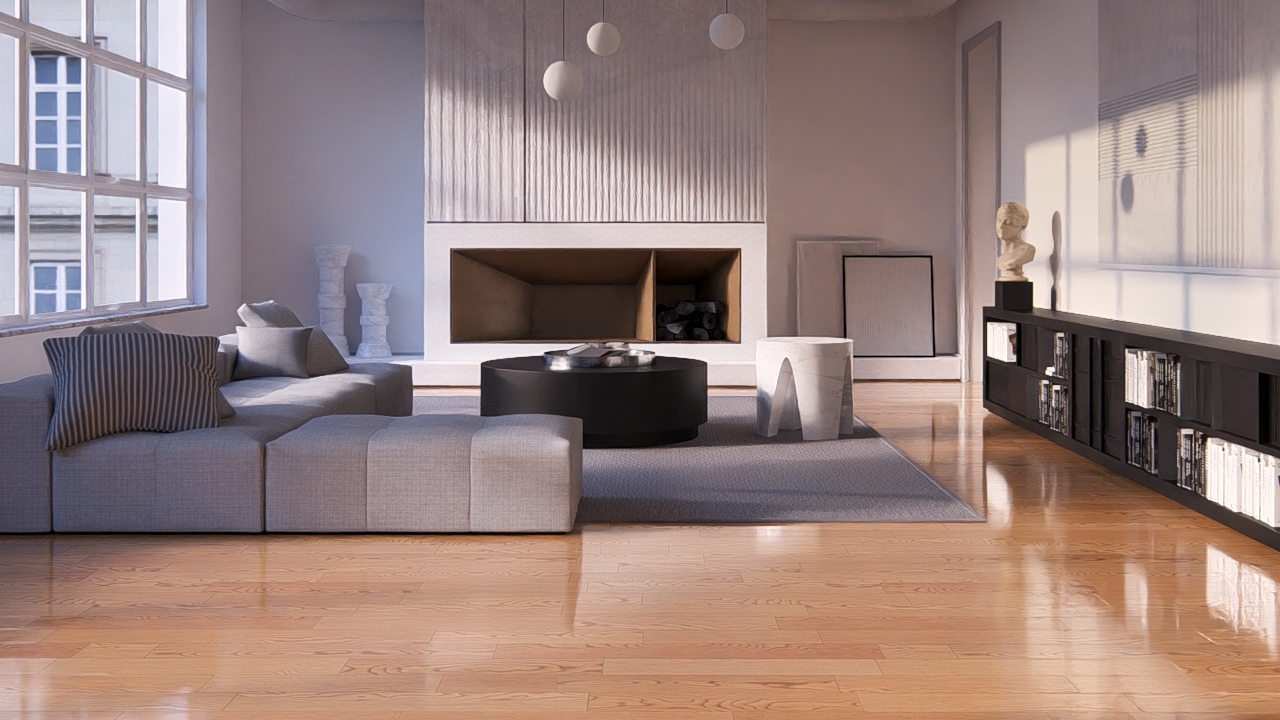
Imagine you have a hardwood floor with a thin layer of lacquer on top of all the other settings. That’s *Clearcoat* for you: use this value to add a layer of shine to it.
No Clearcoat:
Maximum Clearcoat:
**Tip:** go for 0% or 100%, not in-between unless you have something very specific in mind.
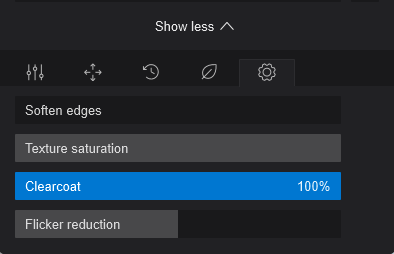
This is similar to the *Clearcoat* that is available as an object property for cars in the *Object Library*. As the name implies, the *Clearcoat* is a colorless resin that is applied over the top of the base coat. It's the layer that makes your car look glossy.
#### 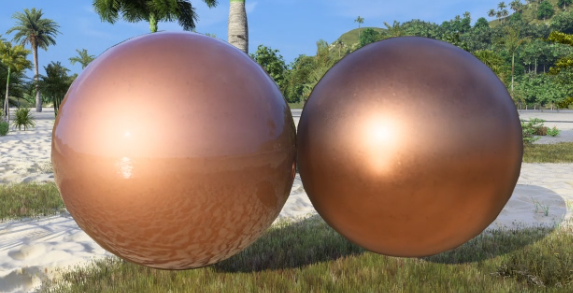
*Same material. The sphere on the left sphere has 100% clearcoat, and the sphere on the right has 0% clearcoat (Ray Tracing off).*
#### **14.4:** *Flicker Reduction***: (slider only).**
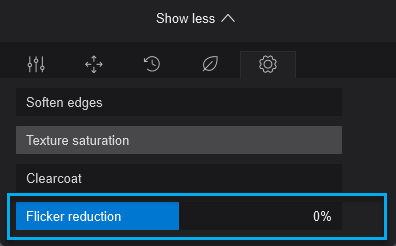
You should only use this setting if overlapping surfaces flicker or disappear when you move the camera.
Avoid extreme *Flicker Reduction* values - you should only adjust it a little bit while holding down the Shift key and moving the mouse cursor left or right until the surface stops flickering.
The best method is to make sure that your surfaces are offset a bit in your 3D modeling application so that flickering is less likely to occur in the first place.

### **Changes from Versions before Lumion 2023**
**15. Notes:**
**15.1:** For **existing** Materials.
Lumion automatically converts *Maps* for use in Lumion.
If you used combined *Maps*, in earlier versions, for example, included an *Alpha Map* in the *Color Map* to also have a *Reflectivity *mask.
All *Materials* when saved to the *Documents\\Lumion\\Library* folders after opening an older version *Project*, will be automatically converted to meet requirements for Lumion.
Those loaded when editing a *Material*, for example via a *Material Set* or the older LNM *Material File* will be converted in real-time on the fly.
For converted *Materials,* all the *Maps* are split and converted.
- **Knowledge Base (section 2.2: Materials Conversion for Lumion 2023+):** [How do you migrate to a newer version of Lumion?](https://support.lumion.com/knowledge-base/api/v2/help_center/en-us/articles/360003455014.json?hsLang=en-us)
- **Knowledge Base: **[Transitions: From prior versions to working with the Lumion 2023](https://support.lumion.com/knowledge-base/api/v2/help_center/en-us/articles/7807462680732.json?hsLang=en-us)
- **Knowledge Base:** [What do the properties of the Standard Material mean in Lumion 12?](https://support.lumion.com/knowledge-base/api/v2/help_center/en-us/articles/4409111356050.json?hsLang=en-us)
**15.2:** For **new** *Materials,* you will need to add separate maps (excluding those image formats that support *Transparency/Opacity* see Section earlier). So there is now no need to create a single image in an image editor using the *Alpha channel* as a *Map*.
### **Applies to:**
Lumion 2024, Lumion 2023.
### **See Also:**
- **Video Tutorial:** [Lumion 2023: Full PBR Material Workflow](https://support.lumion.com/knowledge/articles/8043239213340?hsLang=en-us)
- **Video Tutorial:** [Lumion 2023: Create Ultra Realistic Materials in Lumion (by Architecture Inspirations)](https://support.lumion.com/video-tutorials/api/v2/help_center/en-us/articles/8644819133980.json?hsLang=en-us)
- **Video Tutorial (Chapter: Material Editor Interface, 6:19):** [Lumion 2023: Top Features You Must Try ft. Nuno Silva](https://support.lumion.com/video-tutorials/api/v2/help_center/en-us/articles/8090112796444.json?hsLang=en-us)
- **Video Tutorial (3:25 Chapter: Feature no.3 - PBR Workflow, 3:25):** [Lumion 2023: Game changing new features ft. Upstairs](https://support.lumion.com/video-tutorials/api/v2/help_center/en-us/articles/8209428326684.json?hsLang=en-us)
- **Knowledge Base: ** [How do you use the Material Editor in Lumion 2023 and newer?](https://support.lumion.com/knowledge-base/api/v2/help_center/en-us/articles/7789056049180.json?hsLang=en-us)
- **Knowledge Base: **[How do you copy, paste, save and load Materials in Lumion 2023 and newer?](https://support.lumion.com/knowledge-base/api/v2/help_center/en-us/articles/7764039850396.json?hsLang=en-us)
\_
- [Visit our other Sections](https://support.lumion.com/knowledge-base/visit-our-other-sections?hsLang=en-us)
- [Contact Us](https://support.lumion.com/knowledge-base/contact-us?hsLang=en-us)
- [Lumion Account](https://support.lumion.com/knowledge-base/lumion-account?hsLang=en-us)
- [Latest News](https://support.lumion.com/knowledge-base/latest-news?hsLang=en-us#main-content)
- [Major Known Issues](https://support.lumion.com/knowledge-base/latest-news?hsLang=en-us#major-known-issues)
- [Lumion 2025: Major Version Release Details](https://support.lumion.com/knowledge-base/latest-news?hsLang=en-us#lumion-2025-major-version-release-details)
- [Lumion 2024: Major Version Release Details](https://support.lumion.com/knowledge-base/latest-news?hsLang=en-us#lumion-2024-major-version-release-details)
- [Lumion 2023: Major Version Release Details](https://support.lumion.com/knowledge-base/latest-news?hsLang=en-us#lumion-2023-major-version-release-details)
- [Lumion 2023: Update Release Notes](https://support.lumion.com/knowledge-base/latest-news?hsLang=en-us#lumion-2023-update-release-notes)
- [Lumion 12](https://support.lumion.com/knowledge-base/latest-news?hsLang=en-us#lumion-12)
- [Lumion 11](https://support.lumion.com/knowledge-base/latest-news?hsLang=en-us#lumion-11)
- [Lumion 10](https://support.lumion.com/knowledge-base/latest-news?hsLang=en-us#lumion-10)
- [Sales Questions](https://support.lumion.com/knowledge-base/sales-questions?hsLang=en-us)
- [Subscriptions](https://support.lumion.com/knowledge-base/subscriptions?hsLang=en-us)
- [New User Questions](https://support.lumion.com/knowledge-base/new-user-questions?hsLang=en-us)
- [Learning Resources](https://support.lumion.com/knowledge-base/learning-resources?hsLang=en-us)
- [System Requirements Questions](https://support.lumion.com/knowledge-base/system-requirements-questions?hsLang=en-us#main-content)
- [Determining the 'Complexity' of your Projects](https://support.lumion.com/knowledge-base/system-requirements-questions?hsLang=en-us#determining-the-complexity-of-your-projects)
- [System Messages from Lumion](https://support.lumion.com/knowledge-base/system-requirements-questions?hsLang=en-us#system-messages-from-lumion)
- [Requirements for Prior Versions](https://support.lumion.com/knowledge-base/system-requirements-questions?hsLang=en-us#requirements-for-prior-versions)
- [Download & Installation Questions](https://support.lumion.com/knowledge-base/download-installation-questions?hsLang=en-us#main-content)
- [Download/Installation: General Questions](https://support.lumion.com/knowledge-base/download-installation-questions?hsLang=en-us#download-installation-general-questions)
- [Download Questions](https://support.lumion.com/knowledge-base/download-installation-questions?hsLang=en-us#download-questions)
- [Installation Questions](https://support.lumion.com/knowledge-base/download-installation-questions?hsLang=en-us#installation-questions)
- [Lumion Pro Updater](https://support.lumion.com/knowledge-base/download-installation-questions?hsLang=en-us#lumion-pro-updater)
- [Plugins to CAD software](https://support.lumion.com/knowledge-base/download-installation-questions?hsLang=en-us#plugins-to-cad-software)
- [License and General Product Questions](https://support.lumion.com/knowledge-base/license-and-general-product-questions?hsLang=en-us#main-content)
- [License System Messages from Lumion](https://support.lumion.com/knowledge-base/license-and-general-product-questions?hsLang=en-us#license-system-messages-from-lumion)
- [Import & Export Questions](https://support.lumion.com/knowledge-base/import-export-questions?hsLang=en-us#main-content)
- [Model Import Guidelines](https://support.lumion.com/knowledge-base/import-export-questions?hsLang=en-us#model-import-guidelines)
- [Lumion LiveSync and import plugins](https://support.lumion.com/knowledge-base/import-export-questions?hsLang=en-us#lumion-livesync-and-import-plugins)
- [System Messages from Lumion when importing](https://support.lumion.com/knowledge-base/import-export-questions?hsLang=en-us#system-messages-from-lumion-when-importing)
- [General Questions](https://support.lumion.com/knowledge-base/general-questions?hsLang=en-us#main-content)
- [Keyboard Shortcuts in Lumion](https://support.lumion.com/knowledge-base/general-questions?hsLang=en-us#keyboard-shortcuts-in-lumion)
- [Upgrading and Updating your Lumion Version](https://support.lumion.com/knowledge-base/general-questions?hsLang=en-us#upgrading-and-updating-your-lumion-version)
- [Using Lumion 2023](https://support.lumion.com/knowledge-base/general-questions?hsLang=en-us#using-lumion-2023)
- [System Messages from Lumion](https://support.lumion.com/knowledge-base/general-questions?hsLang=en-us#system-messages-from-lumion)
- [Build Mode Questions](https://support.lumion.com/knowledge-base/build-mode-questions?hsLang=en-us#main-content)
- [Landscape and Terrains](https://support.lumion.com/knowledge-base/build-mode-questions?hsLang=en-us#landscape-and-terrains)
- [OpenStreetMap](https://support.lumion.com/knowledge-base/build-mode-questions?hsLang=en-us#openstreetmap)
- [Lighting: Sun and Artificial Lights](https://support.lumion.com/knowledge-base/build-mode-questions?hsLang=en-us#lighting-sun-and-artificial-lights)
- [Questions mainly for older versions than Lumion 12](https://support.lumion.com/knowledge-base/build-mode-questions?hsLang=en-us#questions-mainly-for-older-versions-than-lumion-12)
- [Library Content](https://support.lumion.com/knowledge-base/library-content?hsLang=en-us#main-content)
- [Library Content in Lumion 2026](https://support.lumion.com/knowledge-base/library-content?hsLang=en-us#library-content-in-lumion-2026)
- [Library Content in Lumion 2025](https://support.lumion.com/knowledge-base/library-content?hsLang=en-us#library-content-in-lumion-2025)
- [Library Content in Lumion 2024](https://support.lumion.com/knowledge-base/library-content?hsLang=en-us#library-content-in-lumion-2024)
- [Library Content in Lumion 2023](https://support.lumion.com/knowledge-base/library-content?hsLang=en-us#library-content-in-lumion-2023)
- [Library Content in Lumion 12](https://support.lumion.com/knowledge-base/library-content?hsLang=en-us#library-content-in-lumion-12)
- [Movie & Photo Mode Questions](https://support.lumion.com/knowledge-base/movie-photo-mode-questions?hsLang=en-us#main-content)
- [Photo Mode](https://support.lumion.com/knowledge-base/movie-photo-mode-questions?hsLang=en-us#photo-mode)
- [Movie Mode](https://support.lumion.com/knowledge-base/movie-photo-mode-questions?hsLang=en-us#movie-mode)
- [Animation in Movie Mode](https://support.lumion.com/knowledge-base/movie-photo-mode-questions?hsLang=en-us#animation-in-movie-mode)
- [Effects in Photo or Movie Mode](https://support.lumion.com/knowledge-base/movie-photo-mode-questions?hsLang=en-us#effects-in-photo-or-movie-mode)
- [Reflections](https://support.lumion.com/knowledge-base/movie-photo-mode-questions?hsLang=en-us#reflections)
- [Material Questions](https://support.lumion.com/knowledge-base/material-questions?hsLang=en-us#main-content)
- [Materials in versions 12 and earlier](https://support.lumion.com/knowledge-base/material-questions?hsLang=en-us#materials-in-versions-12-and-earlier)
- [Using LiveSync for Revit and a Section Box](https://support.lumion.com/knowledge-base/material-questions?hsLang=en-us#using-livesync-for-revit-and-a-section-box)
- [Rendering Questions](https://support.lumion.com/knowledge-base/rendering-questions?hsLang=en-us#main-content)
- [General Rendering Questions](https://support.lumion.com/knowledge-base/rendering-questions?hsLang=en-us#general-rendering-questions)
- [Rendering of Photos](https://support.lumion.com/knowledge-base/rendering-questions?hsLang=en-us#rendering-of-photos)
- [Rendering of Clips and Movies](https://support.lumion.com/knowledge-base/rendering-questions?hsLang=en-us#rendering-of-clips-and-movies)
- [Tips to getting the best renders](https://support.lumion.com/knowledge-base/rendering-questions?hsLang=en-us#tips-to-getting-the-best-renders)
- [Rendering Performance](https://support.lumion.com/knowledge-base/rendering-questions?hsLang=en-us#rendering-performance)
- [Technical Issues when Rendering](https://support.lumion.com/knowledge-base/rendering-questions?hsLang=en-us#technical-issues-when-rendering)
- [Panorama Mode Questions](https://support.lumion.com/knowledge-base/panorama-mode-questions?hsLang=en-us#main-content)
- [Technical questions when rendering with Panorama Mode](https://support.lumion.com/knowledge-base/panorama-mode-questions?hsLang=en-us#technical-questions-when-rendering-with-panorama-mode)
- [File & BackUp Questions](https://support.lumion.com/knowledge-base/file-backup-questions?hsLang=en-us#main-content)
- [Saving and Backup](https://support.lumion.com/knowledge-base/file-backup-questions?hsLang=en-us#saving-and-backup)
- [File Saving Issues](https://support.lumion.com/knowledge-base/file-backup-questions?hsLang=en-us#file-saving-issues)
- [Lumion-Documents](https://support.lumion.com/knowledge-base/file-backup-questions?hsLang=en-us#lumion-documents)
- [Transfer, Move or Migrate Files](https://support.lumion.com/knowledge-base/file-backup-questions?hsLang=en-us#transfer-move-or-migrate-files)
- [Troubleshooting](https://support.lumion.com/knowledge-base/troubleshooting?hsLang=en-us#main-content)
- [Reports about your PC](https://support.lumion.com/knowledge-base/troubleshooting?hsLang=en-us#reports-about-your-pc)
- [Photo and Movie Mode Issues](https://support.lumion.com/knowledge-base/troubleshooting?hsLang=en-us#photo-and-movie-mode-issues)
- [Rendering Issues](https://support.lumion.com/knowledge-base/troubleshooting?hsLang=en-us#rendering-issues)
- [Error Messages from Lumion](https://support.lumion.com/knowledge-base/troubleshooting?hsLang=en-us#error-messages-from-lumion)
- [Hardware related Issues](https://support.lumion.com/knowledge-base/troubleshooting?hsLang=en-us#hardware-related-issues)
- [Other Troubleshooting Issues](https://support.lumion.com/knowledge-base/troubleshooting?hsLang=en-us#other-troubleshooting-issues)
- [Article Developments](https://support.lumion.com/knowledge-base/article-developments?hsLang=en-us#main-content)
- [Devs - Multi‑Image Button Viewer](https://support.lumion.com/knowledge-base/article-developments?hsLang=en-us#devs-multi-image-button-viewer)
[](https://lumion.com/)
[mailto:email@email.com](mailto:email@email.com)
Copyright © 2026, Lumion - Act3D B.V.
#### Product
[Plans and pricing](https://lumion.com/product/buy)
[Discover Lumion](https://lumion.com/product/discover-lumion)
[Compatibility](https://lumion.com/compatibility/)
[System Requirements](https://lumion.com/product/system-requirements)
[Find a reseller](https://lumion.com/about/find-reseller)
[Free trial](https://lumion.com/product/free-trial)
#### Solutions
[Architectural design](https://lumion.com/product/architectural-design)
[Interior design](https://lumion.com/product/interior-design)
[Landscape architecture](https://lumion.com/product/landscape-architecture)
[Urban planning](https://lumion.com/product/urban-planning)
[3D rendering](https://lumion.com/product/3d-rendering-software)
[Education](https://lumion.com/product/educational-licenses)
#### Compatibility
[Trimble SketchUp](https://lumion.com/compatibility/sketchup-rendering)
[Autodesk Revit](https://lumion.com/compatibility/revit-rendering)
[Graphisoft ArchiCAD](https://lumion.com/compatibility/archicad-rendering)
[Rhinoceros](https://lumion.com/compatibility/rhino-rendering)
[Autodesk Autocad](https://lumion.com/compatibility/autocad-rendering)
[Autodesk FormIt Pro](https://lumion.com/compatibility/lumion-for-autodesk-formit-pro)
[Nemetschek Allplan](https://lumion.com/compatibility/allplan-rendering)
[Nemetschek Vectorworks](https://lumion.com/compatibility/vectorworks-rendering)
[BricsCAD](https://lumion.com/compatibility/bricscad-rendering)
[3D Studio Max](https://lumion.com/compatibility/3ds-max-rendering)
#### Resources
[Made with Lumion](https://lumion.com/made-with-lumion)
[Tutorials](https://support.lumion.com/video-tutorials?hsLang=en-us)
[Support and learning](https://support.lumion.com/knowledge-base/api/v2/help_center/en-us/articles/360044608053.json?hsLang=en-us)
[Downloads](https://support.lumion.com/downloads?hsLang=en-us)
[Community](https://community.lumion.com/index.php)
#### About
[Our Story](https://lumion.com/about)
[We're hiring!](https://lumion.com/about/careers)
[News](https://lumion.com/news)
[Contact us](https://lumion.com/about/contact)
[Terms & conditions](https://lumion.com/legal/terms-of-service) [EULA](https://lumion.com/legal/eula) [Privacy statement](https://lumion.com/legal/privacy-statement) [CEIP](https://lumion.com/legal/ceip) [Disclaimer](https://lumion.com/legal/disclaimer) © 2026 Lumion