
The article section follows from the Part 1 article on Ray Tracing for Lumion:
-
Knowledge Base: Ray Tracing in Lumion - Part 1 What is Ray Tracing all about
See Also:
-
Knowledge Base: Introduction to Ray Trace rendering in Lumion
Menu:
|
6. How do you use Ray Tracing in Lumion? 7. Using the Ray Trace Rendering Features and Settings |
1. Summary:
Ray Tracing in Lumion Pro is a physically accurate rendering and lighting system that simulates how real light behaves—producing more realistic shadows, reflections, and global illumination than Lumion’s traditional rasterized engine. It uses Path Tracing to calculate how light rays bounce through your scene, giving you truer, more natural results.
1.1: What Ray Tracing Actually Does in Lumion
- Calculates real light paths instead of approximations.
- Produces accurate reflections without Reflection Planes.
- Generates soft, natural shadows based on light size and distance.
- Handles glass, subsurface scattering, emissive materials more realistically.
- Removes screen‑space limitations (lights work even when off‑camera).
This is a major shift from Lumion’s other hybrid rendering system - Rasterization, which relied on special techniques like Skylight, Hyperlight, and Reflection Planes.
1.2: How Ray Tracing Works Under the Hood in Lumion
Lumion uses Path Tracing, a form of Ray Tracing where:
- Rays are cast from the camera.
- They bounce around the scene.
- Each bounce gathers light information.
- A denoiser tries to clean up the result.
This is why higher Sample counts produce cleaner images but take longer.
To enable Ray Tracing, simply add and turn on the Ray Tracing Effect.
When that Effect is active, Lumion switches from its traditional Rasterized rendering engine to the Ray Tracing engine for that specific image or Clip.
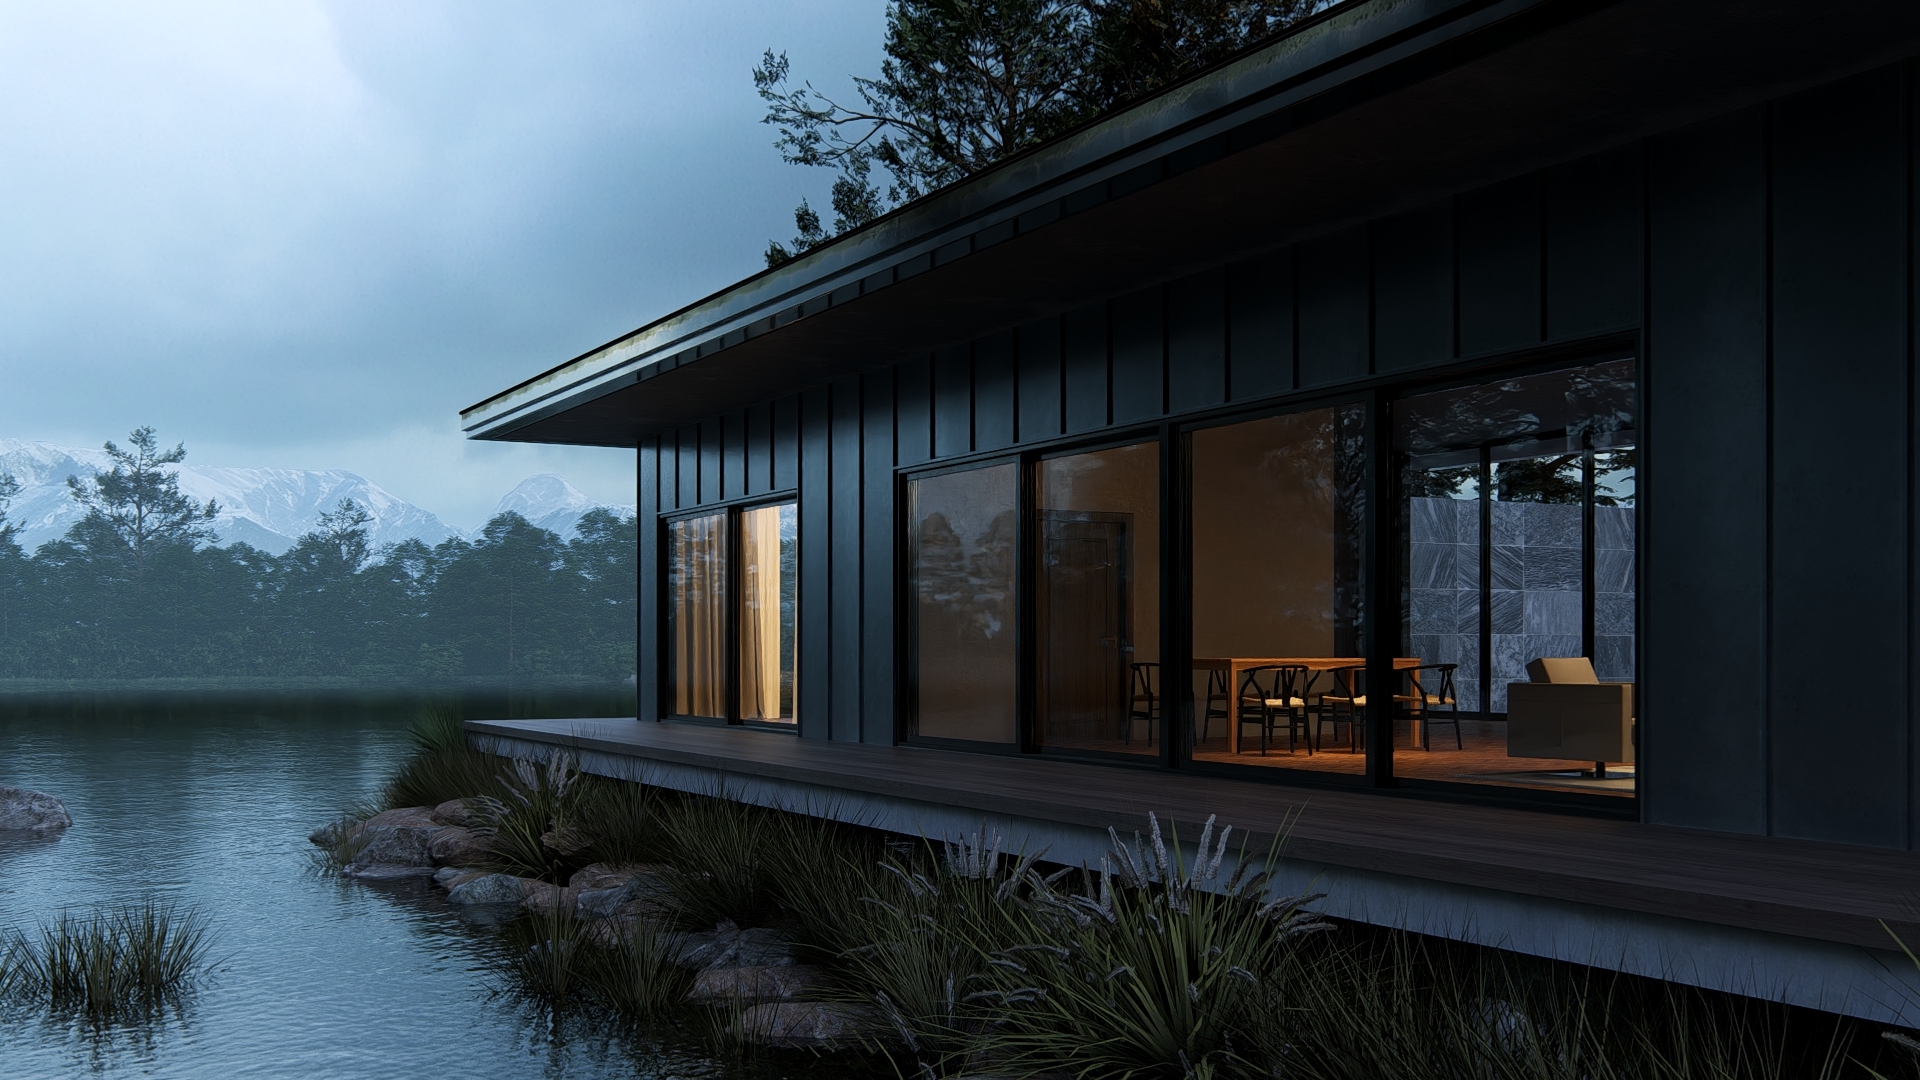
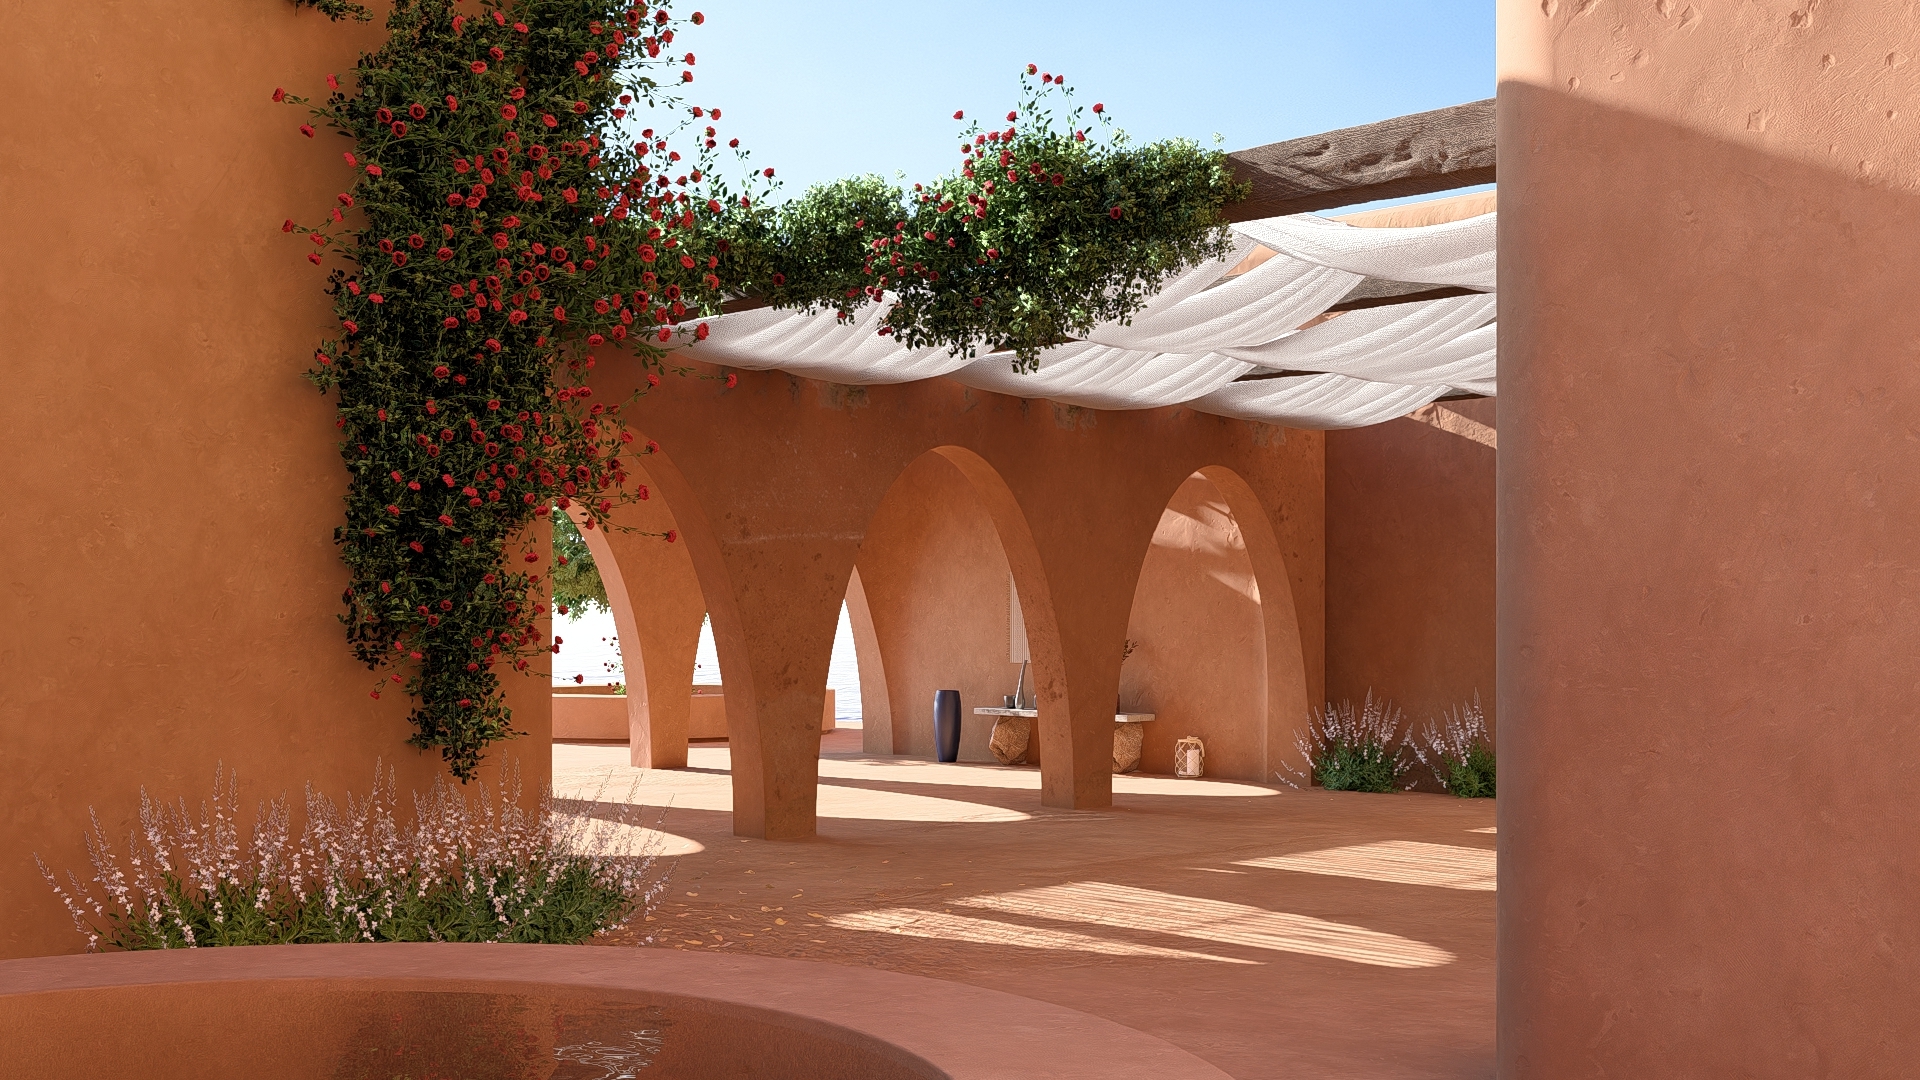
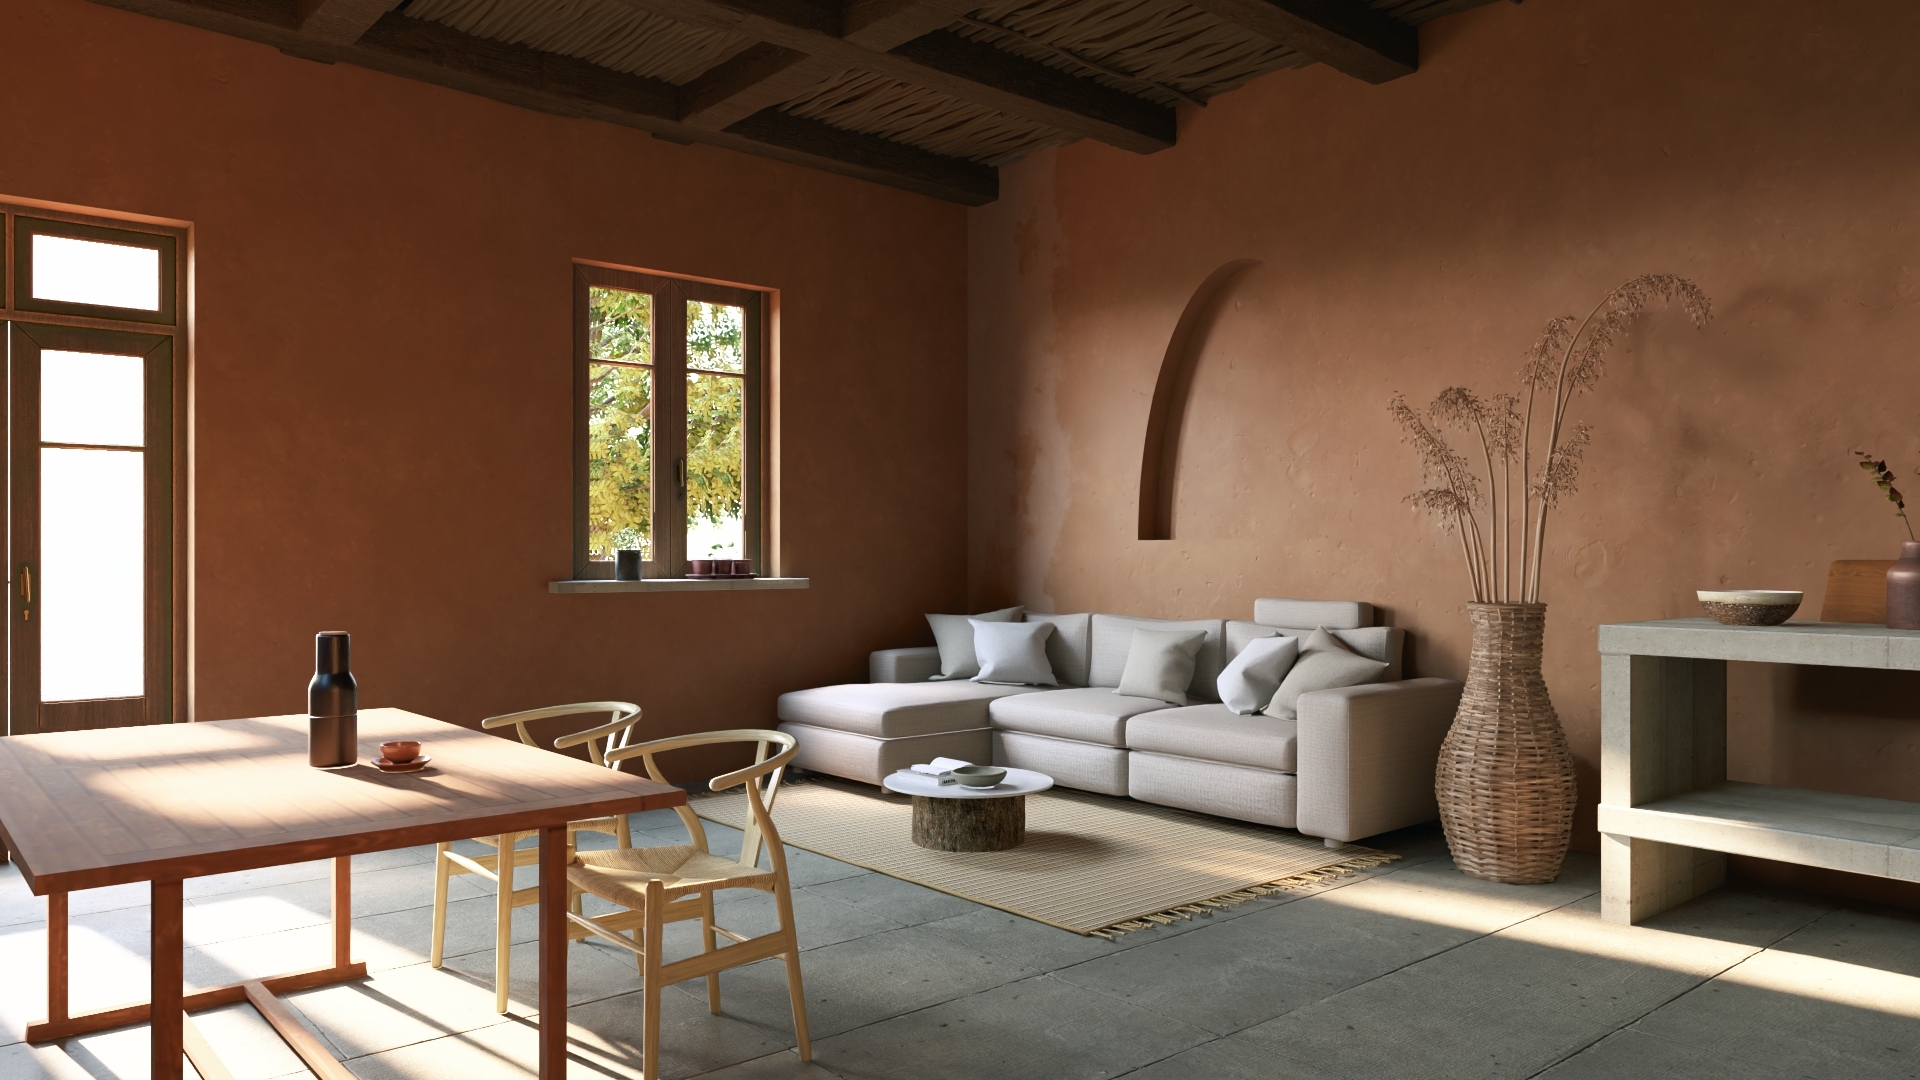
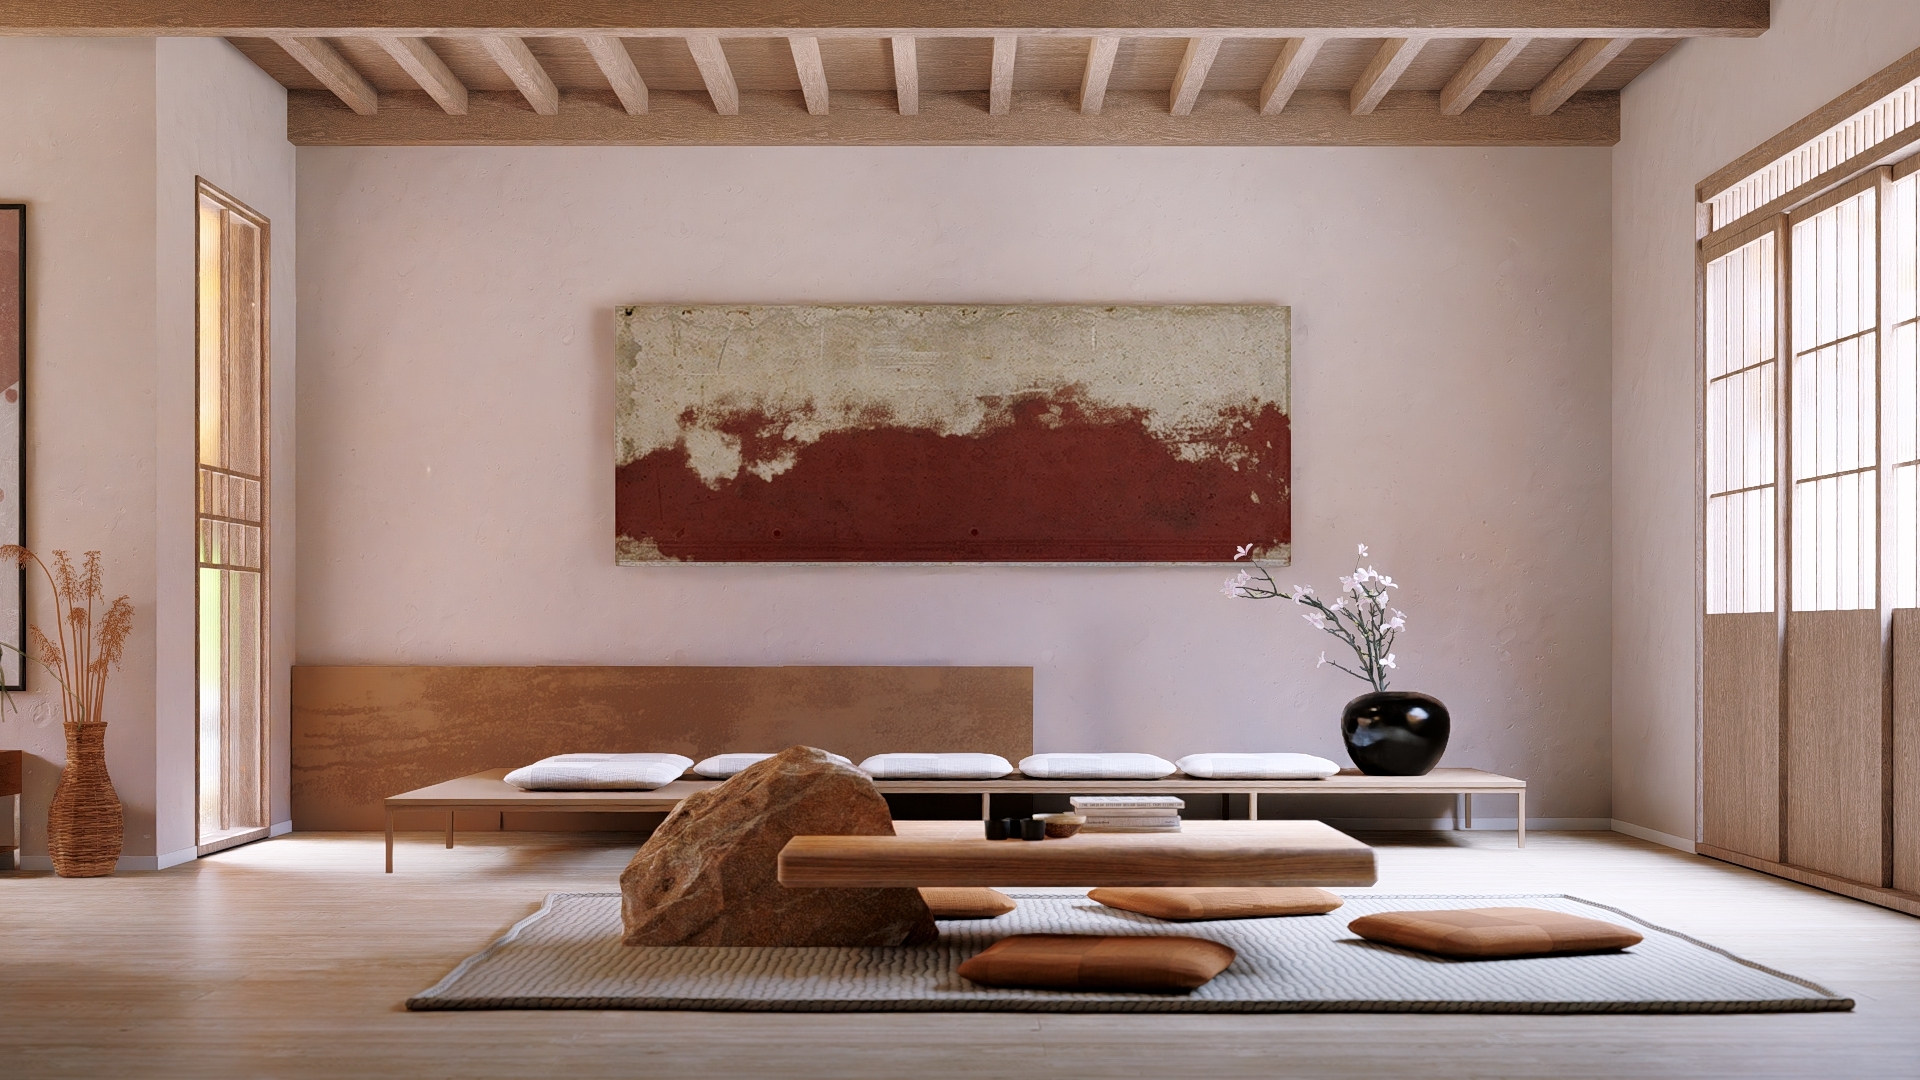
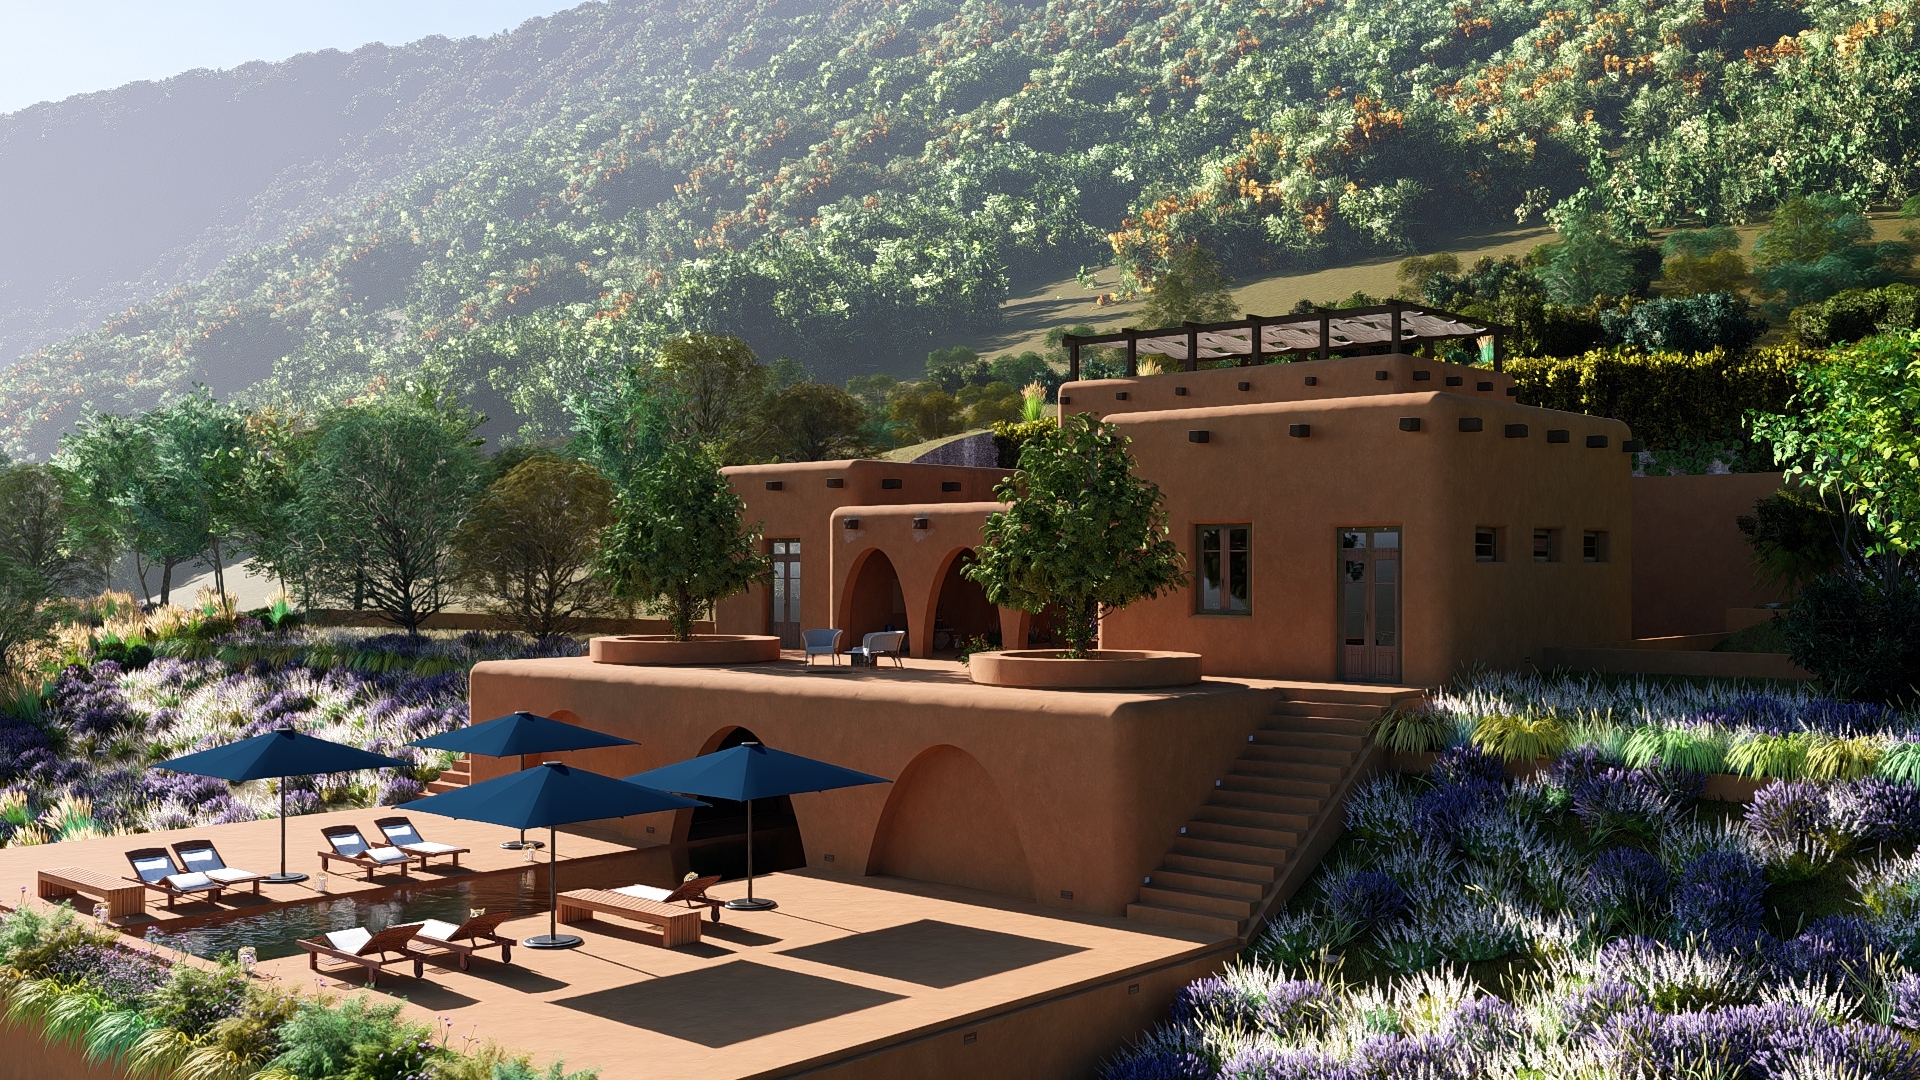
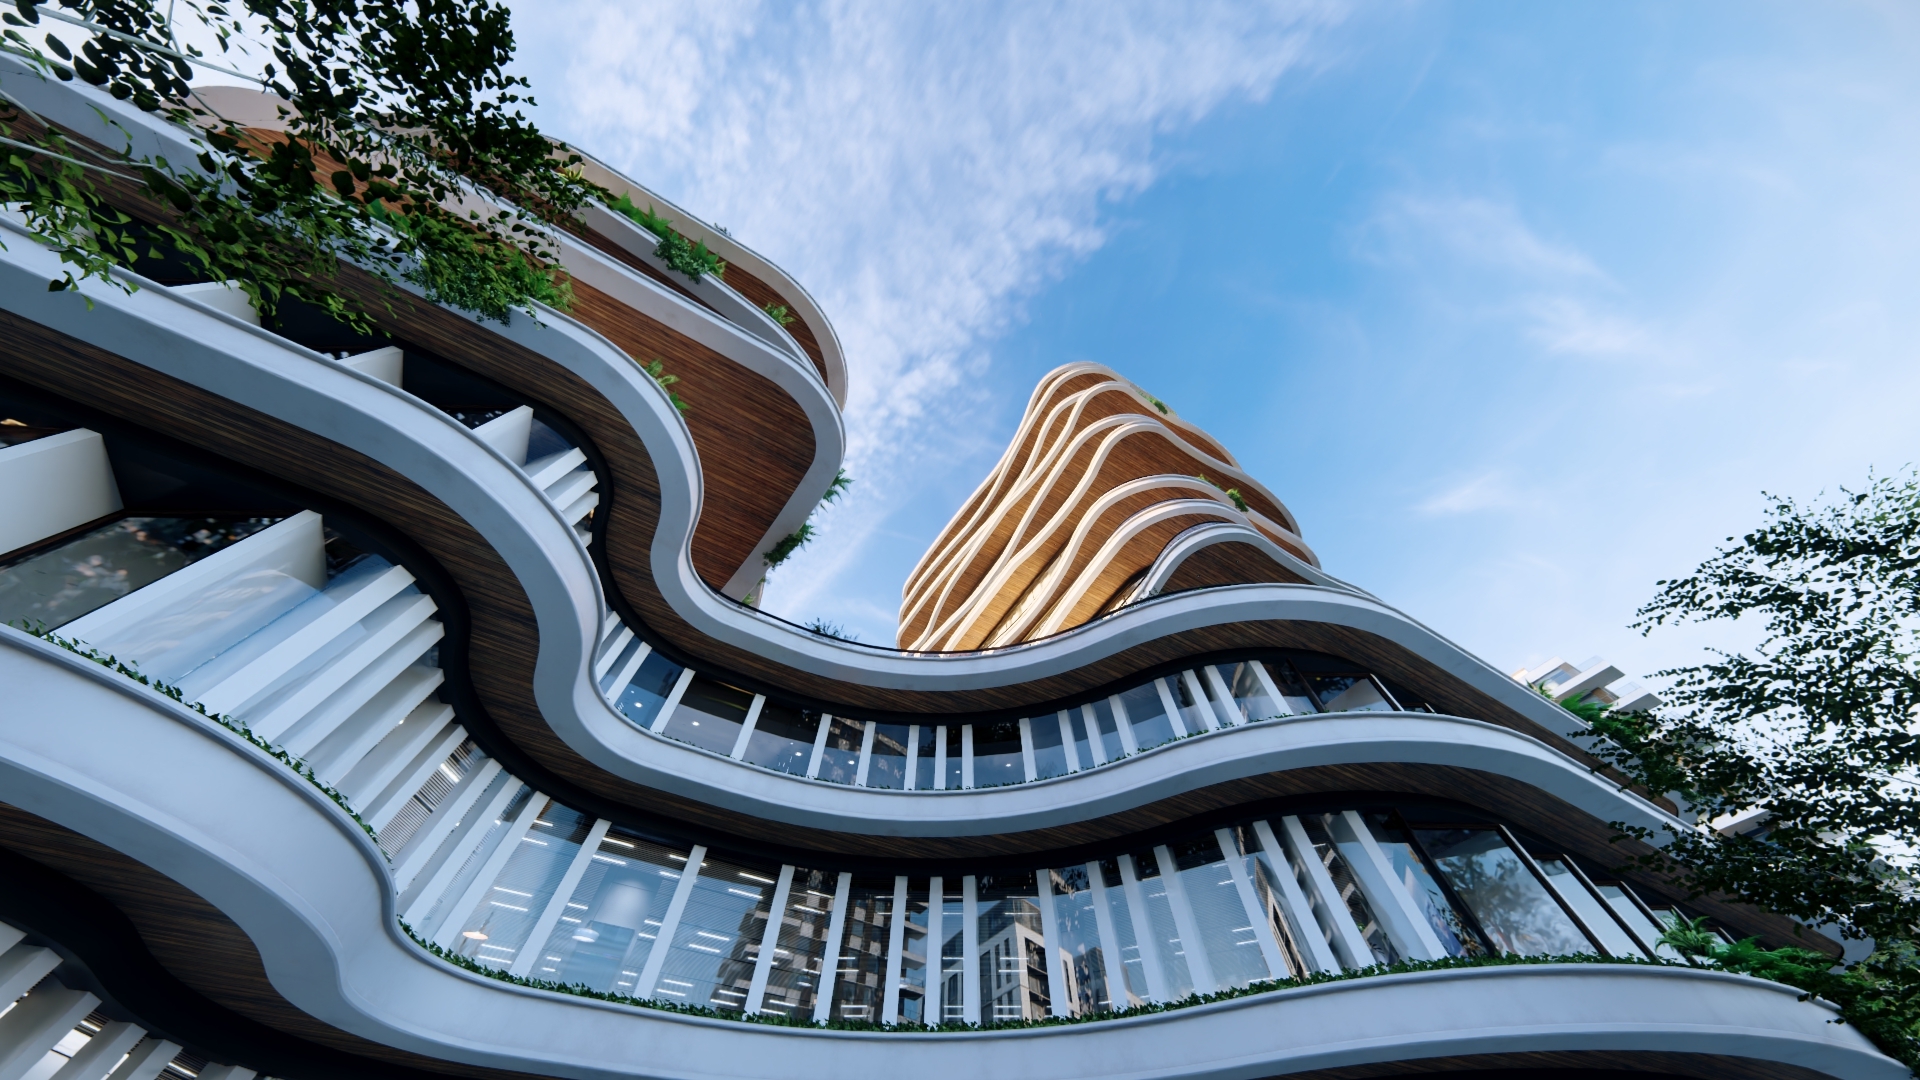
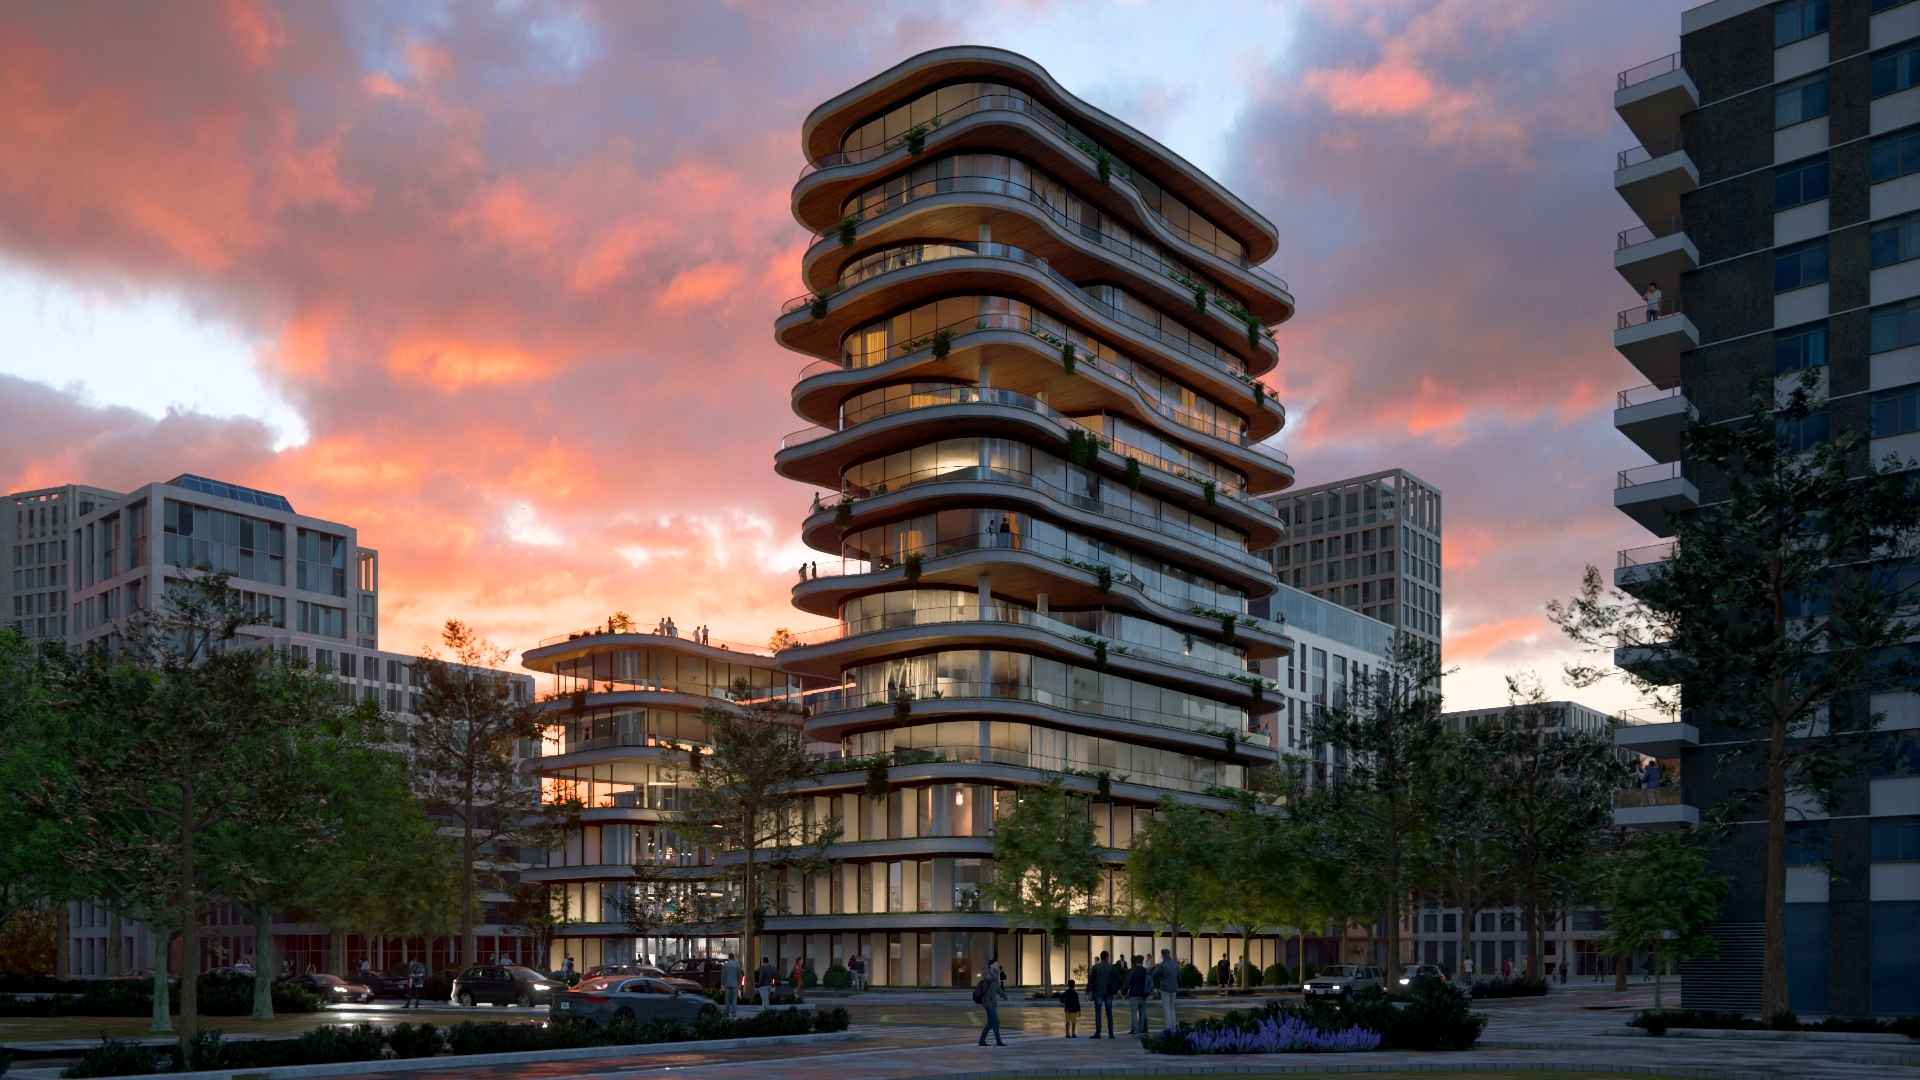
1.3: A few example renders using the Lumion Example Projects
(click on any of the thumbnails for a full screen view (new tab))
 |
 |
 |
 |
|
 |
 |
 |
 |
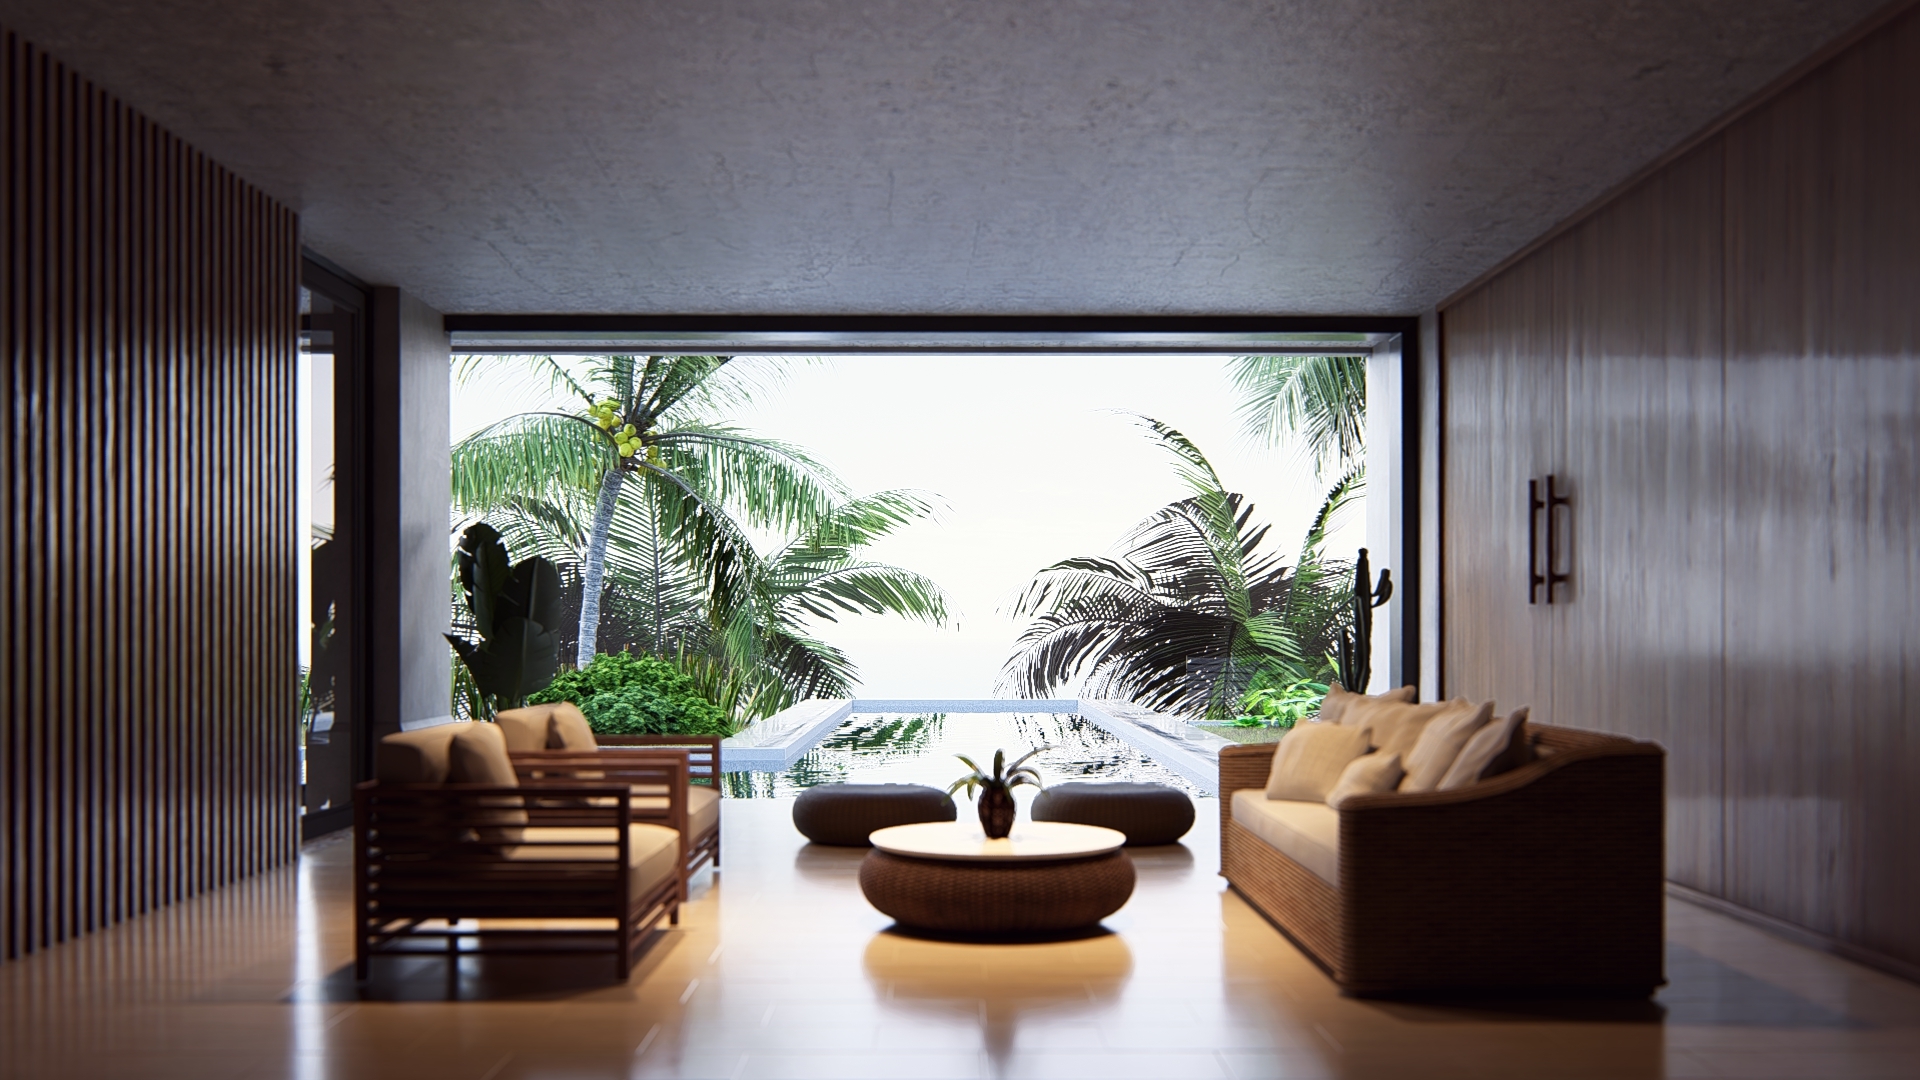
1.4: Get Inspired
2. Introduction:
The Part 1 article on Ray Tracing provides an overview of the Ray Trace technology and what is involved so you have the background and understanding of how to best make use of the rendering pipeline option in Lumion.
We covered among other things:
- What is Ray Trace Rendering?
- What is Rasterization Rendering?
- Ray Trace Rendering vs Rasterization Rendering? and Best of both worlds.
- Key aims: Photographic life like vs the Performance trade-off.
- Ray Tracing vs Path Tracing, what are the differences?
- Knowledge Base: Ray Tracing in Lumion - Part 1 What is Ray Tracing all about
In this article we provide an overview of the Ray Trace technologies now being used in Lumion and how to make use of them.
Lumion makes it easy for you to render using Ray Tracing.
There are no highly complex groups of settings and steps to get a Ray Trace rendered image.
You can learn how to use the technology by simply enabling the Ray Tracing Effect as in this article:
- Knowledge Base: How do you use the Ray Tracing Effect?
And watch this tutorial to see Ray Tracing in action:
- Video Tutorial: Lumion 2023: The Ray Tracing Effect
3.1: Ray Tracing in Lumion
3.1.1: Version History
Lumion 2023 introduced Ray Trace rendering as an optional and additional rendering method to the highly capable Rasterization renderer.
Lumion 2024 enhanced important features making it much more useable for video animation as well as enhancing the quality of output for still images.
Lumion 2025 added further capability focused on full Ray Traced Water Material, and Volumetrics. Including Radiance Cache technology for faster real-time on screen rendering when Ray Tracing is enabled.
Lumion 2026 focused on other features such as workflow improvements. But provides improved ways to upscale your Ray trace rendering..
You get a simple process via the Ray Tracing Effect to render photo-realistic Ray Traced images and animations by simply setting the number of ray cast samples and the number of light bounces.

Under the hood, the rendering pipeline uses Ray Tracing as the fundamental method to determine the color of each pixel that makes up an image as viewed from the camera.
The Lumion Ray Tracing implementation is the name for the umbrella technology that uses modern technologies of:
3.1.2: Ray Tracing:
The rendering technique that traces rays to calculate lighting, shadows, reflections and global illumination (light bounce). Many modern 3D graphics rendering or gaming PCs might employ one or more of these techniques in hardware implementations.
3.1.3: Path Tracing:
Is a specific implementation of Ray Tracing that uses modern statistical analysis to follow rays as they bounce through the scene, calculating multiple interactions with surfaces via the PBR Materials system, and providing a much higher performance than traditional Ray Tracing.
3.1.4: MIS: Multiple Importance Sampling
See Section: Technologies: NRD and MIS for Denoised, Improved Quality and Faster Video Rendering
3.1.5: NRD: NVIDIA Real-Time Denoiser
See Section: Technologies: NRD and MIS for Denoised, Improved Quality and Faster Video Rendering
3.1.6: The Lumion OIDN Denoiser
For highest quality denoising of still images or (some) animations. See Section: Technologies: OIDN
3.1.7: Real-time upscaling of the screen
AMDs FSR 2 (real-time GPU upsampling technology, similar to NVIDIA DLSS (Deep Learning Super Sampling)), to give a high level of performance to meet real-time editing and rendering systems. See Section: Technologies: Denoised Ray-traced Preview and Radiance Cache.
3.2: The Problem with Ray Tracing/Path Tracing
Inherently, Ray tracing/Path Tracing creates noise from the render process and requires technologies as mentioned above (for example NRD) to attempt to reduce or minimize the noise.
This is considerably easier to do and achieve in single static images/frames as compared to multi-frame movie animations. Additionally, the computations required are massive and require modern GPU hardware of which only recent products (2023+) start to meet some of the performance parameters often expected for architectural visualization, that is more fluid and open and not optimized (as compared to 3D real-time games).
Refer back to our Part 1 article:
-
Knowledge Base: Ray Tracing in Lumion - Part 1 What is Ray Tracing all about
3.3: The Implementation of Ray Tracing in Lumion
(as of 26.0.0)
- Lumion implements a "full" Path Tracer.
- Not all content (model types ( decals, F/X , animated characters) are converted for data to the the Ray Trace rendering engine pipeline. See the Roadmap and Knowledge Base: Transitions from prior versions to using Lumion 2025/2026
- When doing full path tracing it does do all lighting (Shadows, GI - global illumination, AO - ambient occlusion, reflections, refraction).
- The number of bounces are applied to GI rays and specular rays. Ray bounces are usually terminated after a certain number of bounces as being an optimal number of rays for best performance.
- Performance: Ray-traced videos in Lumion 2024+ can be up to 5× faster for similar quality than previous versions thanks to better sampling and denoising.
- Hardware: You need a non-proprietary ray-tracing capable GPU (e.g., NVIDIA RTX) and a system that meets Lumion 2024/2025 requirements. See Section 5. Which RT Hardware Platform? NVIDIA or AMD or Intel.
- Effects Disabled that are Specific to Rasterization: Because Ray Tracing takes over lighting and reflections, older lighting/reflection effects are auto‑disabled (Reflection, Shadows, Sky Light, HyperLight, Global Illumination (deprecated)) when you enable the Ray Tracing Effect.
- Certain other Effects disabled: post-processing effects that are available for the Rasterization rendering pipeline, have been auto-disabled as they are no longer applicable. You won’t see much of a benefit to having a Ray Traced image for photo-realistic final output when these Effects are done post-process in Lumion.
- Outlines Effect (Concept), Sketch Effect (Concept), Pastel Sketch Effect (Concept), Blueprint Effect (Architectural), Painting Effect (Artistic), Watercolor Effect (Artistic), Manga Effect (Artistic), Cartoon Effect (Artistic), Oil Painting Effect (Artistic).
 (click for full image)
4: Technologies
4.1: NRD and MIS for Denoised, Improved Quality and Faster Video Rendering
Two new technologies are used to significantly improve Ray Traced renderings in Lumion Pro.
NRD not only cleans the preview, it also accelerates Ray Traced animation rendering because fewer Samples are required to get high-quality images.
It is also a Temporal Denoiser, meaning that it remembers data between consecutive frames to predict and better manage noise while preserving details. This greatly improves the quality and noise reduction between rendered frames. Resulting in smoother, more stable video outputs.
For Movie Mode. This Denoiser is optimized for efficiency and speed, leveraging techniques such as hardware acceleration and neural network inference to deliver fast denoising performance while keeping a good framerate, so it might not be as sharp as OIDN but is well suited for real-time rendering and rendering videos quickly.
MIS: Multiple importance sampling employs multiple sampling techniques and improves light distribution to produce a higher accuracy result. This technology is embedded in the rendering process. For simplicity, there are no settings, it just works to do its thing. The positive impact is clearly in the rendering outcome and its impact on the number of Samples when using Ray Tracing.
The following Ray Traced Clip was rendered with 1 Sample in under 2 minutes (Full HD, 30 FPS) using an RTX 3090 graphics card:
4.2: OIDN
This is the Denoiser used in Photo Mode And also for Movie Mode. It employs sophisticated denoising algorithms that achieve high-quality results but may require more computational resources and time to process. When time is not a concern, consider trying OIDN as it might produce better-quality reflections.
4.3: Denoised Ray-traced Preview
Maximum attempts at denoising. No more noisy previews when using the Ray Tracing. compared to earlier versions
Lumion 2024 introduces NRD (NVIDIA Real-Time Denoiser), a cutting-edge real-time denoising solution that harnesses the power of deep learning algorithms to swiftly remove noise from the Preview in Photo and Movie Modes while maintaining a responsive framerate.
This ensures a smoother and more visually appealing editing experience:
Real-time denoising is on by default when you turn on the Ray Tracing Effect and works on both Nvidia and AMD graphics cards. You'll get a much clearer picture of what the final rendering will be while working on Photos/Clips.
4.4: Radiance Cache
Lumion 2025 introduces Radiance Cache, a new global illumination system that improves real-time preview quality when using Ray Tracing, especially in darker, indirectly lit areas.
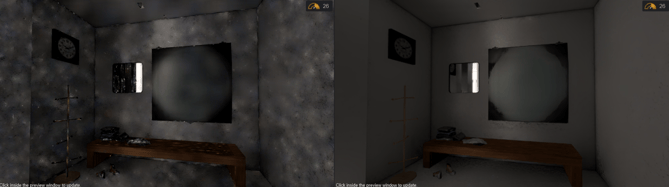
While the difference might seem subtle at first, Radiance Cache gradually builds up lighting information, which greatly reduces the flickering and blotchy artifacts that were common in older versions, leading to a cleaner and more consistent rendering experience.
5. Which RT Hardware Platform? NVIDIA or AMD or Intel:
We mentioned in Part 1 that it is only very recent enhancements in the hardware technology that allow for Lumion to render in practical and real-time approaches for Ray Tracing.
There are currently three main 3D graphics manufacturers. Lumion supports at this time those from NVIDIA, AMD and recently for 2025, Intel.
Lumion makes use of Microsoft DirectX 12 technology, and more specifically DXR (see below), DirectX for Ray Tracing.
5.1: The advantages of DXR over proprietary RT only such as NVIDIA's RTX, AMD's RT or Intel's RT
Lumion implements Ray Trace rendering technology mindful that our customers should be able to choose the hardware platform they want from the manufacturer they want:- as specialized and optimized for Windows and DirectX based software platforms.
They should not be frozen/locked into one or another (which can happen for some realtime 3D software alternatives).
This gives you greater choice and flexibility to do your work. Especially as the graphics card hardware market is very rapidly changing.
5.1.1: You are not tied into one hardware:
That means you can render your Project on any of the currently supported Ray Trace rendering hardware. Currently that is NVIDIA RTX or Quadro/A series cards, AMD Radeon RX cards (Radeon Pro), Intel A580/B580 or better. We expect maturity from other makers in the foreseeable future and will likely aim to see those are also supported.
DXR:
DirectX Raytracing (DXR) is a feature introduced in Microsoft's DirectX 12 that implements ray tracing, for video graphic rendering. The first major update was made to DXR on May 27, 2020 with the Windows 10 May update (version 2004). The May update implemented DXR Tier 1.1, which allows game engines to make real time calculations which makes the raytracing graphics faster and more efficient.
- Source (Wikipedia): DirectX Raytracing
5.2: What you need to run Ray Tracing in Lumion Pro
To see if you have the hardware now, (overview) see Section What you need to run Lumion in:
- Knowledge Base: Introduction to Lumion
Or what you might need, then see these articles:
- Lumion website: Lumion System Requirements
- Knowledge Base (links to specific articles): What kind of computer does Lumion need?
And Contact Us if you have any questions:
- Knowledge Base: Contact Lumion Technical Support
6. How do you use Ray Tracing in Lumion?
6.1: How to Enable Ray Tracing in Lumion Pro
This step is very easy. Ray Tracing is an Effect you add in Photo or Movie Mode (the option may exist in 360 Panoramas - see note below):
- Go to Photo Mode or Movie Mode.
- Add Effect → Ray Tracing (under Featured or Lighting).
- Lumion switches to the Ray Tracing engine.
It's that easy.
- Knowledge Base: How do you use the Ray Tracing Effect?
Note: 360 Panoramas, as of 2026.0 and earlier 2025/2024, the Effect is currently not directly available. If you need Ray Tracing for this Mode see this article:
- Knowledge Base: How do you render using Ray Tracing for 360 Panoramas?
Whilst the Effect will do a great job at Ray Trace rendering, there are some fundamentals in creating your Scene for a truly great, realistic render . Those need to happen in a workflow before you render, for example setting up good lighting, Scene context, Scene detail, quality materials via Lumions' PBR Material System and Editor. You can of course, do renders at any time you want to see what things are now looking like and how your visualization is progressing.
6.2. Using the Ray Trace Rendering Features:- General Guide
Lumion implementations include using foundational Ray Tracing algorithms along with Path Tracing for indirect/Global Illumination for light bounce.
Once you have set your materials to the type of material that will be used in your design and assigned sunlight via the Sun Effect, and/or Real Skies Effect, or Sky and Clouds Effect, you can then render your Photo or movie animation using the Ray Tracing Effect.
You only need to add the one Ray Tracing effect to do the render. The settings are simple to use:
- A slider for the number of Samples for each ray that is cast from the camera. (rays per pixel)
- A Bounces slider for indirect lighting - Global Illumination. (how many times light can bounce)
- A setting for reducing Noise that is inherent in Ray Trace rendering: Enable Noise Reduction.
- Along with the Firefly Reduction slider for reducing Firefly artifacts. Available only when Enable Denoiser is On
Again, see this article:
- Knowledge Base: How do you use the Ray Tracing Effect?
7. Using the Ray Trace Rendering Features and Settings:
7.1: Quality presets
Presets: Fast, Balanced, High, Extreme.
Higher presets = cleaner, more realistic, but slower renders.
Photo mode uses more samples than Movie mode for the same preset because movies rely on more aggressive denoising.
7.2: Samples
- Controls how many rays are shot per pixel.
- More samples = less noise and more detail, but longer render times.
- For exterior or well-lit scenes, low to medium samples (e.g., 16–64) are often enough.
- For darker interiors or complex lighting, higher samples can help.
7.2.1: General Guidelines for Number of Samples
Range 1 to 2048. (Lumion 2024 and newer); Default: 64.
Increasing the Samples will increase the render time to resolve the image, but will result in less noise.
Increasing the Samples increases the final quality of the photo-realistic render. As you can imagine it also requires longer times to render.
Balance the time to render with the quality desired.
Use low Sample values when doing test renders, for example, the minimum 8 Samples up to 32.
Use Samples in the range of 128 to 512 for most Scenes and you want the shortest time to render. Time to render will still be heavily subject to the complexity of the Project. (Refer other articles on Complexity).
For high level and you do not need a quick render then use 512 to 1028 Samples.
The maximum if you need it is 2056 Samples. It is rare for a Scene to require this level of Samples.
The number of light sources will also impact on the number of Samples you need.
Increasing the Samples helps to
- Resolve Noise and artifacts from the general Ray Tracing algorithms.
- Add more defined pixels in relation to the lighting and each ray of light interaction with all the surfaces in your Scene.
- Improve reflections and shadows.
7.2.2: Setting Samples in Photos and 6.4.3: Setting Samples in Movie Animations
We'll cover these topics in other articles in more detail such as:
- Knowledge Base: Transitions: How to Set up Lumion 2023 for Good renders
- Knowledge Base: Why do you get artifacts, blotches or patchy looking renders with Ray Tracing?
7.2.3: Setting Samples in 360 Panoramas
Current implementation limitations exist. See note earlier and this article:
- Knowledge Base: How do you render using Ray Tracing for 360 VR Panorama?
- Knowledge Base: What does the Output Quality setting mean in Movie and 360 Panorama Modes?
7.3: Bounces
- Range 1 to 8. The default is depends on the Preset chosen..
- The number of bounces a ray can take in its path after intersecting with the surface of an object.
- More bounces = richer global illumination (color bleed, light in corners).
- Increase the fidelity of reflections and shadows.
- Especially important for interiors where light bounces multiple times, depending on the number and extent of reflective surfaces.
- Increasing this value will increase the render time to resolve the image, but will improve Global Illumination, ambient occlusion, etc.
- With 8 Bounces, Lumion supports up to 8 levels of reflection. That is, if a ray of light is going to bounce due to the material settings, then it will bounce possibly up to 8 bounces in total, depending on the other materials that the ray encounters along its path.
- You only need the number of Bounces that will suit the Scene requirements. Generally, more for interiors (5 to 8), less for exteriors (1 to 3 or perhaps 4)
(From left to right 128 samples with respectively 1 bounce, 2 bounces, 4 bounces, and 8 bounces.)
7.4: Denoiser
Ray Tracing introduces noise (graininess, different pixels from neighboring ones when not expected). The Denoiser cleans all or most up in the rendered image or movie output:
-
By Default it is set to On.
-
Photo mode: Uses OIDN for high-quality denoising on final output, NRD for preview.
-
Movie mode: You can pick between NRD (faster) and OIDN (sharper but heavier).
-
Turning denoising on gives better-looking results at lower sample counts (faster rendering).
7.5: Firefly Filter
- The other of the two main types of 'noise' that result from a Ray Tracing system.
- Removes isolated bright “sparkles” (fireflies) from reflective/low-light areas.
- It compares each pixel to its neighbors and clamps outliers to reduce artifacts.
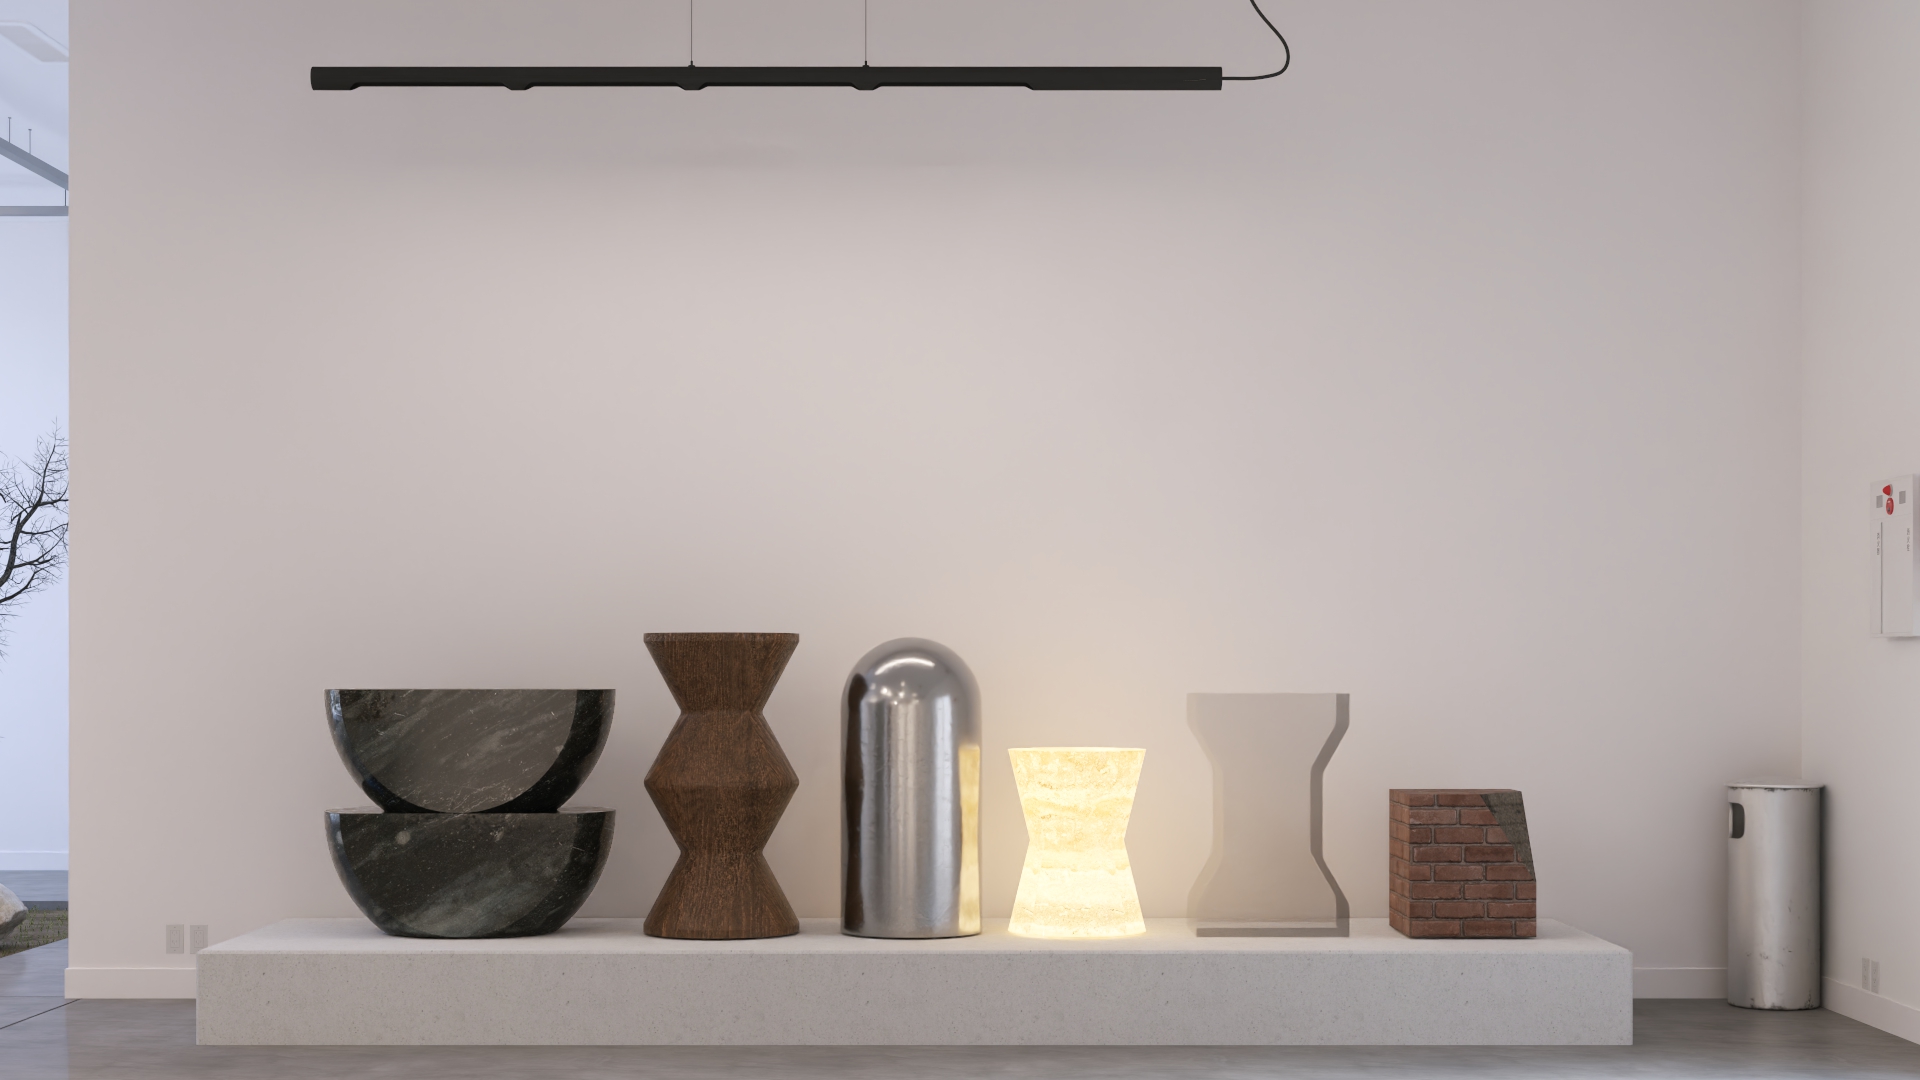
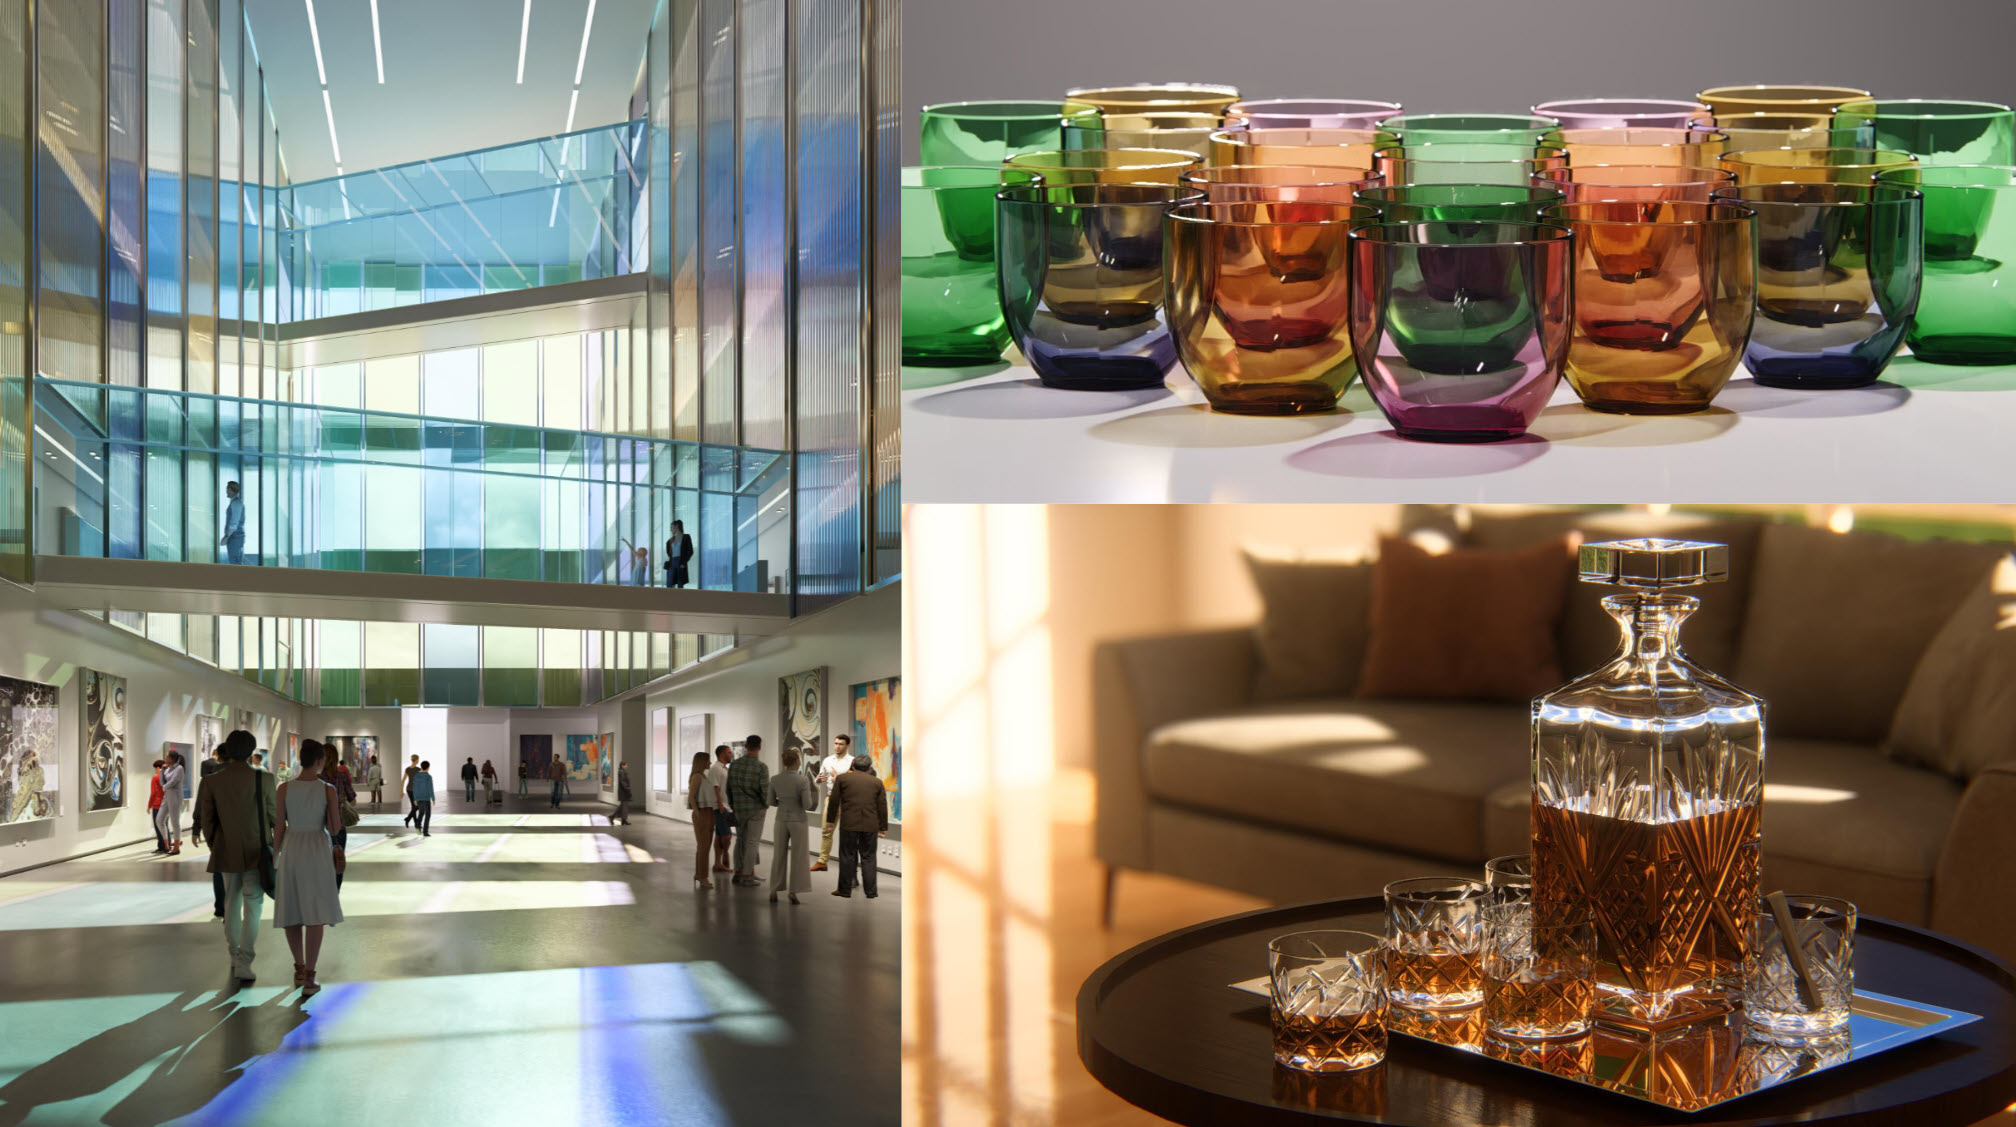
7.6: Fully Ray-traced Glass & Water
- Glass: Enables physically-based refraction and reflection, with controls like thickness, absorption, and index of refraction for very realistic glass.
- Water: Uses the ray-tracing pipeline for more realistic water behavior and reflections.
- Knowledge Base: How do you use the Ray Tracing Effect?
And watch this tutorial to see Ray Tracing in action:
Return to top of article8. Key Steps to Making Great Ray Trace renders:
Ray Tracing in Lumion 2023 and newer now gives you full scope to render interiors or exteriors.
-
To render still images - Photos.
-
To render video animations.
-
To create amazing photo-realistic visualizations.
Using the Ray Tracing Effect means you no longer have to spend time including and adjusting the Rasterization Effects for: Reflections, Shadows, Global Illumination (deprecated), HyperLight, and Sky Light.
Enable the Ray Tracing Effect and the rendering system itself will take care of and generate true to life light, shadows, reflections and refractions.
-
Shadows:
- Are determined fully by the Ray Trace rendering system. No need to consider shadow mapping distances, if for interior or exterior, the colorization of the shadows due to other lighting settings.
-
Ambient Occlusion:
- Are determined fully by the Ray Trace rendering system as for shadows.
- Reflections:
- Are determined fully by the Ray Trace rendering system. No need to add Planar Reflections for windows which for Rasterization can quickly slow down the rendering time. No need to set if you want SpeedRay Reflections. No need to consider how to use the global Reflection Control for Projected reflections. (2)
-
Global Illumination:
- Determined by the Ray Trace rendering system.
- You can further affect the quality and realism of the render by adjusting the Bounces, for example when there are reflective surfaces for an interior you might want to see more or less global illuminaiton.
- The Lighting System:
- Managing the lighting in your Scene does become more important. After all it is a very central and key part of how to set the tone and feeling for your design.
- We discuss some important workflow steps in some later articles.
- The Materials pipeline:
- Managing the materials for your design does become more important. Time spent adding the right textures, managing the resolutions and setting the properties so that the surfaces physically interact as you want them to with the lighting is central to visualization and managing the look of your design.
- Managing the materials for your design does become more important. Time spent adding the right textures, managing the resolutions and setting the properties so that the surfaces physically interact as you want them to with the lighting is central to visualization and managing the look of your design.
- Putting it all together with one simple Effect:
- Now you can focus more on your content, design and the outcomes desired.
- Choosing the right level of Samples and Bounces.
- Managing the lighting.
- Giving your models materials that will interact physically correct with light.
- Limitations:
- It's worthwhile to be aware that implementing Ray Tracing is an ongoing process. Certain limitations exist that affect your choice of content, sometimes camera views and other settings.
- Knowledge Base: Transitions from prior versions to using Lumion 2025/2026
- It's worthwhile to be aware that implementing Ray Tracing is an ongoing process. Certain limitations exist that affect your choice of content, sometimes camera views and other settings.
9. Where to from here?
We have these guides and assists to help you manage your Scenes and get the best for Ray Trace rendering in Lumion:
- Knowledge Base: How do you use the Ray Tracing Effect?
- Knowledge Base: Transitions: Why does my Project look different in Lumion 2023 and newer compared to previous versions?
- Knowledge Base: Transitions: How to Set up Lumion 2023 for Good renders
- Knowledge Base: Why do you get artifacts, blotches or patchy looking renders with Ray Tracing?
Some later articles will address:
-
Lighting
-
Choice of Denoiser for Movies
-
Resolving Flickering and Artifacts in Photos and Movies
-
How do you set up a Photo to render for night time with Ray Tracing? [lighting]
Refer back to Part 1 on general information about Ray Tracing, so you have an idea about the limitations and impacts of this type of rendering, if needed:
-
Knowledge Base: Ray Tracing in Lumion - Part 1 What is Ray Tracing all about
10. See Also:
- Knowledge Base: How do you use the new Ray Tracing Effect?
- Video Tutorial: Lumion 2023: The Raytracing Effect
- Knowledge Base: How do you Determine the 'Complexity' of your Projects
References:
- External Link: Ray tracing (graphics) [Wikipedia]
- External Link: Path tracing [Wikipedia]
- External Link: RTX Technology: NVIDIA RTX Architecture [NVIDIA]
- External Link: RTX Technology
- External Link: Ray Tracing vs Rasterized Rendering – Explained